1/24 scale Crawler course :page 4
Index: this page
1st Making a fence for top of Minuscule Mtn.
2nd Wile E Coyote Genius at work
3rd Adding plants and 'decorations' painted sand
4th Overview pictures of layout What's Next...
All pages of this build
Part 1 the start, layout table, Miniscule Mtn. w/ Schmidts Mine & 3 hill climbs
Part 2 build Cathedral Rock, rope bridge and Twin Arches
Part 3 Start river, expand table, small arch bridge, detailing east of the river
Part 4 This page Miniscule Mtn fence, rock spire w/Wile E coyote, greenery and small details
Part 5 Painting walls-Nothing to do with layout progress
Part 6 Start West of river add small balance rocks
Part 7 Layout basically done add dynamite shack, minor changes, future plans, 3/2024
Top of Minuscule Mtn is 5' from the floor and depending on route taken takes a few backups/ repositioning to get lined up. The potential to fall quite high so a barrier had been planned.
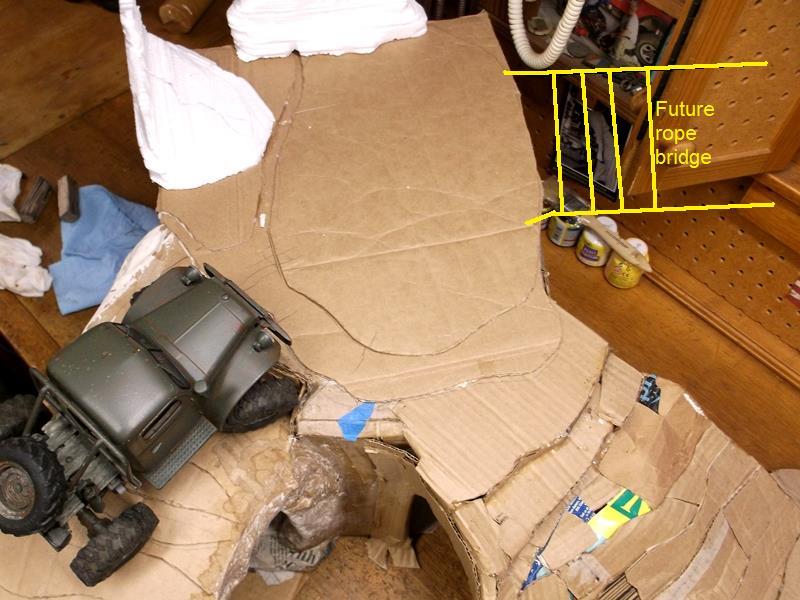
Originally I had made a few carved foam rocks I was going to place on top perimeter. Found the top was to small to turn and the rocks took up what little room there was.
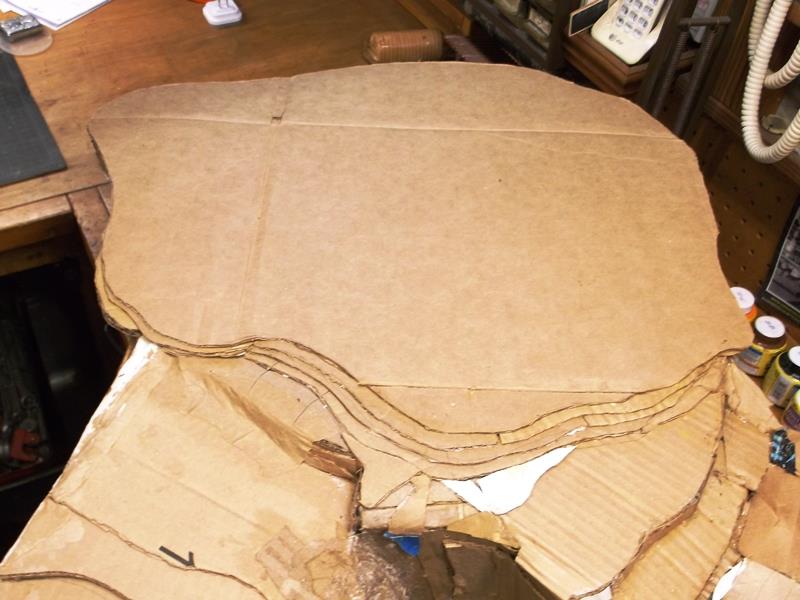
Remade top enlarging the top quite a bit. Turning is now possible (w/maneuvering) but still not enough room for the rocks. Decided to wait to figure out safety barrier until layout further along. Well, its time.

Really wanted natural rock barrier but with the mine below and the rope bridge obviously some activity here in the past so a fence wouldn't be too out of place.
It would take up less of the area. So were building a fence.
A simple 2 rail fence using split popsicle sticks with 3/8" dowel posts. Drill posts and use 1/8" dowels to insert and glue into layout.
That's the plan. Cutting slots into posts to install the rails, just not enough material to face nail/glue rails.

Cut 5 posts 3 1/4" long. Sat up in drill press to make the slots drilling several holes.

Then used mini files to clean up until rails slide into posts.

Used a coarse wood rasp to weather posts and rails.

And painted...

Fence on layout. Jurys still out
It's what was envisioned, planned and came out better than I thought I could do. However changes whole feel of layout? Does serve its purpose to keep rigs from falling 5'. Adding some tuft of grass at base of posts. Had picked up some premade tufts, there nice by really small.

Making some larger tufts out of combed out sisal, mix with the premade ones for more height.

Found a little knarly tree, used to block opening between hill climbs. Blended base to match layout, added a few grass tufts. The tire swing fun but I may nix as the scale is off plus from any view point draws my eye to it.
Back to top of this page
Wile E Coyote...
Last feature done on layout, though doesn't add to driving, is I had carved a tall rock spire.

Just visual interest. But as soon as it was placed on layout I saw Wile E. Coyote on top with an anvil waiting for the Road Runner... Looking around on line came across a Wile E perched on a rock.So I ordered. 
Just for fun. Once here I'll make an anvil and crate placing with Wile E. on a small balance rock at top. He'll be holding from a rope while perched on top of spire. We all know how that ends.
Wile E showed up, had no idea of size but he's perfect.

Painted the rock he's on and made a base. Made a crate that vise came in, then I'll try to carve an Acme Anvil to hang from a rope. Likely will extend the base and place Wile E further out on outcropping.
So according to the story, Wile will drop the anvil and rope catches his feet and pulls him off, he passes anvil mid air, hits the ground then anvil hits him. Or anvil reaches end of rope before hitting ground pulling Wile off (and breaks rock outcropping) which follows him down landing on him after he crashes to ground. Or Road Runner just comes up behind him, MEEP-MEEP startles Wile and he falls off, anvil follows then outcropping breaks and also follows. Several possible scenarios but regardless, Wile E never wins.
Again just for fun.

Tried unsuccessfully to letter the crate so made and printed out labels to glue onto crate. Also lettering I can glue to anvil.

Well kind of looks like an anvil... carved from wood, maybe if crate read folks will know what its supposed to be. Stuffed the crate with cut combed out sisal rope to look like excelsior (wood wool) packing material.

Added outcrop to get Wile over layout. I may add a small arch from its bottom back to spire. Or just thicken the single layer between spire and out crop. Wanted it to look like ready to break off but the single layer or thinness between spire and outcrop looks funny. I'll add a layer or 2 on underside of span then think about adding arch. TBD

Outcropping gives more room for crate and coiled rope suspending the anvil. Speaking of anvil

Did get it painted and Acme glued on. Funny looking vice. Ended up gluing wheel weight to it so it hangs pulling rope straight. I haven't figured out how to tie off so it looks ok. Plus likely have to glue rope so it doesn't just untwist over time.
Later...
Finally got Wile E Coyote placed and anvil suspended.

No purpose other than fun...
Back to top of this page
Adding greenery etc...
Mostly to break up the 4'x8' of nothing but red...I went to Hobby Lobby and Michales. Landscape items, at least nice stuff, is expensive. Roaming around found a few 'clearance' mixed small plastic cactus in pots that I can remove, and some plastic bunches of some kind of plant that I can cut apart and use as trees. Bag of assorted moss. A resin tree with swing and a foot bridge.

These were 99�each, 3 or more plants glued in foam. Easily plucked out and used individually.

Couple of cacti w/ moss at base of river arch

And on top of cathedral rock.
Already shown adding tufts of grass various locations. Adding some 'trees', cactus and moss.

Some trees and some ground cover under Twin arches. Also acting as barrier. Again the trees are actually bunches of some kinda of floral item, cutting apart to use as 'trees'. They dont really look like trees but serve the purpose.

Few trees at side of Quicksand pass

Sand and moss on the fence line.

Small foot bridge at end of river with moss

Some sand and cactus at base of spire. I'll be adding some more. Issue is I dont want to over populate and its placing so driving not hindered. Mostly tufts of grass and moss I can stuff in crevices and crannies. But more of lighter tan stuff. The green against the red is a bit much. I do have a few small barrel cactus and others stuff. As I get to it.
The sand I really like. I had bought a bag of play sand early on thinking of making a pit but unless glued it gets every where, plus the color is off. But 'blown' against rocks, around the fence posts really like the look so I may try to spray some of it with the red primer then mix with unpainted. If it blends ok likely glue down a lot more.
Raw verses painted sand

And spray painting the sand worked. Spread a couple of cups of sand on a piece of cardboard. Spray painted, then stirred it up, re level, spray again. Did this several times. thoroughly mixing the sand between coats. Looks more like red rock sand, nice is the variations of color.

"New' sand applied around fence posts... helps blend to layout. Looks like they've been there a while. Applying the sand at base of rock features, around plant areas, .
Back to top of this page
Few pictures walking around layout of what's done...

We've named most areas
A: River source bottom left
B: Minuscule mtn. upper left and the 3 hill climbs. B1 Layered Arch, B2 Easy-Hard Climb with V notch between
C: w/Schmidts Mine underneath
D: Quicksand pass (long since dried up) around back side to Lava Beds
E: Rope bridge to Cathedral Rock
F:Cathedral Rock on the right
G: Twin Arches
H: Lava beds under Cathedral Rock
I: River Arch bridge bottom right
J: The River
K: Wile E's Spire
L: The Flats (west of river behind Wile Es Spire), leading under the hill climbs to Quicksand pass and back entrance of Schmidts Mine or west to front entrance and to Lava Beds
Not shown in this pic
M: Tom & Hucks hideout,
N: The Ruins,
O: The Granary, (TBD is add some layered rock partially closing opening)
P: Hole in the River

West of the river looking east
 Northeast corner looking Southwest
 Southeast corner looking Northwest
 Southwest corner looking Northeast
I'll add a few more plants where it looks appropriate but I'm thinking this is one of those less is more deals.
Anyway just playing, taking a break from the construction.

I have 1/3 of layout left to do. The east side of river took up a lot more space than planned.

Kinda stuck as area that's left, west of river, is small so haven't decided what to add or what I can.
Back to top of this page
Painted layout room...
Nothing to do with layout or driving so move to another page...
...While I'm stuck still trying to make a plan for finishing layout I decided to repaint the room. Like 20+ years, old quite dirty, but mostly because it was chalk white, very reflective and contrasting layout. Especially since I changed over head lights to led shop lights-just glare
Later.
All pages of this build
Part 1 the start, layout table, Miniscule Mtn. w/ Schmidts Mine & 3 hill climbs
Part 2 build Cathedral Rock, rope bridge and Twin Arches
Part 3 Start river, expand table, small arch bridge, detailing east of the river
Part 4 (This page) Miniscule Mtn fence, rock spire w/Wile E coyote, greenery and small details
Part 5 Painting walls-Nothing to do with layout progress
Part 6 Start West of river add small balance rocks
Part 7 Layout basically done add dynamite shack, minor changes, future plans, 3/2024
Back to RC crawler index page
Back to Ourelkhorn Camper Modifications page
46