1/24 scale Crawler course: part 1
Index this page:
1st Plans & direction..
2nd Building the table
3rd Starting layout, building mountain with tunnel using box, starting main arch climb
4th Building main arch, framing tunnel entrance
5th Adding main hill climb
6th Redo mountain top, to small, carving foam for top to side,
7th Add support for future bridge, recut hill climb arch
8th Mountain placed on the layout, start actual course layout details..
All pages of this build
Part 1 This page the start,
Part 2 build Cathedral Rock, rope bridge and Twin Arches
Part 3 Start river, expand table, small arch bridge, detailing east of the river
Part 4 Miniscule Mtn fence rock spire w/Wile E coyote, greenery and small details
Part 5 Painting walls-Nothing to do with layout progress
Part 6 Start West of riveradd small balance rocks
Part 7 Layout basically done add dynamite shack, minor changes, future plans, 3/2024
Plans & direction
After building a few wood obstacles, bridge, teeter totter etc decided to build an indoor track that i might use them on. I've watched a ton of videos of what others have done. I dont know how successful but I'm going to try and build a Utah/dessert/old mining theme indoor layout.
At minimum it'll be something I can drive on. Hoping that it looks somewhat like a realistic landscape. Main goal is enough variety and route choices so it doesn't become monotonous which I think is the difficult part. Second is actual construction of the course, and 3rd spending as little as possible. (4th is elevated table top height but isn't affected by first 3.) The 3rd constraint will dictate 2nd, and the 1st will likely override both. Being indoor weight is a consideration, so cant use a lot of natural material (rocks etc)
Like a lot of folks Ill be using trash-(boxes odd pieces of packing foam and what ever else) to get basic profile. One thing I'm avoiding is using tons of spray foam and sheets of rigid insulating foam. Sheets are just expensive as spray foam and both require a lot of carving for look I want. However it is a very good simple way to build a lot of mass. Other main procedure folks use is plaster cloth. Its a great easy way to cover the trash and "sculpt" layout and build features, but again gets expensive. Because of the ease of use I may end up using the plaster cloth but Im going to try to just use paper and plaster, paper mache.
I made a few boulders, waded up newspaper then covering with dipped strips and brushing on plaster for final coat. They came out pretty good, but its a slow process. Whether I stick to this method debatable . It will be considerably less expensive but more time consuming- Where I'm starting...
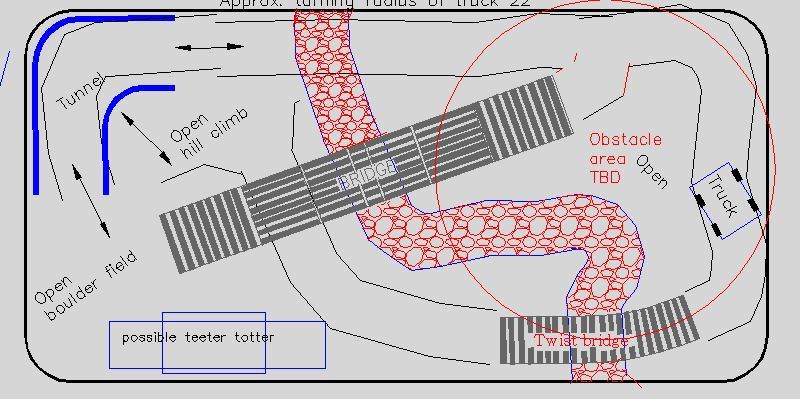
Sketched out rough layout. Plan was 4'x8'.
Back to top of this page
Building the table & base for layout
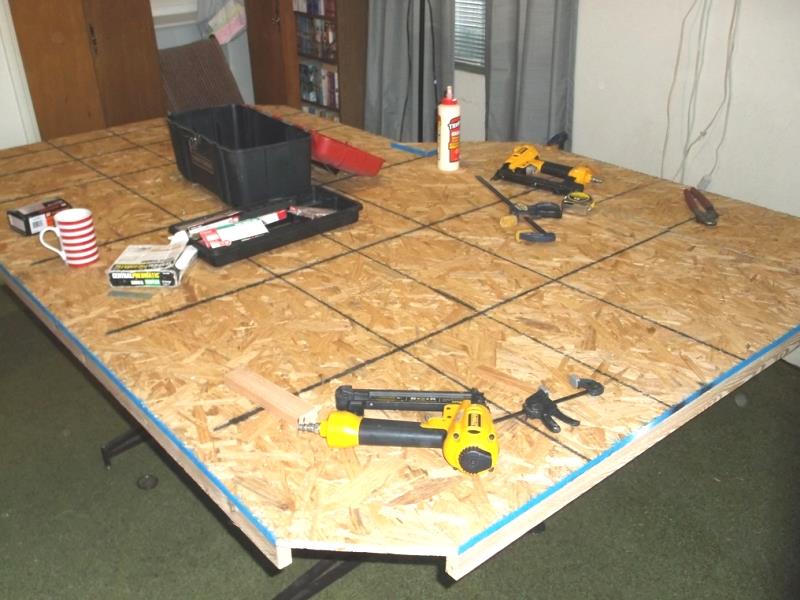
I have an old kitchen table using as base.
Picked up 4x8' sheet of 7/16" chip board 'OSB' [$17], 6 1"x2"x8' [$9], some wood glue x2 [$11], single can of spray foam (just in case) [$5], bag of red lava rock (its light [$6], glue stick [$8] some 1 1/4 drywall screws [$8].
I use the term inexpensive meaning using whatever is cheaper but doing ANYTHING now, materials cost a fortune..
1st trip to hardware cost me $65 bucks....
Second trip, I decided for ease of making landscape base picked up a 2" thick sheet of 4x8' polystyrene. [$32] same as packing foam to supplement collection of packaging foam. Carving sheet base easily get profiles for stream bed, simple elevation changes in routes etc without building.
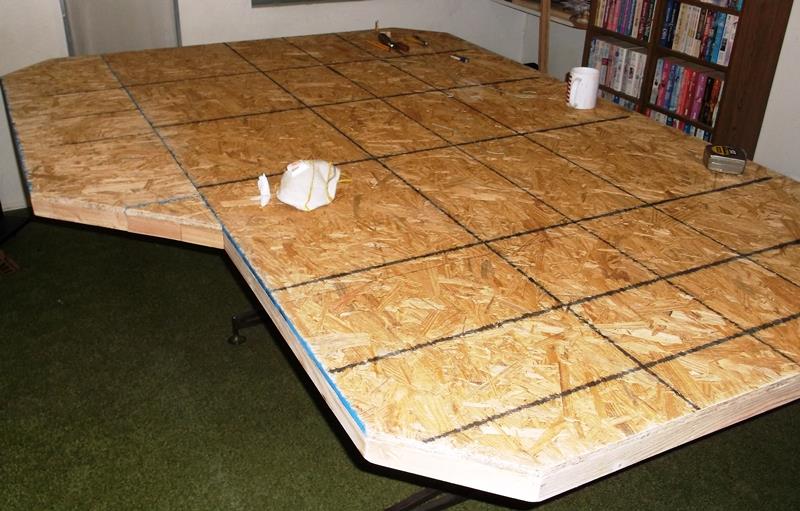
Building the table. Mentioned sheet of OSB is setting on top of old kitchen table. Use 1x2s to edge and give structure.
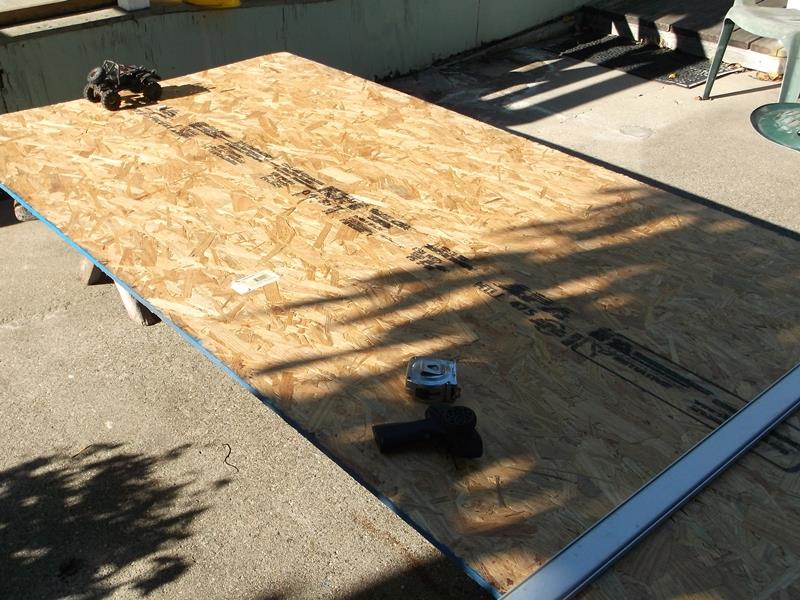
1st change is 8' length in room is too long to easily walk around so cutting to 7'.
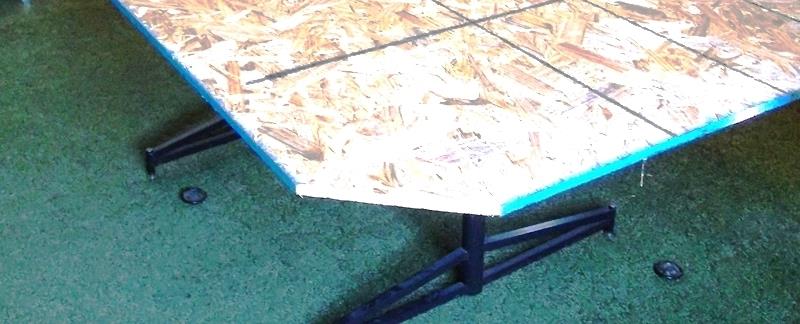
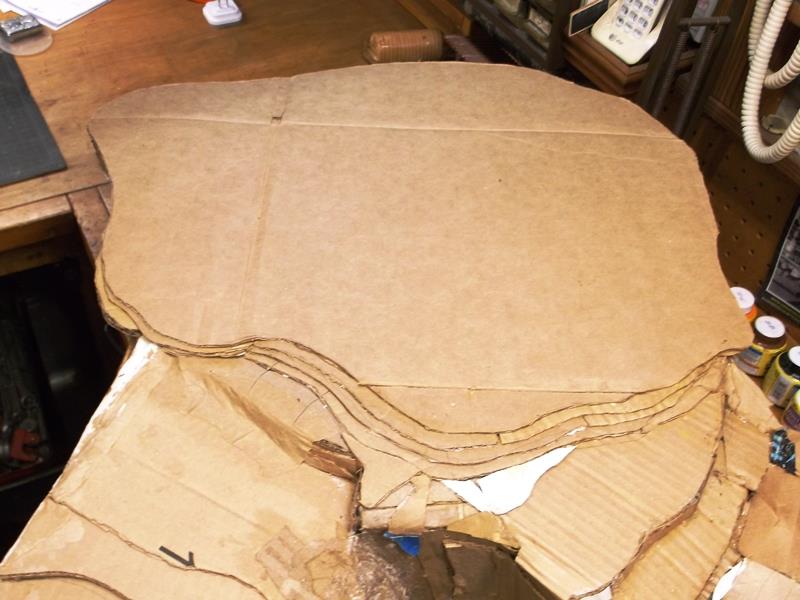
Second change is clipping corners instead of round for ease of trimming. Realized by 3rd corner cut I could reattach the cut off 12"x4' end of sheet to make one end wider.
Cool, way more room for planned mountain...ummm...
However this would put the 5' width with mountain on top at corner of room where most access is needed (closet, sitting area and window), making not so convenient. Having already cut 3 of the corners I flipped entire sheet (and layout).
This puts the wider end of sheet and mountain in back corner of room.
Proceeding to edge OSB, add cut off to side. This is where I decided to run 1x2 supports under sheet raising off the table for added height and support for added side piece. Also could cut thru if I want an extra 2" of depth like for mud pit...
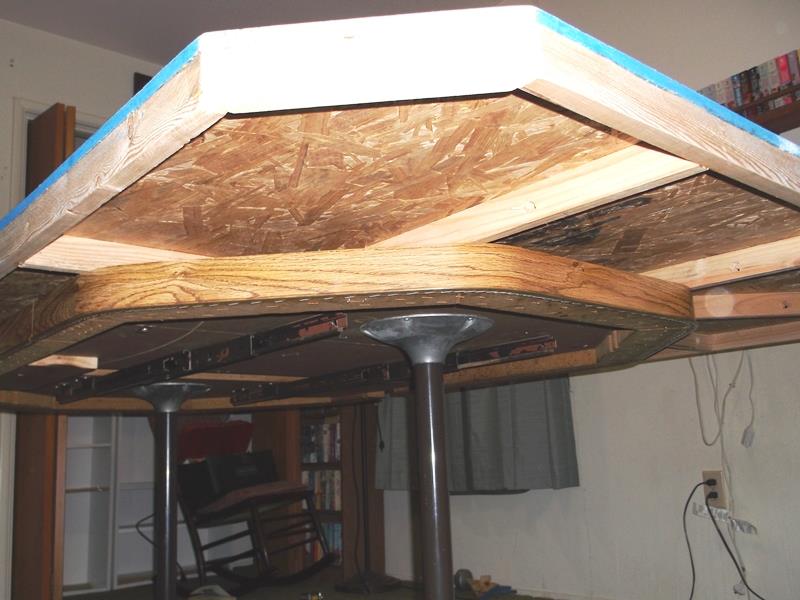
Couple of issues Ill need to address. The table uses 2 pedestals. Side to side very rigid but end to end sways a lot. So Ill need to add some kind of structure between the 2 poles or brace from ends of table to bottom of legs TBD.
Second and more important is the very thick carpet & padding. Table is like floating, spongy. 1st thought (if ever converted back to bedroom needs new carpet anyway) is to cut holes where legs contact. easiest but limit moving table. Could cut out rectangular under table. Or could nail down a piece of ply to compress carpet. Some thought required...
First finish structure..
Add more 1x2 bracing under table. Ended up screwing under table thru bottom into the 1x2s . Added a bit more rigidity and stop base from sliding.
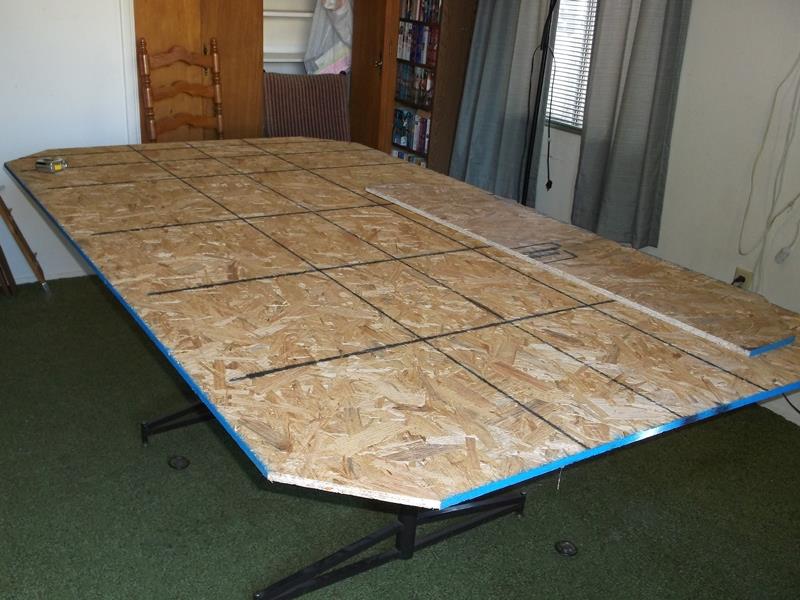
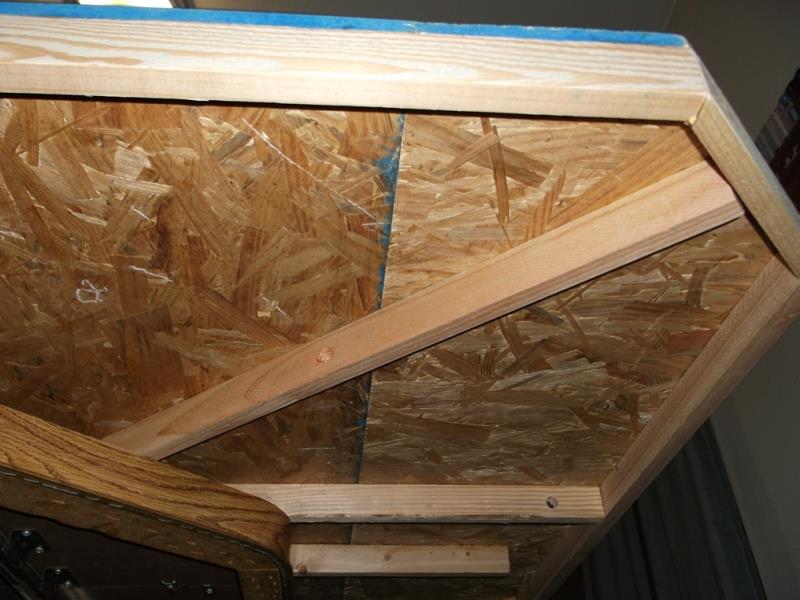
Finished perimeter edging, add one of the cutoff corners to inside of added piece to extend the 45�.
Finished table, 2 days and haven't started layout, but happy with final area. May address table floor issues before starting.
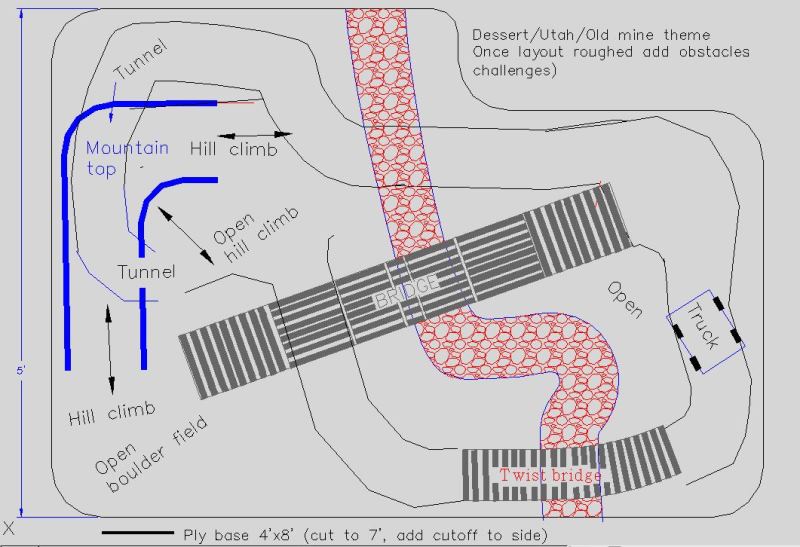
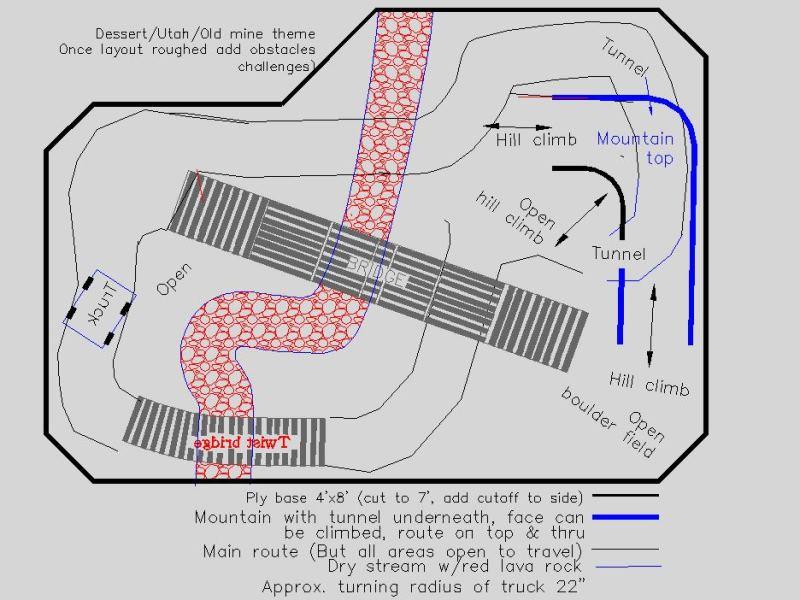 Modified layout plan to reflect changes. Very loose direction. Probably start with hardest which is mountain and stream layout which will determine rest of features and placement.
Ideas-visuals help..
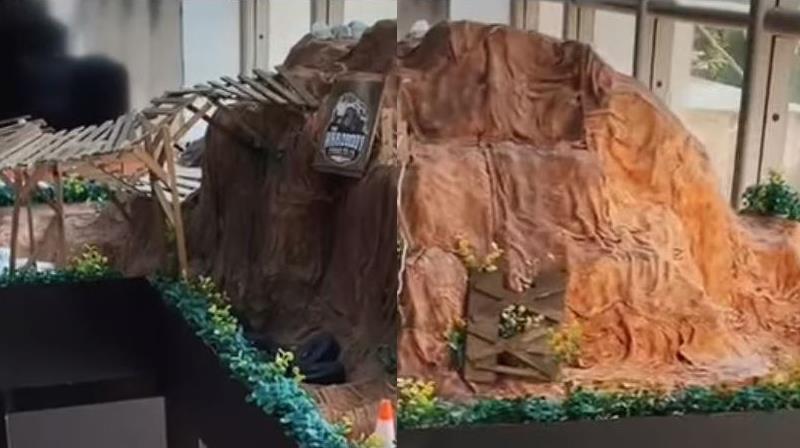
Found these pics, merged 2. Prospectives off but small hill climb on this side, over top and down other side. Alternate Route around back side. More than enough area for tunnel thru...I hadn't thought of it but where the wood bridge shown I could incorporate down to a lower rope bridge to another small mountain or platform where you could also get back down to ground.
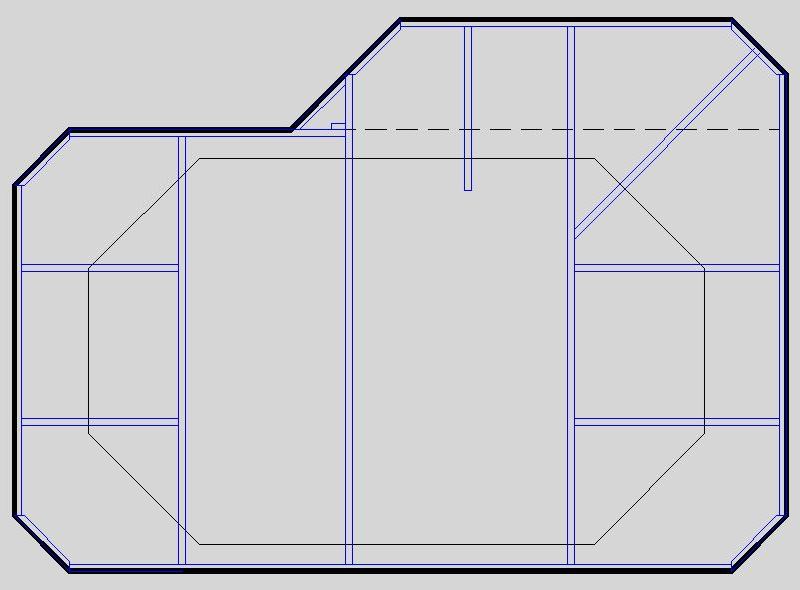
For my reference- 1x2 layout. I drilled holes thru the 1x2 so if light/wiring added I have access..
To be continued...
Back to top of this page
Starting the layout, mountain turn outhouse
Decided to build planned mountain 1st. Its the largest feature and its final size will dictate what and where everything else will or can be.
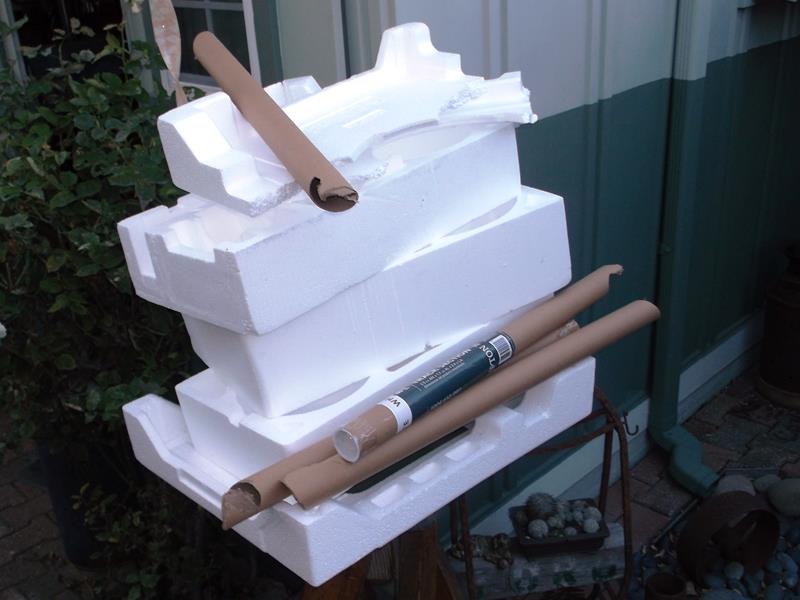
I've been collecting used foam packing, cardboard, boxes, newspaper etc. . I've already decided I didn't want to use spray foam and plaster cloth. Starting took a couple of days as I dont really have a plan on how to construct mountain. I kind of have idea what I want it to look like but unsure how to begin.
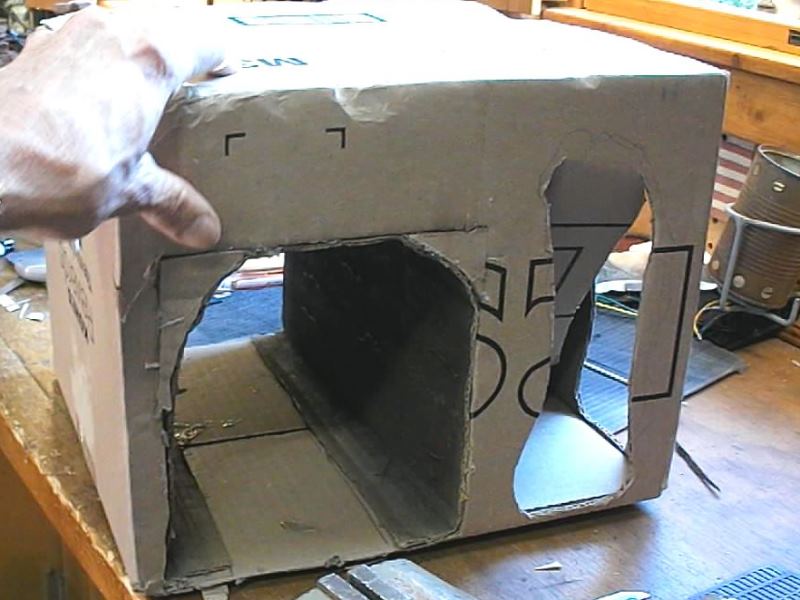
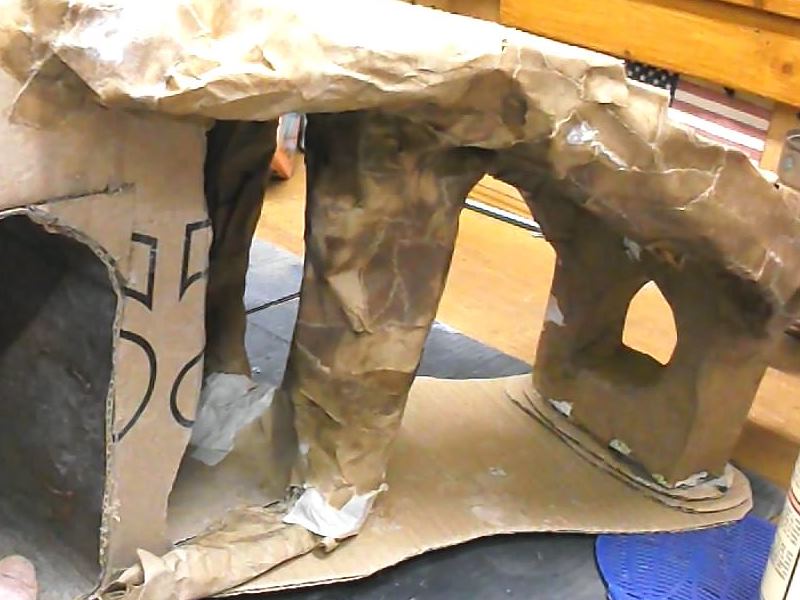
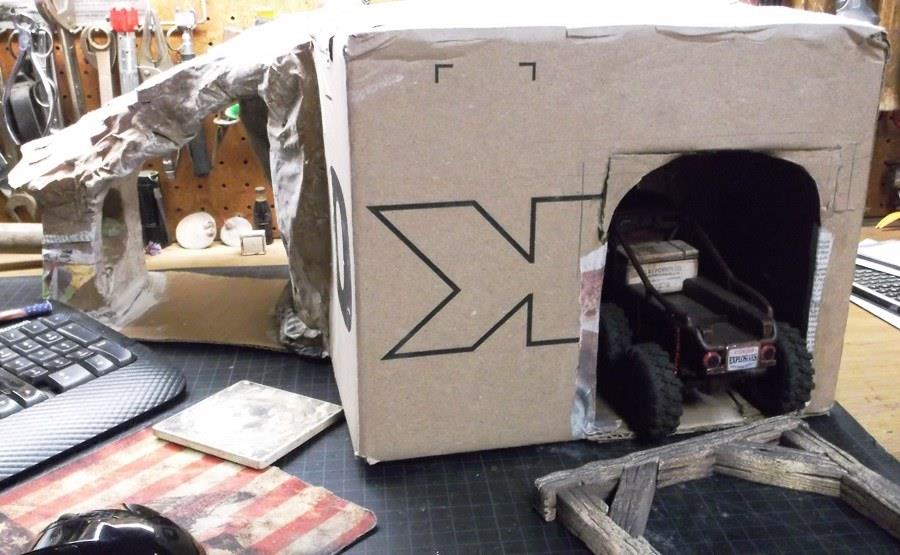
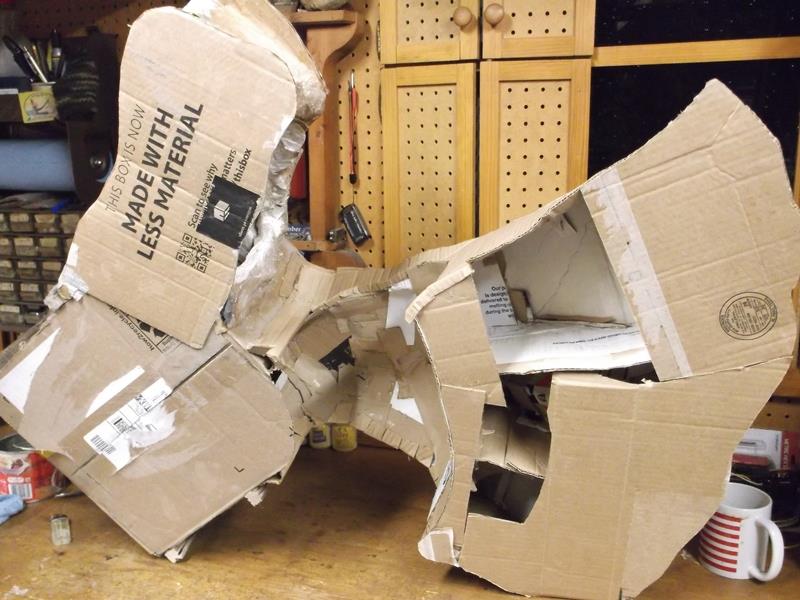
After couple of days hee hawing around realized I just needed to do something even if its wrong. So grabbed one of the boxes and started cutting. I want a tunnel thru. Opposite tunnel, one corner will be an arch climb to top. The other corner will be a continuous part of mountain with hopeful a couple of more difficult optional climbs.
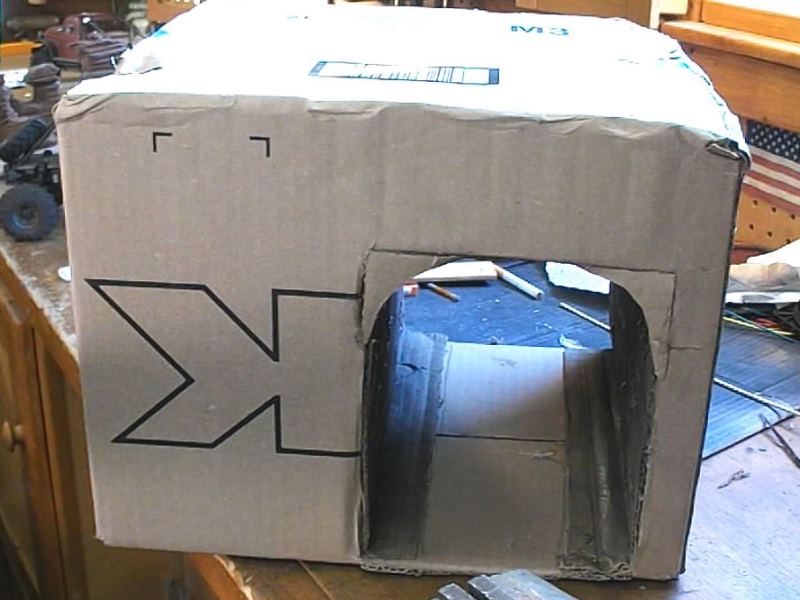
Tunnel: Cut opening thru both sides then cut a length of cardboard to make a hoop to line. Ended up re cutting opening taller as I want to scatter debris/rocks inside. Pre painted the liner, glued in some piece of cardboard for supports then glued in the liner. Crude tunnel. Want to make wood supports for tunnel opening, got on line to see some pictures....
Sidetracked- Came across some old cabins and homestead pictures thought be kind of cool feature stuck on the course then stumbled on pics of old outhouses. Hmmm smaller, simple something positive to do...
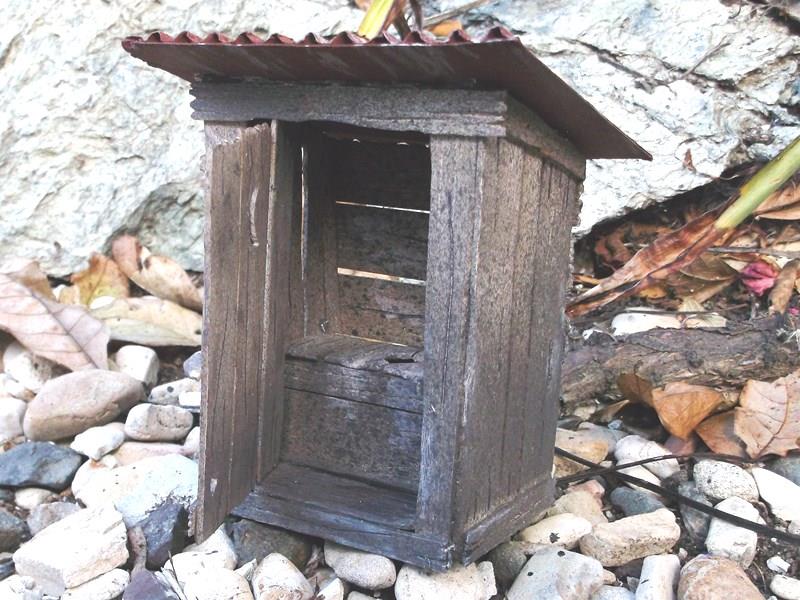
Few popsicle sticks later
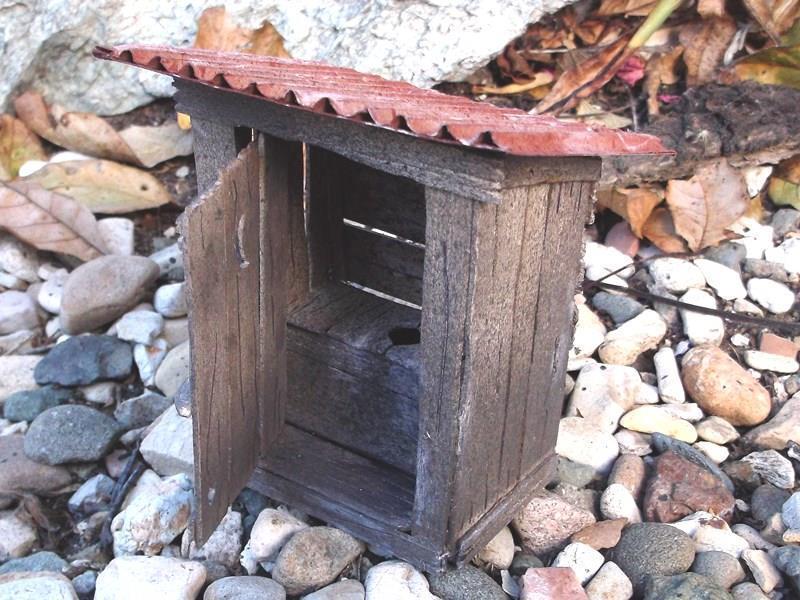
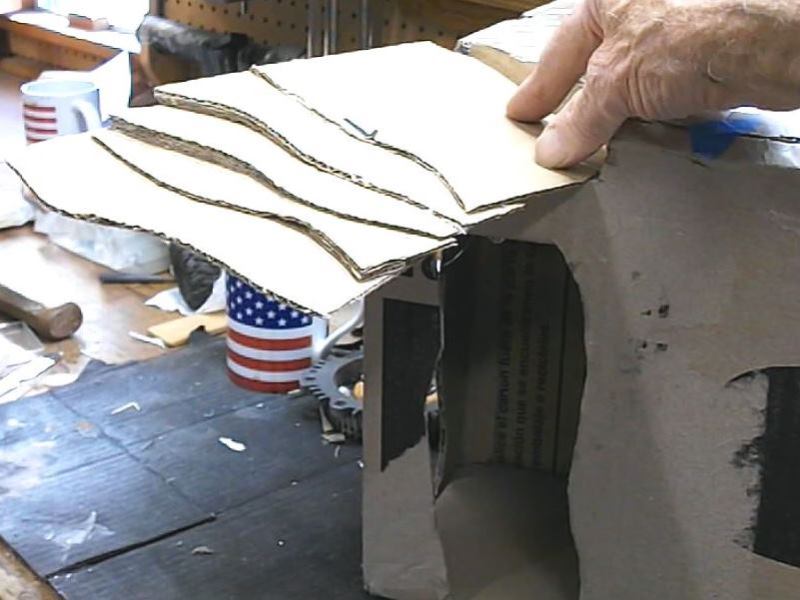
For roof tin I peeled off top layer of cardboard-almost scale.. That was fun, enough to re motivate me on creating mountain.
Back to the mountain. I cut out the corner under where arch climb will be just to open up 'boxeness'. I'll wrap to look like columns.
Not useable but peering inside looks like a cavern- made me think of Huck and Tom exploring the cave- ya that old. On the opposite corner will be a hill climb/part of the mountain but I need to get on layout before creating. I can start the arch
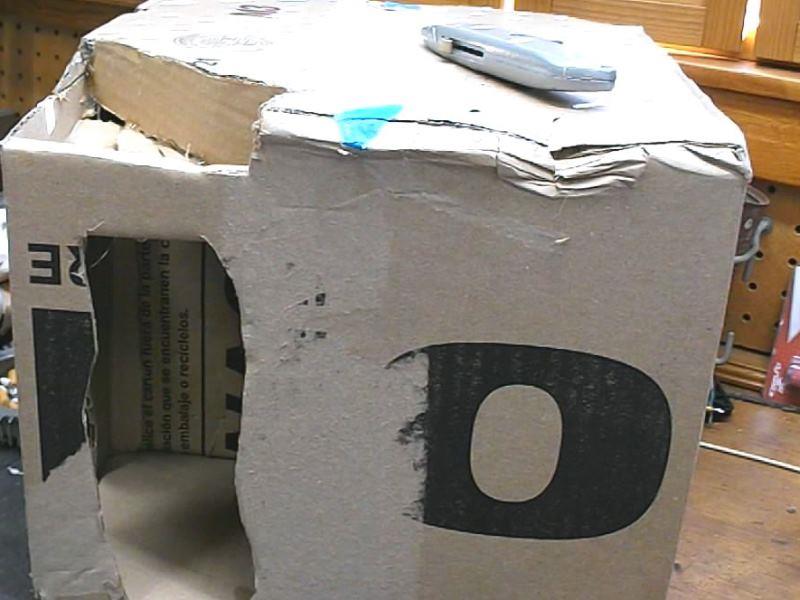
Measuring to get back to ground, arch running to long so I cut top of box to drop top. Box is only 12x13x10" tall but amazed how much area its going to use
Back to top of this page
Building main arch, framing tunnel entrance
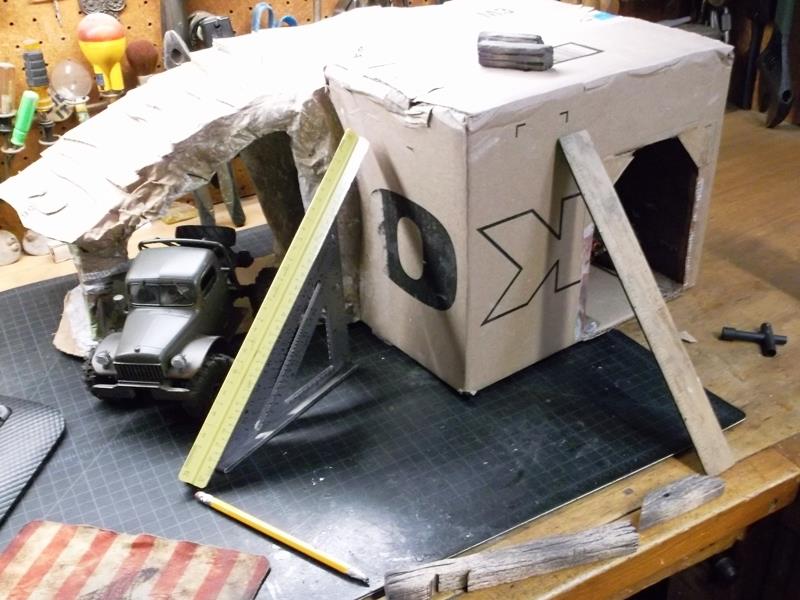
On the arch I was going to carve scrap foam but thought cutting strips of cardboard will give easier layered rock look. Also curving to get back toward center of layout.
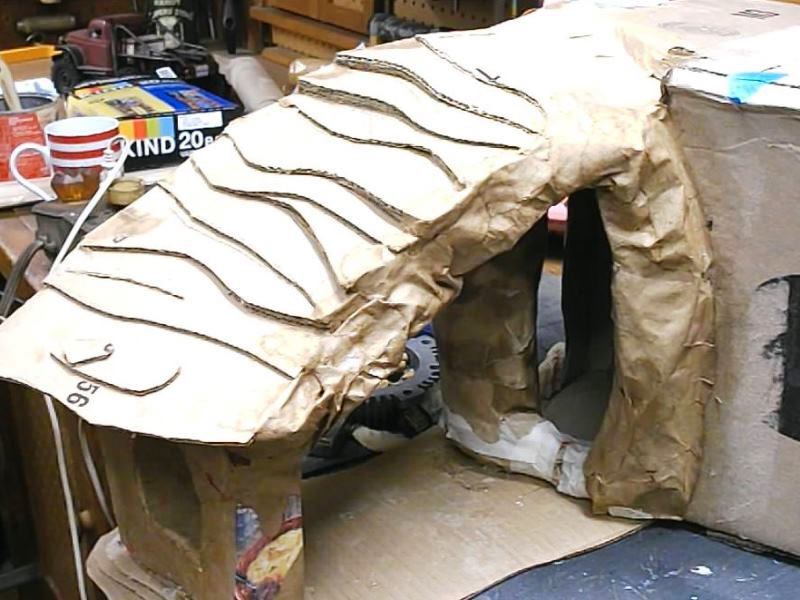
Got about 2/3rds of arch, cut hole in small box ( to look like more arches) for end support. For arch side supports and columns decided to just use rolled paper instead of carving foam. Hot glued in place then began wrapping. Tearing strips of old craft paper, dipping in watered down white glue. Tedious but easy.
Need to put on layout to ensure end of arch doesn't need to change direction. Was thinking possibly end could be a separate piece, making different ends with different level of challenge
Linking progress, cant wait to se it plastered.
Rather at a stand still- cant do end with hill as not sure how it will tie in. Can't do sides until tunnel opening trimmed. Cant do the back side as I think Im going to extend using foam to create a wall on 2 sides so when making 3-4 points turns dont back off top., but I need to figure out how/where hill climb is going to be.
Could plaster what I have but I guess Ill add the tunnel trim...ponder hill
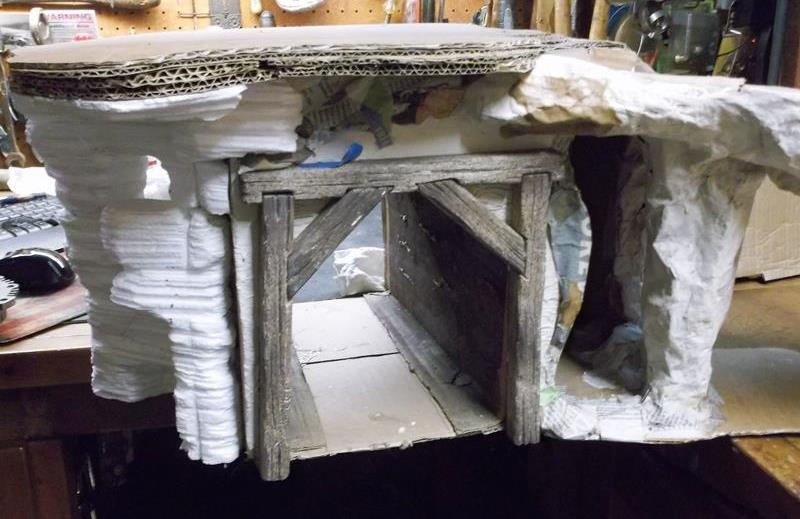
Tunnel entrance frames

Got one side of tunnel trimmed. Going for rough timber look. Need to do some build up of entrance, pre paint the wood, then blend in rock face to timbers.
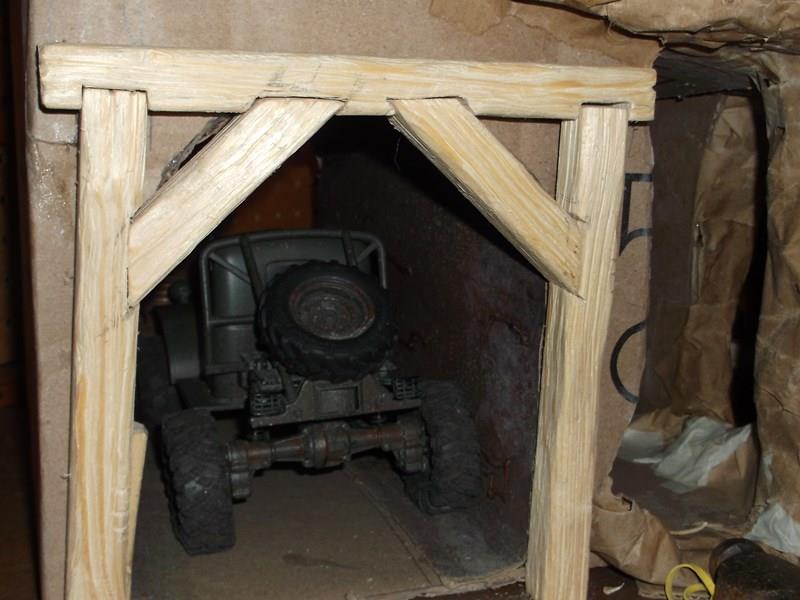
Can't decide if this is a tunnel, a mine or an abandoned train tunnel. If I had some old track might lay section down. Viewer could interpret as old train track or for mining cart.
Obviously not scale to any existing mine admit or train tunnel entrance but he look is kind of what Im trying for- something left over from very long ago past activity.
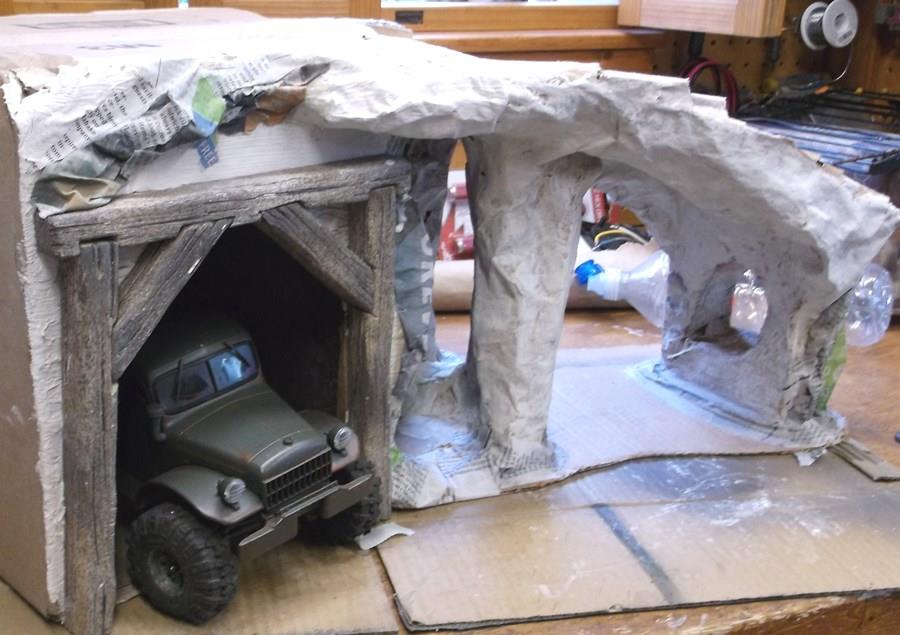 Got timbers painted, started some of the plaster.
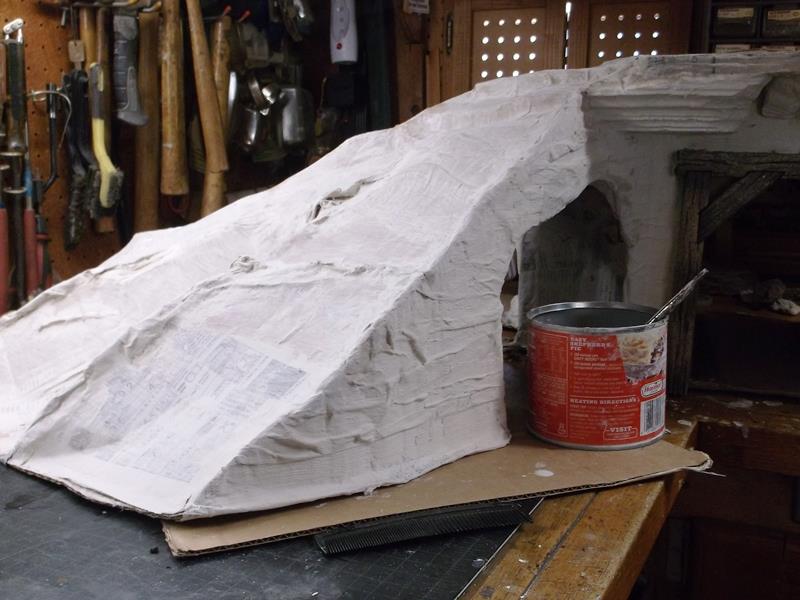
 Changed to newspaper for blending. The craft paper stiffer and holds shape but the news paper more 'moldable'. Especially filling gaps. Very thin glue wash, let dry to stiffen paper before switching to thin glue/plaster, then build with thicker glue/plaster. These details differ than the rocks I made where strips were dipped in glue/plaster covering wads of paper to build up. On the mountain as I'm gluing to box had to do more gradual build up to maintain shapes of pieces glued up.
Found the curve I started on arch if continued will end up in middle of layout so I need to recurve back. That changing plans in mid stream often bites you...
But rain in forecast so I need to cut timbers for other side. Biggest problem is layout is in an other house, working in shop cant check progress easily. Keep going just a bit too far.
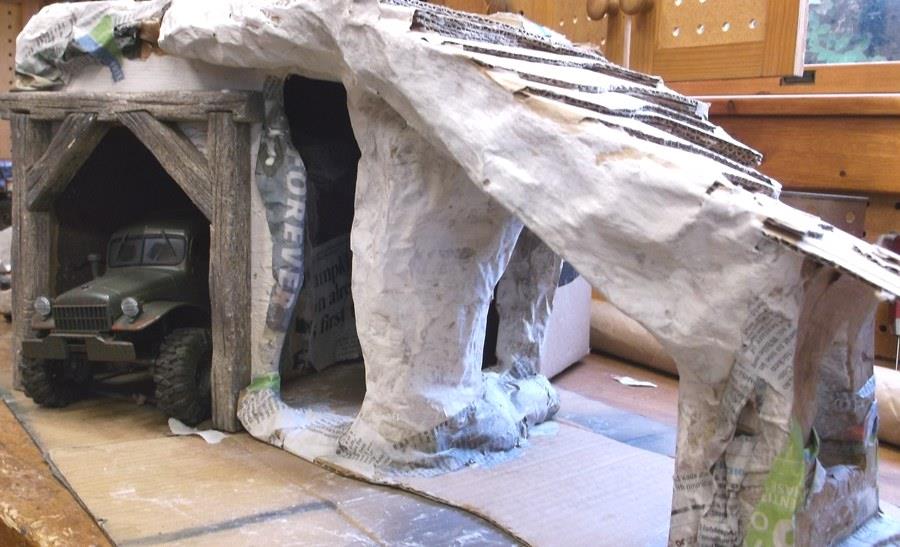
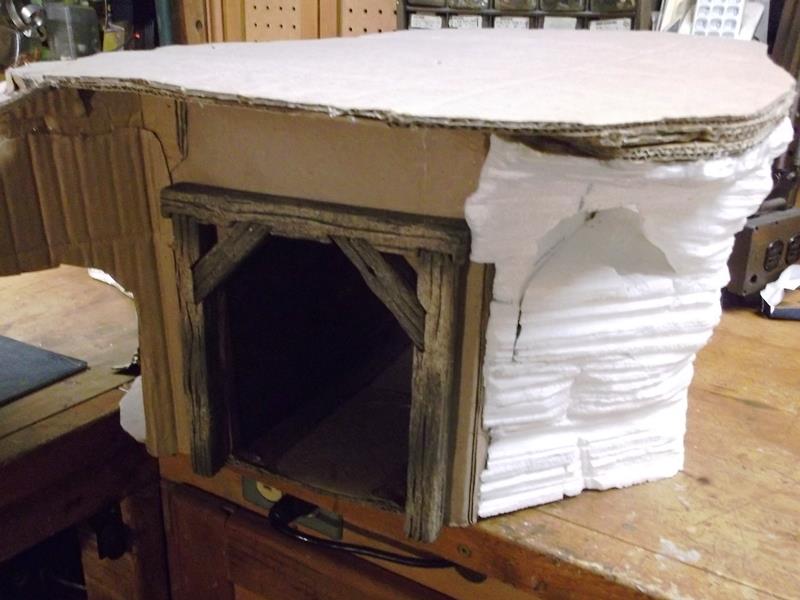
And second tunnel opening started.
Got the 'timbers' cut and painted.

The left corner is to be hill climb. Probably clip corner like I did for arch, Top will be about 8" fan out to bottom 18" or better. Want multiple paths from doable to difficult-not a lot of room... Just need to not block the route under arch and tunnel approach. Also need to add the larger top so not just a square and for turning to alternate paths off mountain, arch climb or hill climb and rope bridge (to be added later) above tunnel entrance.
Back to top of this page
Adding main hill climb
On the hill climb thinking to make separate. Also instead of piling a bunch of stuff and top covering is to cut flat vertical profiles from cardboard. Then bridge with horizontal strips of cardboard. End up with hollow shell, might be easier to create. Ohh could, if separate piece, set away from mountain to have a chasm between. But a bunch of small boxes or waded paper then create surface simpler...
Started hill climb
Decided to just add to mountain. Cutting vertical pieces of cardboard for profile. Adding pieces to span, more pieces to gusset. Finally laying top surface.
View from underneath, lot of cardboard..about 1/4 done...cut the corner of box and pushed inside. Will be an arch under top of hill climb so lot of gussets as top will be cantilevered.
Fully covered inside of arch for strength and so you cant see guts of hill climb. Add center vertical profiles for hill climb, outer ones go all the way to mountain.
.
Bottom view
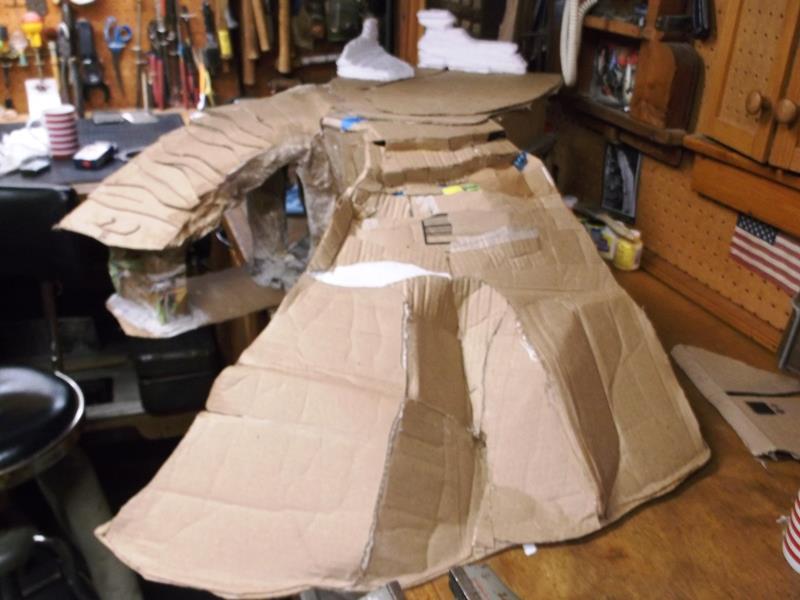
Hill climb roughed in. Enlarged top and added Hoodoos to help with backing off. Left climb fairly easy, right side more difficult, added the V-notch between. When I begin paper strips and plastering Ill be adding a lot more texture, ledges etc to hill climb.
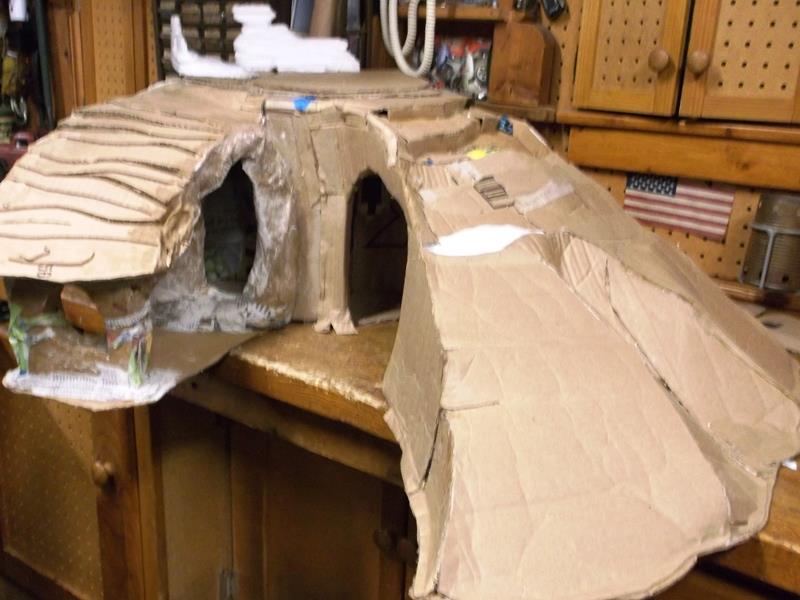
Set up outside and test drove 1st time. Fun, Can drive around the mountain, come out arch, go under hill climb or out between, go thru tunnel- multiple routes...however-
Back to top of this page
Redo mountain top, carving foam for top to sides
However top of mountain, I knew issue, due to small surface, but more so than I thought. Just not enough room to turn. I added larger piece of cardboard to give more room but still takes at least 8 point turn to get from arch to hill climb, which usually ends up backing off edge. Patience and control, moving 2" in either direction to work truck sideways, doable (50%) sort of but takes so long gets frustrating. If coming up hill climb almost impossible to turn left or maneuver to go down arch (U-turn), and will be the same turning right to go across rope bridge once added.
Between arch & rope bridge should be able to just drive across but getting on / off hill climb to arch or rope bridge a problem. Should have use a bigger box. the added Hoodoos need to remove and redo top. Cardboard hanging out in space... Was wanting to start plastering but some thought required to fix. So all the features working just need more top surface.... find out how hard to remove hot glue and paper/foam.
Several days later...
Not that bad to remove, slipped a putty knife under foam to pry off foam, tears top of cardboard but just adding more layers on top so no issue.
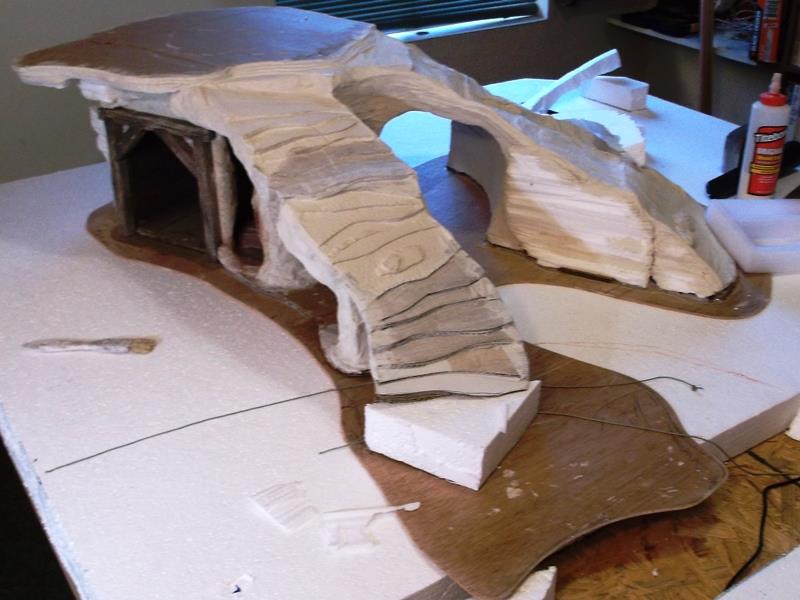
I added 4 layers increasing top area from roughly 14x12" to 19x17". Enough room to make 2 to 3 point turn to enter/exit any approach.
With a 3-4" over hang at sides and 6" opposite hill climb need to add some serious blending/support from bottom of top to sides of box. The multiple layers fairly rigid but looks funny. Sides above tunnel entrances just adding paper with cardboard gussets.
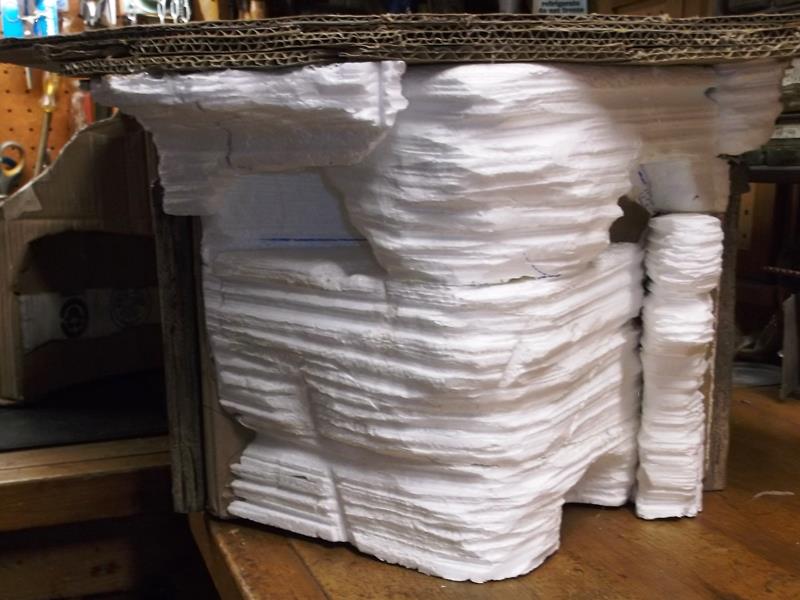
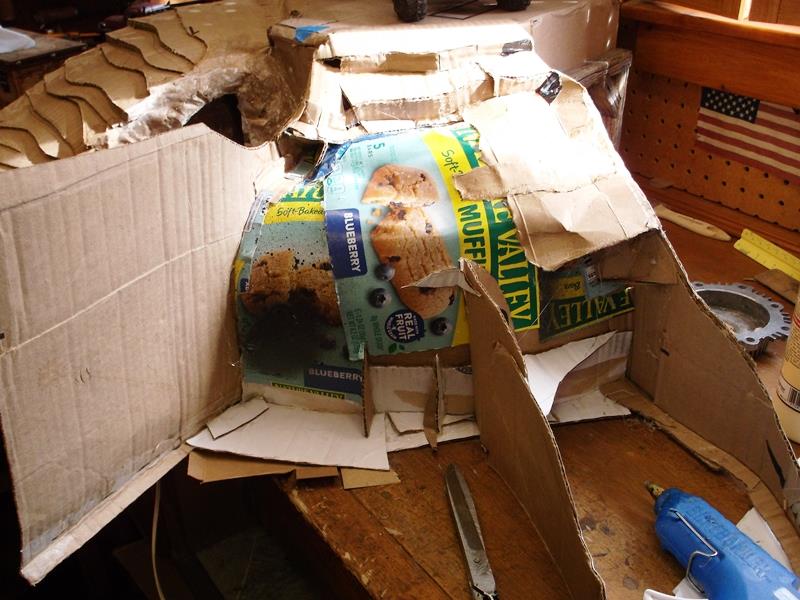
The back side at 6" overhang decided to use some of the foam. a lot of foam. I had picked up a hot wire cutter but jury still out. Due to the mess and fumes but mostly trying to carve large flat surfaces not sure I'll be doing a lot of foam carving at least with the packing polystyrene 'bead board'. Does make for more realistic rock and allows to create more features but the paper and plaster easier. I imagine the denser insulation type foam board would be easier and other tools could be use to carve.
Back side of tunnel. Need to blend/join the 2 sides. On the paper/plaster planned was creating the layered look with plaster, doubt it will look like the carved foam. Viewed from this side will show difference in methods. But so far happy. Spending way more time and energy on this layout than planned. Though crude Im liking the overall appearance so I guess worth it. I had imagined layout would have been done by now and I haven't even finished this first feature yet.
on to other tunnel entrance
Back to top of this page
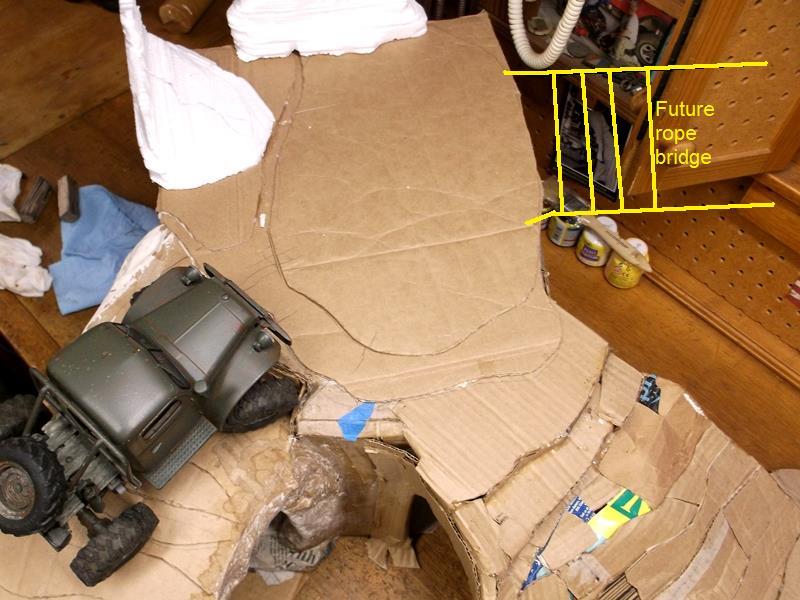
Add support for future rope bridge, recut hill climb arch.
On this tunnel entrance still need to add layered cardboard. But above this entrance is where rope bridge will take off, It needs to start at extended edge so as not to take up turn around area on top. With the 4" over hang some thought required how Im going to anchor rope bridge and blend top support. Think I can get to underside of box top and glue in a piece of 1x2. Or make a wood structure from the tunnel frame.
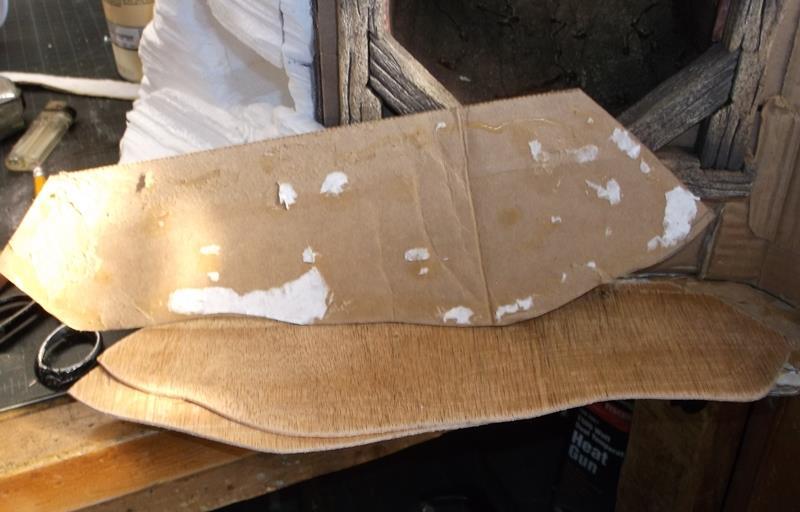
Nope, but what I did was pull off the last piece of cardboard I glued, used as pattern and cut 2 pieces of 1/8" luan plywood. Carve another piece of foam to act as gussets. Then I can screw in from the top wherever needed for the rope bridge attachment.
Plywood for rope bridge. Have to remember on other hill (TBD) to allow support for rope bridge. Had a block of foam that end angles matched walls but too short so cut in half. Added rock between, need to blend more but gussets the top. Mixed a batch of mud, filled all the seams and joints on foam.
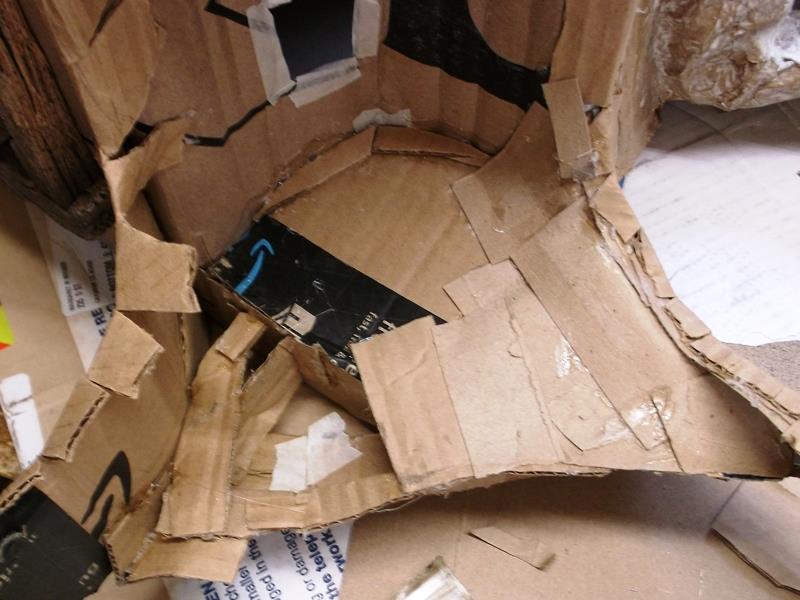
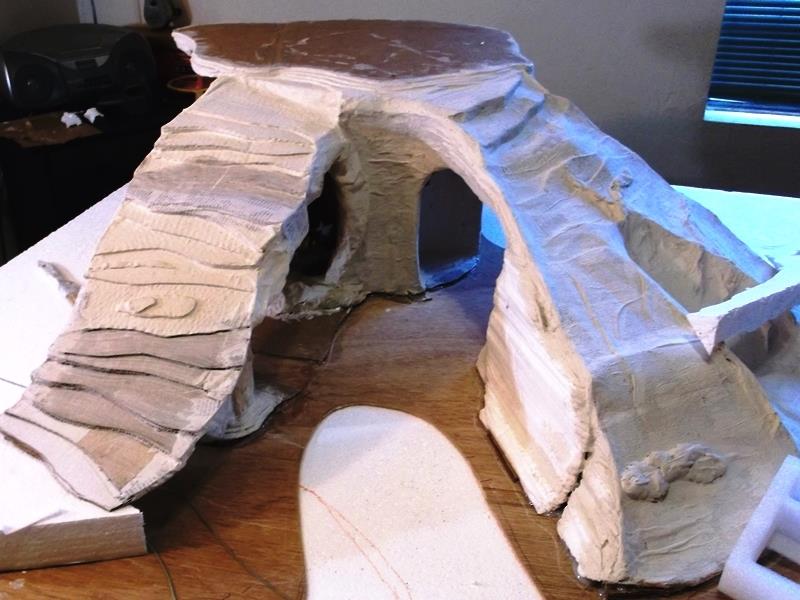
Keep seeing the arch under hill climb on this side, starting to look like another tunnel. I may re cut.
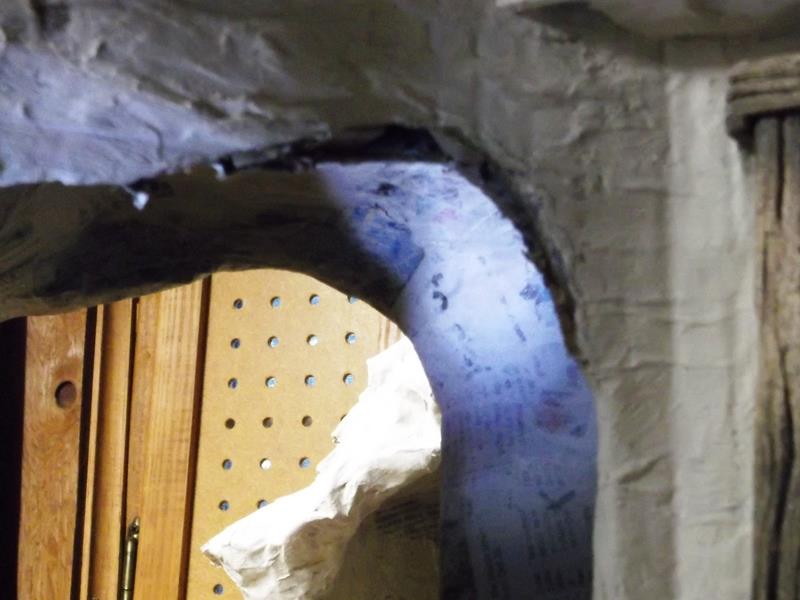
Seeing this picture while writing this, just grabbed utility knife and recut arch. Fortunately only outside cardboard and inner piece that goes to roof. Was expecting some inner bracing.
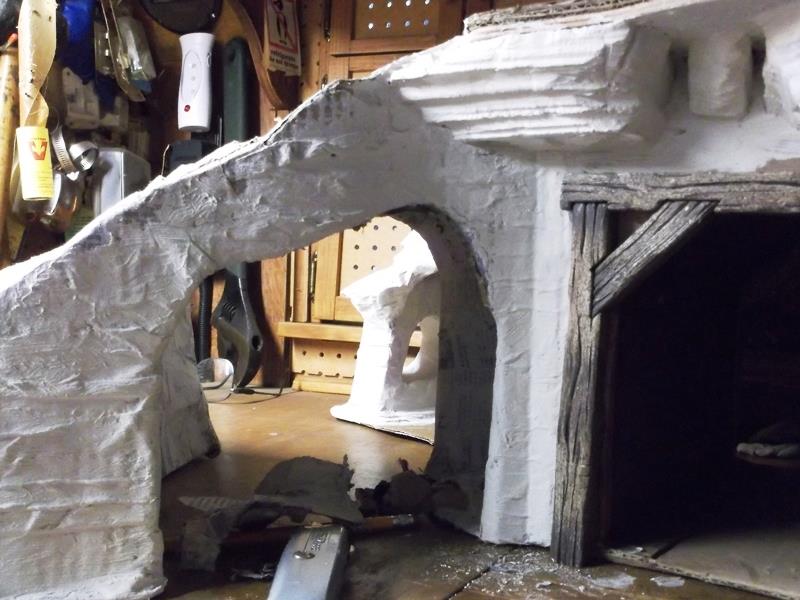
Cool, looks like more of an arch. Some patching required. Surprising what pictures show...I'm looking at gaps either side of small rock. Imagination run amuck- but looking at it like something that was done long ago, it appears that 'rock' may have been intentionally cut for something. Hmmm...maybe hoist/winch, or structure for bridge? Insert couple pieces of 1/4x1 1/4" lattice with bracing back to wall & tunnel frame. Making support for rope bridge landing....ideas.
Meantime, have a few hours of tearing paper and plastering. Want to pick up some sand. Also look at some kind of base.
This feature is moveable but weight of arch and hill climb is flexing and will crack plaster, weaken the cardboard. I have a piece of 1/8" luan ply so will use it and mount mountain to it. Then I can blend to base.
Because of space nixed the idea of Hoodoos on top but 5' off the ground falling off would be bad. Maybe an old broken fence, dead tree trunk or two. See what develops....
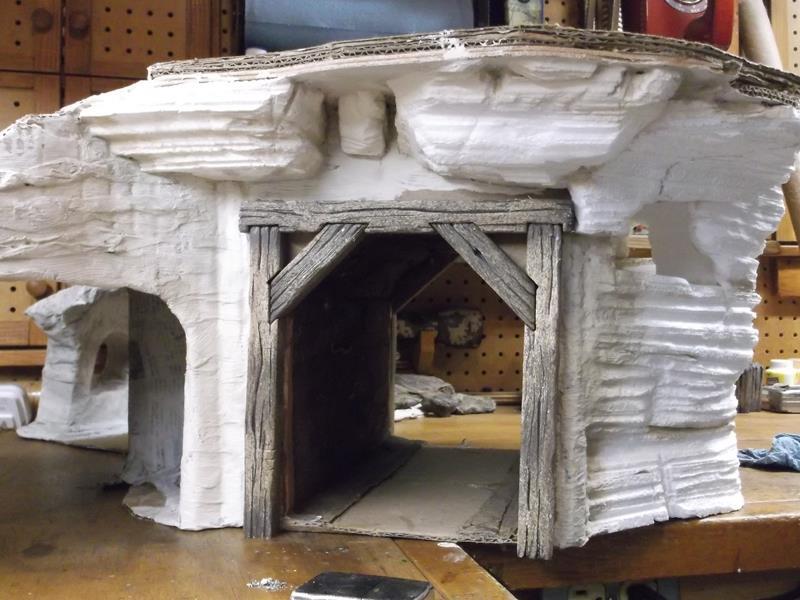
Began final plastering, adding details...
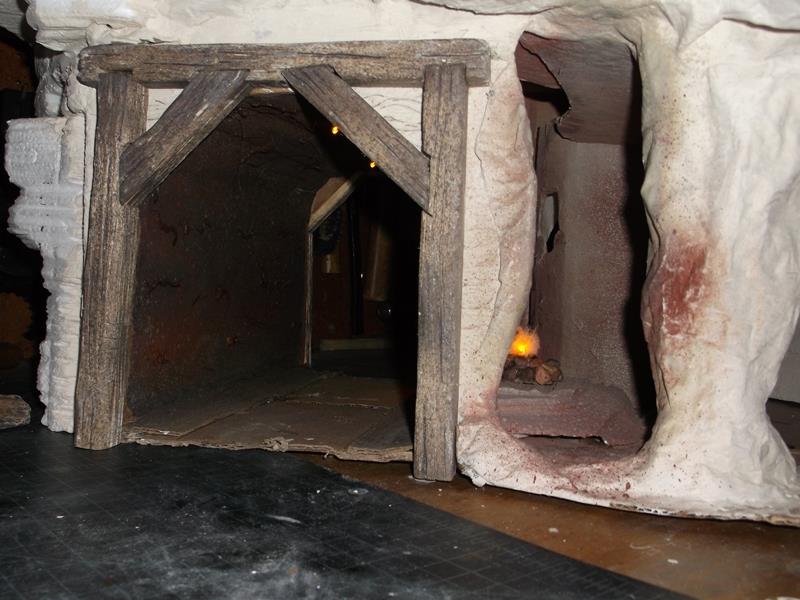
Found some random flickering LEDS and added lights in tunnel and made a campfire in Huck and Toms hideout...
Back to top of this page
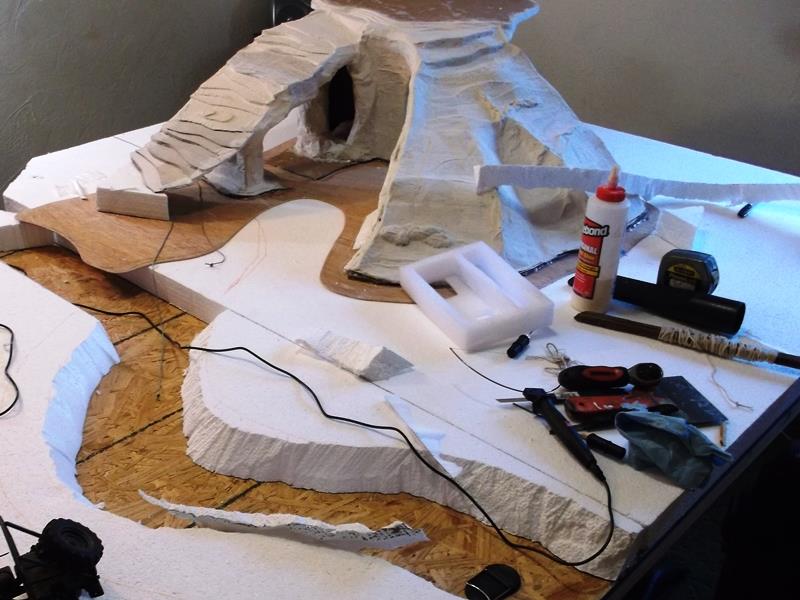
Mountain on the layout, changes, start carving river
Finally got mountain on the layout and had to make some changes. This silly mountain ended up gi-normous. I ended up mounting it to a piece of luan plywood as it became unwieldy moving around to work on it. I need the mountain placed to begin carving layout base, see where the river will be. Need river place so I can finish the arch.
Driving around mountain and entering under arch couldn't make the right turn between the arch and hill climb. So I cut the arch in half, rotated swinging arch away from hill climb.
Started carving the river bed . As mountain extends a lot further than planned river will now go under end of arch which will span to opposite 'bank' to give more room at other end of layout. Cutting ply at arches middle support. Once river cut and arch finalized I can start painting. Then its figuring out other obstacles.
Opposite corner was supposed to be another mountain that was accessed by rope bridge from top of this one. However it would block the hill climb, which again due to size ended up facing side of layout instead of planned toward the center... Need to completely rethink.
So Im focusing on finish the arch, get mountain painted leaving the top unfinished. Work on river then figure out where the rope bridge will go an how to get back down.... Possibly elevated section on poles? I'm thinking what I had envisioned I would need double the available area.
This page is getting WAY too long. almost 50 pictures so will start a new page when mountain is further along.
All pages of this build
Part 1 (This page) the start, layout table, Miniscule Mtn. w/ Schmidts Mine & 3 hill climbs
Part 2 finish this mtn., build Cathedral Rock, rope bridge and Twin Arches
Part 3 Start river, expand table, small arch bridge, detailing east of the river
Part 4 Miniscule Mtn fence rock spire w/Wile E coyote, greenery and small details
Part 5 Painting walls-Nothing to do with layout progress
Part 6 Start West of riveradd small balance rocks
Part 7 Layout basically done add dynamite shack, minor changes, future plans, 3/2024
Back to RC crawler index page
Back to Ourelkhorn Camper Modifications page
142