- Add accessible and visible switch with pilot to front of sewing machine. In line with the Sailrite WorkerB power pack switch.
Consew CP206RL sewing machine with recently installed Sailrite worker B power pack/motor.
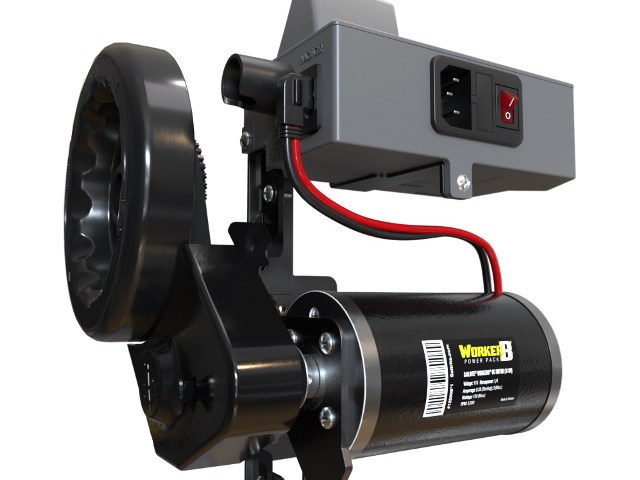
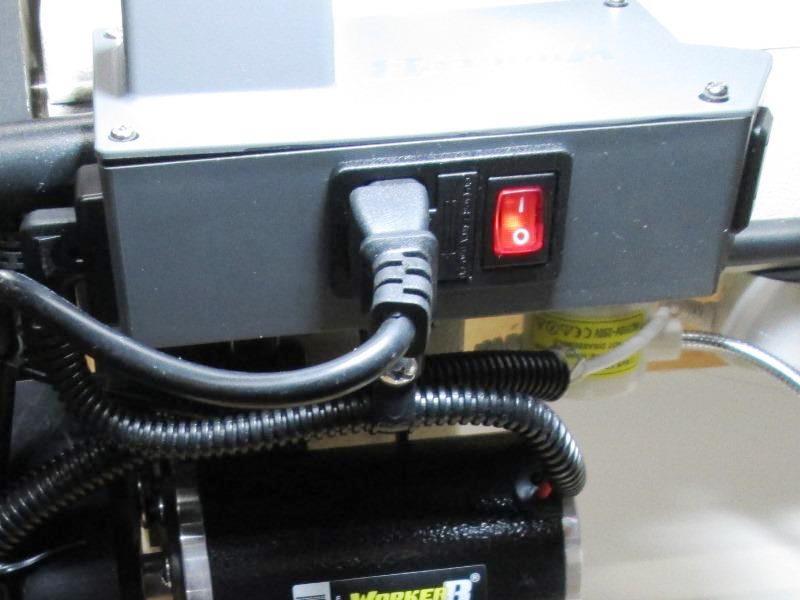
The new Sailrite motor with speed controller is truly awesome. However the power switch with pilot light on the back of controller just gripes me. You have to fumble to turn on/off- pilot is useless as you cant see it.
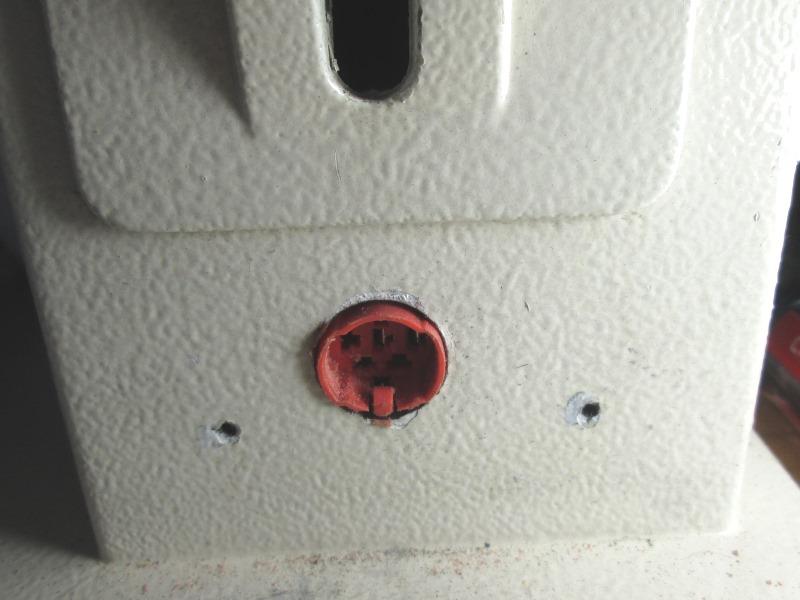
View at front showing control knob, on the left is aux. power receptacle. At the rear out of sight is power switch.
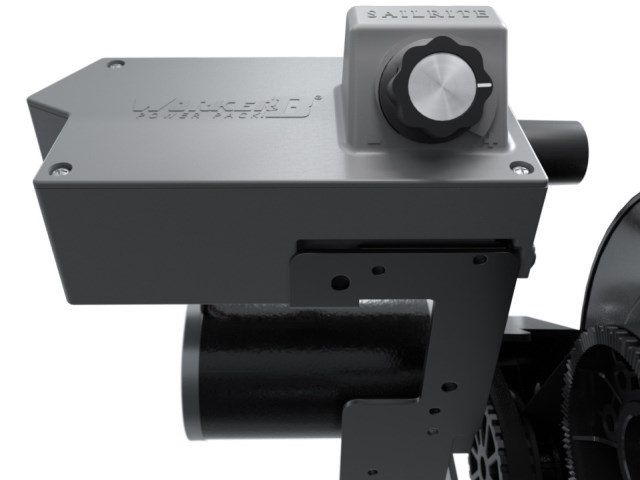
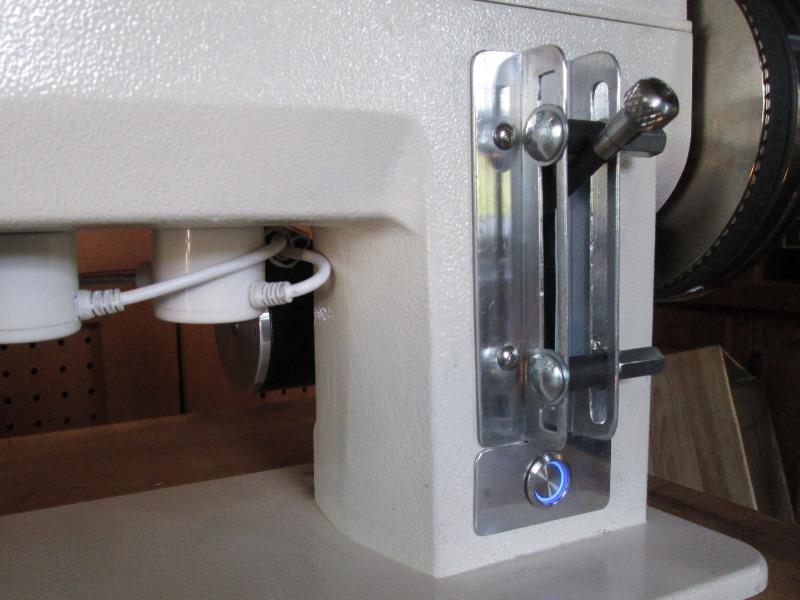
View from back side.
My table has a power strip that everything is plugged into. The new system has its own power switch (even though its inconveniently located) so I can turn off machine and still have lights. New controller also has a built in 110v receptacle so you can plug in lights right at machine but I dont use it as Sailrite power switch also turns the receptacle off. My lights have their own switches. When not sewing I turn off machine so I dont accidentally power machine if stepping on pedal inadvertently.
I am modifying by either moving controllers power switch or adding one in line for access setting at machine. Well that's what Id like to do, void 2 year warranty. Even a visible pilot would be helpful. Having an electrically powered machine without easy access to kill power is just crazy. Having a pilot you cannot see is absolutely pointless. Enough justification...
Adding switch
Every time I sit at machine I end up looking at what it would take to relocate power switch (and how easy it would have been for manufacture to mount switch differently). Simplest would be to remove the unused aux. receptacle, move power switch to that location. Not ideal but better. However the power cord receptacle/fuse and switch unit doesn't lend itself to be easily separated, would involve rewiring controller.
Could simply add switch inline by cutting hole in box. But if I do this I want to do in a way that doesn't alter controller and/or easily returned to factory.
The controller uses a simple 1 piece housing that has power cord receptacle, fuse and switch in a single unit. Line power comes in, goes thru fuse then small jumper wire sends hot feed to its switch. To add an inline switch would be unplugging jumper between fuse and switch, sending power from fuse to new switch and then plugging new switch output to factory switch where jumper was plugged in. Basically replacing jumper with longer jumper that has inline switch. So that's what I'm doing. Factory switch left in on position new switch can turn on/off. Either switch can turn off.
But where to locate new switch? I dont want to modify controller box, switch on sewing machine itself would be more practical so first is to create switch location.
I decided to mount switch on the front of machine. There is ample room inside machine to run a cord internally that will not be at risk of contacting moving parts and/or shorting. To enter controller I will drill small hole. So with out further thought proceeded.
Mounting switch and running cord requires a hole drilled in front for switch and hole in rear for cord to exit.
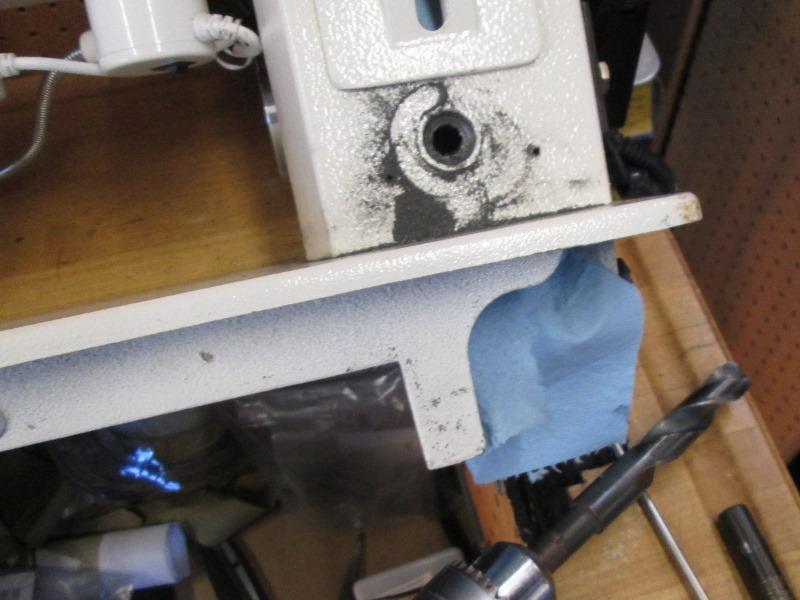
Using a round switch requires 5/8" hole. Drilling cast iron odd. Creates dust not chips but this is as far as I was willing to risk. Cast iron can easily chip or crack and a 5/8" bit if it caught breaking thru could be bad . At this point finished switch hole with round file.
Drill thru back of machine with 5/16" bit. Routed piece of cable from switch hole up and thru back. Picture is deceiving, cord is about 1/2" away from cam plus there wont be this much slack. That said once switch wired several zip ties and cable straps will ensure cord out of harms way and fully immobilized.
Starting with wiring cable to controller. Drilled 5/16" hole in bottom of box for cable to enter.
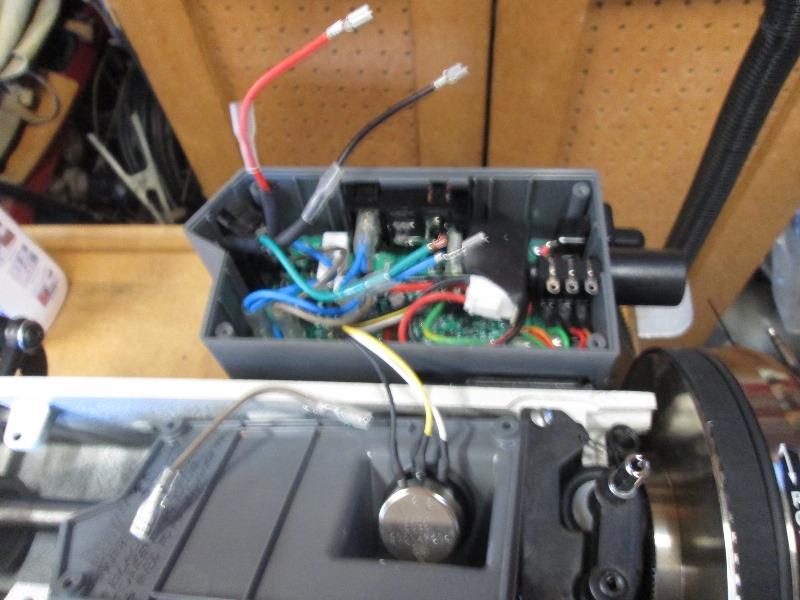
Nice fuzzy picture. Unplugged jumper (in foreground) from fuse to switch. Red wire from new cable will plug onto fuse (goes to new switch). Black is from new switch and plug into existing switch where jumper was plugged in. Soldering .187 female connectors. As far as controller is concerned wired the same. Wrote all the wiring colors on lid. Note controller 110v line/hot is brown, return/ground is blue.
New switch will have pilot so need a ground. Was going to use a piggyback connector but didn't have any on hand. Decided to just solder to existing ground for now. Will revisit when I pick up connectors so new cable can be simply unplugged.
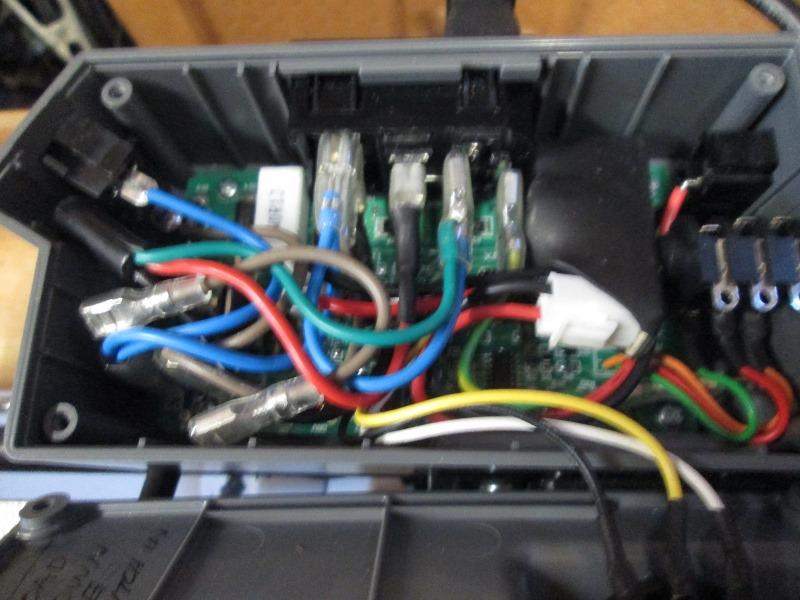
And wired. Stuffed jumper for future if needed.
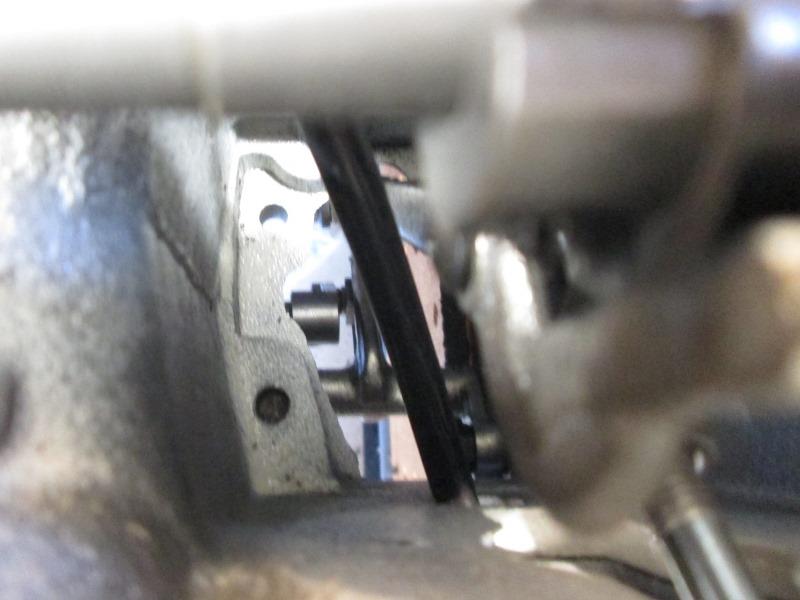
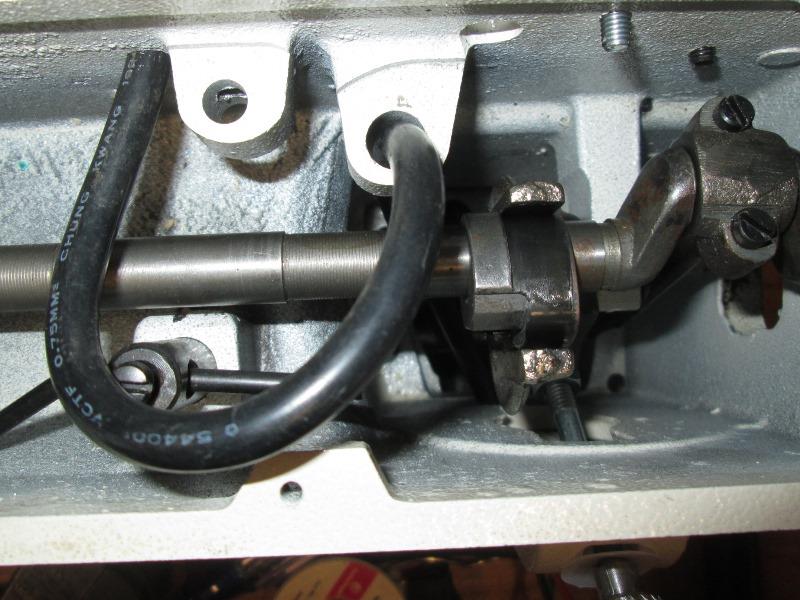
Trying to show cable run down head and out front hole. Lots of room and several places to attach cable restraints.

Waiting on switch. Will be cutting several inches off of cable, easier to cut shorter. Switch will be centered under stitch length lever. I am using a push button switch. Pretty sure the push button switch will fit, but it may possibly extend too far inside. Allowing for, if needed, to either make spacer plates using existing pin holes to get internal clearance or rework hole If I have to and use standard rocker switch, making a plate that will attach to machine covering hole.
Otherwise I'll reinstall the brand logo plate push pins to fill the 2 holes. Relocate the Consew brand and model tag to back of machine or elsewhere.
Not into branding even a little as noted by the already removed bright blue painted on brand name.
Ok I digress, actually killing time until switch arrives tomorrow...
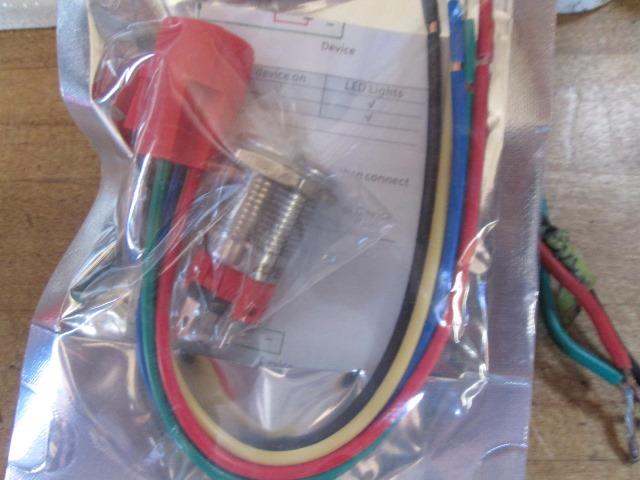
Switch finally showed up. Smaller than I thought which is good.
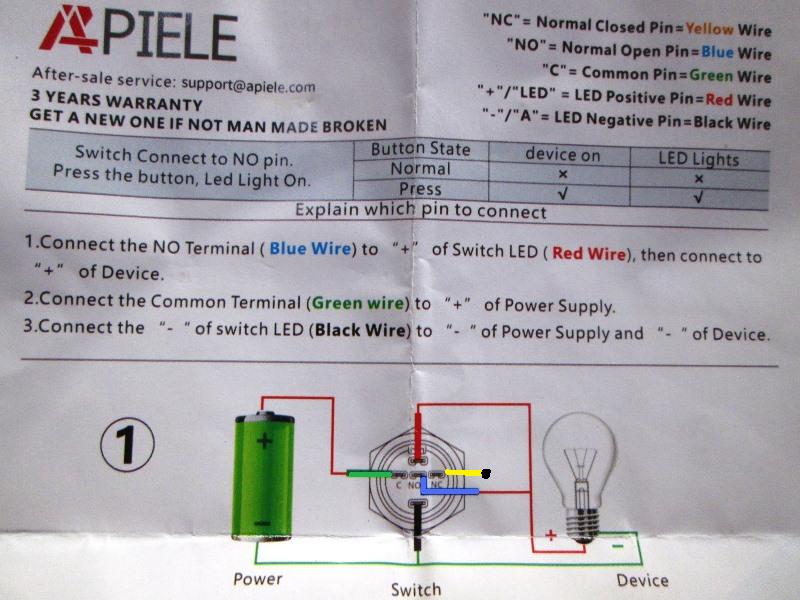
Wiring colors odd-included diagram shows battery but this IS a110v switch.
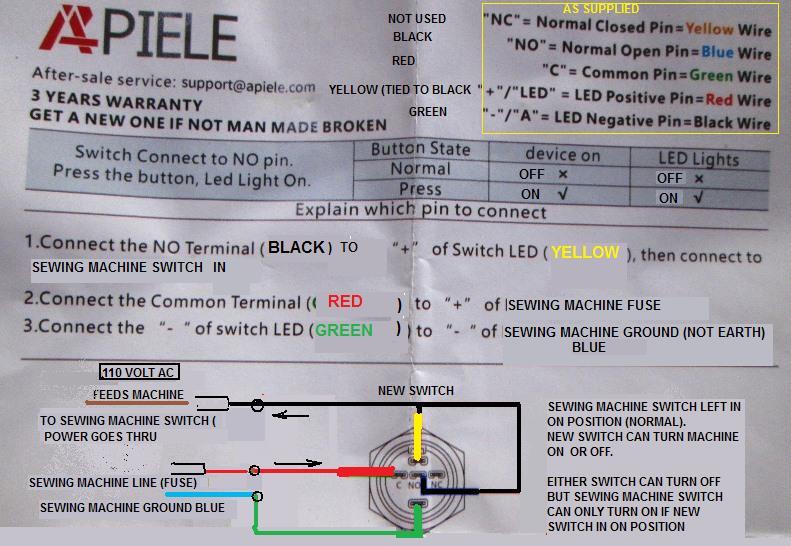
I unpinned all wires from switch plug and swapped wire colors to match cord- Red line in 'C', Black switched power out 'NO', green LED ground, Blue wire removed used yellow that was to NC terminal, it gets tied to black so when switched both load and LED get turned on. Blue wire and NC terminal unused.
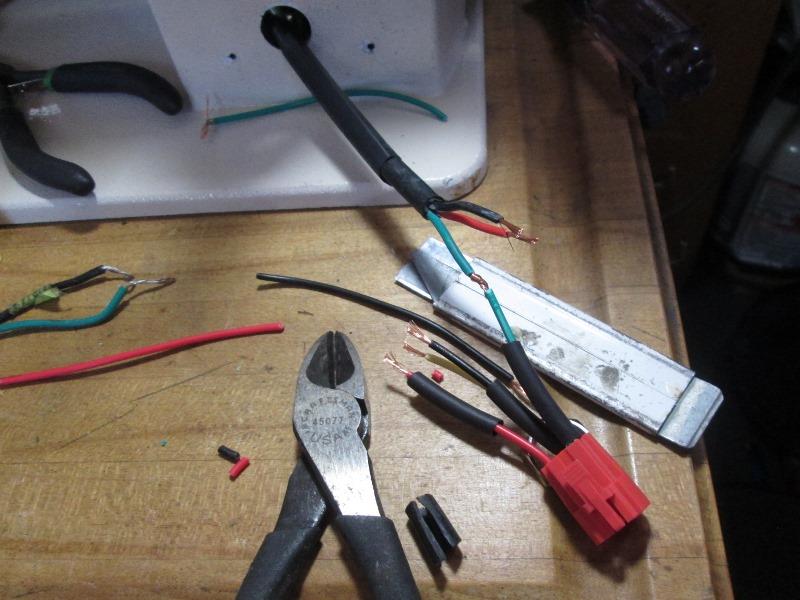
Getting ready to solder cord to switch plug
WHY did you guys let me do this? Plug soldered. Went to push switch on and realized I soldered plug with cord pushed thru hole. Its larger than hole....was suppose to pull cord up to top to solder-duh
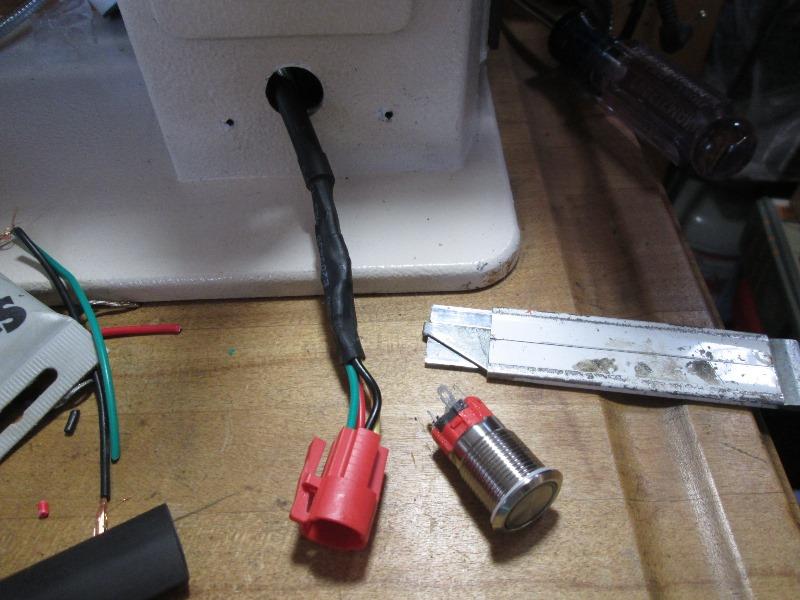
Determined not to unsolder plug spent half hour sanding plug-filing hole until i could force thru. I could have unsolderd ground wire and unpluged wires inside of controller, and completly pulled cord out. Would have been more painful I think, this wasnt to hard. Gave me the opprotunity while sanding plug to reflect :) .
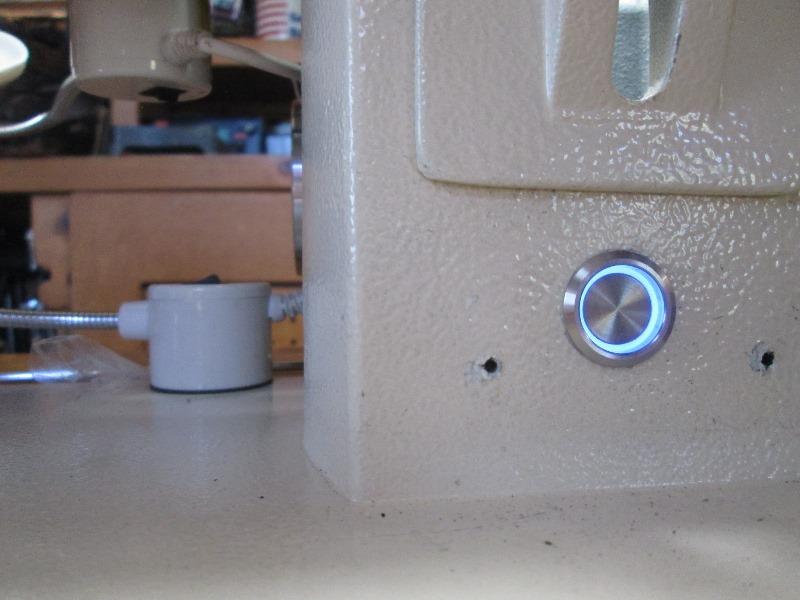
Took a bit of effort to get switch nut threaded on and tight. Hadn't taken into account fact cant get hand inside so 2 fingers from bottom of machine and couple more thru thread adjuster hole (was removed to install and plug in switch). But installed. Profuse amount of zip ties to secure wiring
Nice. Odd is camera will not show blue led color, its a deep blue, fairly bright but soft.
Accidentally discovered though camera wont show color looking at LED...
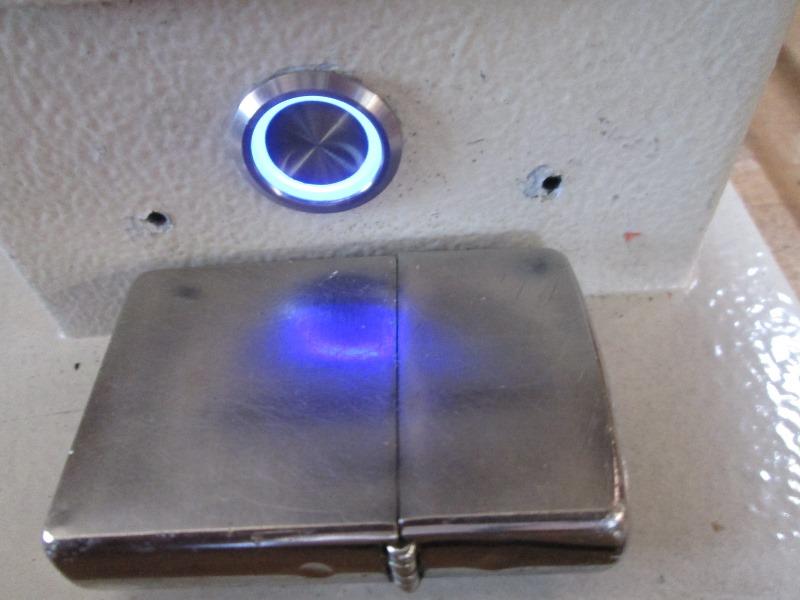
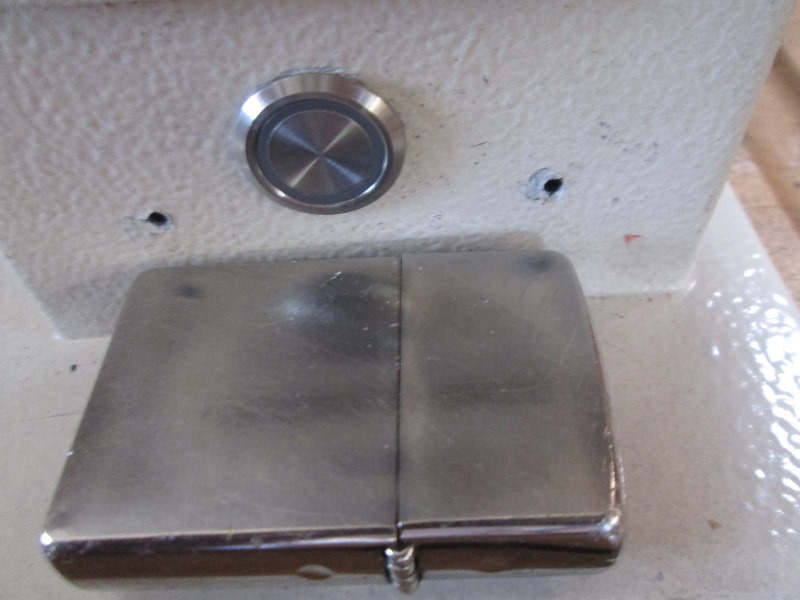
It will pick up the reflected color of LED? Switch is really nice, button is slightly recessed so be difficult to inadvertently turn on. All but silent and depressed with little effort.
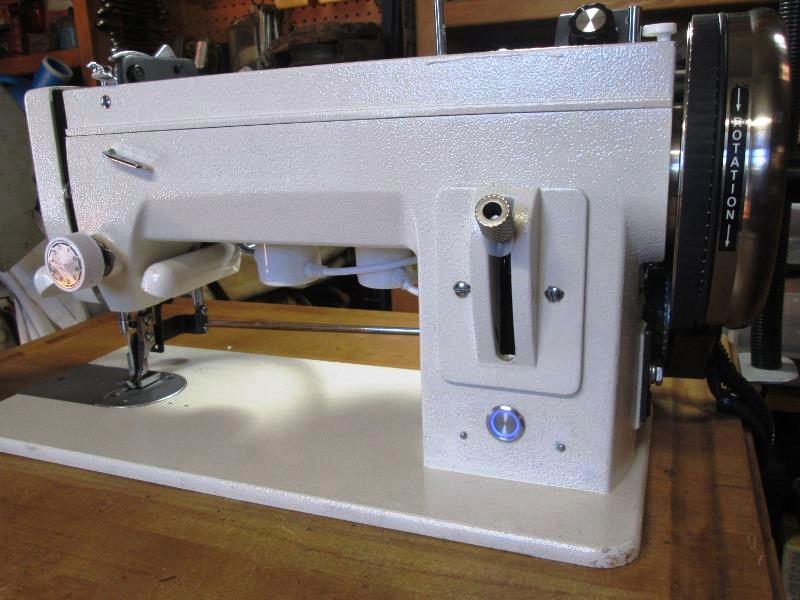
More importantly right there in front...
Need to sew something
Later
Added a stitch length adjuster with stops, required lowering newly installed switch, then made a trim plate.
See Thread adjuster page
Back to Consew sewing machine tool mods section
Back to Shop tool mods section