- Adding a means to adjust stitch length consistently.
Consew CP206RL
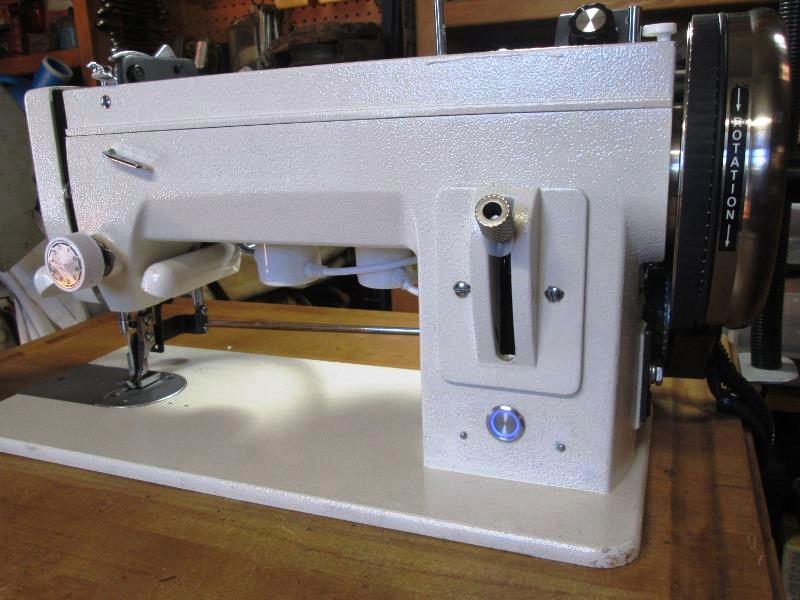
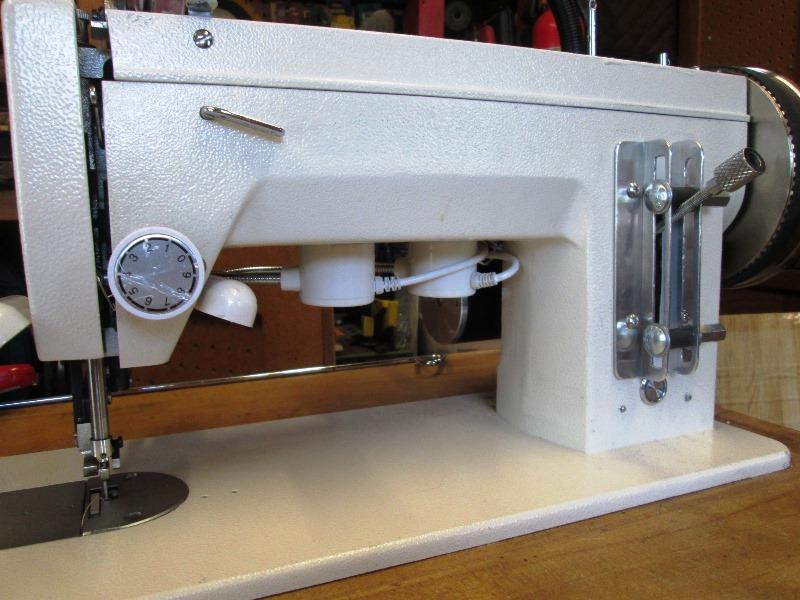
On these sewing machines the forward and reverse stitch length is adjusted by sliding the lever up or down. All the way up is max forward stitch length, down is reverse max length. The problem is if sewing with shorter than max stitch length is when reversing getting the same stitch length. More a problem is when returning to forward getting back to same place or same stitch length.
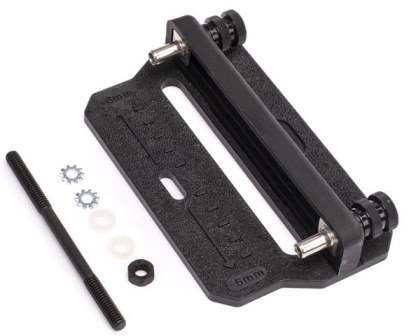
Sailrite makes and sells a nice replacement upgrade unit, EZ set stitch length plate
However it's $55. I've already spent enough on upgrades and all the EZ stitch does is add adjustable stops so when moving lever easy to return or go to set stitch length.
While an elegant simple solution I just can't justify the cost. Other than only alternative there is no reason for the price. I mean it's just stops? While I could recommend and it comes with newer Sailrite machines I am going to try and create something.
If unsuccessful Ill order the EZ Set, but have to try.
Looking at the EZ set first impulse is to try to duplicate. Well maybe if I had a 3D printer but I dont. Primary problem is capturing the nuts. Piece of angle would work but require 2 hands to screw stops. Possibly use T nuts but easily hand fabbing not happening.
A lot of imageneering I finally decided to use opposing pieces of angle with slots and use carriage bolts. They would be captured from spinning, can slide and nut on opposite side would secure with one hand.
With a very loose plan proceeding. No idea if this will work, But only time wasted if it doesn't.
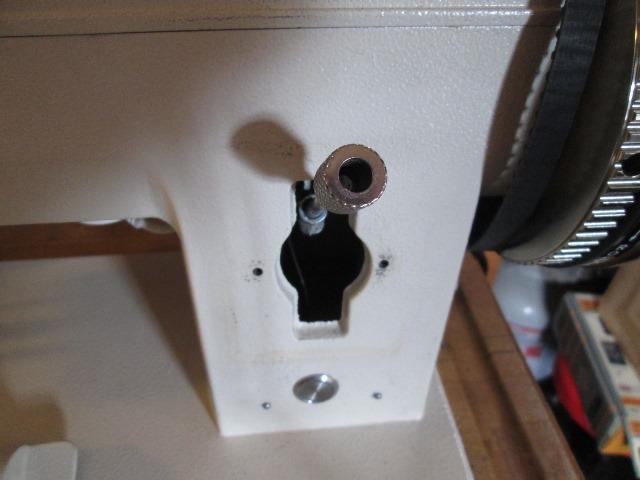
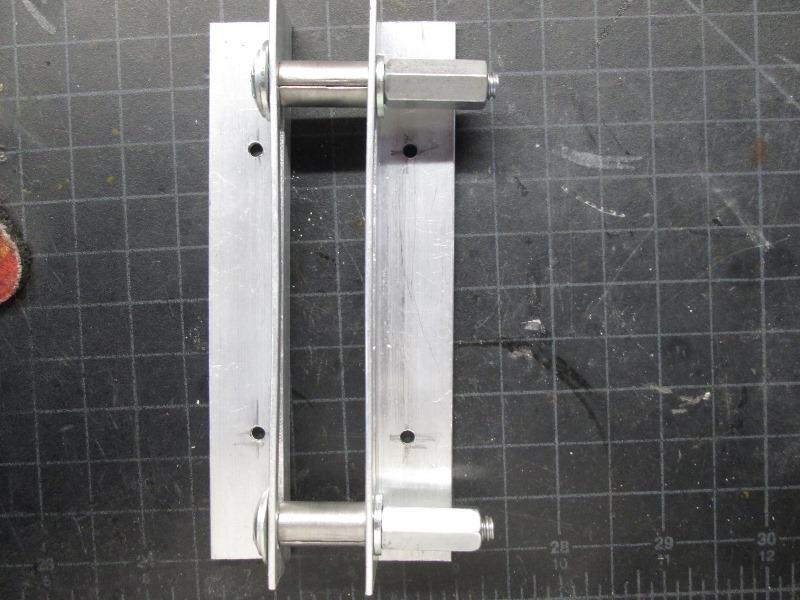
Removed the lever cover. Big hole, allows access to threaded rod. I am using some 1/16"x 3/4" aluminum angle I have on hand. Holding against machine, guestimating where rod would hit stops I measured about 4" between stops so 5" for length of angel.
For slots first I measured the square of 1/4" carriage bolts, 0.26. As Im using 3/4" need slot as close to outer edge so nut can be turned. Will place slot leaving less than 3/16" material at outer edge of angle. Thicker angle or 1" might work better. But the 1/16" will be easy to work, if it proves to thin I can remake IF concept actually functions. Considering this a prototype so not buying anything (intent).
To make slots Im drilling a whole bunch of holes then cleaning up.
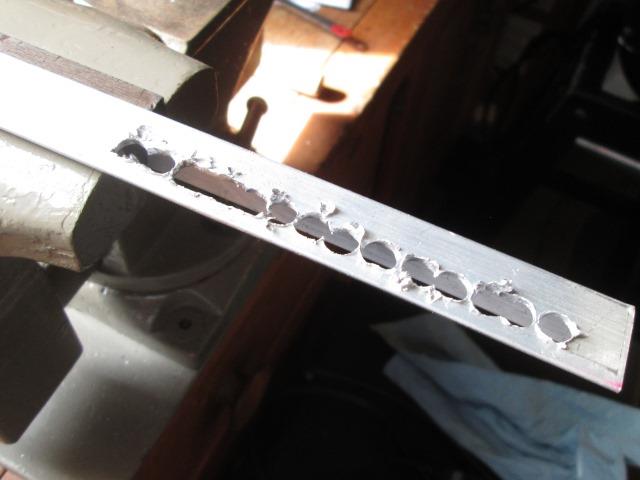
Holes drilled, fairly straight line. Concern is once cleaned up slot doesn't end up wider the square of carriage bolt
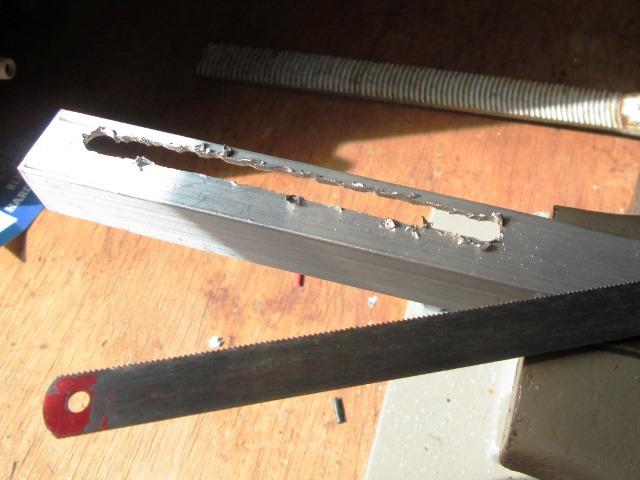
I used a small file to clean up between 2 holes, then used hack saw blade cutting to next set, use file to clean so blade flush to edge then cut to next hole. Repeat...
Using a blade by hand, if it catches it can & will slice hand. I wrapped end with tape, blade is PULLED to lightly cut while stabilizing push side but dont push blade it will bend. Dont force the cuts let blade, slow but less risky. Could have use jig saw or dremel or other means but this only took a few minuets.
Spent more time carefully cleaning up with small file. Constantly checking carriage bolt fit & width stayed close. Not too bad, now to do other piece
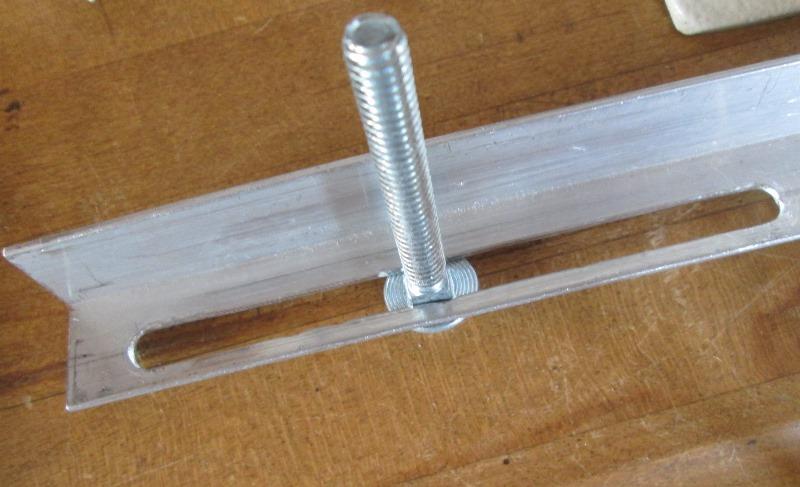
For the stops. Using 1/4"x2" carriage bolts, cutting to 1 1/2" long (check squares are same, I have several on hand and different manufacturer. measured different).

I ended up needing to add spacer that fit's between angles. Wouldn't clamp tight enough to keep bolts from sliding in slots. Off to hardware store for 2 steel 1/4x 3/4" spacers and some washers. Wow 17 cents for a penny washer,
As the angle is so thin used large washer under bolt head to minimize stick thru of square, still had to chamfer ID of spacer so it contacts angle, One the other side used 1/4 washer and a 1/4" coupling nut for knob.
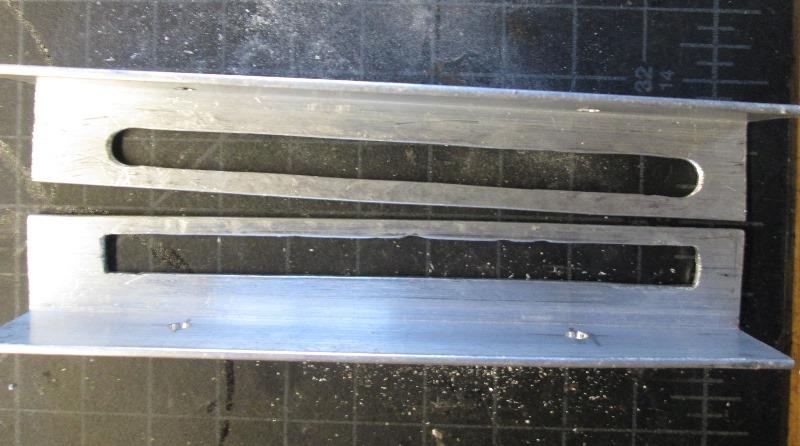
On the side where carriage bolt goes thru lengthened and squared so bolt travels same distance to end (was setting crooked)
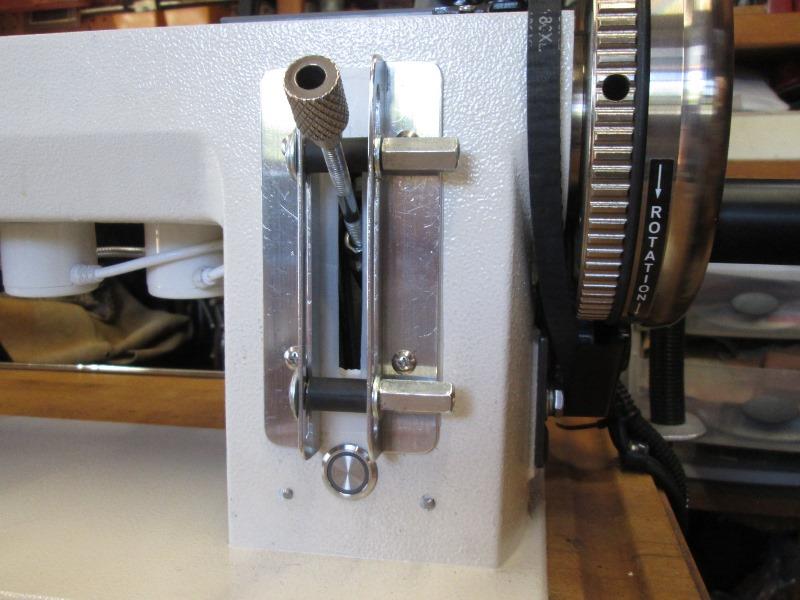
This was the most time consuming, getting placement and matching travel. Set factory cover on machine and set to max travel, then hold up adjuster just contacting rod. Remove and repeat for reverse. Did this several times, matching travel and getting placement on machine. I want at least factory travel but I do not want it to allow going further. I did open up slots for about 3/16" more travel to match original.
Marked machine where new stop assembly will mount.,
Realized the single center screws on machine wouldn't really work for separate pieces so drilled 2 holes each piece.
Clamped to machine and marked holes
 Drilling and taping for 6-32 screws. I couldn't identify the existing screws and have a bunch, I assume metric (since identified as 3.5mm. )
Not sure if Ill use the center screws- might for extra support but later if this works.
Drilling and taping for 6-32 screws. I couldn't identify the existing screws and have a bunch, I assume metric (since identified as 3.5mm. )
Not sure if Ill use the center screws- might for extra support but later if this works.
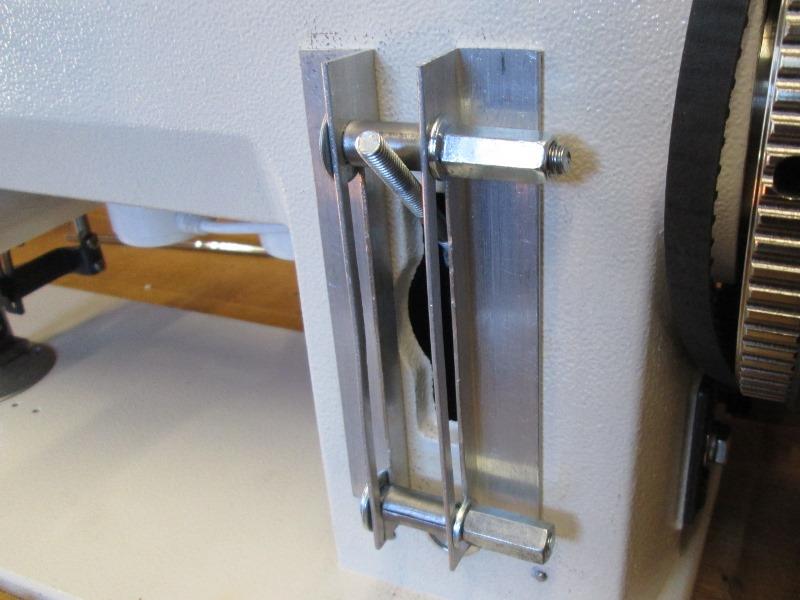
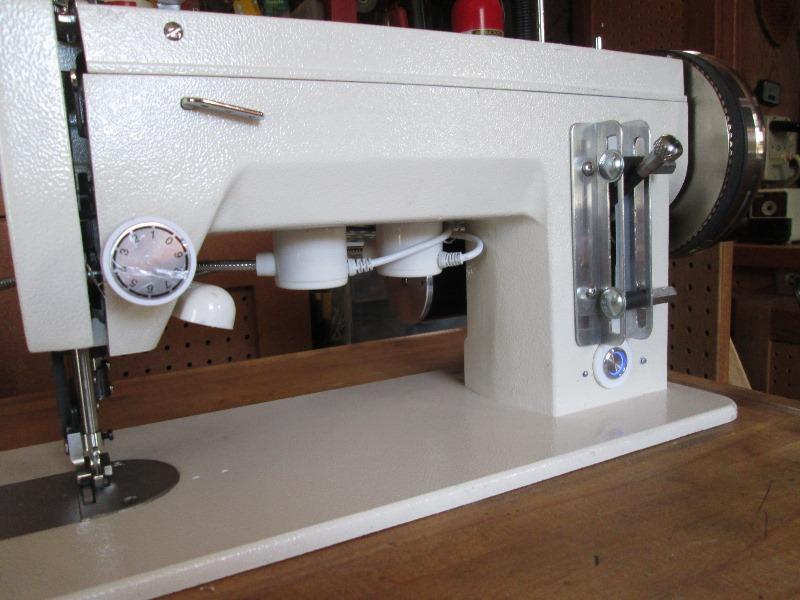
HOkEY SMOKE - it works....

Loosen nut they move, tighten with fingers they dont move. The spacers kind of walked though, buffed the ends with some emery cloth and that solved. Could use some friction washers. But in use once set rarely change stitch length, other than shortening like reaching end of stitch and then stops don't need to be moved. Center screws nixed.
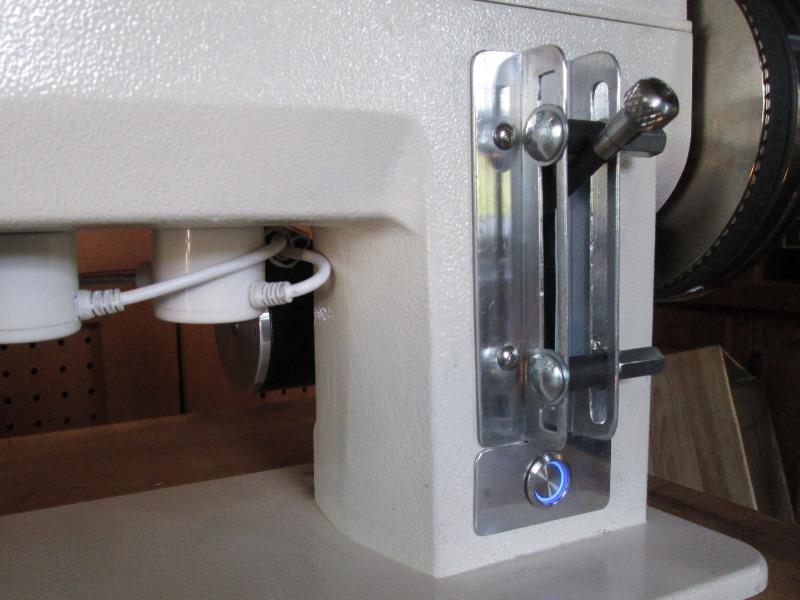
I was hoping at best this would work enough to give direction for making permanent ones but I'm done. Well except pulling apart rounding all the corners. Id like to paint but at least sides with slots would just get scraped off. Could polish-we'll see. Replace the large knurled nut, didn't do anything before, less now, just sticks out. Found some nice knurled nuts to replace the hex coupler nuts but $5 each , resisting the urge. I'll hold off
Pulled apart, shorten top of angles 1/4" and bottom about 1/8" and rounded face corners. Larger radius on ends of slotted sides. Used some Lucas metal polish to make the angle all shiny. My newly installed power switch now a bit too high, still functions fine should have been a least 1/4" lower. The spacers are raw steel, can't paint so slipped on some heat shrink tubing. Cut a full backing shim out of plastic (milk jug) to cover most of the large hole.

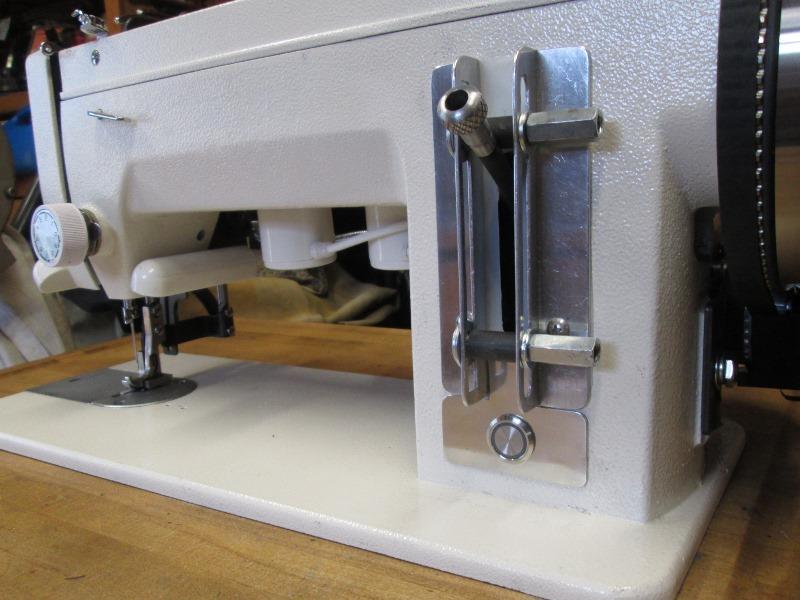
Definitely going to address (remove and replace) the knurled knob. Way too large, doesn't need to turn or be knurled. Some where I have an old black plastic teardrop handle.
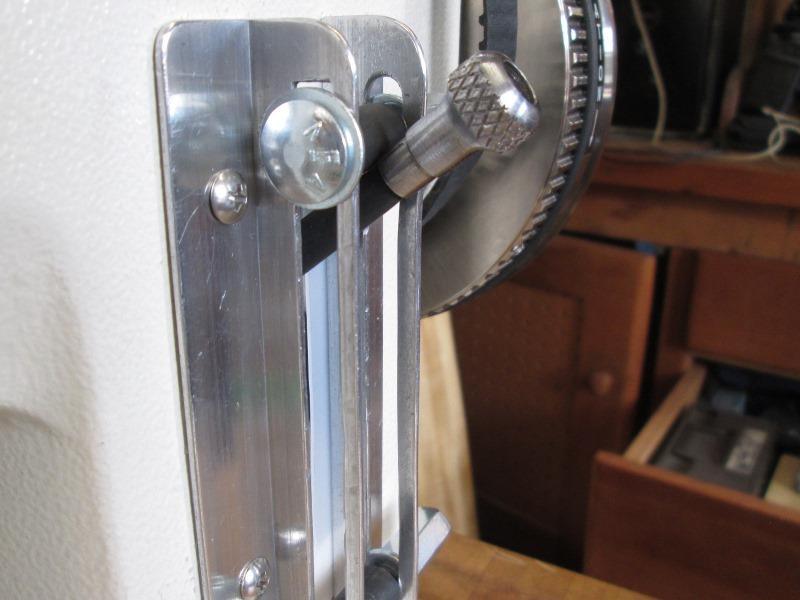
Couldn't find...so reworking supplied knob.
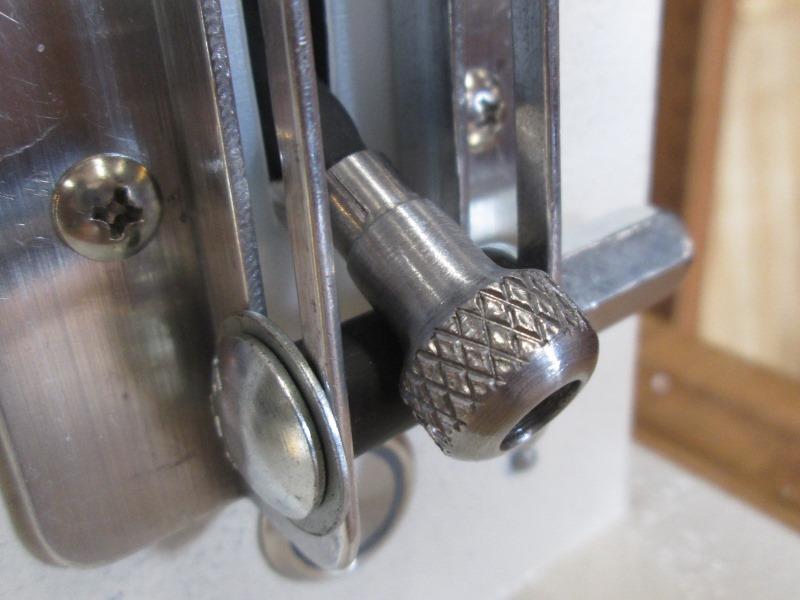
Was going to simply cut off 1/2" but ground back down so it threads on further. Protrudes a good 3/4" less. Note ID of unthreaded section is larger than thread section so dont grind matching OD of base). Rounded end. Slipped piece of shrink tube over rod, used blue locktite to secure knob.
Not counting stuff on hand, ended up spending $7.95: 4) 6-32 screws 4) 1/4" washers 2) 1/4" spacers and 1) 1/4" coupling nut. No wonder the price of finished goods is going thru the roof.
A little later...The recently installed power switch ending up partially up & between the adjuster was bugging me. Moved down about 5/16".
Found a plastic washer large enough to cover hole, was easy but simply don't like it. At some point making an aluminum plate. Which was the plan but don't have anything on hand. It will be width of adjuster, covering the 2 unused rivets. (name plate 3m taped to back of machine).
No more than finished, put everything away, sat down and looked up -setting up on the shelf there is a piece of old project box with aluminum lid.... Yup
Unplug the switch then unscrew its mounting nut. Cut a piece of the old project box lid to fit, add matching hole. Push switch thru trim plate and machine, plug in and thread mountng nut on. Trim plate held on by switch, can't rotate being against thread adjuster.
Easily set and repeatable stitch length forward to reverse and back. Nuts only require bout 1/4 turn to loosen and snug.
FYI. - Reflecting on how and why this is working as well as it is, it shouldn't. I've determined #1 it's the thin angle. It's what I had on hand. If I had had thicker it wouldn't not have worked as well. #2 the angle material is slightly less that 90°, maybe 89°.
When I placed and bolted on machine it was with the 2 pieces of angle bolted together with spacers thru slot legs. Because angle is less than 90° when screwed to machine it's actually flexing the bottom legs to make contact. So when the stops are loosened tension is released and the slotted legs spread apart allowing spacers to move freely. This is very slight, maybe 2 thou, but why it takes so little force to clamp spacers and when loosened stops slide freely. If the material were more rigid or 90° it would required more force to clamp or when loosened spacers wouldn't slide as freely.
Curious. Bottom line IF I were to make another it would be with the thin 1/16"-.065 angle so it can flex. Second if true 90° mount to machine with spacers slightly loose (or sand spacers after).
I seriously considered welding spreaders between the 2 angles so the original 2 screws could be used instead of drilling and tapping 4 holes.
What I had planned would have limited the flex. However if 2 flat spreaders were used the slotted legs could still freely flex. Bazzilion ways this could be done.
Back to Consew sewing machine tool mods section
Back to Shop tool mods section
 Now we're done.