Adding Drill Press Table Counter Weight

To aid in lifting drill press table I'm adding a counter weight in column. An attached steel cable will run up and over pulley inside of belt guard then back down outside of column to pulley on table lift bracket. from ther it will go up to motor and be anchored.
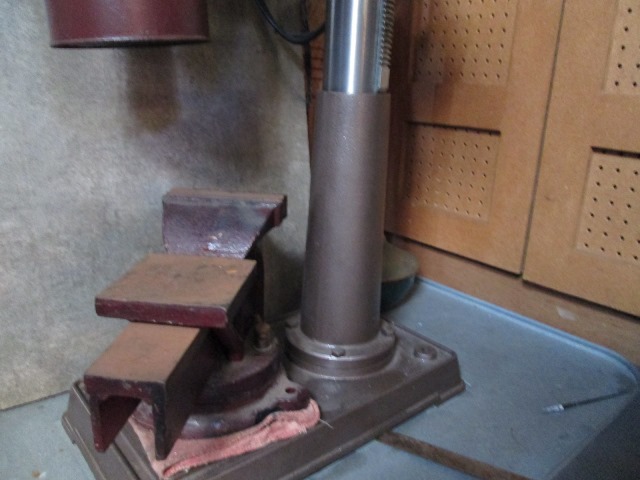
Been on the round to it for some time as my table with 6" cross slide on it weighs almost 50#. However to do this requires access to column, which is why it never got done or pursued. I've looked at several of the external methods but most, well still some work. Recently the table bracket on my drill cracked Since I had to take drill apart to replace figured I would see about adding the counter weight.
There is a company that makes a bolt in kit like what I'm building but they are in Australia. Some folks use gas struts, jack screws, even external counter weights - many different ways. Some nice installs using electric motors to power lift. Search and you'll find what might work for you.
Ill add that many are doing this on drills that have no raising mechanism. Or adding counterweight to balance the table so crank up not needed (like the kit). I am keeping the gear climbing lift, all I am trying to do is offset some of the tables weight. Parts were ordered thru FarmTek, listed below.
As of feb 2020 kit appears no longer available. removed link. Was "Torquata drill press easy riser kit ERK-100".
I started with doing only what was needed while drill apart so I could reassemble drill once replacement table bracket arrived. Specifically making and placing counterweight in column, drilling a hole in belt guard for the attached cable to exit. Mine already had a hole centered over column. So project got split, column & and cable, then once drill reassembled and useable revisited to add the pulleys and details not thought out, that is after I made replacement crank handle. So this may be a bit disjointed.
- Adding table assist counter weight-

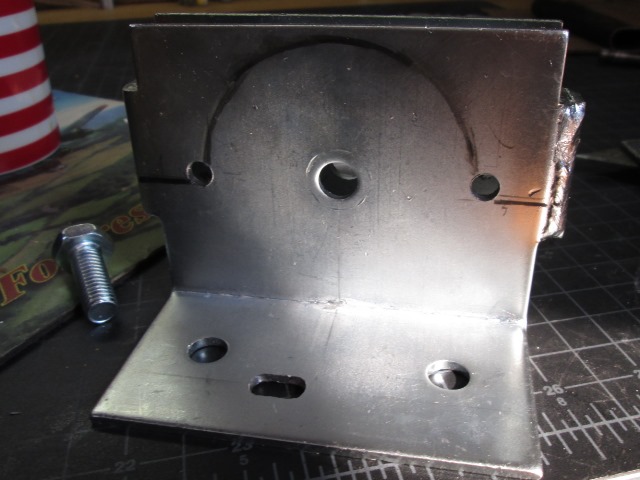
Here I'm just looking at adding counter weight cable hole. Some details to figure out. All I need to do now is what is needed while apart that cant be done after drill reassembled.
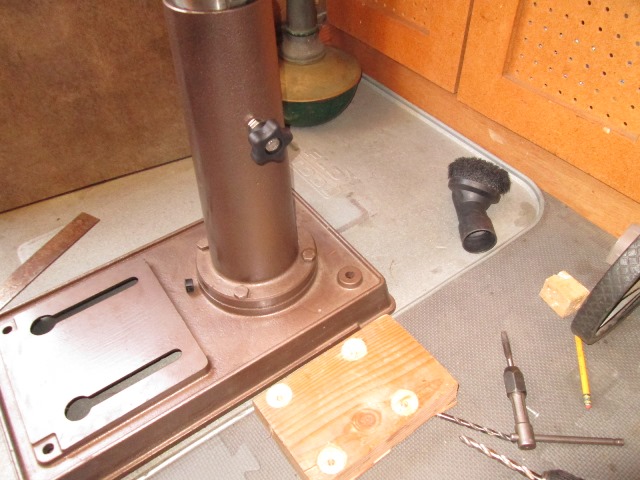
The existing hole in belt guard box between 2 mount holes is centered over column. I've laid out where hole for cable exit should be, sort of. Basically down inside the column Ill place a length of pipe with weights. A steel cable attached to pipe will come up thru centered hole in box, over a small pulley then back down thru added hole to table bracket. I'm making hole a 'slot' due to unknown pulley size and relation of motor bracket which is underneath. This will give me small amount of adjustability so cable doesn't rub.
As I don't know exactly how I'm adding the needed pulley that's how I'm proceeding, just enough to reassemble drill press after parts arrive.
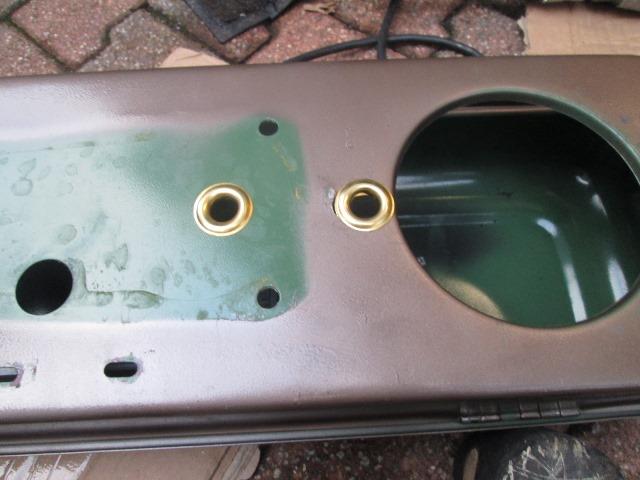
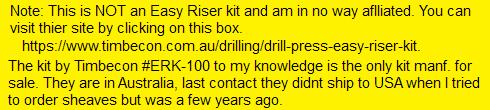
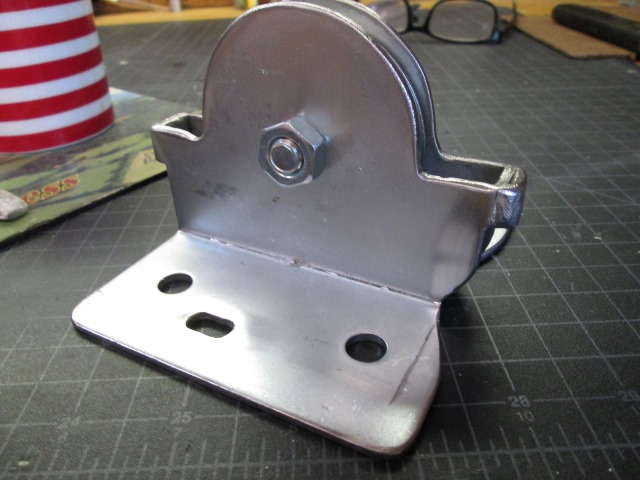
Drilled second hole and open up to a slot for cable to exit. I loosely formed some brass grommets thru the holes, they can move around a bit. Likely unneeded but cant hurt.
This is later but just to show the holes in box. Cable on the left side is coming up from center of column, then over and down beside motor bracket. Under the cable eventually will be a pulley. I am hoping to utilize the 2 belt guard screws to mount the pulley bracket. At this writing haven't found pulley (sheave) that will work. I contacted the seller of 'kit' and they don't sell parts- made me glad I didn't get their kit. Next is the weight itself.
- The counterweight
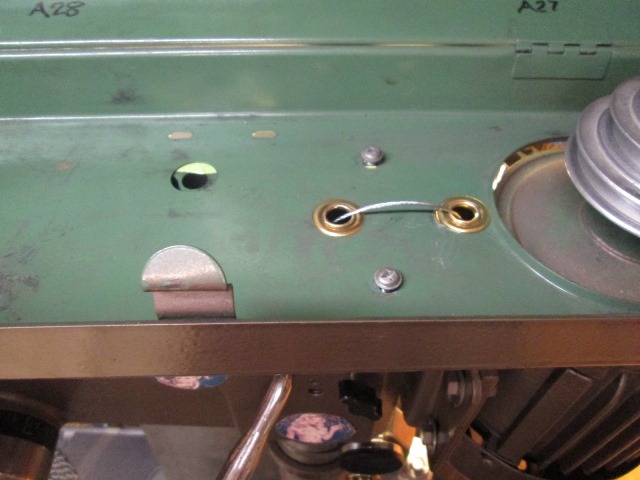
A lot of hee hawing around, trying not to shoot myself in the foot. Finally decided on 36" of 2" black pipe to make counterweight. Many use plastic or other, but with the black pipe Ill gain the weight of the pipe itself. Many fill/use lead shot but I'm using what I have on hand, some old 12" cast iron window weights. Here I've cut small plate to be welded capping bottom of pipe. After some thought I'm cutting pipe length to 30" which will allow using 2 1/2 pieces of the window weights, with weight of pipe should still be about 25#.
The reason I'm cutting to 30" is its about half the height of column. I am using second pulley at table which will yield a 2:1 ratio of movement, BUT in case doesn't work and I end direct to table, or 1:1, I want to ensure counterweight length doesn't overly limit table travel. Kind of a catch 22...
The old window weights I'm using. I put one in the vise and tried to cut with sawzall-instantly ate blade? so I whacked with sledge and broke in half
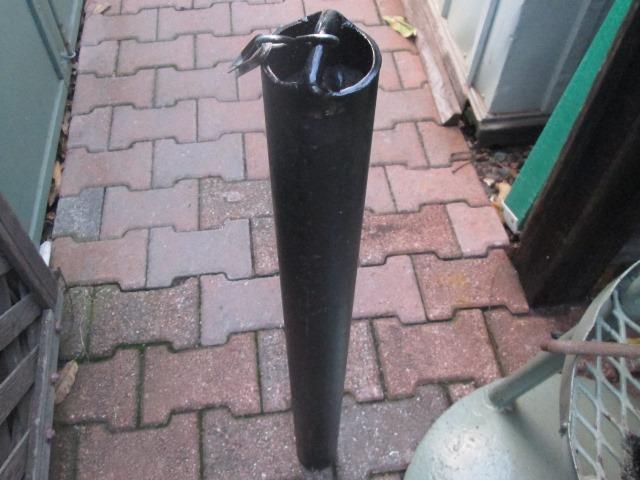
Slipped weights inside, poured a bit of sand to contain. Bent a piece of 3/8" and welded with S hook to top of pipe. Weighed, ended up about 25#!. Half of table/vise combined weight but should help.
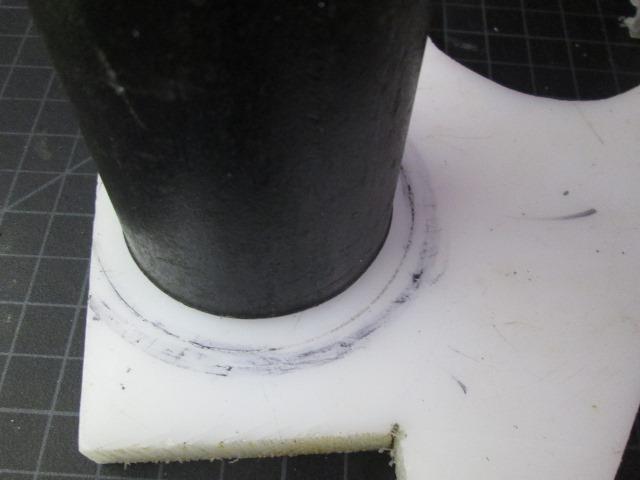
Getting ready to cut a disk to mount to bottom of pipe to minimize 'ringing' the column and closer to ID of column, hmm pipe is full of sand. ..still pondering how to add deadener at top of pipe.
Sanded the PTF 'puck' edges with full radius. Stuffed top of pipe with some paper, tapped it closed so I could flip upside down. Drilled & tap bottom plate with 2 holes. Drilled and counter bored the puck, and attached with liberal amount of thread lock.

Added cable with crimp on sleave but ended up adding a bolt on connector also.
For the top sound deadener all I figured out is what I should have done. That would have been, welding another plate on top instead of the cross bar, with centered cable attaching point or eye bolt threaded or welded to plate. Then I could have simply bolted on another puck. To lazy to cut apart, instead I split two pieces of 2" ABS, slid over pipe with splits opposed. I did bevel all edges so they don't catch (hopefully) on internal column weld seam.
Wasn't until I grabbed this picture that I saw what I forgot, I was using flux wire to weld the pipe, I was going to switch to gas & weld eyes of S hook closed. Unless counter weight gets stuck in column and then drops shouldn't be an issue. I hope. Welding closed would have been cheap insurance...its in the drill now. If S hook opens, disconnecting the cable, lay drill press on its side to extract the weight, weld closed. Doesn't sound like fun but doable. If that happens Ill also replace the split ABS sleeves with cap like bottom.
Slipped the counter weight with cable into column after laying it down. (remember, at this point drill press is dissembled for other reasons). I placed a piece of 2x4 under center of column so when tilted back up counterweight is setting on it. When cable hooked up and this working Ill remove but just extra allowance for cable stretch when setting up. Downward travel of weight affects how high table can go. An as far as i can go until table bracket arrives to fix drill press. Meantime I need to' locate pulleys to get ordered.
And drill press up and running. Now I can proceed with hooking up counterweights (reassembly with new bracket on its own page). Picture just of assembled drill and visible cable tied off. I used for almost a week like this until pulleys arrived. Pretty sketchy.
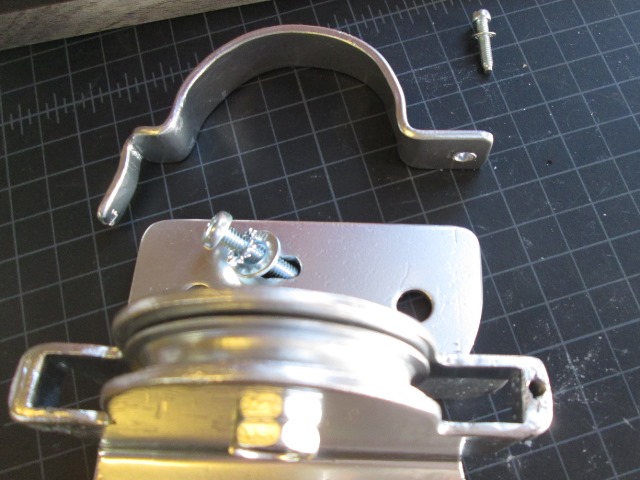
- The Sheaves
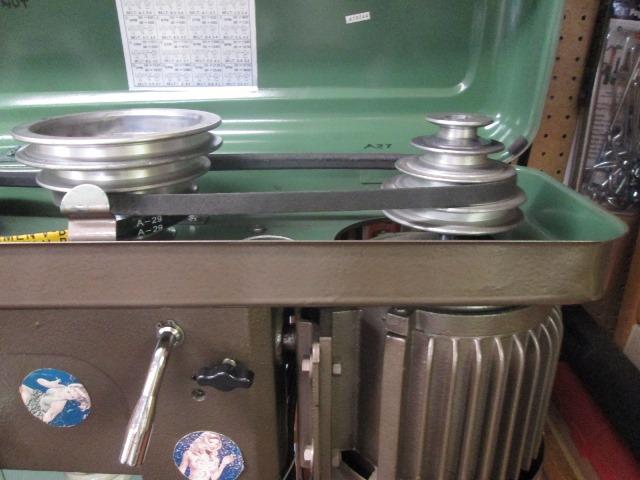
Sheaves arrived!. Nice, though top bracket pulley a bit larger than envisioned this will work. The bracket pulley is 2" diameter (ID) and the smaller is 1 1/4" ID. Both have semi sealed ball bearings. Of all places I located these from a poultry farm industry supplier. Used for curtains. Called a 'thru the wall' or vertical sheave the bracket pulley will bolt to belt guard cover using its screws. For the smaller one Ill need to make bracket to attach to the column cinch bolt. Originally was just going to use bolt thru the pulley arms but I want the pulley at right angle to it so cable isn't twisted. The larger bracket I need to trim a bit to fit though.
FYI- I ordered thru FarmTek, top 2 1/2" (OD) vertical pulley #AS5054 with , lower 1 3/4" (OD) split bracket pulley #AS5042 , both with bearings. The smaller bracket, since I've turned 90°, I could use a larger one, 2 1/2" #AS5052, just easier if larger diameter. Other sources I'm sure.
Update quite a bit later. Replaced the lower 1 1/4" sheave with the 2"ID sheave. ALOT easier for cable to make the 180° turn, most of the load is at lower sheave.
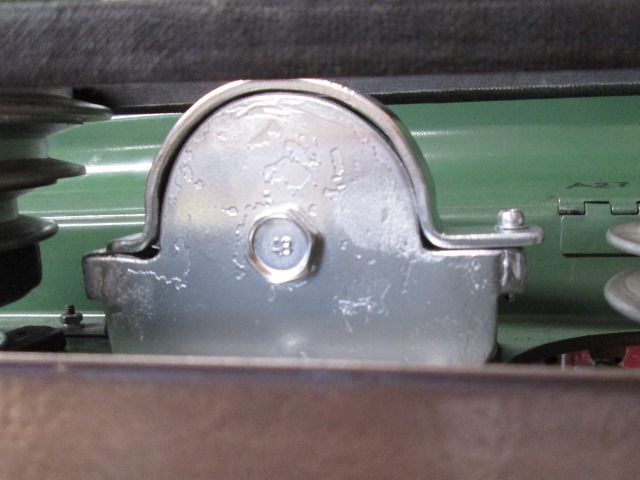
Top Sheave
Bracket pulley modification started. Drill and slotted holes for mounting using the belt guard screws. Marked for material to be removed. All it really needs is clearance on left side to clear the center pulley but just for appearance cutting symmetrical. That and mounting flanges cut back to center at front to set against the motor hole in belt guard box. Drilled holes at the inside corners of cuts just for nicer radius.

Rough cut with sawzall.
Ground and round. Mounted in drill press to verify fit.

Fits well, ran belts in all positions, tons of room. However I'm just not comfortable with the cable open at top of sheave. IF cable broke, somehow otherwise became loose, unlikely as it may be, could end up getting grabbed. So out it comes. Making a cover on sheave brackets to contain cable.
Bent a piece of 1/2" flat bar. Was going to use screw both ends but as its long, cold bend left side to 'hook', need only one screw cover...
Ground down left side to make a tang that will hook in bracket. Bent to tension once screwed down, single screw on right side.

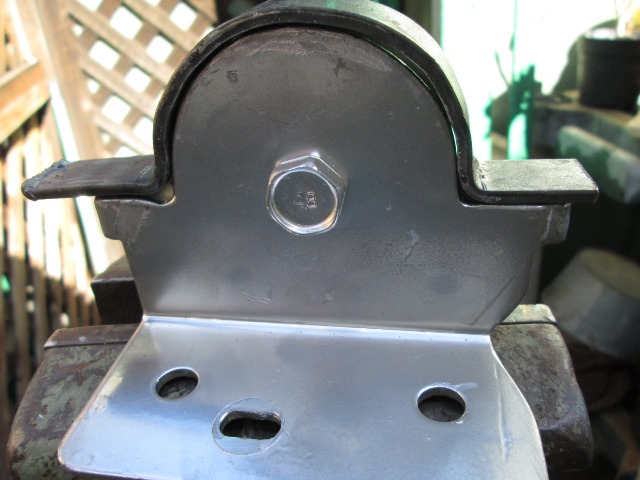
I don't think mentioned. there's is a 1/8" piece of ply under sheave due to the grommets. Top sheave done.
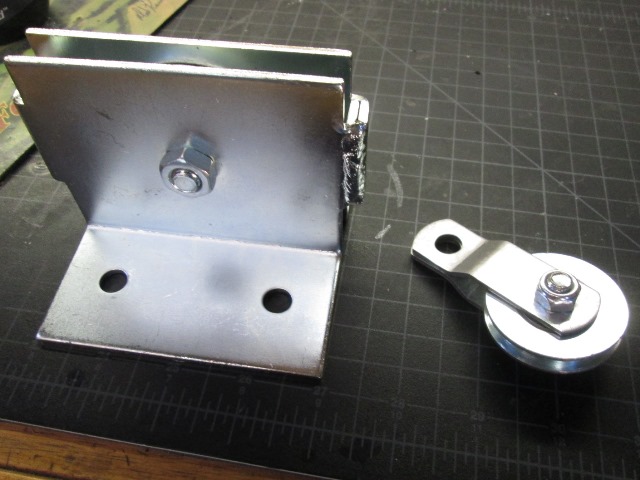
Table bracket Sheave
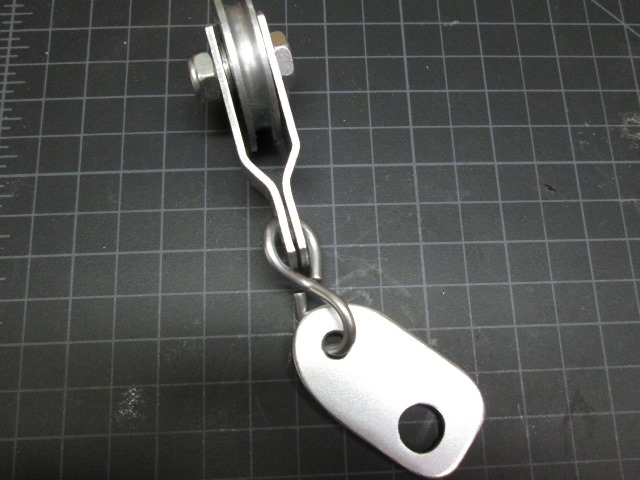
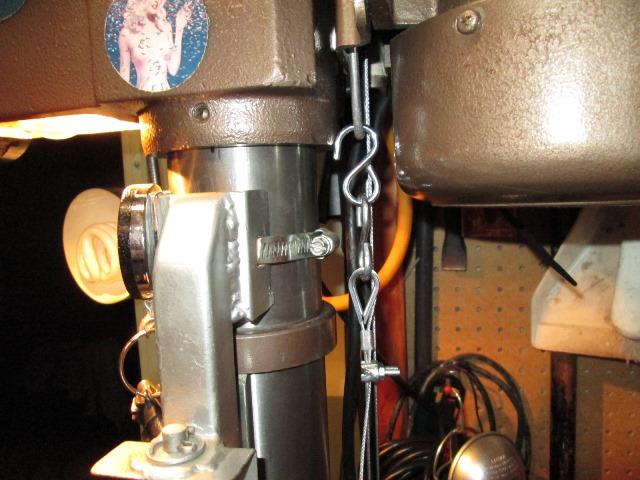
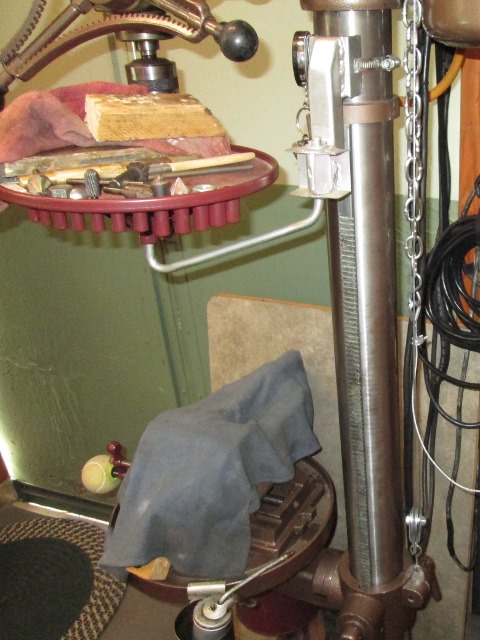
Cut a piece of 12ga flat bar to attach the table bracket sheave to. It will go in between or in the gap of the table bracket, cinch bolt retains. Twisted the added S hook 90°. This will let pulley be a right angle to the cinch bolt verses just running bolt thru the sheave. Keeps both ends of cable, from the top sheave and return to motor mount anchor, parallel to column and the space they run in between motor bracket.
Also centers the 'pull' on the table bracket. It is likely later I may need to clearance the gap on table bracket. Right now it works , new table bracket clamps the column, just snugs on table sheave bracket. As it wears in it may clamp on the cable bracket before tightening on column.
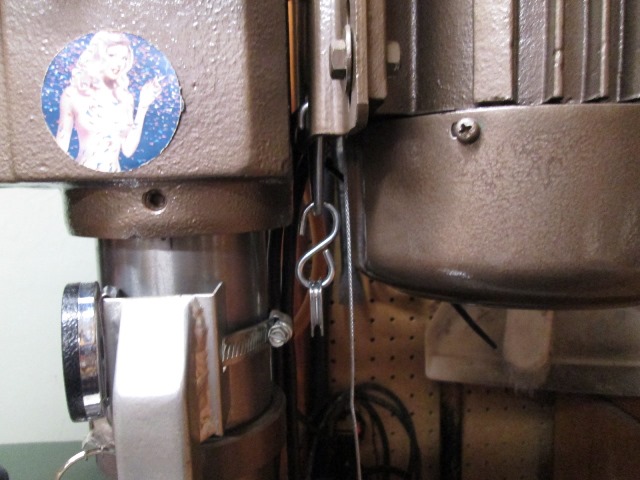
End anchor point
Last piece needed has had me stumped, the anchor point for end of cable. There are 2 holes in motor mount plate that can be used. However been 2 days since finished the rest but unable to install last clamp. Once cable is clamped I'm not seeing any way to easily remove. The 2:1 ratio will limit table travel. If I need more travel than this will allow, need to unhook. Second is just not possible to lift the counterweight at shoulder height using the cable to get slack so it can be unhooked, third is simply hooking up the anchor hook. Have to put hook in upside down and work it around-simply painful-with 25# hanging can't see how that will be done. Lastly is the anchor hook would need to be pre installed on cable as no way to get in there to do after hook is attached....Mostly its being unable to adjust length if needed an/or unhooking the cable.
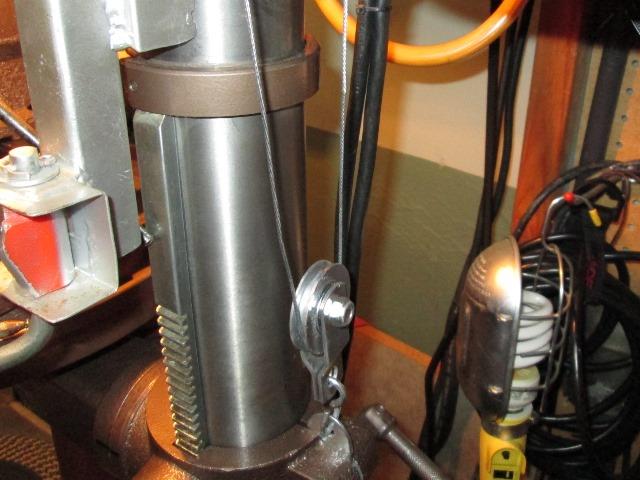
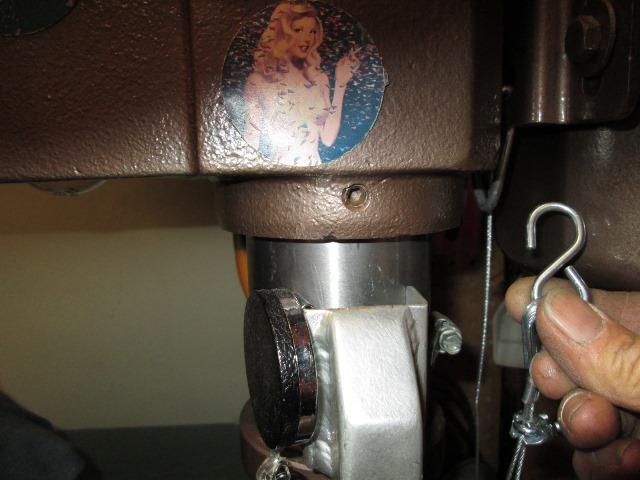
The Yoke
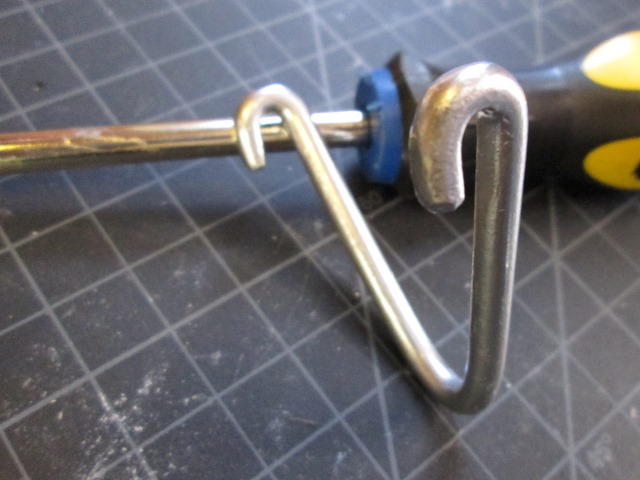
What I came up with. Bent a piece of 3/16" round bar. It will catch BOTH holes in motor plate and gives me attachment point where I can easily access. Also centers the cable.

More importantly allows easily assembling the before hand, straight shot to hook.
It also, by making a small rod extension, let me adjust when needed for using table at lower heights. So now were ready to hook up. This will give me full rang of motion-easily disconnected etc-just solves a lot-
Note to self, what I should have done: If I ever take the drill head off again I am going to drill and tap the back of the head, or probably at top of column, make a flat bar hanger or stud instead of using motor plate as anchor point. I hadn't thought this out, its how most do it, assumed that's the way-attaching to motor bracket. But now that I'm looking at it, this isn't the way to do it. Anchoring to column would have alleviated my Yoke and what it solved. Just hanging/ adding that much more weight to adjusting rods and the motor assembly isn't too smart in my opinion. As a matter of convenience maybe. One of those projects that once done you understand and see how you should have done it. Not happening now...
Now to set up cable length. I'm debating on if I should set up with cross slide removed. Table needs to be raised a bit higher once counterweight is on floor/bottom to take tension off cable. Both for installing, removing, adjusting etc. (Unless you do this with drill on its side). Na- if I set up with cross slide removed (6 1/2" tall) will decrease the downward travel that much when cross slide on. Cross slide vise rarely comes off. Ill just open vise, raise till chuck is inside, so as soon as table is lowered to working height, even with short bit, counterweight will be in play...what ever I do I should have done something else so I'll just do it. They sell more cable...
- Reassembly

Ran the table up to within about 1" of max height with the vise on, counterweight is setting on 2x4 block under press base. Swegded the cable and also used bolt on clamp to add anchor hook. Hooked cable to the 'yoke" attached to motor plate.
So as soon as I start lowering table its picking up the counterweight. First thing I notice is lowering table takes a bit more effort than before. Raise it back up- WOW!. AS soon as I hit that last inch that counterweight is on floor (wood block) and its about 3 times harder to crank. So its working. Stoked! I wasn't anticipating the lowering of the table (raising counterweight) would be almost equal force needed. But thinking about it makes sense. Actually kind of nice as table doesn't drop if there is slack in climbing gear.
I was really unsure about setting cable height but I think its good. Running down I'm about 13" from bottom of travel. Just don't use it down there that often. Running all they way up though I have assistance, say if I need to counter bore/ chamfer bit in thin flat bar. Top 10-12" is where usually working. but for grins...
Ran the table all the way up until counterweight at bottom, cable slack and disconnected-sweet...
Added a second S hook, about 1 1/2" long just to see if adding would allow lower column use. Ran the table back down. Down to 11 1/2" from bottom. Cool that means that if I make some assort length hooks I can utilize full length of column. Then it dawned on me. If I use maybe a 12" length of chain when needed I can hook where ever for what ever range needed for work piece when beyond normal range of the counterweight. But as mentioned rarely needed but easy work around so counterweight doesn't limit use of drill press.
Amazed how easy it is to raise table though. Which was the whole point. It was a pain..almost glad table bracket cracked..almost. Easy lift!
- 'Refinement 1'
Picked up length of small chain to change range of useable column. Raised the table as high as it goes to take tension off counterweight cable to unhook and add chain. It didn't, I mean raised all the way up cable still taught. Obviously the wood block on floor under counter weight moved. Counterweight still hanging, cant unhook. Could drop chuck to get 2" more travel- not. Hmm, raised up a bit and then fished the block into position again with a ruler. Took a few tries until the counterweight hit the block and weight off the cable. I didn't think block would move but I had used some air to clean the other day-I guess it can move. Need another way to lock counterweight- not going to be fishing the wood block every time I want to change useable column...
A simple set screw thru the column base would work. Easy enough to drill and tap the cast base. I could lock the counterweight anywhere in its travel without having to raise table all the way to top. That would be a big plus. Except I don't know how far column enters into base. If I drill thru both I see issues if I ever need to pull apart, tapping thru both, tapping column above base would limit swing and downward travel. Really need to flop drill on its side to see...dang-it.
Leaned press over about 30°, measured about 10" from the seam where column base is bolted to base to edge that tape hit. As I couldn't see, stuck camera up there to see what I couldn't verifying its what I think I'm measuring to.

Yup there's bottom of column.Going to see if local HWD has anything in small knobs. Id like 3/8" thread thru base but drilling for 5/16" just in case, Marked and drill 17/64" tap hole to measure length. Pushing thru hole against counterweight, moving it against opposite wall, measured just over an inch from c/w to face of base. So 1 1/4" min thread. Hardware didn't have much in 3/8" knobs, had this open one to use hex bolt so picked it up and a 3/8x 1 1/2" all thread SST bolt.
Open tap hole to 5/16, tapped for 3/8-16. Works pretty good. Now I can lock the counterweight to unhook cable. Just in case I made a semi permanent block that's captured by webbing in the base, 5"x 7 3/4" counter bored where the base bolts are. Sliding under the base fun, but got it. Block will slide around just bit so free (no part of drill is touching). Off to the side you can see the original small block I used to space the column. I had though afterwards it would be removed and give me 1 1/2" of cable stretch allowance. I hadn't realized the need to unhook and the fact on the upward travel of table (downward travel of c/w) doesn't matter when counterweight stops-table can still climb-though wont be assisted. Having the block there now because that's how I sat up cable up. Plus if counter weight drops from 3' might save my pan and floor :) If/when I replace cable Ill setup without the block. Now that I have other way to lock column. Learning curve.
Whole point, I can lock the C/W anywhere in the top 10" of travel without cranking table all the way to top or relying on CW hitting the floor. Disconnect cable-attach to 12" chain. To reengage the Counterweight, (because we now have 12" of slack) the trick is pulling on chain so some tension on cable as table lowered to point of reengaging/lifting C/W. Release C/W lock and lower/raise table at will. Gives me an additional 12" of downward travel.
I guess a picture of added chain in order. Allows regain use of table from about half way on column to bottom. Again this isn't normal in my use of drill press- but on occasion the ability to utilize the assist in lower table height now also an option. Without the chain table range is from top to about half way down the column to top. If I didn't want to set chain I could disconnect and just lower table. Probably wouldn't though because the counterweight is spoiling me.
Just an FYI
I did discover why it was getting so much harder to lower the table. The pressed in bearing on lower sheave had slid to one side and the pulley was tight against the bracket. Removed bearing (pushed it out with thumb) and used drift to upset ID of pulley and pressed the bearing back in-huge difference. That and readjust the crank handle.
Buried on this page wont help folks where it'll never be seen but there's a right and wrong way to set the table crank handel. On these drills the table crank handle sets the distance gear and shaft can move into housing body. Poor design but just what it is. The table/column 'should' be bored for at least a bronze bushing where gear shaft passes thru body to attach handle instead of steel spinning in a cast iron hole. Second, the depth of gear and shaft should be fixed with thrust washers on both sides. But its not, mine will move in and out almost 1/4". At least mine there is no mention of adjusting the crank handle. Its more of an issue with age/wear but its the only thing that stops gears from binding (wearing) .
When you raise the table, turning handle counterclockwise the gear and shaft move out away from body. There should be a shim inside but there isn't but generally not a problem, as table starts moving without putting a lot of pressure on back of gear inside housing. However when lowering the table, turning clockwise, the cut angle of gear pulls the handle shaft and gear INTO the climbing gear, its actually jamming into it. The only thing that prevents this is back of handle acting as stop. Keeps the gears from jamming but then its the friction of handel being pulled into body. Eventually it wears into the housing, allowing gears to get pulled into each other further. At minimum is add a shim between handle and body to address the friction. I use milk jug, the plastic makes good thrust shim.
To set the handle/gear depth lock table/column bracket. Turn handle back & forth to check how much free movement, I've seen some so wore get a full rotation of handle and gear slop. With table locked turn handle counterclockwise to end of free rotation. Remove the handle. Turn the shaft counterclockwise watching how far shaft pulls in before getting hard. You want about half this distance.Turn handle back CW, set handle with that gap showing. Mine is set about 1/16-3/32". Decreases the free handle rotation from about 270° to about 100°, but more importantly its moving table instead of applying more force to gears. Also the free 'slop. If handle is setting in the free rotation counter clockwise, you loosen the table/column bracket clamp the table can drop till the free rotation is taken up. On mine due to weight of table and cross slide its a lot force, I'm sure its what cracked my table bracket. Easily snap a tooth off gear rack or climbing gears. I try to always turn handle back clockwise taking up the slop with handle setting about 1:00-2:00 so it doesn't flop over to prevent this. But soon as I loosen the clamp bang! opps.
Bottom line its the length of counter weight that eats the travel distance-on mine cuts in half, only 30" of C/W travel, at 2:1 ratio of the counterweight system the table only moves half that, out of 24" range. I was going to try 1:1 but didn't. I suspect raising table same, maybe, but twice as hard to lower. Hmm I think with my setup I could try-naw I'm done-this works.
guess because the difference in direction of travel between the table and counterweight. That and distance difference between table travel and length of column -rate of 2:1 movement compounded by length of counter weight. Confusing - so just set weight on floor-table at near max usual height to fix cable. Though you want to set up with table near maximum normal height when the C/W is all the way down-where your normally working. Just need to leave an inch or so that table can still go up to remove tension on cable if you need to work on it. Table will still go up, just unassisted. The more critical is downward. As the C/W is going up when table going down, when it hits top of drill the table is NOT going to move down anymore. So you need to either disconnect the cable or make extension like I have to use bottom 1/3 of column. Most rarely use, but if that's your normal you could actually setup opposite than I did. With table at max downward, C/W at top, just figure a way to shorten cable to utilize table at top. Might be simpler. Or anywhere in between. Its just being aware that this system cuts table travel useability in half- adjust accordingly.
Interesting project. Before I had to lift on table while cranking to raise and still took some effort. Now its one hand easily spinning the crank. I like it. Now that's its done well worth the time.
Back to top of page
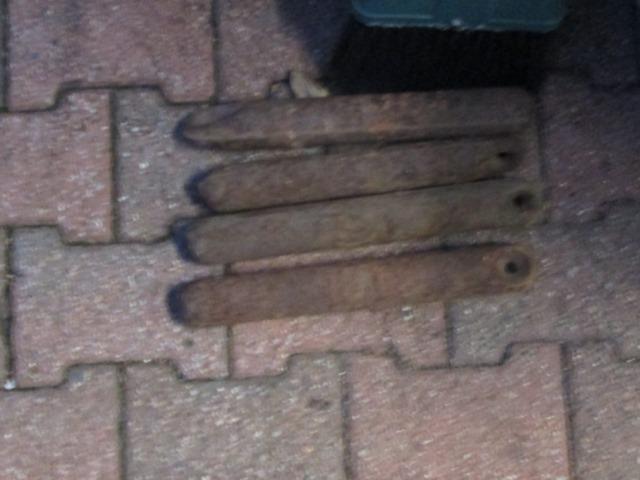
Part 1 Table lift bracket replacement where this all started
Part 2 Make new table handle subsequent discovery/replacement of cracked crank handle
Back to shop tool mods
Back to Our shops home page