 |
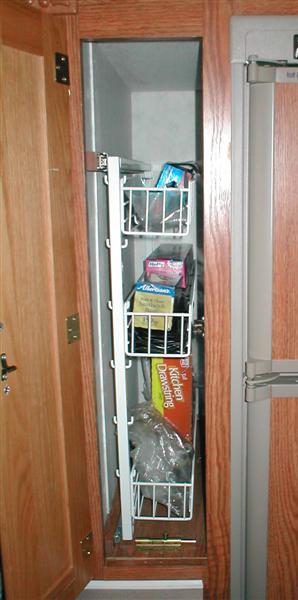
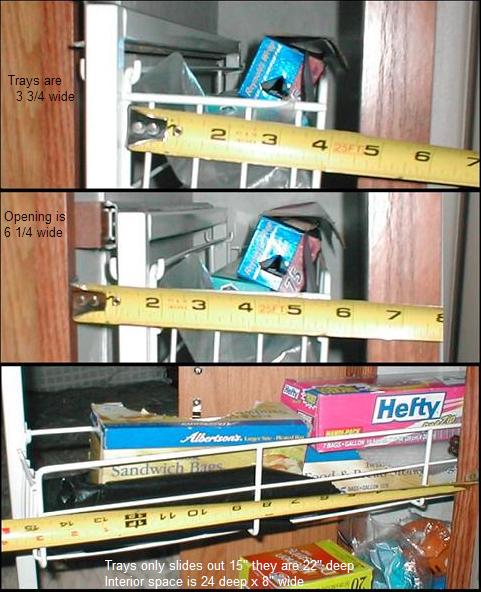
The 'rack' in all its glory. Typical in a lot of campers.
2. If it utilized the actually width (racks are 3 3/4", space is 6 3/8" door -8" inside) 3. If you could put tall stuff in it without falling over, (anything much taller than the racks, stuff would lean over and rack wouldn't slide out,) so your in there with both hands
I've seen quite few others had made some really nice modification to there racks. Most replacing the entire assembly with a sliding wooden shelf rack of various designs that would slide out completely using double extending slides. Or a rack of individual drawers. One a combination of the above. The one that intrigued me the most is one fella replaced with a sliding wooden rack but also added a drawer underneath. Wow a drawer would be real useful. Ill add some links to posts/ pics of others mods, some really nice, so you can see what options others have come up with, only limited by your imagination. As I just finished installing a drawer and was in the Wood working mood decided since I had some leftover materials that I could at minimum, raise the rack and install a drawer underneath. Tackle the rack another day.
|
|
Here is what I'm talking about. Some ideas on what others have done Turning this into.. (links should open separate windows) |
This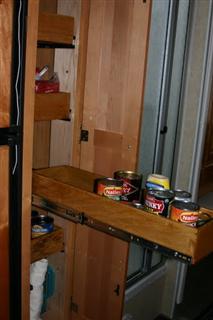 davepcpowernet pantry drawers |
Or this  Mrblaines really nice work |
Or this-my motivation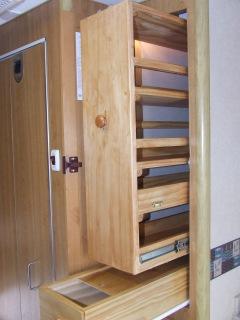 Southerlytide2s rack AND drawer |
 |
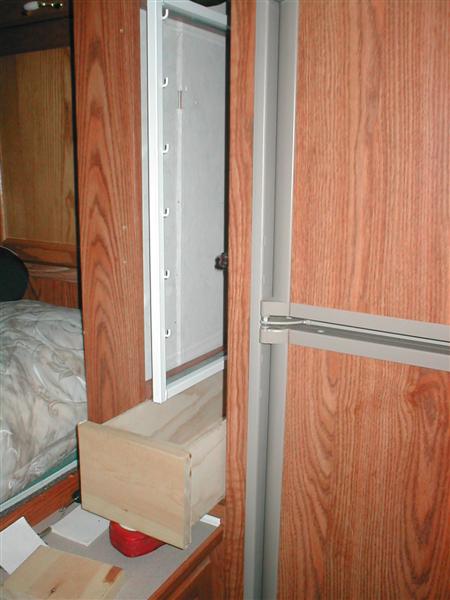
Just to verify the bad use of space and some of the 'numbers' reasons I'm redesigning. Nothing about this rack makes sense to me. Originally, see the fist pic, I was just going to move up rack as high as I could, build a drawer to fill the space. You would still open the door to access. Easiest way to accomplish something, mess with the rack later. Still a good plan, but I abandoned it. I soon realized if drawer was inside or behind the door Id need to allow for a knob, plus the length of exterior of drawer Id loose about 3" possible storage. Also you'd have to open door to access the drawer. To maximize the drawer length it needed to come all the way out which meant making an actual face drawer, which means shortening the hinged door.... after a lot of thought and measuring that's my new plan. As its not something that needs to be completed to use the camper, I'll finish as I time allows. One reason this turned into a bit more involved project is once I decided to make a face drawer, it means I have to modify the door. Shortening the hinged door may be a disaster. The way its built wont be easy or at least with my skills. So its last on the list. |
 |
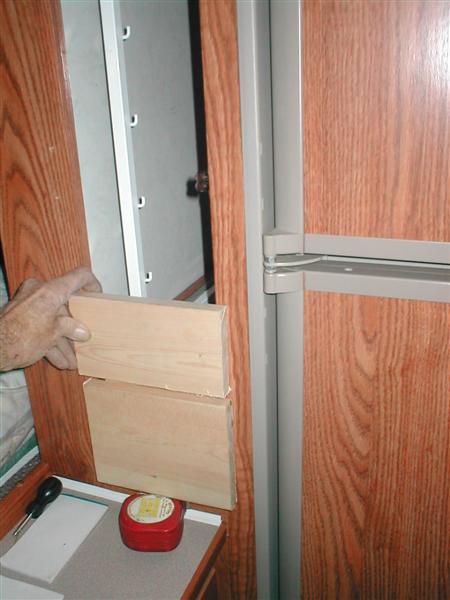
Heres the drawer with unfinished face, just sitting there. The drawer inside is 4 3/4", tall enough for most cans, x 5 5/8" wide, opening is 6 3/8" -3/4"(1/4" sides and 1/8" gap) x 22 1/4" deep. I need to add a piece above drawer on cabinet frame. Got the drawer slide rail, installed, a single center mount to maximize drawer width. Now to router edges, stain & finish the drawer face, install get a knob, drawer will be done. Cut the door. Finished.
This plan, just raiseing the rack allows room for new drawer & can still can use the wire rack once remounted, until I come up with replacement. I'm thinking removing the frame & mount a piece of 1/4 ply with 1/4x6 ends, use 1/4" ply for shelves with 1/4" x 1 1/4 to face all edges on access side. Use slats to bout 3" up to hold stuff on shelf. Not sure how many shelves. Could use the frame also to attach shelves hmmm, Not sure just thinking out loud. |
 |
And then the plan changed... While I was standing there lining out my plan to finish, thinking how much more convenient this will be, it occurred to me, "Me-since you've committed to modifying the door, you might as well add another drawer." Doh! Well I couldn't convince me it wouldn't be worth the work-"your here might as well". I'd have to shorten the wire rack, "but that's minor, just cut & reweld. Plus the rack would be shorter-making wight less an issue when I get around to redesigning"..So I'm adding another drawer. Then I thought since you've now got to modify the rack, why not a 3rd drawer? Well it would be a bit high, more hardware another handle to buy plus more work. Margaret would probably want some of the sliding rack for the roll goods -nah 2's good. Second drawer will be fairly short probably 3 1/2" deep. I'm going to back the cabinet face drawer divider pieces with some H shaped 1/4" ply on the back side to support the drawer slide. So soon as it stops raining Ill build second drawer, finish & install the faces & hardware, add cabinet face pieces then shorten reinstall the wire rack. I'm anxious to start on the door, that will be interesting. Once that's done and door goes ok part 1 of this project will be done. Worst case might have to make a new door. Once the drawers, door and rack are done, Ill decided on how I want to replace the wire rack, part 2 of Pantry redesign.
|
 Got the second drawer built, stained urethane & installed. Put a false top above it to separate from the sliding rack area. Cool, on to modifying the door and start the rack.... |
And the plan changed once again..... Margaret came out and was stoked with new drawers. Then she said "why even build a slide rack, just put in a shelf. We have quite a few items that we could put up there. I could put the roll goods in the drawers, be a lot easier". Hmmm-I couldn't argue with her-makes sense. Just putting in a fixed shelf allows use of the whole 8" width inside, certainly easier and really more practical. So the sliding rack is history. Though the completion of this project has become a moving target, its evolving into something more useful than I had planned. Removed the frame divider from above second drawer & the false top and its 1/4" x 1" perimeter supports. Fortunately I hadn't glued top supports on yesterday, only nailed with 1/2 brads. Verifying the dimensions of 3rd drawer with shelf above and resultant space required in cubby hole took a bit of layout & thought and was the most difficult part. But its all down hill now just doing the work. Made 2 new frame dividers so the spacing is equal. The face frame dividers are backed with 1/4" ply that's wider than hole/ glued screwed to interior face. Got the 3rd drawer built and its face routed & stained, it the same size as 2nd drawer. The false top will go back on 3rd divider and act as the shelf. All that's left is to do is attach the slide on 3rd drawer & install into cabinet. Cut new perimeter strips for the false top/shelf. This time Ill be screwing/ gluing as its now going to hold weight and put in couple of cross pieces. I may put in a cross support toward the middle of 2nd & 3 rd drawers slides. just looks like a lot of span, there only attached at back wall and face dividers. Wow this took me all day-almost done. Couple of hours and then finally -attacking the door. |
Finished the cabinet.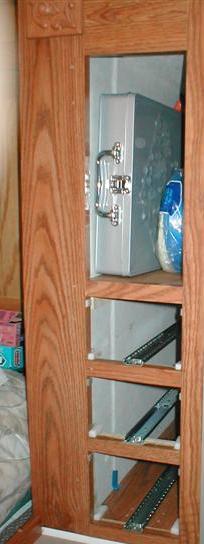 |
The scary part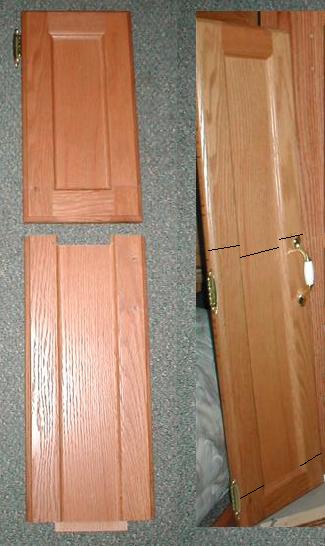
|
I included pic of cutting door, 'cause I wasn't sure how to shorten the door without ruining it, but it worked. I was surprised. So for us non cabinet craftsmen that need to cut a panel door -an option. Would have worked even better if I hadn't used a skill saw on a milk carton to cut. But not to shabby. Measured length is finished door length minus width of bottom rail. Carefully cut sides on lines shown to panel. Then cut the panel a bit longer on top (new door piece) to reinsert into bottom channel. Cut the bottom rail on line even with the channel top, Pulled bottom off old door reinserted to the new top. Used dowels glued and clamped. Other than my not quite straight cuts looks really good for a fence builder. Due to oak grain the color does shift but no more than adjoining pieces. I'm liking it, a lot. My other choice was making a door similar to the drawers (which is why I didn't drag out the table saw because I didn't think this would work.) |
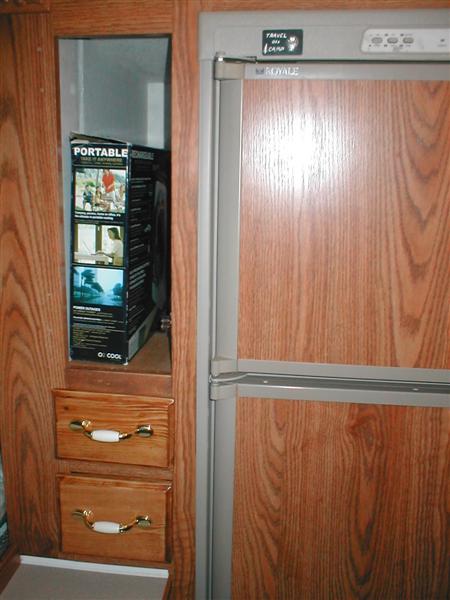
Finished!-Installed, new door & drawers. 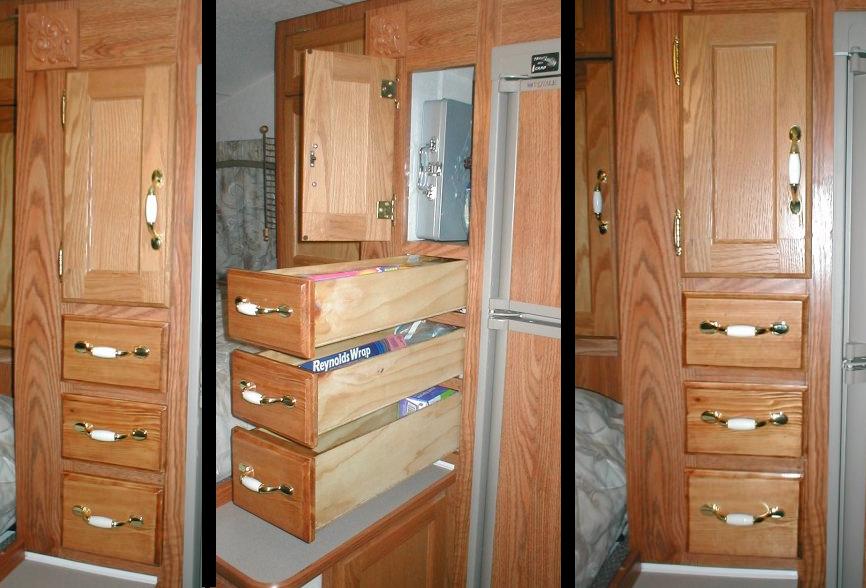 The shelf is almost flush to face so I'm going to add a piece of 1x1 on shelf across opening and an arm that pivots up to stop stuff from sliding against door, possibly poping it open. Also as the drawer slides have no upward movment (to lift & unlock a self catch lock) nor do the slides self lock, I need to come up with some clever way to lock & keep drawers closed...details. |
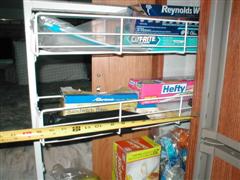
Picture of the load bar. 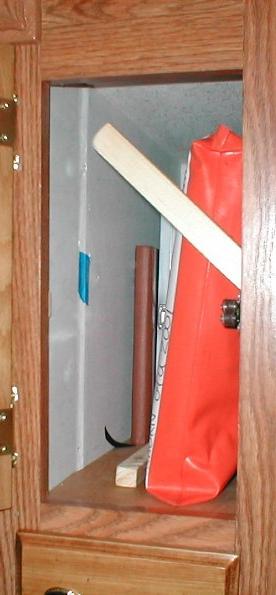
|
update01/10 added drawer lock
 Well using a shoe string to hold drawers close worked last outing-figured I could do better..Pulling knob out locks drawers for traveling-for details how this works see Drawer lock lock page next sheet |
Back to Ourelkhorn
Camper Modifications page
![]()