- This fix 06/2013 lasted untill 9/2021- roof sheet metal replaced, no cab lights so these are gone, possibly re-add cab lights later. For now- added ID lights to grill
UPDATE: Bummer. Original install 05/2010, new lights on order 06/2013.
Yup got 3 years on 'em. Had one light completely fail. Other than the headlight bulbs all the incandescent bulbs that came in our '01 truck are original. Good grief. Could replace just the one but will be replacing all. Only thing I can say is the lights continuously are full of condensation. They don't leak into cab-but the lights themselves usually have water in them. Kind of annoying to see the condensation, finally took its toll, I assume shorted or corroded the circuit board inside. Apparently it's the lens seam to base. Bottom line- failure. WONT be buying any more Recon products., original install -just FYI-left original install in place.Found some Vision lights , look all but identical to the recons $35 cheaper. Which I may or may not do, if so I'll try to seal the seam somehow, maybe plastic glue. Otherwise its taking apart to seal. This is what I did for now. You might look at this before installing yours. Also if you have some and want to try to fix, either replacing dead leds or sealing.
AFTER I had originally installed our cab lights, wasn't 2 months before I noticed them full of condensation. Getting on line I found this common. As stated I had one fail. My intent was to replace. I contacted Recon to see if they would offer some sort of discount, they do only have a 90 day warranty, but 3 years? "Sure we'll give you 15% off"...wow I can get them cheaper from Ebay-thanks anyway for the ultimate customer consideration. I politely said Ok Ill order later. Good grief-I've also since learned Recon isn't famous for customer service-LEDs last forever-unless they fail then you're on your own. Replacing expensive fixture instead of dollar bulb.
I had found some similar to the Dodge style recon lights but decided even if replacing I needed to see if there was a way to seal them. So I took failed light off truck to see what might be done.
What I discovered was a single led failed, the 3 lights are wired in line-one quits they all quit. I also discovered why they leak. The lens isn't sealed to base, uses a thin gasket, which was totally degraded-function less. Lens also sets inside a groove, any water collects in the groove eventually working its way inside of light. Why these are not snidely or otherwise sealed is beyond me. They aren't intended to be taken apart.
$8 dollars for 20 leds verses $60-$100 for new lights and still I would still need to disassemble to seal lens, I decided to order some replacement leds and try to fix. I'll remove gasket and seal with silicone. I honestly can't say if led failure was due to condensation or not. But they don't like water. So this page shows how to disassemble and seal the lens. Secondly replacing the leds. I wouldn't think most wouldn't do the bulb replacement-but just FYI. I ended up only fixing the one light, removing headliner and lights just a pain. Sometime in the future I'll order some new lights-seal the lens to base & have on hand. If/ when I have another failure Ill replace all the lights. I wish I had known all this before-though I probably wouldn't have taken a part new lights-hindsight. Also I almost ordered new lights due to led failure-they are fixable. Possibly, as I have extra leds on hand I may just pull apart & fix as they fail...or if I were not so lazy, pull the other 4 and seal before they fail. All this page does is offer the information-option of disassembly/sealing and led replacement, well venting my frustration with more imported non American KRAP.
Sooo...in the meantime.
Disassembling recon led cab lights.
update-if removing existing light and fixing to reuse: mark the lights to be put back in same place-When removing depending on how originally installed-the gasket may tear . I did not remove gasket from truck. Reinstalling as removed will help, I used metal putty knife to slip under base-used another plastic putty knife forcing underneath between metal knife and roof. Take your time so as not to either scratch roof or break base. Resealing will by sealant around perimeter & at wire hole and screw holes. Existing gasket will only act as spacer. At any rate label where they go, also lens to base-case you end up working on more than 1.)Mine are 3 years old-whether design has changed unknown.
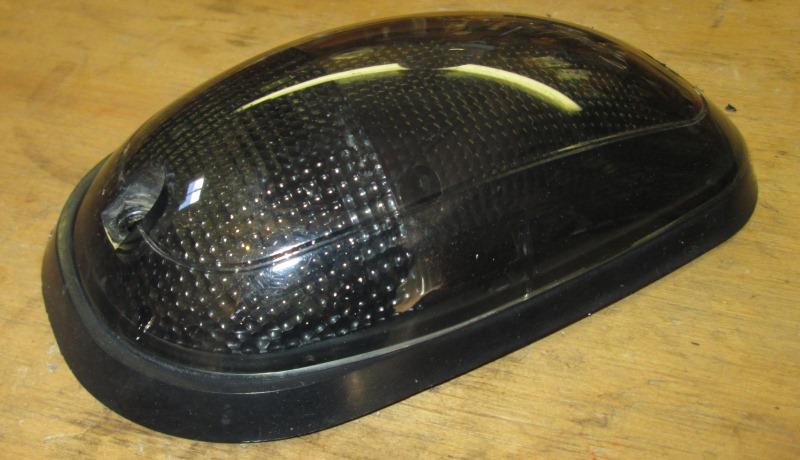
Picture doesn't show but light is full of condensation. I suppose but beyond my ability to do and have look half decent is run a bead around the lens. If dry.
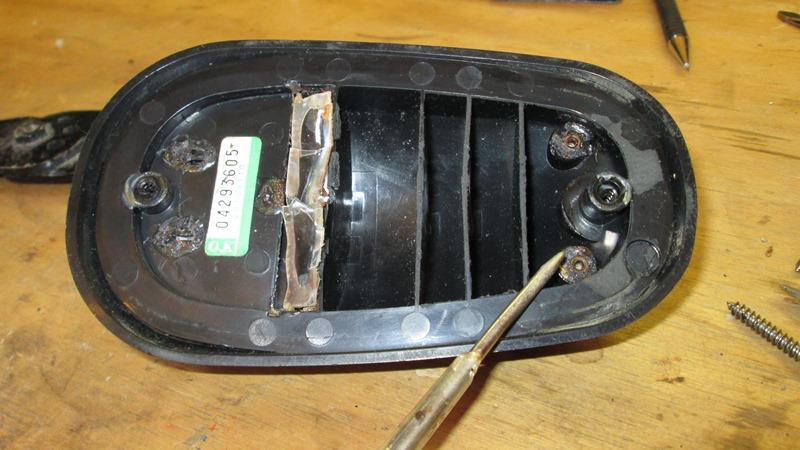
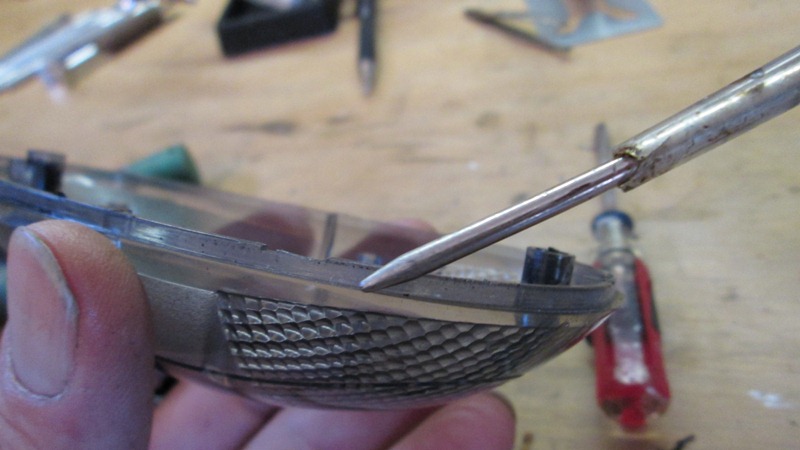
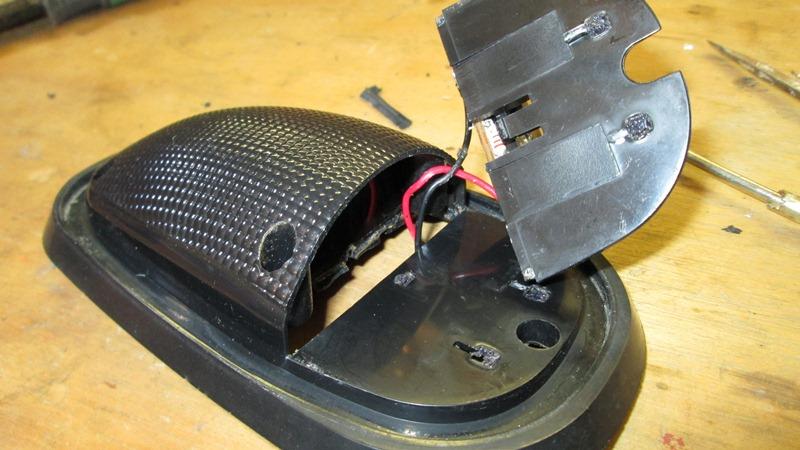
The lens is actually held on by 4 small screws. They are 'sealed' to bottom of base with what appears to be hot glue. Lightly wave a bic lighter on blobs and it pops off easily from the exposed rear screws. In this picture you can see the clear strip that is also glued. It 'seals' the led board but it also covers the 2 front screws shown in picture below. I simply had already pried it off. If I do the other lights, I'll cut the ends of clear plastic or drill just enough to get to screws. Make it easier to reseal.
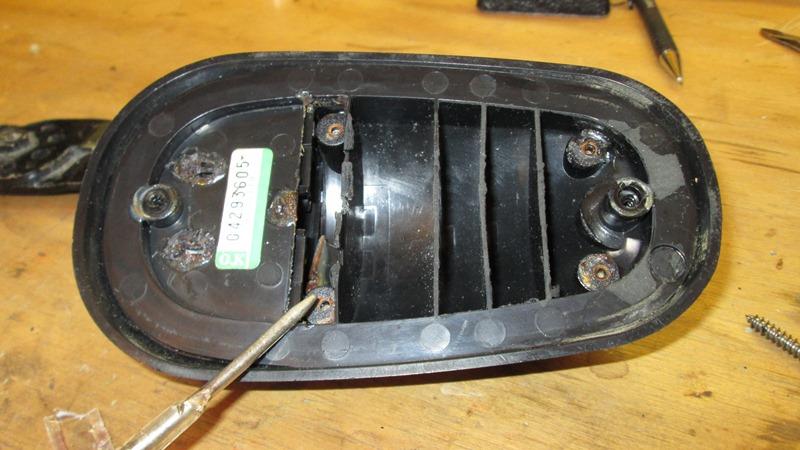
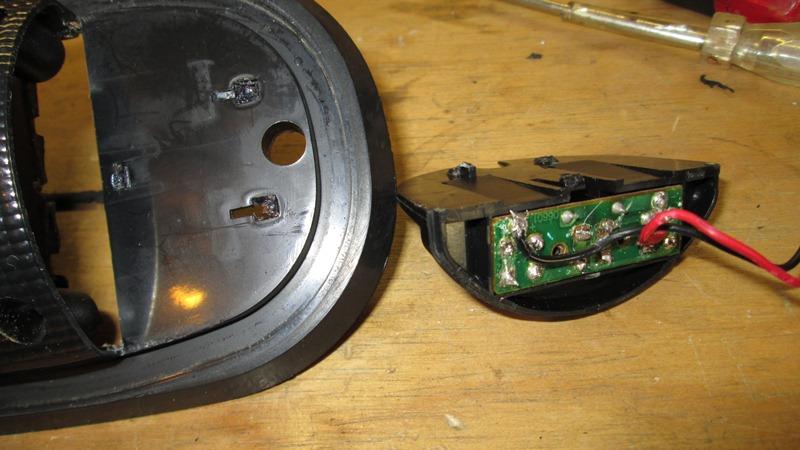
And the front 2 screws removed. As mentioned there is no reason to completely remove plastic strip as I had if your just sealing lens. Unless working on led board (it comes out front, need to pull wires & plug thru) all you need is access to screws. Will makes resealing easier.
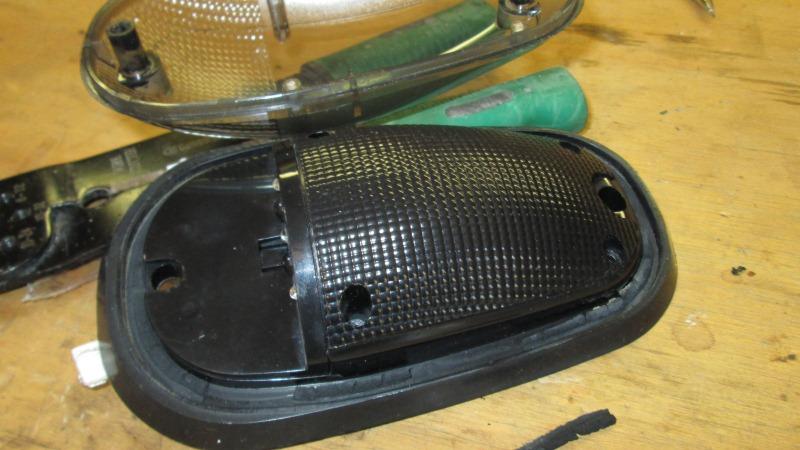
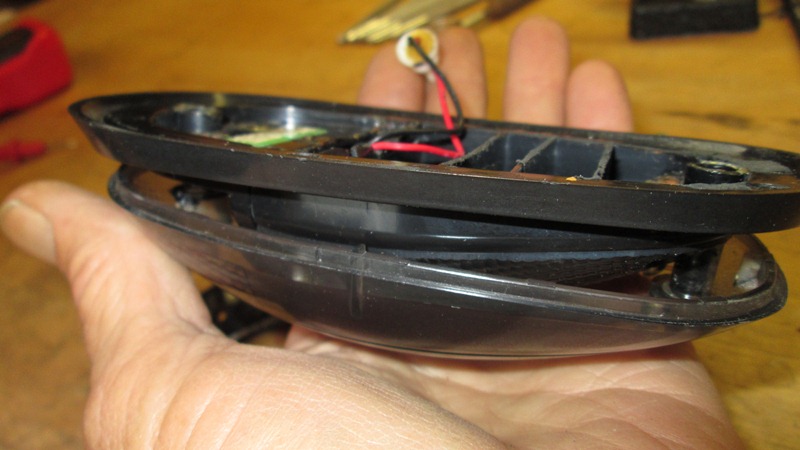
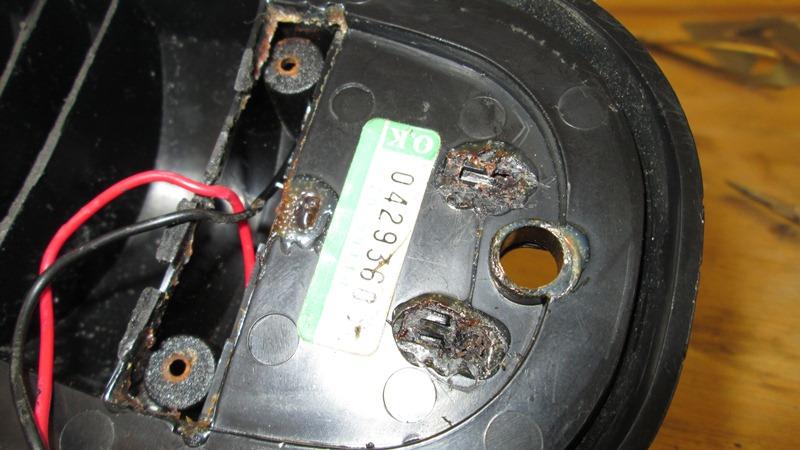
With screws removed lens just pops off. FYI, don't pry of from lens edges- push off from underneath insert large screw driver thru 2 mounting screw holes. You can see how the lens sets in groove, the small flat gasket, deteriorated beyond use, is supposed to seal.
Just another shot of lens groove-you can see the stain where water was standing in groove.
First thought was to fill groove but it probably ooze inside of light so running a bead of silicone around perimeter of lens.
Now I need to fix leds. If all you're doing is sealing lens you're done. Clean base groove and lens, Run bead of sealant, reassemble to base and reinstall the 4 small screws. I used dry paper towels to wipe of excess sealant. Seal heads of lens screws and plastic strip, I used hot glue but sealant would work. Point here is once reinstalled sealant at mount screws and wire hole should keep from leaking into truck-however any water the does get under base as it evaporates will rise into light if not sealed. Done. Reinstall or install on truck. On mine as they were removed I didn't trust gasket as mentioned to reseal, so used a perfuse amount of silicone and bedded. With light setting on truck used blue tape on cab to outline light. After verifying plugged in correctly and working, ran a large bead of silicon on base and at wire and mount screw holes. Set light on cab gently squishing out silicon and tighten screws applying sealant to both the screw and into holes. Once tight scrape off excess silicone (hence the tape). Removed the tape and cleaned up with dry paper towels.
Cool-all my lights work. So now that I've fixed the dead one I'm removing the other 4, pull lens off and seal. Maybe they will last. Just a note. If yours have been leaking a while like mine you may find the tiny screws heads rusted beyond ability to hold screwdriver. I had to drill the head off of one of the screws under plastic strip to remove the lens.
Replacing leds
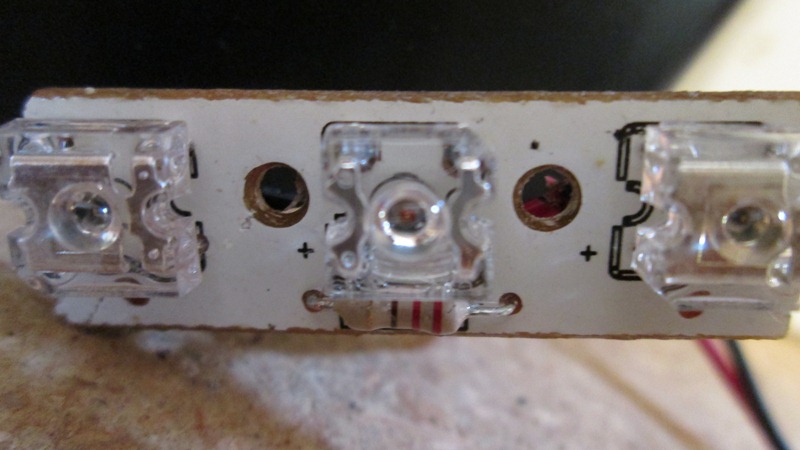
- Before I go any further, assuming you want lights on hand first I'll pass this on. The whole time I was working on these I kept noting the polarity of board markings. Red wire goes to what is labeled negative, black to marked positive? Ok wire color will get you in trouble but to function power is applied to red wire. Second there is an outline of bulb orientation on the board face. The bulbs have a polarity and is identified by one of the corners being clipped at 45°, also a polarity marking on board. To function power IS applied to the red wire. Which is opposite of the input connection AND the placement orientation markings on the board? (ie what is labeled + is actually the negative leg
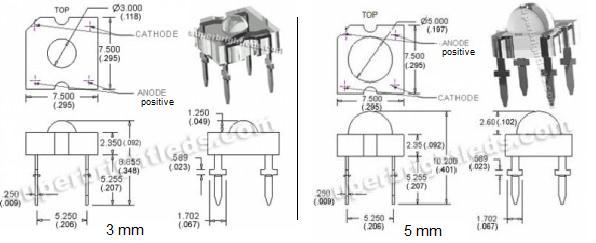
At any rate this is diagram of the 2 bulbs. These lights use a piranha/super-flux led available in 3mm & 5mm. The difference is the diameter and height of center dome-and the polarity as shown below. Measuring mine they are 3mm, polarity would match what's printed on board. That's what I ordered. However I had to install backwards. Though original bulbs are dimensionally 3mm, the polarity is that of a 5mm. My conclusion is the boards were printed for 3mm polarity bulbs. The bulbs they used are 3mm in size but polarity is 5mm, so they just switched the input pos/neg leads. WTF.
Not realizing all this I soldered the 3mm onto board matching the outline and polarity markings. Obviously they didn't work. So I removed the 2 new bulbs and flipped. They worked-
Bottom line is you need to check polarity of how your boards are wired and install your bulbs accordingly. Ridicules. When /if your checking bulbs individually DO NOT apply 12volts to them directly-they will blow. Use a AA battery or less than 2volts. As either the 3mm or 5mm will work-order the 5mm. I ordered the 3mm matching dimensions, but they are a little dim. Many sources-I used lighthouseleds.com -get more than you need. LINK
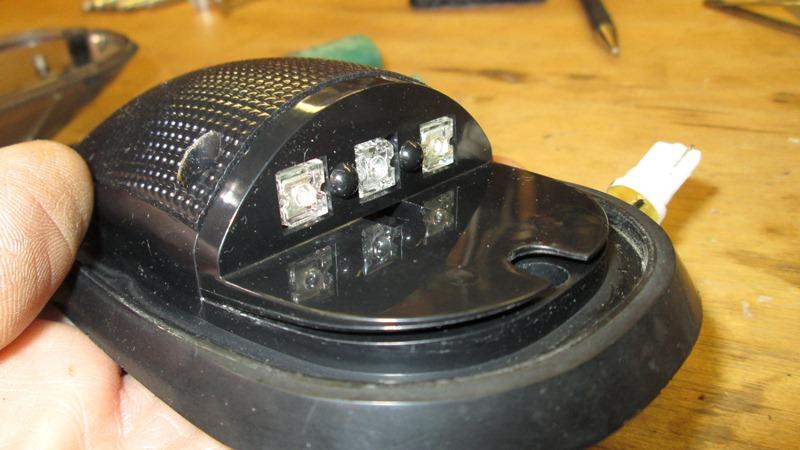
Showing Leds poking thru the separate plastic piece that led board is mounted to. 'L' shaped.

Separating the board plastic, I lightly warmed using a bic while gently prying between the parts until the 3 melted plastic tabs separates.
Just another shot of melted tabs.
And free
Board assembly held on with 2 small screws, already removed. The leds have 4 pins soldered thru board. Be very careful when soldering new bulbs, they REALLY don't like the heat. Used a small pair of pointed tweezers as heat sink. I also tested bulb after soldering a leg-to verify it still worked before proceeding to next leg. I only blew 2 out of 4..
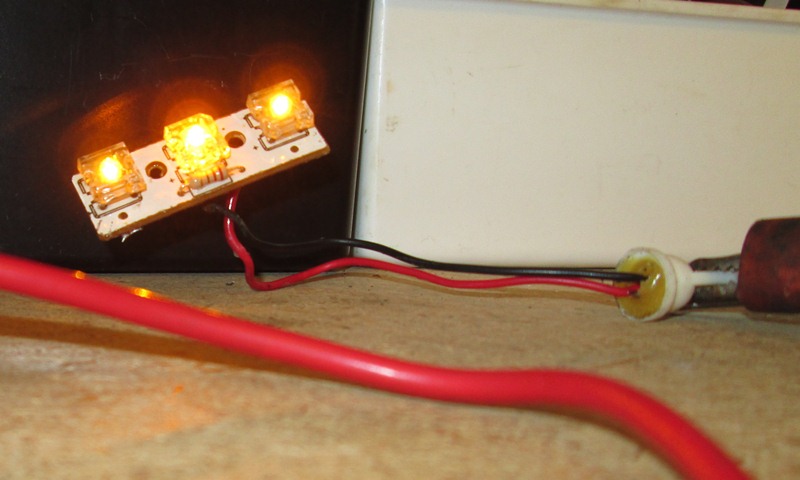
This picture surprised me, I was stoked with color which was my concern. To the naked eye the bulbs appear the same color though new ones a bit dimmer. Camera shows different color. With the original led moved to center on the truck this fixture really looks no different than the others. Again I would suggest the 5mm bulbs would be a little brighter, The supplier I used had yellow/gold and yellow orange(amber) which would be even darker in color that the yellow/gold. I'm satisfied with them.
Picture of board, moved the original working bulb to center due to its brighter than ones I ordered.
Reassembly I hot glue the tabs on plastic holder to base. Applied silicone as outlined earlier to lens and reinstalled lens screws. Reinstalled on truck and verified they it looked ok.
Tomorrow I'll remove the 4 remaining lights to disassemble and seal the lenses.
Hopefully with lenses sealed I don't have to redo this again in 3 years. If I have another failure I do have extra bulbs but because I like the look of the leds I'll more than likely just order new lights. However I wouldn't install them unless I took them apart to seal lens. JUNK. Otherwise I might locate a set of factory Dodge incandescent lights. Too much fun...
Wonder if camera will show a difference in lights on truck? TO the eye I can barely see the difference-can't really tell which had led replaced-curious. When I get others back on Ill snap a picture...
After reworking the remaining 4 lights, sealing the lenses I reinstalled lights on truck. Used a perfuse amount of sealant. Outlining the lights in tape helped with the cleanup. I hate silicone. Got late so finish wiring in morning, put the head liner and all the related stuff.
Well next morning...
- Total failure.
Decided to wash the truck before it got too hot, re-clean the roof and wax it. Silicone smears all over. Then I'll button up wiring and interior. As I'm standing in the bed cleaning the roof a sparkle catches my eye. Get down and look at the outer light, the lens is cracked. Oh crap.
I looked at the others. All 4 I had installed yesterday are cracked. Well not really cracked but fractured- looks like they exploded, just a spider web of fractures, still in one piece but.... The one I had fixed and installed earlier was ok. I do not know what happened. I do know this effort could have failed at any point and would have been ok with it. I didn't know if I could solder in new leds, didn't know I could get the lights apart, didn't know if I could seal the lens. But after going to all this work and actually accomplishing- having them fail the morning after final reinstall just kind of frustrating to say the least. No help for it, gotta order new lights. Puzzled though on why they all cracked. Maybe too much sealant- it created pressure, either physically pushing against base or atmospheric inside lens as silicone cured. Maybe simply over tightened ? They are not that tight. I'm at a loss. Maybe with the lens sealed a temperature fracture. Why the 4 and not the first one? Bizarre, still sucks.
So were back to the beginning-ordering replacement lights. As I won't be reinstalling new lights unless I seal the lens at least i know it can be done. However I need to decide if maybe I should go with standard incandescent fixtures. At least if bulb fails you can change 'em without soldering. Leaving page up for any info that might be had-the fracturing of lights an unknown....
Ordered and received new lights they are Vision leds-look identical to the recons. However they do not have screws for lens so maybe they are sealed. Ill wait for the recons to fail before installing.
Old lights are still working! I have another set- waiting for these to fail before installing-they just haven't-been almost 2 years. Go figure.
Back to original LED install page
Back to our F250 truck page
Back to Ourelkhorn Camper Modifications page