Convert camper stove manual striker to electronic ignition,
add igniter to oven with a BBQ kit.
-
If you have a camper and it has an oven you know the drill- I’ve seen this mod for a while. Always thought would be nice not having to lay on the floor, one hand on the pilot knob other hand trying to get lighter under pilot- just a pain for me.
The manual striker we rarely use to light the stove top burners-it’s just too obnoxiously loud. Finally decided to do this-primarily to simply push a button to light oven. Having ability to simply push same button to light burners a plus.
NOTE: lighting the pilot on older Atwood ovens. Our stove oven (2001) DOES NOT require holding in knob to light pilot. A lot of folks think you need to hold in knob while trying to light pilot. Some even believe they need to heat the thermocouple for pilot to light. Older stoves simply do not work like that. When knob is turned to 'Pilot On"- it IS ON, gas is flowing. The thermocouple only control gas to main burner. What reinforces these notions is it takes a while for gas to purge the air thru that very tiny hole out of pilot tube. I know some folks have been holding in the knob, while holding a lighter heating the thermocouple...on pre "Pilot/Push/Hold" when all they are really doing is waiting for gas to purge line. Whether you have 'Pilot On' or 'Pilot/Push/Hold' this mod will work. Newer stoves that have push and hold feature will say so.
Several sources on different forums on how they did there’s- a bazillion places to purchase the kits. You can either get kits that come with igniter/electrode or just the spark generator and an extra igniter for the oven. The generator can be had in any number of outlets, For most campers a 4 outlet (number of burners +oven). You can utilize existing stove top ignitors and wiring. Most remove manual striker from stove, enlarge the hole in face plate and add the new battery powered spark generator. The face plate on stove once knobs removed is easily removed to be worked on. 4-5 screws. Other option is installing the lil black box generator in a wall or in a surface mount elect box. Options up to you.. Note this is not a bolt on. Though minor, it does require some modification to your stove, extent depending on the kit you find. My install is probably worst case because the generator was too tall, correct one would fit without hacking. Still, you need to enlarge the hole on face for generator knob, fabricate a mount for oven igniter (if adding), run wire from top of stove, down behind and into oven.
Only problem I had was on my stove its really tight fitting the spark generator. As there are many sources on subject I won’t go into any detail, this isn’t a how to. Just showing what I did to ours.
Some links to different sources: as long as they last
http://www.amazon.com/PayandPack-MBP-03340-Universal-Replacement/dp/B004L8USVS/ref=pd_sim_lg_41 --- tons of different generators
http://www.walmart.com/ip/Electric-Ignitor-Kit/8587363 ---kit with igniter (but only 3 outlets)
http://www.wildcatcamperforum.com/t4031p30-stove-mod ---mod on a Suburban stove, top burners only
http://www.rv.net/forum/index.cfm/fuseaction/thread/tid/24521274.cfm Link to mod on Atwood stove. This is the one that motivated me.
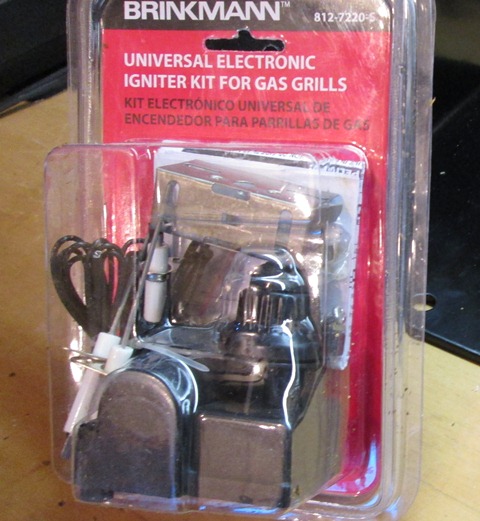
I picked up conversion kit from Home depot- same one offered at walmart but $10 more (Impulse buying can be expensive). Not the kit to buy though will work with some minor trimming of stove. Also it only has 3 outlets but comes with igniters (1 short/2 long electrodes) and wiring. My justification was we DO NOT use the front burner on our stove. Well once-12 years ago-it warped the stove top and popped of a lot of the porcelain off. It was replaced under warranty and haven’t used it since. Also front burner is out of vents extraction ability. At any rate I’d like to remove the control-if not I may replace the generator with a 4 outlet.
Install
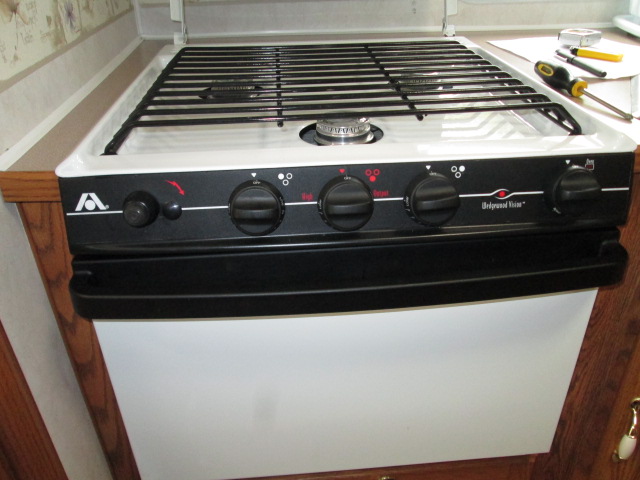
- First removed stove top. It just pops on, lift from front then back. Remove all the knobs. Next unplug wires from manual striker. Then (on mine) removed 2 screws on top edge and 2 screws underneath holding face plate. Removed the 2 screws holding on manual igniter. Now to locate new generator hole. I should end up close to existing hole though higher and to the left. With face loose just easier for me to try and guesstimate enlarging hole. As its almost as tall as face plate top edge and top of stove-it’s fairly obvious. Left to right has to fit between square aluminum gas tube and the end of stove top. As tube is curved a little guessing where generator will end up once inserted thru face. On mine I had to cut front folded edge of stove top, could be folded flat, I cut off. A large washer or making a face plate out of plastic/aluminum etc. if you miss judge the hole or afraid to cut it. I’m sure if you really screwed it up you could get another face. New hole needs to be 7/8" in diameter. I just used a fine scroll saw to open, file to move it over.
Once generator installed on face, plug in stove top igniters. Note existing wire pins are round, new spark generator pins are flat, very lightly squash they'll slide right on. As I’m using an igniter that has fixed wire Ill fish it up and plug in after oven is reassembled. If I were using with separate wire I’d go ahead and drop wire for oven down the back and inside. Some have problem with this. Ours I can reach around from under sink to feed wire. Back of oven is open where gas lines enter thru the layers of sheet metal.
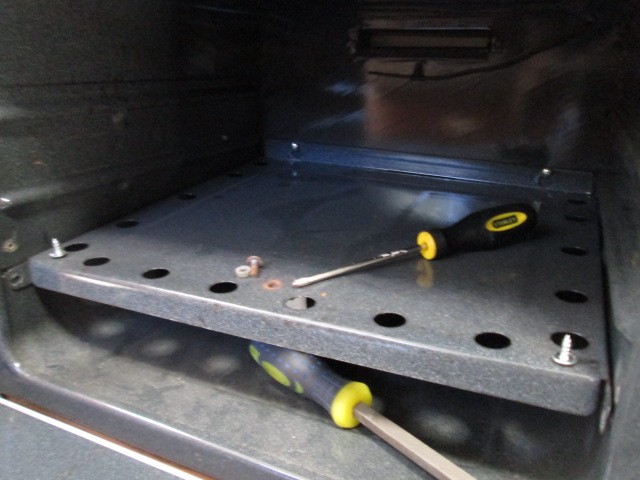
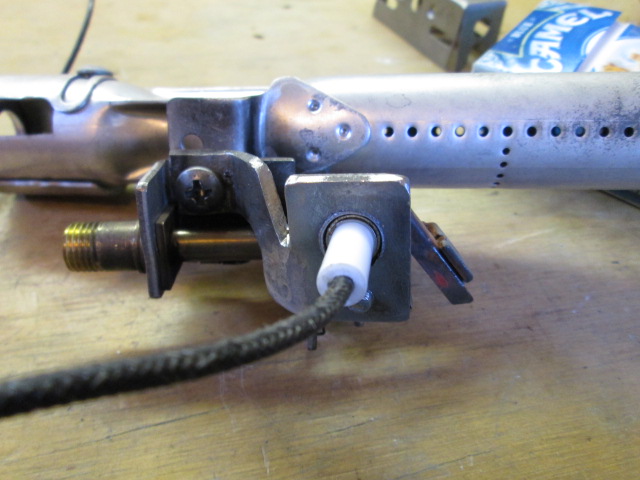
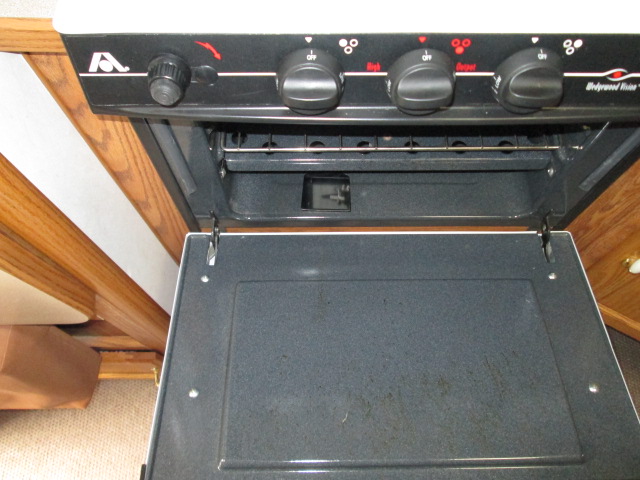
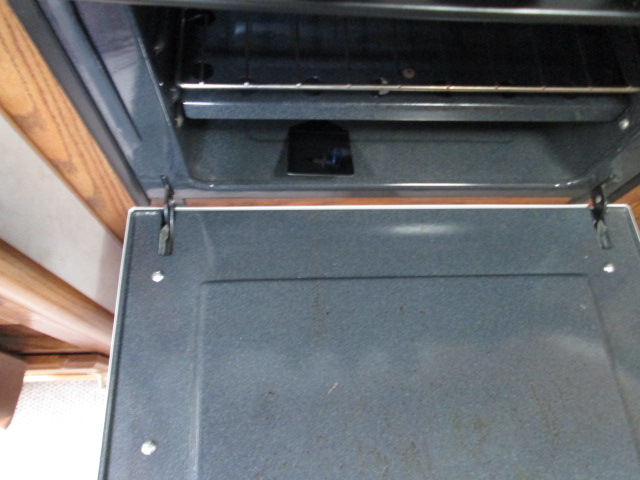
Adding the oven igniter. I removed fixed tray in our oven for easier access to install igniter. I actually removed the burner and took to shop. Just easier to make a bracket & set up. At the front center of tray is a screw and nut holding burner to tray. Removed, the burner will drop. Loosened the 2 rear tray screws, remove front 2 side screws. Removed tray. To remove burner, Simply removed gas line and thermocouple from pilot bracket assembly. Thermocouple slides out rear of bracket-it’s held in by a small wire spring clip that rests in groove of thermocouple. Removed gas line, the nut is fairly tight-firmly grasped pilot assembly minimizing force applied to assembly and spot welds holding bracket to burner.
Fabricate bracket, I used a fairly short igniter so it comes in at right angle. A longer electrode would be easier as you can bend it (don’t apply ANY force to ceramic!). Give a bit more leeway for simpler bracket design.
Reinstalled gas line & thermocouple to pilot assembly, Reinstalled the tray and bolt burner to it. Turned on the gas at bottle. While waiting for gas to diffuse air played with the sparker. Cool really good spark at oven, one top burner is a bit weak. But kind of excite- think this may actual work. Turned on burner, push generator button- Burners light 1st or second spark. Nice but the real test is oven, Turn to pilot-waited a few seconds for gas to travel to pilot. Hit button WOW 1st spark it lit, turned pilot off back on hit button- did this several times. Oven pilot lights 1st spark every time---Just stoked.
Some pictures on my install. As I hadn’t planned on till after the fact to take pics some are not in sequence but show step..
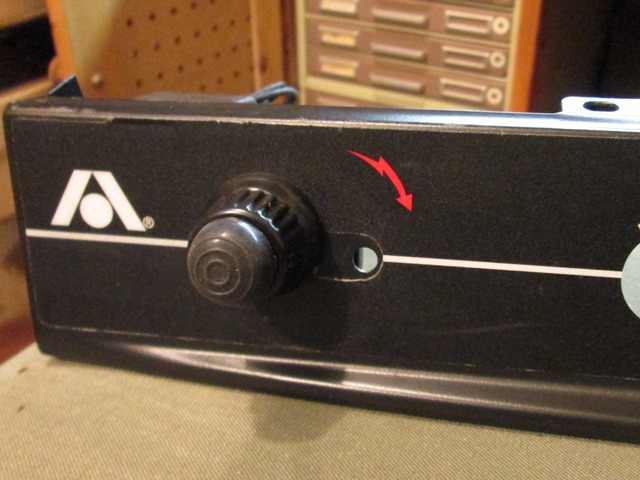
Though I’ve already located hole this is to show how tall this unit is. Works but requires trimming as shown below...
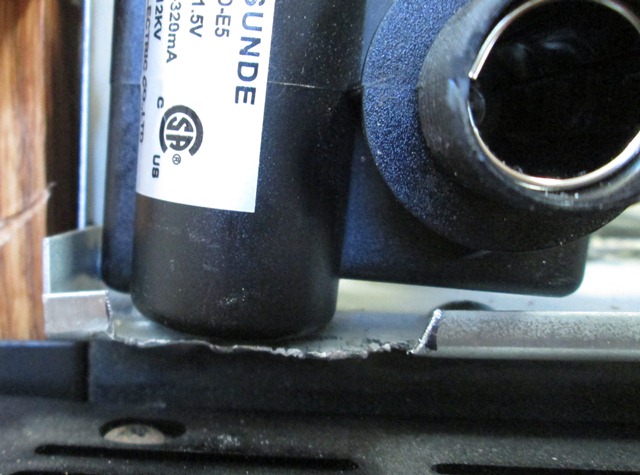
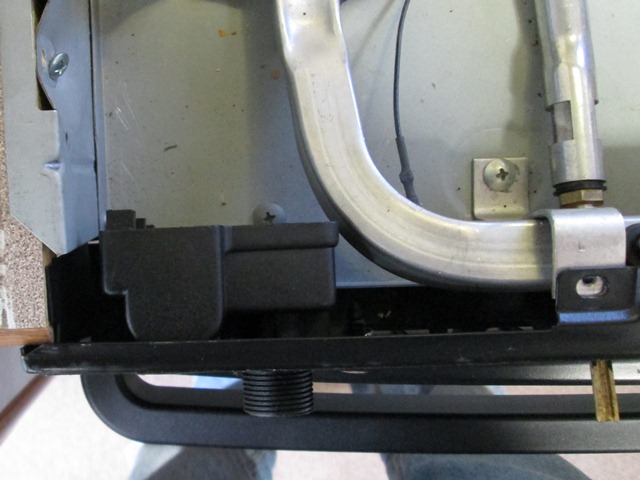
Because of height of generator I had to trim the front lip of stove top. Actually I could have done single cut and folded over the lip but I just hacked it off. Most of the units I’ve seen dimensions on are less than 2" tall, This one is 2 5/16". The distance on our stove from top of stove lip to underside of face panel is 2 1/4". So more than likely this will not be a consideration for most.
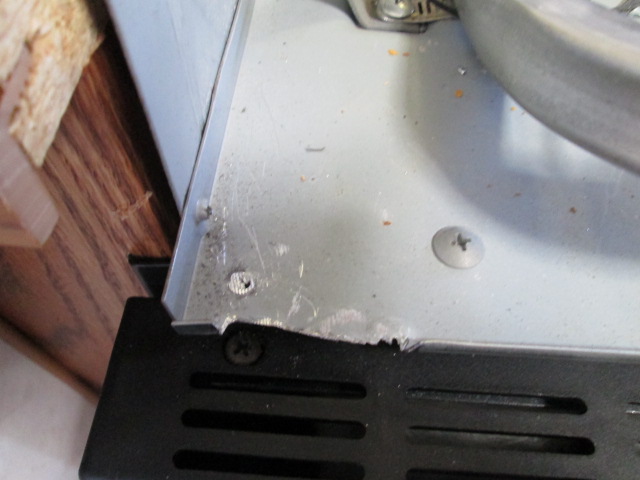
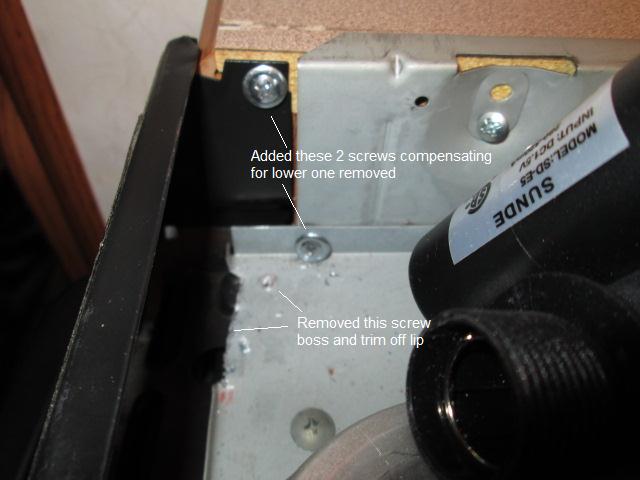
Also the screw boss in the left corner had to be filed down. Screw can't be reinstalled so Ill add one thru side. It’s one of the panel screws. Other than my extra 'clearancing' pretty simple.
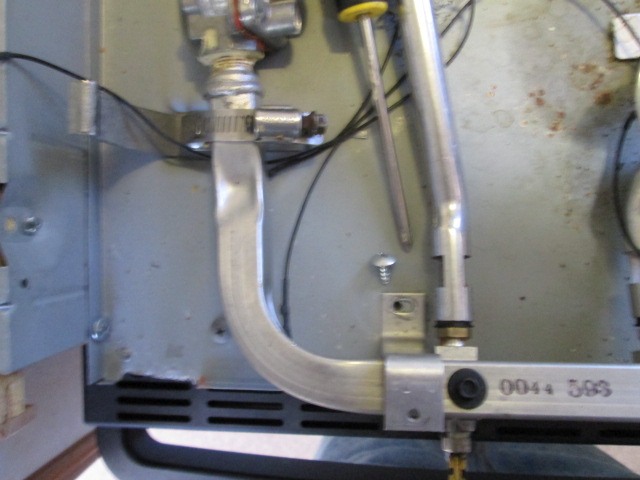
I removed the square tube bracket screws so I could move stuff around while marking knob hole center.
View showing where generator needs to set and where stock manual one was..
Mod to make this oversized generator work..
View of face- most conversion will end a bit more to right, exposing both original screw hole. Simple plastic plug will cover or you could make a panel. I’ll only need a single plug.
Now the fun stuff..(and the real motivation for this project, adding an electrode to oven for push button starting. Fist removing the fixed tray for access. Center screw&nut holds burner underneath to tray. Once tray removed remove gas line and thermocouple from burner, take the burner to shop to fab and setup new electrode position.
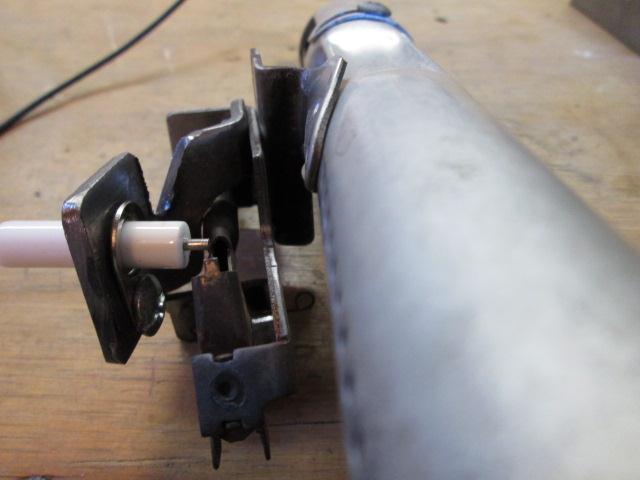
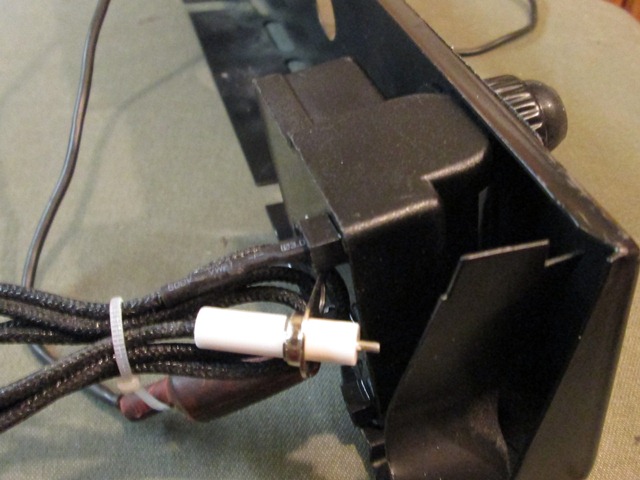
What I came up with for bracket. Decided to use the short electrode so it needs to set 90°. When setting up electrode end needs have a 1/4" gap between it and metal surface you want arc to jump to, obviously set near pilot. Ensuring no other metal surface near enough to 'steal' spark.
You can use just about anything to make bracket. Most of the electrodes have a small tab for mounting. Ones with long electrode tip would be easiest as you can bend the end to reach into pilot. Using short one I had to get fairly close and use bracket to place tip. Again if bending electrode tip do not apply any force to ceramic. Seemed like a good idea but I'm having doubts about longevity with short electrode. I may go ahead and make bracket-carry extra electrode. Look at other installs for different ideas on brackets.
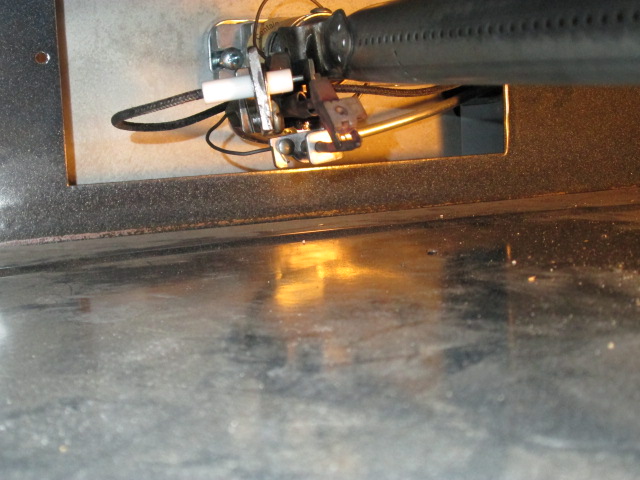
Oven burner reinstalled.
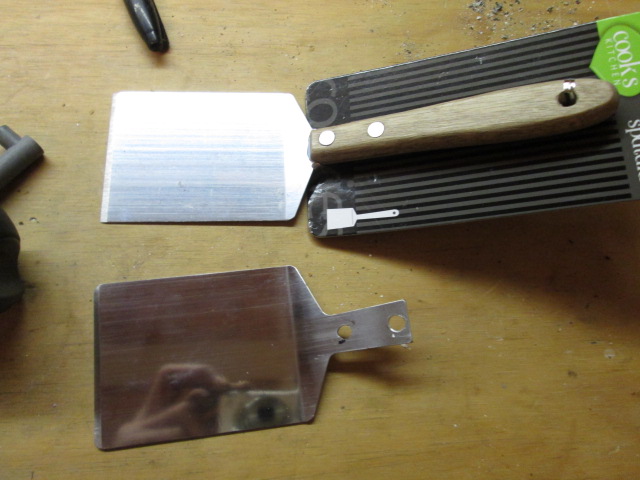
Mirror so don’t need to lean over to see if oven lit. Found cheap polished SST spatula at the dollar store. Camp or signal mirror would work but by removing the handle make easy mount
Easily see igniter-especially while pushing the striker button.
Bright blue pilot flame
Such a simple fun project-can’t believe didn’t do this years ago. Stove top burners just simpler to use-no loud obnoxious bang using factory igniter or getting out the long reach lighter, turn on the gas, push the button until burner lights. Usually within 2 or 3 snaps. Nice! Igniter continuously sends spark until you let go.
The oven on the other hand, lighting now is soooo easy. Turn to pilot, push the igniter and pilot lights, 1st time. Simply awesome. No more laying on the floor, reaching in trying to light-I even volunteer to light the oven for her now.
Simple video showing electronic striker working. 2:48 minuets- link if embed doesnt work... https://youtu.be/2v3D0hF8Whg
Back to Ourelkhorn Camper Modifications page