Rebuild camper rear skirt
After redoing the drivers side skirt decided this side could wait. Also was thinking this side would be simpler because of no door and some of the other interfacing of drivers side. But after breaking our faucet-got stalled waiting on parts, decided to start- probably have this side done by the time faucet parts show up.
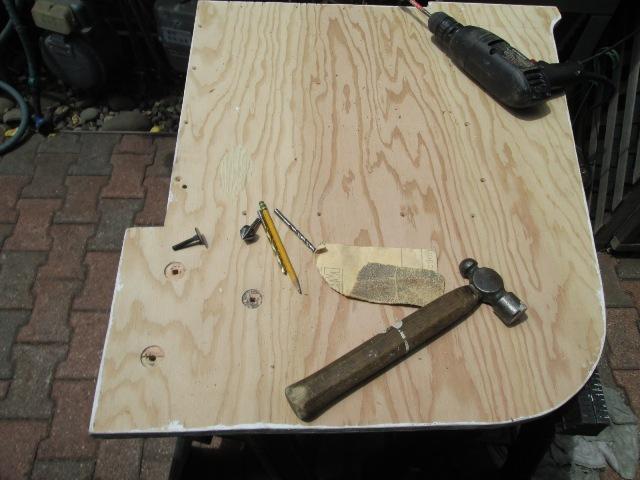
The Tear down
-
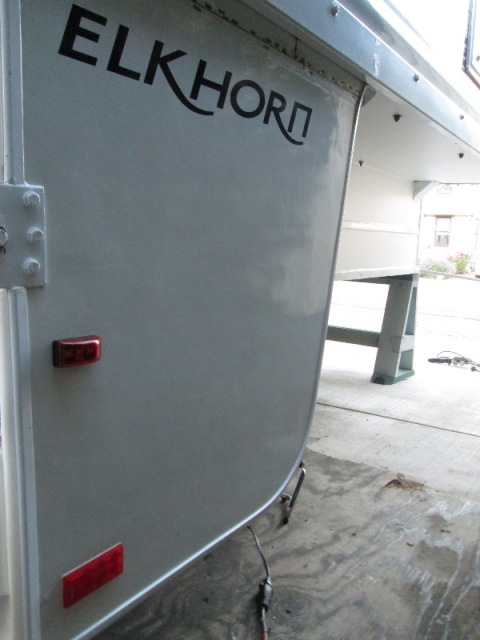
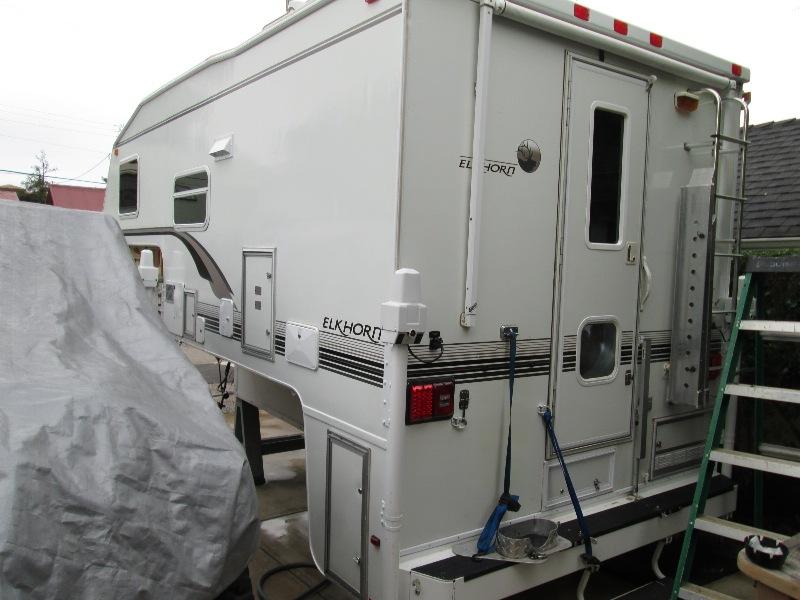
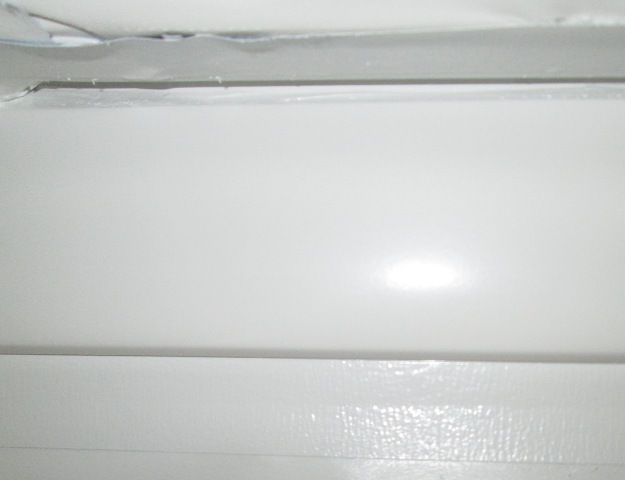
Cleaning up rear passenger side skirt..
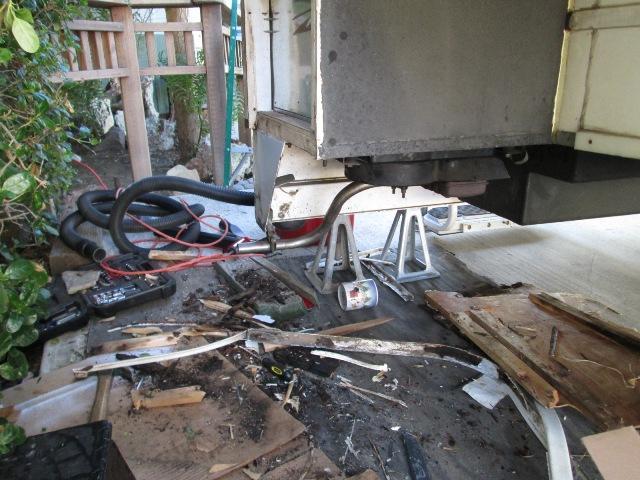
Well its that thinking thing. I assumed this side would be easier, but what will make it easier also makes it more difficult. Primarily no door, or more accurately no access to the back side thru door. A few pics of the ugly .Well got it apart but lack of access to behind the skirt threw this for a loop- fortunately the faucet parts arrived so I could button that up.
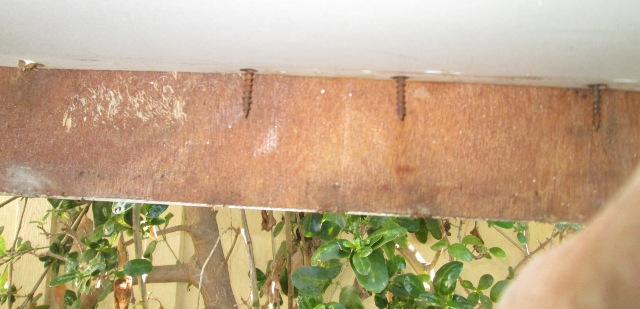
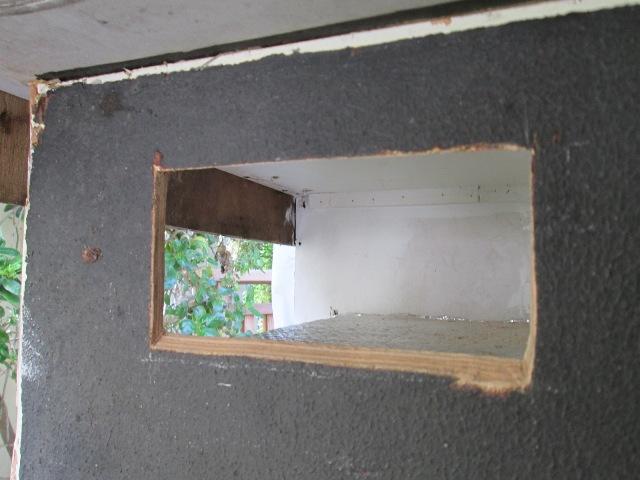
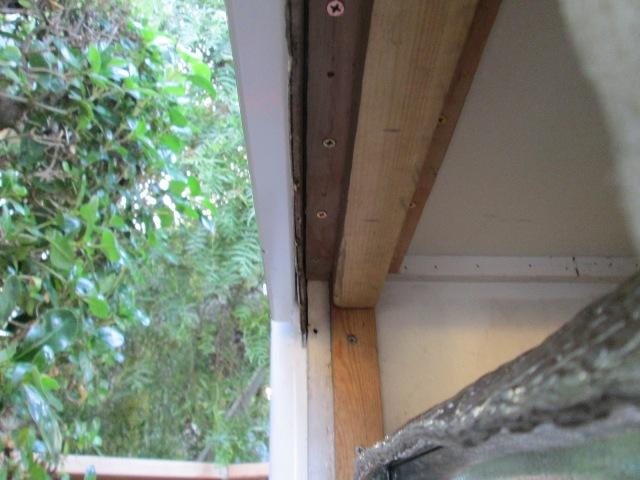
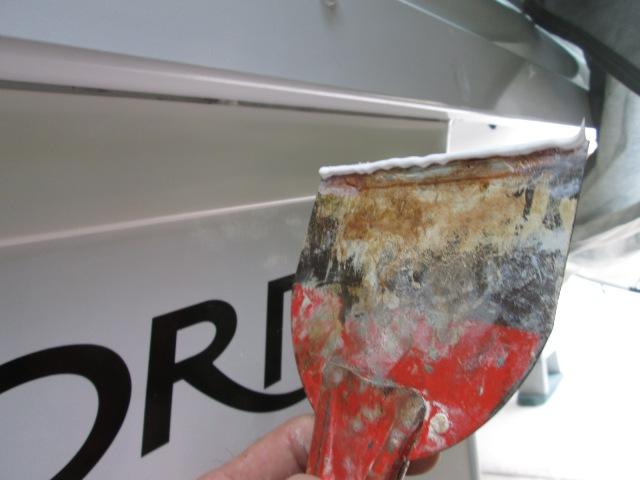
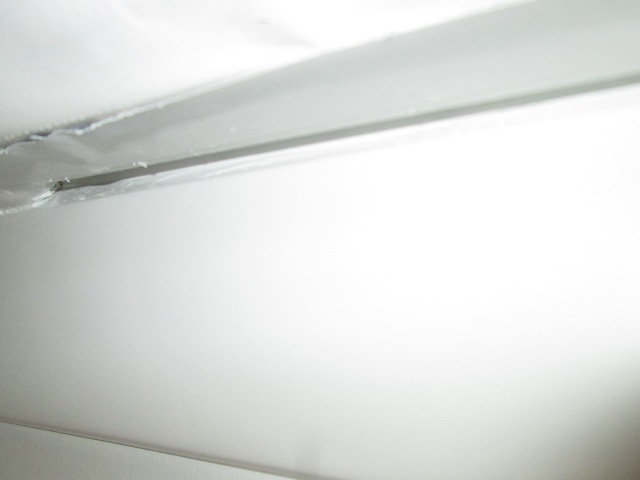
Remove lower jack mount and unbolted jack for access to corner trim. Removed filon seam trim then the rear corner & edge trim, Remove the filon, hmm, well I've seen worse. Some leaking migrating from the corner trim, and before re roofing I did have a leak in roof cap trim.
My Rant
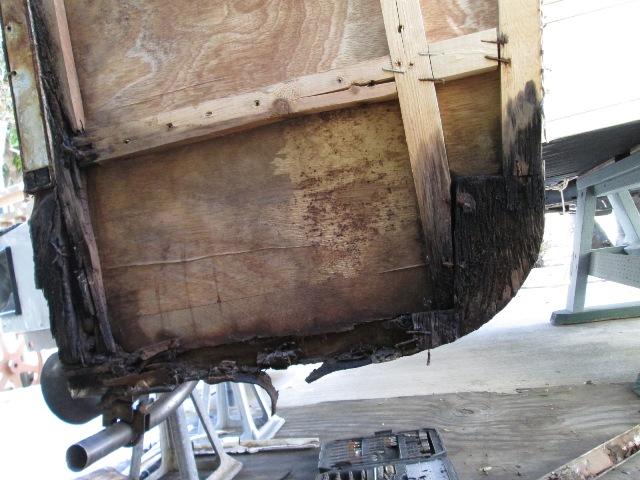
However most of this rot which became apparent in disassembly was 2 fold. Primary was my dealer installed generator. They removed reflector, bored a 3/4 hole thru filon, ran a carriage bolt to hang muffler clamp. Covered the hole with the reflector, no sealant. The muffler clamp sat about 1/2" from inside of wall, obviously the carriage bolt spun. So open holes, water getting in from both sides.
Second was the filon. It was cut a good 1/4 larger at the lower radius than the skirt and the front and bottom edges of the filon sheet. It also is about 3/8" short and is above the edge of bumper wing. The edge trim also hits the rear face of bumper so it sets away from the filon 3/8". It kept edge trim from sitting flush or against the filon. The edge trim didn't overlap back side of skirt at all, its been loose from day one. On the filon side the lead and bottom edges at best lapped about 1/16", and away 3/8" at bottom. Factory solution-pumped it full of caulk. The seam between bumper and skirt at rear because it wasn't attached to the bumper impossible to keep caulked. Water just enter between to backside of skirt. So hole in the middle, open edges, open seam, this wood didn't stand a chance.
I gave up caulking years ago-only thing holding edge trim at rear was the was the vinyl insert of rear corner trim wrapper under and was screwed to edge trim. I always thought the skirt was a sandwich piece of foam as you could squeeze skirt and it crunched. Rot had probably started before I even bought camper. All mute-just why this side so bad. Though camper skirts prone to rot, seeing where & why is only way to slow it down. Most can be addressed and redone correctly.
End of non productive rant
On to disassembly
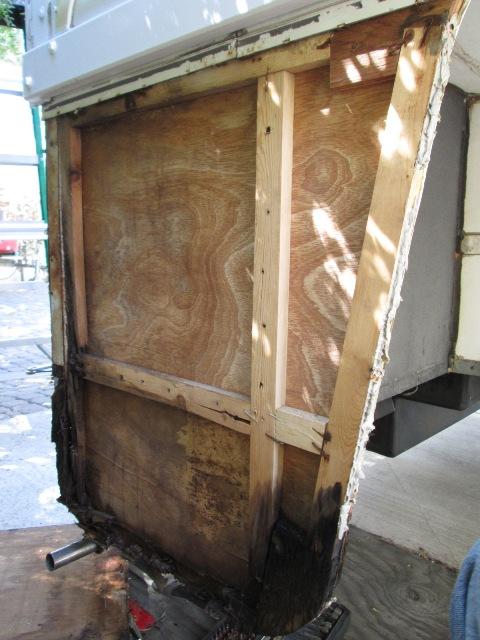
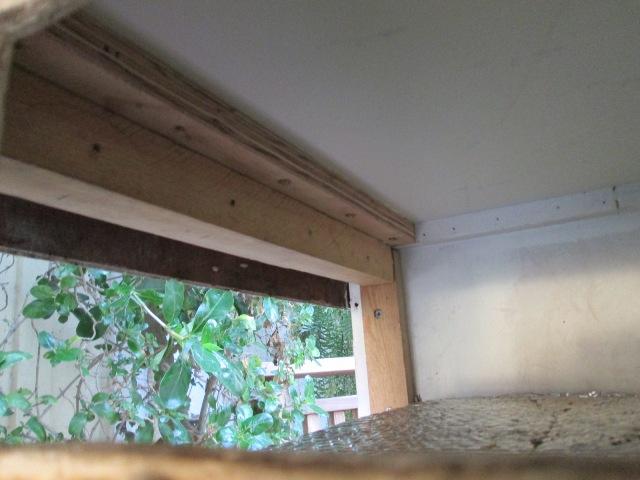
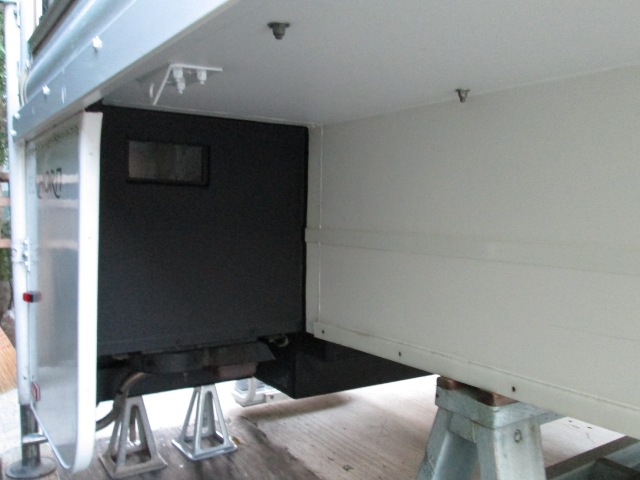
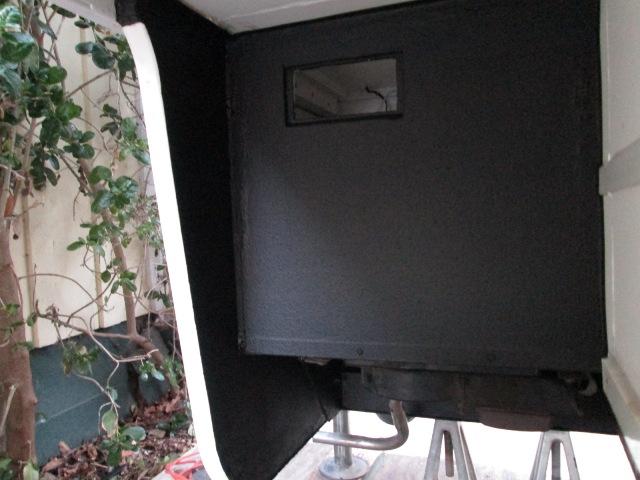
When I first realized no access was going to be an issue. Basically the 1x2 frame of skirt is screwed to the camper, the top 1x2 though is screwed to from above thru the frame. Its not shown, above the 1x2 in pic is a 1" space then the 1x2 that is screwed to frame. The back side luan is glued to it. The drivers side I left the upper most 1x2 and front ply block to reattached which worked well. But I cant get to the rear luan plywood to separate. Only thing still glued. No pics but I started cutting, working my way up trying to get behind. At this time I realized even IF i could separate there wasn't a way to get to for reattaching. Cant clamp, cant staple, also the front plywood block isn't screwed to from above like the other side.
So another plan for reassembly needed. I ended up pulling off every thing up to the top of camper wing or floor.
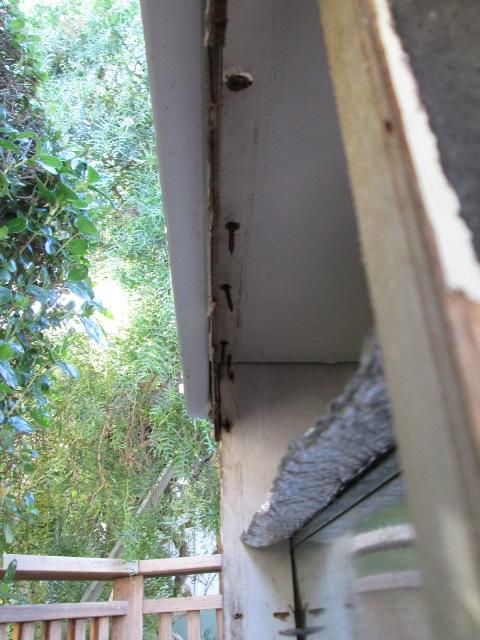
Just looking up showing screws that went in to skirt fame. Ill cut off flush with cut of wheel. Not sure how Im proceeding. I could place a block along top, slip skirt in between it and the upper filon. Its very slim but I might be able to reach from inside of camper to staple or screw. If I could reach a simple 1x2 screwed to floor with predrilled holes and screws in it, IF I could reach then drive the screws into skirt. Very Slim as the opening above the gen inside is at floor level, only 4 1/2" tall this is about 24" deep. Possibly use extension on drill to reach-that would work, But its a one shot deal if something goes awry. But that's plan A. I need to go look at the opening inside
Plan B which is really the one that would be nice and Im leaning toward is adding a door or access panel thru the skirt. It would make reassembly way easier allow to clamp new skirt to upper filon for gluing, attach to blocking to floor. It would also add some clamping of the exterior filon sheet, instead of just perimeter, allow access for wiring lights Im adding. Plotting as I write this..And the door got nixed. One is cost, second is Im reusing original filon, there's lettering that would need to be removed. Plan B dead
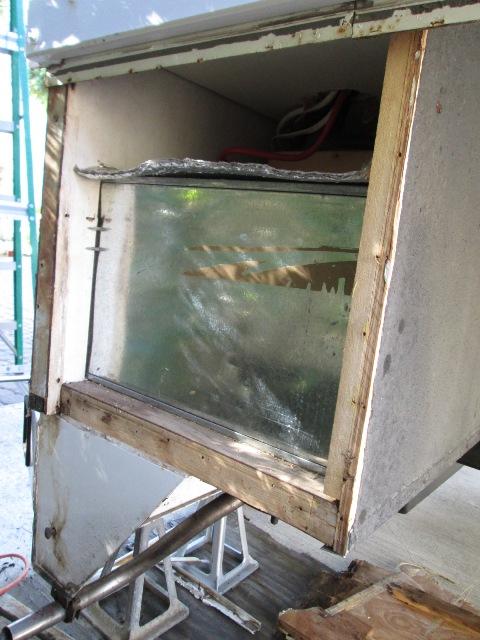
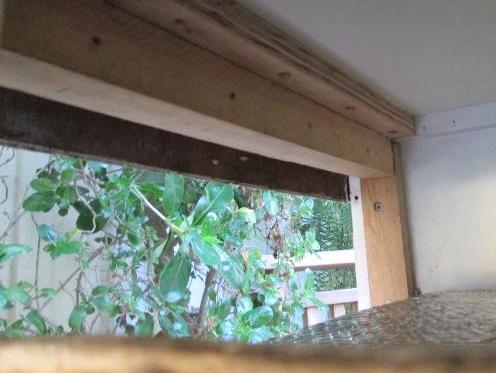
Camera inside looking out at the 3" overhang of upper filon.
Years ago removing the fire ext. holder I discovered this area above gen. This area is not sealed and is open to inside of camper. A 4" hole that all the generator cables & wiring pass, 1/2" gap along the top and rear wall. I had added bubble wrap trying to deaden the sound a bit, and added drawer that uses about half this space inside. Having exposed now I can seriously seal this from camper interior. I am going to add 1x1 blocking to all the corner joints. Add some insulation which should help with the gen noise. No pics, but I was able to slip some foil between gen box and rear wall and a piece acrossc on front. Sealed all edges with aluminum tape. If I add the exterior access door I'll add a small divider wall at the rear of drawer.
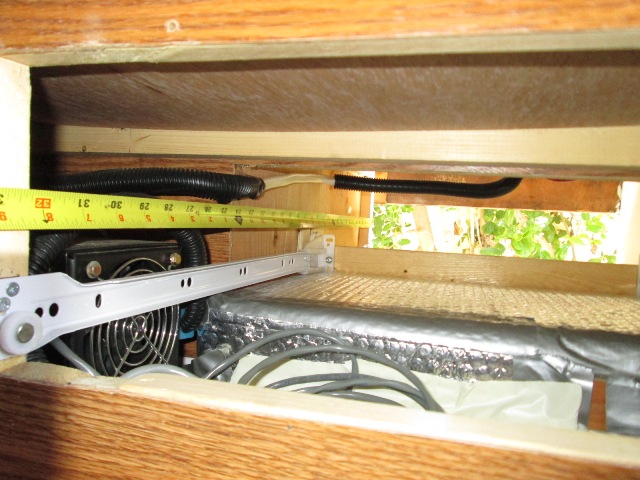
You may or may not have noticed -mostly at this point I talking to myself trying to figure this side out.Its all about access. The other side pretty much made itself apparent how to proceed. Pic above is looking out from camper. Possibly I could assemble thru here, but at 34" don't think so, plan A dead. I pulled some of the loom off 110 wire-adding a 1x2 block behind it to insure screws don't reach should I decide to add aluminum angle to out side of this corner joint, its pretty weak.
Though removable at this point I already divided this dead air space off from rest of camper. Ill caulk out once Im sure.
But kinda stalled, went back inside camper and finished the faucet project as parts arrived early-fortunately. Waiting on parts camper already down, let me think since I had a few days I could knock skirt out while waiting on parts...that thinking thing ...Ill ponder skirt while plumbing.
ACCESS! 5 days later
-
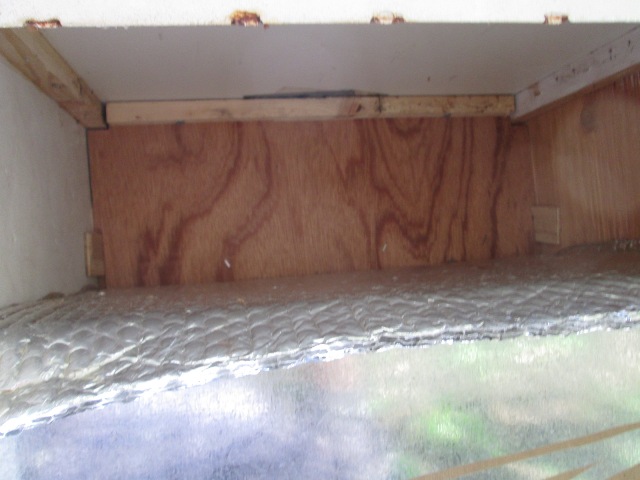
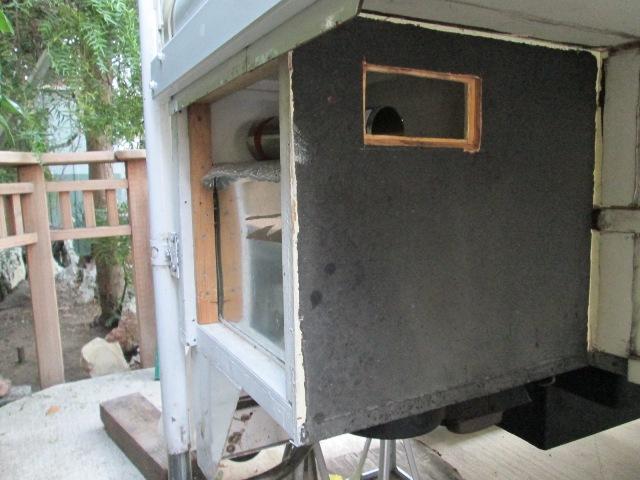
I believe a plan C is finally coming together. Once I decided Im not doing an exterior door, plan A, not going to try the mega reach, plan B, short of dropping generator and removing the box (never on the table but a viable option) I still need access. Then I saw the back wall or right side looking in. What Im pretty sure Im doing is cutting a hole in the rear of box or on the right in pic above. This is under wing. Hole will be about 4" tall x 8-10". It will give me more than enough room to reattach skirt with drill or stapler.
Cool, access had me stumped. Reinstalling the skirt can precede. Ill add a 2x2 to a piece of 1x4 that can be attached to roof of box. New skirt top will slide up in between the 2x2 and upper filon, reach thru hole and thru predrilled holes screw 2x2 to profusely glued skirt. Im also adding a 1x at rear wall to also face screw the skirt in addition to the thru rear wall and into edge as it was. I'm toying with idea of adding a 1x thru center of opening. Im using 3/4 marine grade ply wood so likely not needed-but it would stiffen even though previous 1x2 and 1/8 luan never bowed-still seems like a large span. Reinstall face screws into bottom and sides of box. Install few elevator bolts thru skirt & bumper wing.
Already spent close to what it took to do other side just for lack of access. enough of a plan to start
Reconstruction
-
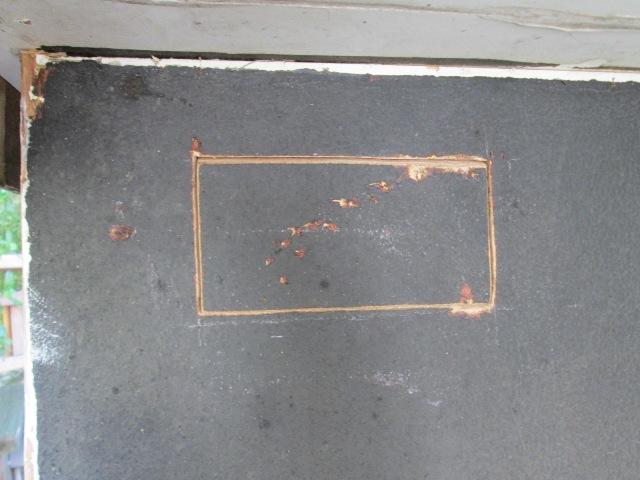
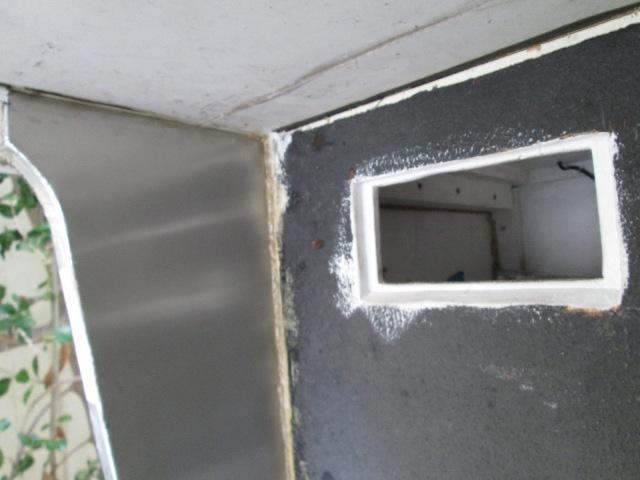
First is cutting the access hole
Cut hole. A bit rough as I just free handed. Also didn't drill holes but fed the jig saw into ply, which works but not that easy at angle. I wanted top and bottom edges sloped. Haven't decided if this will get resealed or made into access 'door' but wanted allowance. Likely will be left for access. Another reason for access is Im adding side marker lights-wiring access when all done. Just need to remember to stub wire- or pull string when I reinstall skirt pieces-hmm details
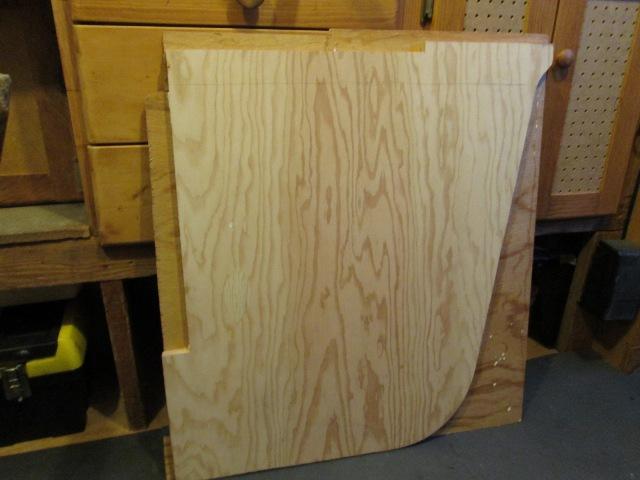
Cut backing 5/16" plywood to go inside, hole is a bit small than hole in wall.
Glued & stapled to the inside of new hole. Should return any removed strength, and give a lip to replace the plug.
Plug tucks under top edge so all that's need is latch at bottom. Could run piano hinge. Could glue in, caulk and seal if wanted. But later
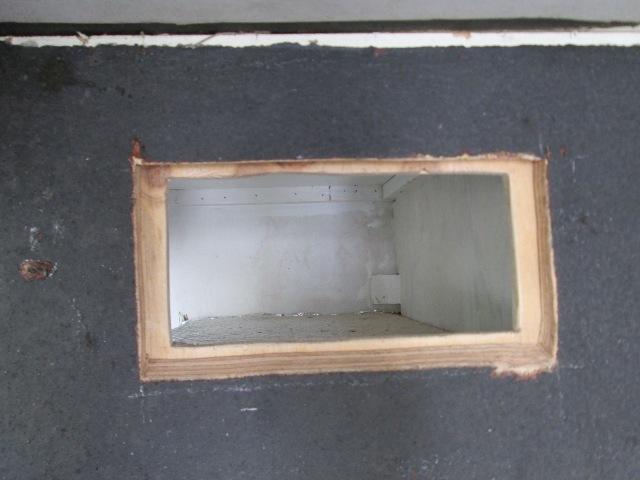
I now have access to the back side of skirt.
Back stop at top for reattaching skirt. Approximately 7/8" from edge, glue & screwed 2"x2" to a piece of 3/4"x4" plywood. Predrilled holes in 2x2 for skirt attachment. Glued and screwed in to ceiling and thru into frame.
Also glue & screwed a 1x2 at back edge to face screw the skirt in conjunction with the screws that go thru the rear wall into skirt.
The top radius of skirt, protruding outside of the box, Ill simply add a 2x2 block under wing for attaching skirt. Again, the drivers side was screwed to thru frame. this side wasn't and just sticking out there?
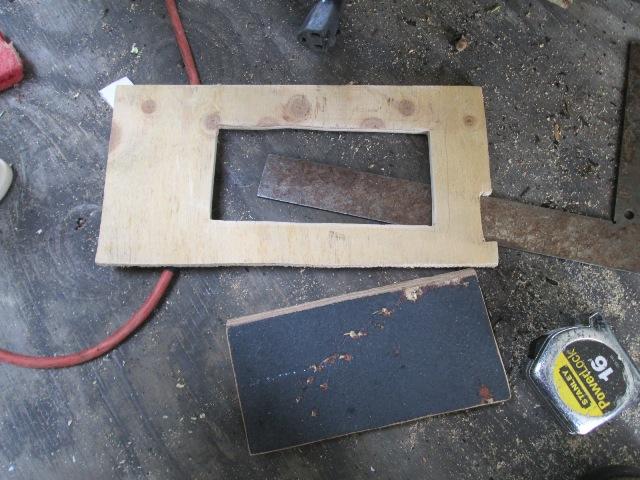
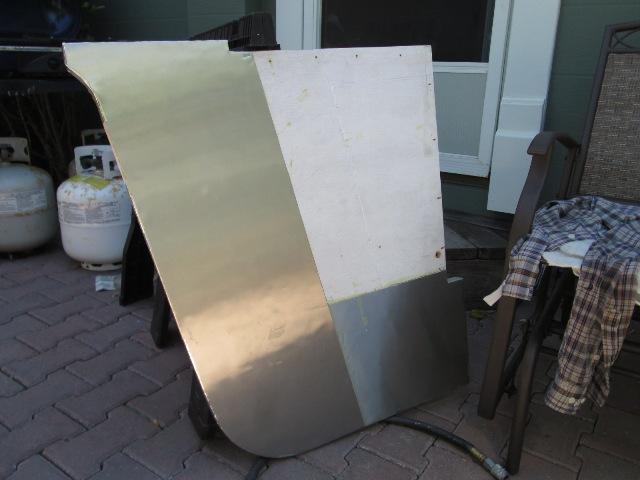
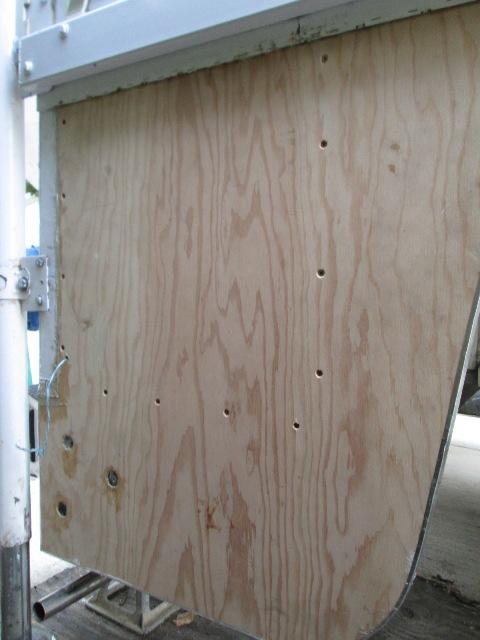
Got the filon cleaned up. This is where I noted the radius was offset from the front and bottom edges. I sanded the filon to blend. Cut the backing & glued to it. Using filon for a pattern then adding the additional 3" to top for the skirt. Made some measurement for the match cuts to fit camper. Got a good fit but when I clamped the filon on to verify match the shirt was, well just didn't match. About 1/8" trim required lad & bottom edges. But got it. Glued the luan backing to it. To the shirt I just glued last piece of luan I had, Ill trim to excess tomorrow. Seal both up.
Took all day. This simpler side- is proving to be a test. I had to re bend the aluminum edge to match reshaped filon and skirt. As mentioned earlier When built someone erred, the bottom curve was offset so when assembled pushed the edge trim away both bottom and lead edge. Fixed
Apply aluminum backing, prep and Install skirt
Lost a few pictures from yesterday but all I did was trim the luan, Seal both pieces. Did a lot of eyeballing how this is actually going to go together. Went to hardware picked up screws & bolts, some construction adhesive and contact cement. Decided Im going to try to use contact cement to attach the filon to skirt. Mostly I wont have to jury rig clampage, IF I can figure a way to align-some thought required. I did open up the right taillight and tap wires for new side marker lamps Im adding.
Because there's a ton of screws going different directions, measured and predrilled holes in skirt. Clamped in place on camper to drill thru the top 2x2 for holes at top edge. Mark locations for the through the face screws, back at shop drilled and countersunk thru holes. As most everything covers something else I don't want to be trying to screw into a screw. Last 2 days I must have carried this and the filon sheet between the shop and camper 20 times. I have a small floor jack that has a flat plate, I use to lift the skirt plywood into position.
Counter bored for the elevator bolts that will attach to bumper wing. Sacrificed an old 1" butterfly bit by grinding the pilot down so it would be less than the 1/4" square of bolt. I'll bed them in construction adhesive to ensure they don't spin down the road (like this will come apart :)
Cut the aluminum flashing, overlapping full bottom piece with side piece. When installed the al will extend into or inside of the box. Perimeter I cut tabs and folded over edge of skirt. Used contact cement to attach. Flipped over and redrill covered holes. took back to camper drilled the holes in bumper skirt for elevator bolts , verify skirt still fits. Then I did several dry runs on installing skirt on camper-several things need to happen simultaneously it seems. Needs to slide up into the channel I created while sliding up & back to rear wall, tuck in behind the lead edge of wing...well details. Problem really is only doing all this so it ends up where it needs to be without scrapping off the construction adhesive. Also, as the back side of upper filon and the face of the added 2x2 is fairly snug for skirt, it will need to be glued to skirt, not enough space for adhesive. Though I will run a bead of adhesive on the top edge of skirt.
No time like the present...First liberally mopped gorilla glue to both sides of the 'channel'. Fun, poured glue on scrap wood as palette then used an acid brush to get between the 2x2 and upper filon that's hanging down. Then added profuse amount of to mating sides of skirt that will slide into channel. Then working against drying glue applied the construction adhesive with caulking gun to all areas on camper that will butt or set against shirt. Applied a bead to the top of skirt and a few places I couldn't get caulking gun into on camper.. Then with glue everywhere sat the skirt on floor jack and lifted into place, tiling just a tad so it went into the channel while holding bottom away so as not to scrap off adhesive. Took a few taps with rubber mallet to get it to slide back against rear wall. Clamped the skirt to bumper wing then screwed like a mad man. Whew.
The access hole worked well, though once started it seemed to get smaller. Short of building some kinda frame than hung below upper this seemed the easiest. I know its a lot stronger than what I replaced. As mentioned I'll be adding a 2x2 block against the inside corner of skirt outside the box, or I do have some aluminum angel. However Im adding a 2x2 across the back top upper corner (above my access hole) so Ill probably make an ell. I want to add some more positive attachment tying wall & wing lid. I see this back or inside wall of box actually holding up the bottom or end of the generator box. The skirt does keep it square, and now also help hold it up, but more is better in this case I think. The swept skirt outside of the box is purely cosmetic but need to ensure top cant move.
Stapled the upper filon to skirt, surprisingly glue was still wet. Removed clamp, applied some adhesive and ran the elevator bolts thru bumper. Had picked up nylock nuts but they spun the bolts before they could seat the square shank, due to adhesive holding out and force required to thread thru nylock plastic. So used regular nuts to pull them in. I could have removed & installed the nylocks but just added the nylock on top as I had enough thread showing. I guess in my hurry I got a little overzealous with the adhesive-stuff was oozing our everywhere. Not a bad thing I guess. Just a bit of clean up of visible areas and where filon will be glued.
Tomorrow Ill play with the filon, see if I think I can use the contact cement. Placement is critical, I do have some scraps of al flashing that I might be able to slide in between..2 holes for the lower jack mount I can use in conjunction with top edge. But wont install for couple of days, Still need to clean up the trim, de-silicone the face of filon and some other details....
Cant tell you how much I regret breaking our bath faucet. But needed to be done, were on the downhill side
TO be continued
Got the trim and filon panel cleaned up. I was surprised the panel is actually white again. Not a before pic but was pretty bad-lot of scuffs, marks, dingy. Used some bar keepers.
Gluing on the filon panel
I'm using contact cement. I got one chance-its either going to work or-not sure. Worst case, as long as it ends up flat is redrilling for the lower jack mount, having to resand any protruding edges. Down the road if it comes loose Ill add 'something, false cabinet door, screw it down & cover screws with seam trim-. Just at the point and Im trying to stall doing it. But thought I'd add a note here before it possibly all turns to poop. Next entry will be a Whoo-Whooo! or Aw chit!
Whoo who, but anticlimactic, just turned into a lot of effort, maybe I was stressing over possibly total failure this late in the rebuild more than I realized-. Extremely relieved I was able to get it in place, just wasn't sure (and still am not) about the contact cement. Did save a bit of time and let me get buttoned up. Quite a few dry runs putting it in place pretending it was glued, noting mostly 2 upper corners, gap width, 1/4" bits in the lower jack mount holes. Brushed on several coats of contact cement, with about 20min between coats, wood just sucked it in. 3rd coat on both pieces it looked good. Sat on jack with a crescent wrench in between bottom edges, lined up the top, slowly tiled into skirt. When the top looked good a rolled with a 1" wood roller, removed the crescent slowly rotated until almost touching-looks correct, then from top middle pushing with roller ran it down the center to bottom. Then rolling it with a 6" hard roller, worked from center out in both directions with all the weight I could bear on it.
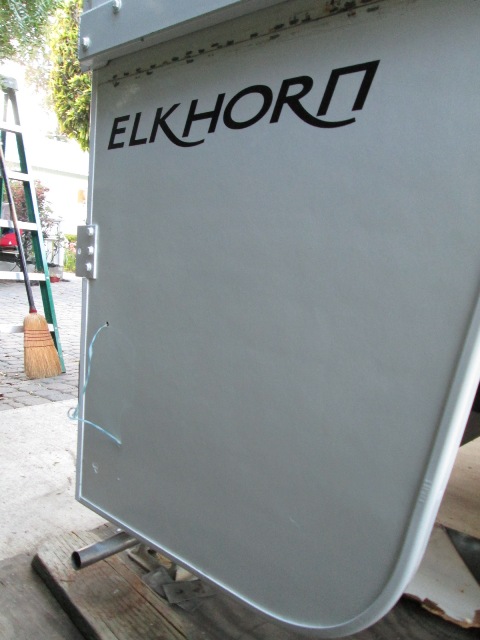
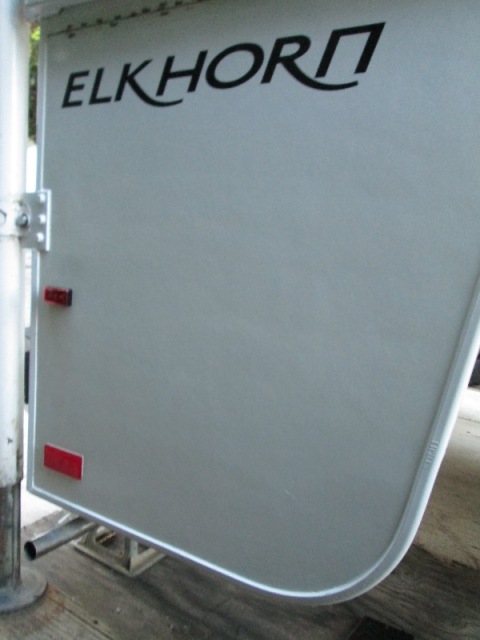
Replaced all the trim, lower jack mount. Front edge trim needed a bit of trimming. Drilling & screwing bottom was a bit of a pain, camper is just a tad lower than when I did the other side. Got the jack back on. Well several hours but its installed. Took longer than expected, even though happy just burnt.
Wished I had taken some before pictures of this side. The filon and back was flopping at bottom edge, black with years of caulking, trying to seal, lower edge trim hanging by the wrapped end. Hopefully tomorrow starting the re coating of back side and cleaning up the lower box, getting my LED side marker installed will get me bit more reenergised.
Need to get a wider piece of seam trim. The upper filon originally sat about 1/16" out from lower skirt frame. Factory answer- just use a bazillion staples to make it reach. What this did was cause the filon between the staples to bow out, resulting in filon quite wavy. It also caused the seam trim to not set flush & leaked. No sealant underneath, edge caulking a piece of vinyl trim-it may have worked for a while. Rebuilding the skirt it is now up against the upper filon, but I still had to staple all the high spots. A bazillion more screws. I coated them with some zinc. Caulked the seam. Need to leave a gap between seam trim and the 1x4 tube above that's face mounted, so any water that gets can get out other wise create a dam. Top of the 1x is caulked but bottom isn't. details...
Still haven't figure out what Im doing with the access panel. Hmm I seem to recall a short pieces of aluminum piano hinge in the back of one of shop cabinets..I found it. I wonder if... door sounds like a project by itself. Need to resolve though so I can coat
Finished!
Installed the new LED side marker lamp, using 3M auto super strength molding tape. My pull string I used aluminum tape about 8" from end to permanently attache to light wire. If it needs replacing removing the light will bring the fish string out with it. The end I just used masking tape to help it front snagging. Went in easy. Also installed the lower self stick reflector.
Going underneath first thing I did was wash the wing box with plain water in a bucket. Removed all the silicon caulking from sides and top of wing box and back of generator box. Re caulk the new aluminum skirt backing, and wing box wall & lid to generator wall, as this is getting coated used some 40 year siliconized acrylic caulk. The Wing wall I used 'cringe' GE #5010 silicone, stays white easy to apply water proof and flexible. I don't wash or other wise handle so should stay sealed.
Turning my attention to the access 'door' I decided to simply attache it with 4 sst screws- done. The top of the skirt that protruded I ended up using a piece of 1/8" 1x1 aluminum angle to anchor. Drilled & screwed into skirt & wing lid. Removed then bedded in construction adhesive and reinserted the screws
Everything done-caulk & prepped got ready to coat the back of skirt. I noted the visibility of the 4 back side of rear bumper behind the generator. . Actually its something I always notice when camper is setting in the driveway. Being white Its always covered in dirt mud, setting in the drive its quite ugly. Plus the powder coating is pretty nicked up. I guess its low enough to get stoned by tires. Cleaned it up. Possibly might help with generator noise. Least its black and will disappear.
Applied 2 heavy coats to entire back of skirt and all surfaces bumper. Inside corners I wrapped about an inch on wing walls & lid to cover the caulk joints. I use Henrys #107 Sealer & Damproofer asphalt emulsion. Its water base, dries hard and Flat. Originally I used this to kill the reflected glare of truck tail lights. Ill probably recoat tomorrow.
Now were stoked!. The passenger side skirt rebuild is done. A few details left... install my access door tomorrow and recoat back side again. Drill the rear bumper to move the generator tail pipe bracket to it that was previously on back of skirt. Jack will come off one more time so I can remove the top bracket from rear wall. Cut the vinyl trim so it isn't tucked under the bracket. Reinstall, paint and recaulk the upper jack bracket. Reinstall the jack, paint the bolts. Oh and get the 2" seam trim ordered and installed.
Though motivated by skirt rebuild, separate project is to make another set of lower jack brackets that attach to bumper.Just bolt couple of short pieces of aluminum angle to bumper attach another pair of lower tube clamps. This will tie both jacks to bumper, will help with rear sway and also add support to bumper
This has been on the round to it for a couple of years. Drivers side was worse, opening cabinet door almost pulling whole skirt off. It was what finally got me started because my auxiliary battery is in there/plumbing valves etc. I was concerned about the structure however that side really didn't depend that mush on skirt. The passenger side however is very important and more structural as my generator box is behind it. Along with rear wall skirt is attached to it holds back of generator box. I was going to put off doing passenger side- not realizing how much support it contributed.

Took right jack off, removed the upper rear side bracket, cut vinyl. Some serious wire wheel on bracket, this one was always kind of ignored as its in between ladder and jack so access not easy. It showed, lot of rust. Also cleaned up the jack. Primed with some zinc, then repainted the jack. Reinstall bracket, reinstall the jack. Masked off and painted both upper brackets and all the bolts. During this whole procedure I was daily removing and reinstalling the jack. Not coming back off removed the extra stands from under bumper. Rebent the generator muffler hanger so it can attache to bumper. Drill lower bumper flange and hung ( which didn't get in the pic).
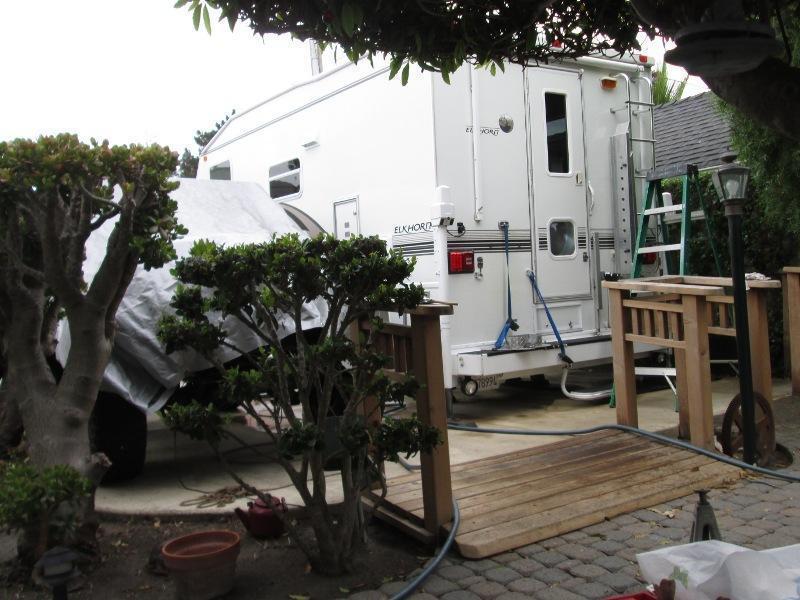
By golly I think were done.
To make sure, I threw everything that was still out in a pile, tools extra hardware etc, then I washed the camper. Kicking back, I can not relate how good this looks to me. A 100% improvement over what it looked like a few weeks ago. Skirts are sound, wing boxes clean recaulked, jacks and brackets sealed and repainted. New LED tail & side markers. Lot of work but a lot of details that only become obvious while doing.
Happy camper-
Couple of minor things yet to do, add the lower jack brackets, remove the trim piece that runs across above bumper to clean & recaulk. No idea what it does but note all the caulking is pretty bad. Ill add as another project. Then my round toit list will be clean, well as far as the camper. The passenger side skirt put me to the test. It will be nice, after several years of putting off.
UPDATE:
recieved and installed the filon seam trim

Being in a hurry I didn't order sample, color is a bit off, actually a lot off. Rather yellow, looked like it was 14 years old. Highly recommend getting the sample before ordering. Because of location didn't think it would matter-but because of its location, in shadow, against a painted piece it did.
But more critical is I cant caulk the top edge of trim. Not caulked water would sit behind it as pre-applied tape doesn't go to edge. I don't know if the tape would stop water that might stand. Second is the 1x3 tube that's mounted above needs allowance for any water to get out from behind it. If I just caulked in between would create a dam, too many places water could get behind the tube which is why its lower edge above skirt isn't caulked. Its top edge has tape and caulk. So I cant simply caulk between it and new trim. But the new trim MUST be caulked, at least I want it caulked.
Only thing I could think of... Using 4 1/2" blade applied a small bead of caulk-looks like a lot, carefully insert then 'tuck' the caulk into trim edge. Little bit of effort but it worked. Sliding in at angle then rotating blade down, ensuring caulk packed into space, then more but sliding out to get a beveled edge. Slid a stiff piece of paper up and behind tube to ensure it was still clear.
Took a few pictures but hard to see, shown is masked trim but above the filon trim is almost visible beveled edge of caulk.
Im pretty sure its sealed
Masked it off & painted the trim with Fusion, color was just too far off. I painted scrap first and it seemed to hold paint. Now were done!.
Adding the lower jack brackets to bumper
Rebuilding the Drivers Side Skirt page
The related LED side marker light addition if interested Here
Back to Ourelkhorn Camper Modifications page