Modify Harbor Freight Workstation Table #46725.
Update 2022- rework this table to use for walking foot sewing machine See Consew.htm
Have want of a small standard table height workstation. Decided to use the H/F unit. Reading reviews looks like some assembly issues but for the price ($24) worth the effort as a start. I'll be adding a power strip, a light and possibly a small pegboard back with shelf. After receiving, noted the 1/8" pressed board on the lower shelf and will be replaced with some plywood. The middle shelf I may laminate after cutting the lower board to top board, however I'm really looking at adding partial drawer. I may add casters but bottom line is I bought the H/F workstation as starting point to make something. The reviews on assembly weren't an exaggeration, I assumed "how bad could it really be"? Most stuff from H/F requires tweaking. Worst I've encountered, I'll note what I found and observations before documenting my workstation mods.
Reviews of this table are correct- Takes some thought to assemble. Mostly due to instructions (or lack of).
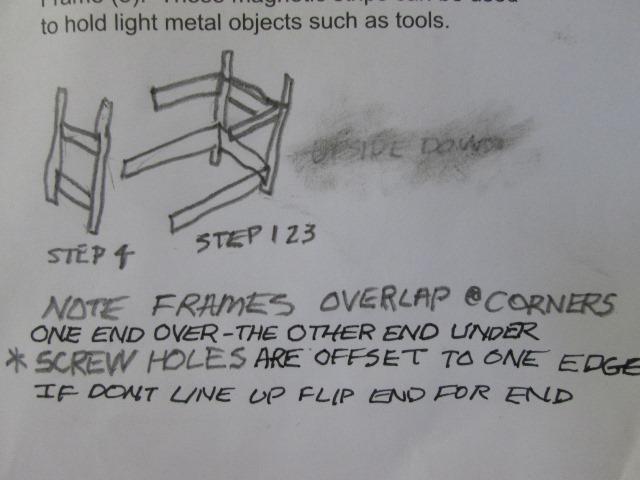
No where is it mentioned in instructions to overlap fames where they meet each other in corner, or the orientation of offset holes in frames/legs. 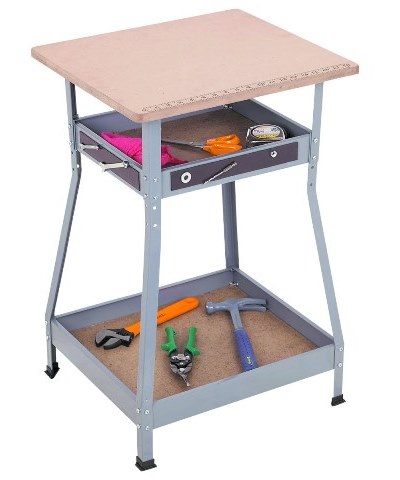 Specifications:
Harbor Freight #46725 Adjustable Height Workstation table
Table Top 20 1/8" wide x17 3/4 deep"
Table height 23 3/4" / 27 3/4" or 30 1/4" (after assembly)
Rated 1000lbs capacity-
Table bottom tray/shelf 19 3/8"W x 17 1/8"D
Table middle tray/shelf 15 1/4"W x 13 1/8"D
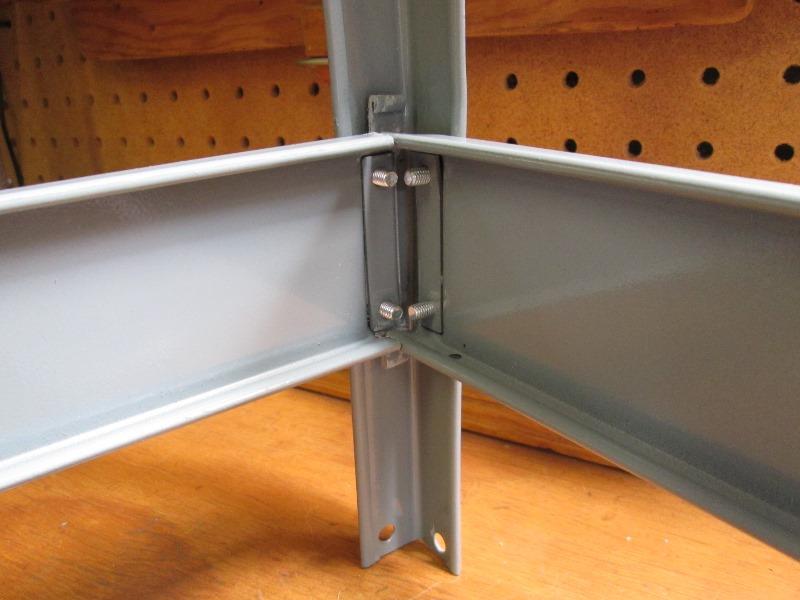
Not knowing designed to overlap in a feathered fashion, not realizing hole in frames closer to one edge, then working with offset holes in legs, it is quite a puzzle.
Many assume holes mis-drilled, ends wont butt. But it will bolt together, just not how you think (or likely want) and instructions don't explain. Took me an hour to figure out intent, by that time I also decided I don't want the frames overlapping all catywhompus so modifying so it can be assembled frames flush. Replacing the 1/8" fiberboard shelves, actually they are only 3/32" thick.
In the off chance someone assembling one of these ends up here few pictures that might help...
STEP 1, ignore the part about tightening the screws; do NOT tighten any screws until done, need to wiggle and flex to align stuff.
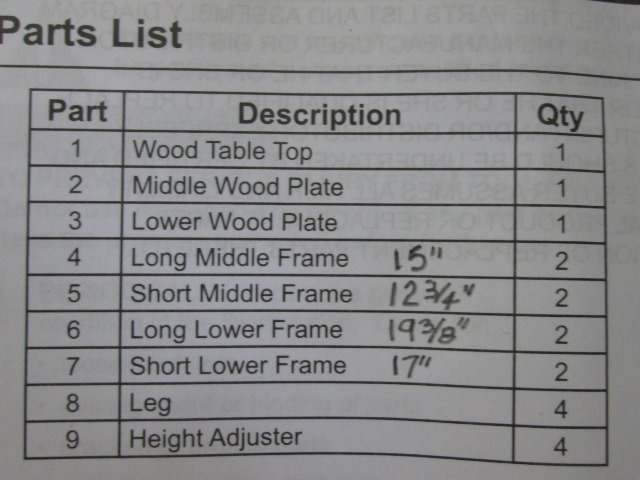
None of the parts are labeled, the 'frames'
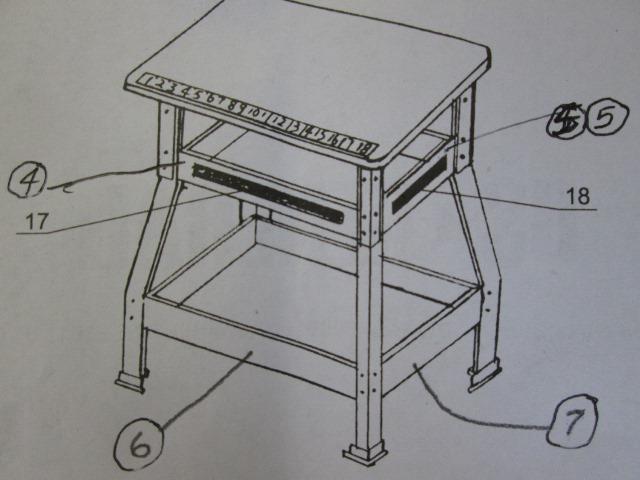
and which is which
Rewriting the instructions assembly would be a lot easier.
Just showing the difference in leg hole placement and screw holes in frames. Knowing this before hand and that frames ends are supposed to lap would save folks a lot of grief.
My mods:
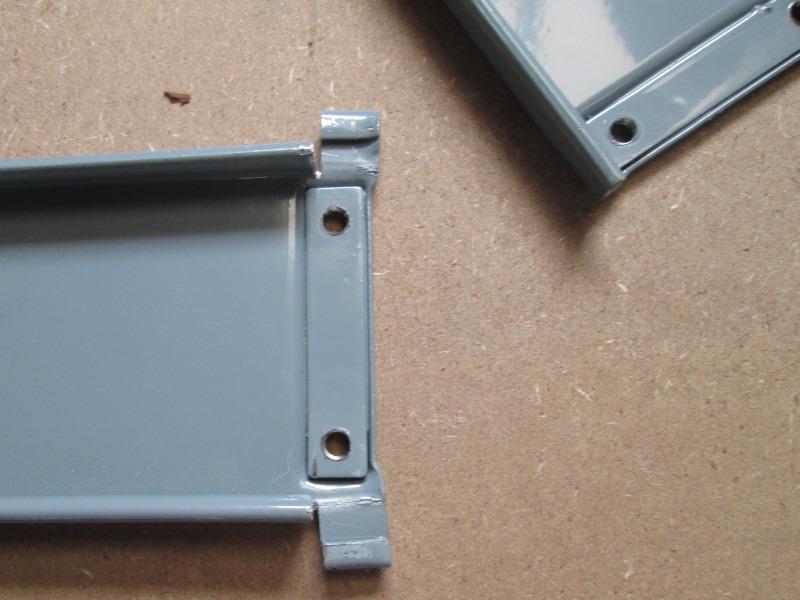
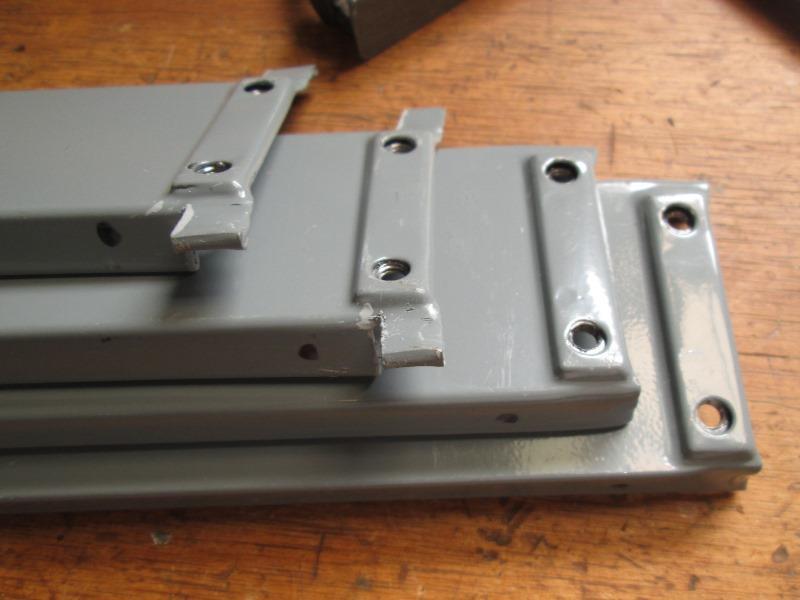
I don't want frames overlapped so shelves will set flush. Simply cut the legs of end pieces #7 and folded over, so frames can butt in corners. Could have cut all ends at 45°.
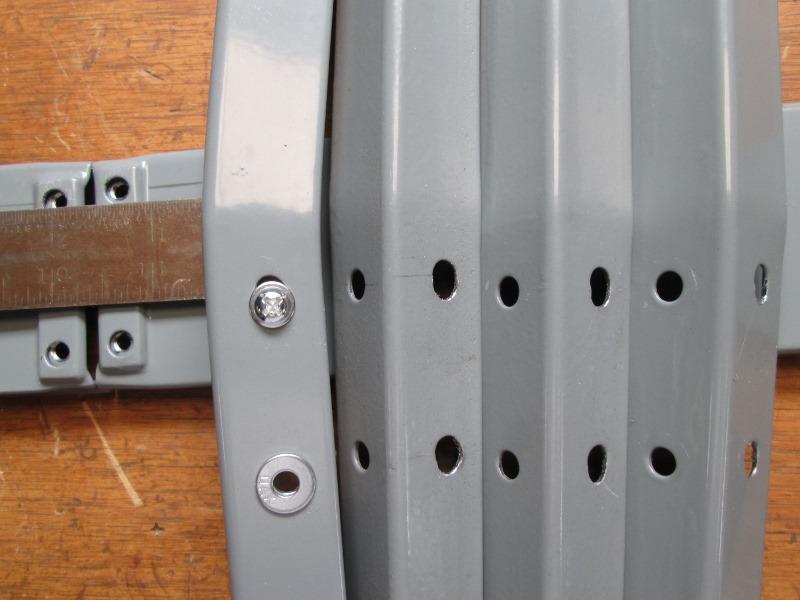
The holes in legs I used small file to slot. Using larger #10 washers to cover.
Marked all the frames for ease of identifying orientation.
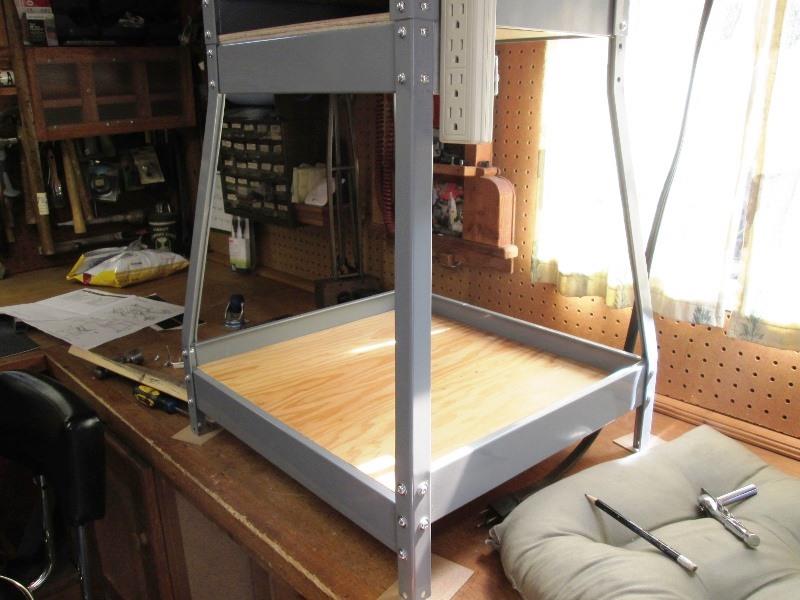
Assembly started. Top and bottom legs of rails flush.
Started the top but at a quandary...I noticed the adjustment holes would allow mounting the front frame below shelf. Would give more access to whatever is on shelf and room for adding drawers. Still contain at sides and back if used open. It likely subtracts from overall strength, setting at table probably hit with knees- but dang...
Looking at pictures realized I'll be adding caster so raise above knee height, placing frame below shelf would give an easy place to mount power strip. Though I think vertically on leg would be more practical. Or on the side frame, cords be out of the way. decisions..
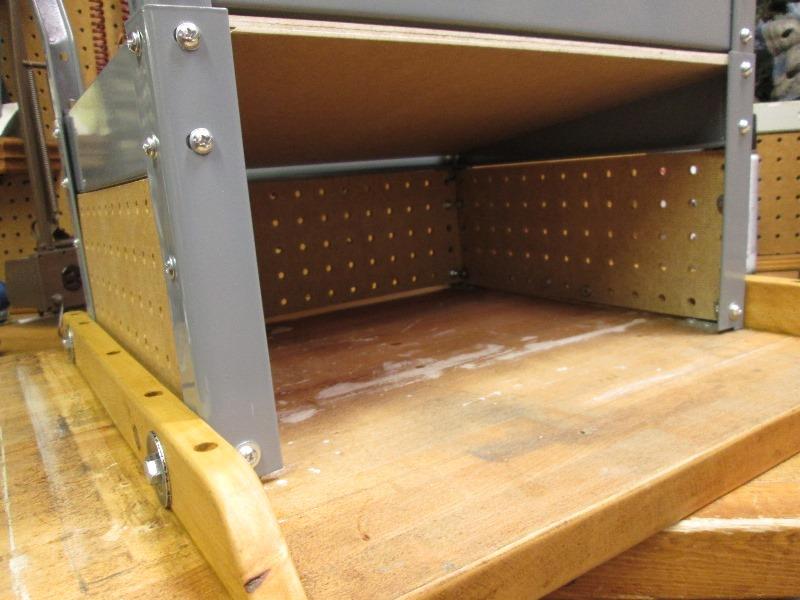
Either way front frame going below shelf. I only need to notch back frame. Use the screws and nuts intended to attach top so same as others. Cut new bottom shelf and start bolting together.
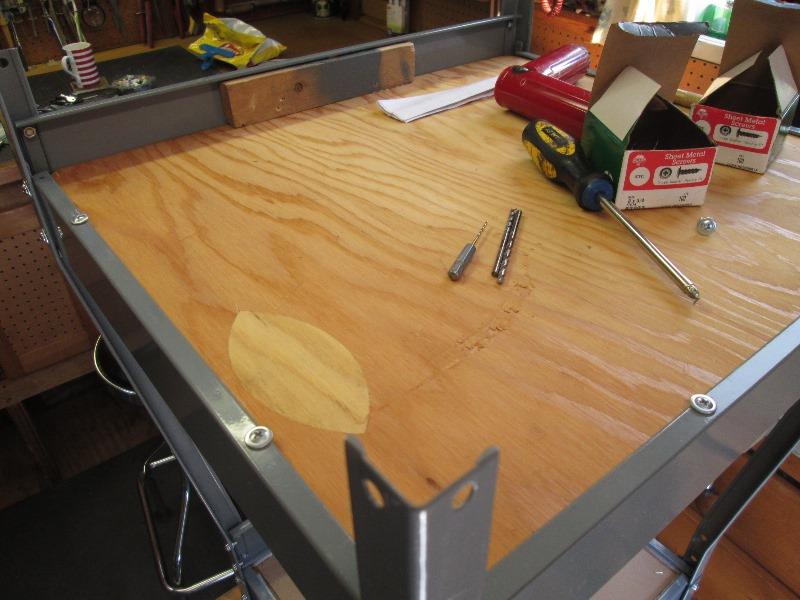
Using 1/8" bottom shelf as pattern cut a new one out of scrap 3/4" plywood. Then cut the original bottom to laminate to bottom of top shelf for more thickness. It will fit against back and side rails and set on front frame. Or shorter on sides and back so bottom sheet sets on front frame and top sheet sets in back and side frames. Lip.

Clear as mud...and fail. Front edge still didn't reach the front frame, that actual 3/32" thick verses 1/8" nominal. I ended up gluing on a filler strip across bottom front edge to set on frame. Effectively defeating whole reason cutting as I did. So what I should have done is just cut sheet same size as middle shelf, then add 2 filler strips across front. What I really should have done is just used piece of plywood, routed 5/16" deep x 1/2" wide lip across back and sides. This'll work.
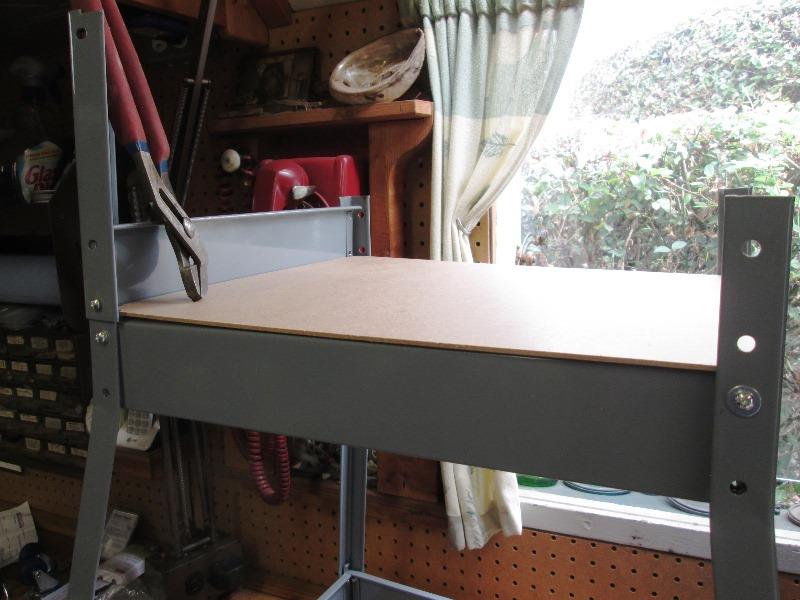
Need to coat shelves with something then look at the top. Been trying to ignore but getting close to adding. Uses 4 little L brackets to bolt to legs. Im not sure how many times you could pick up table without pulling top off. Second its a bit small at just shy 18"x20". Could easily go to 18"x24" maybe up to 30" wide and still maintain stability. Does mean replacing top I could have used as bottom shelf. This project turning into 'what I should have done'.
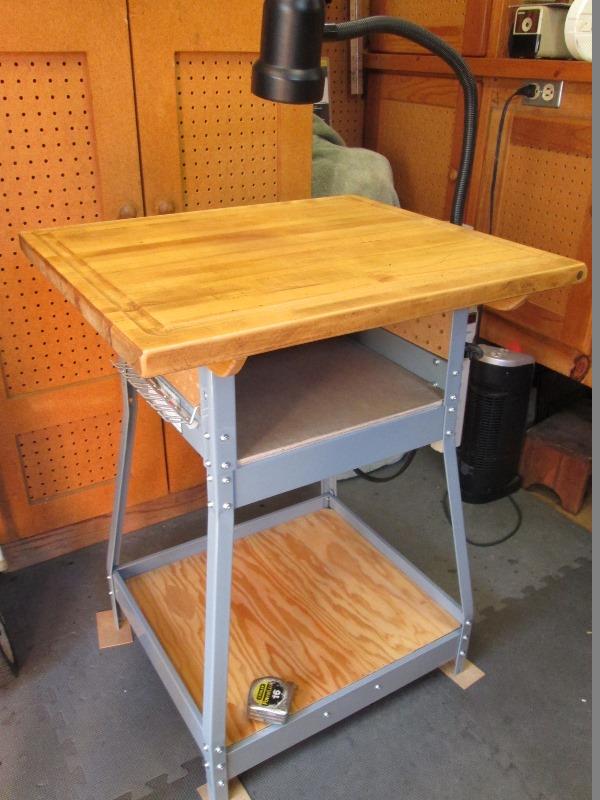
Then I found this...24" x 21" x 1" thick laminated butcher block cutting top. Originally from old portable dish washer, modified over the years for different cabinets, leaning in the scrap pile for at least 10 years.
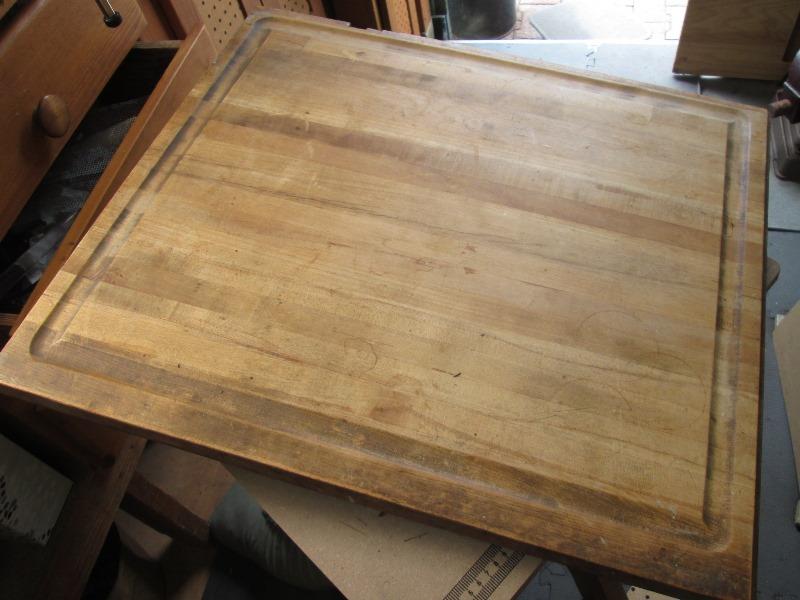
Gotta use it. One reason for this table is its smallness. Using the refound board will still keep smallish (I was leaning toward a 30" top) but give me 3" more depth & 4" more width. 1" thick super solid. Has a perimeter groove to contain spills, pencil, small screws. Extra depth allows mounting so wont need to get as close to table. Stoked.
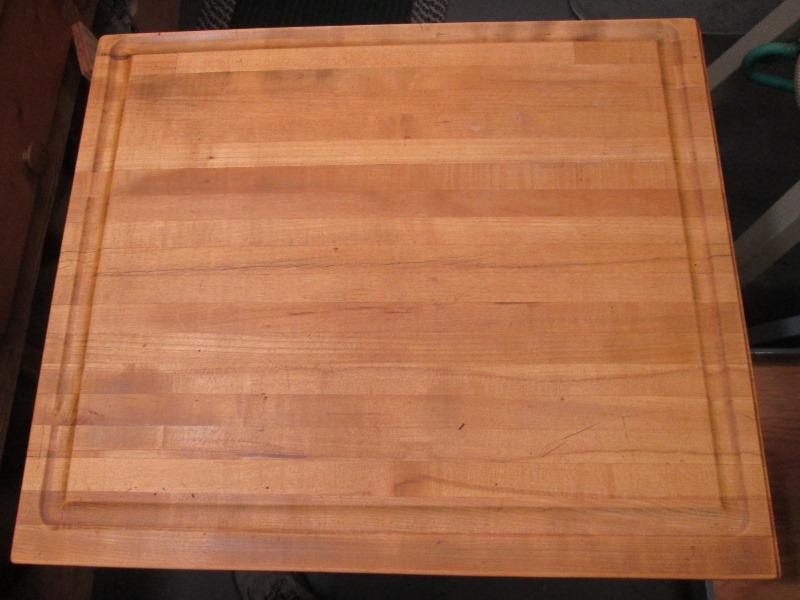
Spent more time cleaning up-stained, fluorescent lights, its not this red.
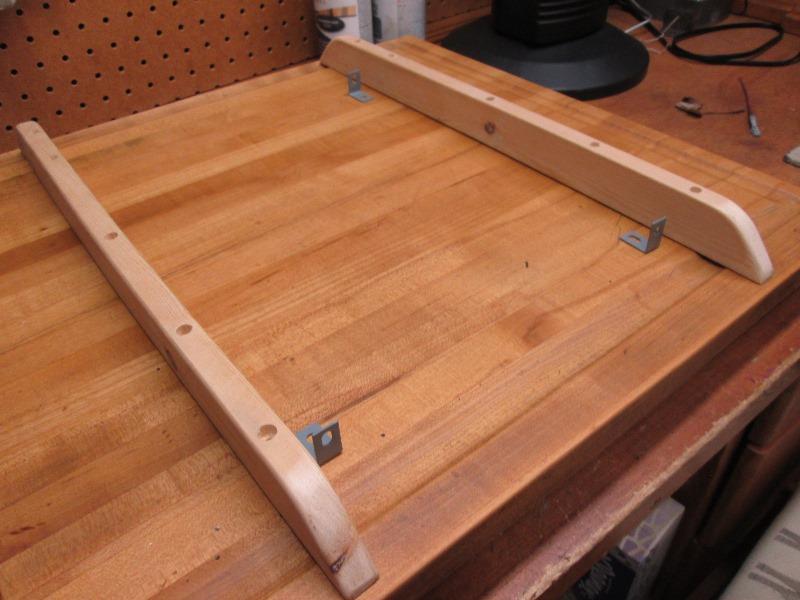
Cut & drilled rails that will be screw&glued to top with 2" bugle head screws, Slight counter bore the 1x2's so screws have about 3/4" bite into top. Table legs will be bolted to them. Also using L brackets, though not these.
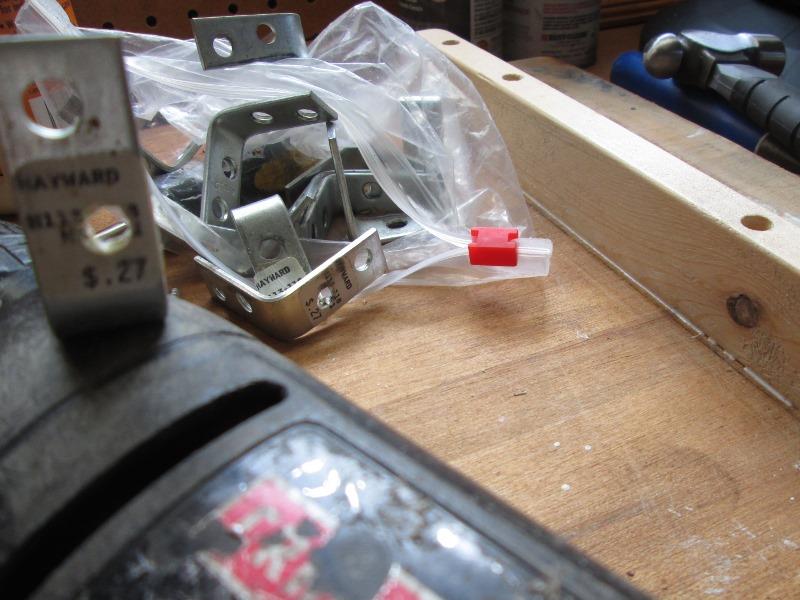
Have a bag of old 1/8" x 1 1/2"x1 1/2" with 4 holes, from swap meet. Legs will be captured by both sides of the angle. 1 1/4 bolts thru wood rail, 1 screw & nut thru L bracket that will be attached with 2 wood screws. That should hold it.
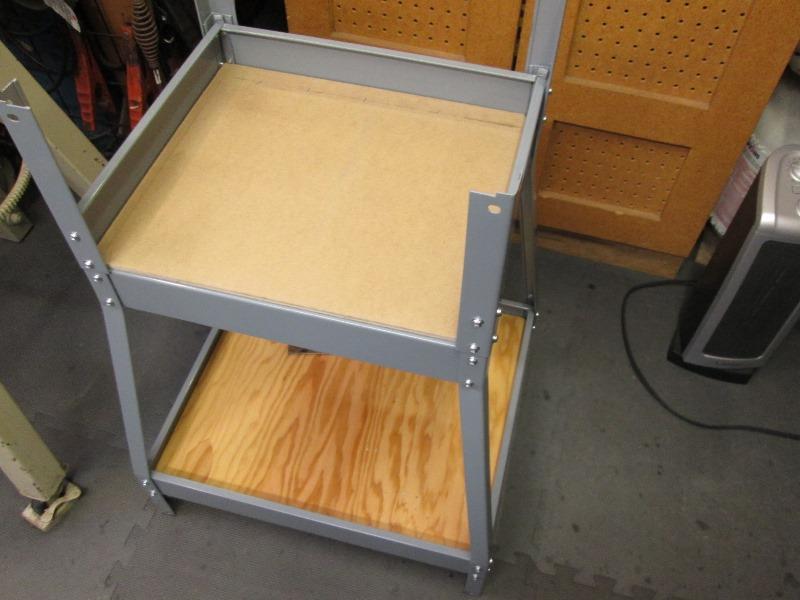
Table bolted together. Surprisingly it will rack a bit. Wasn't until I placed the 3/4/" plywood in bottom did it stay square. Likely flip upside down once top on and run a few screws thru the frame lip into the ply. Noted the grain runs opposites of top-oh well.
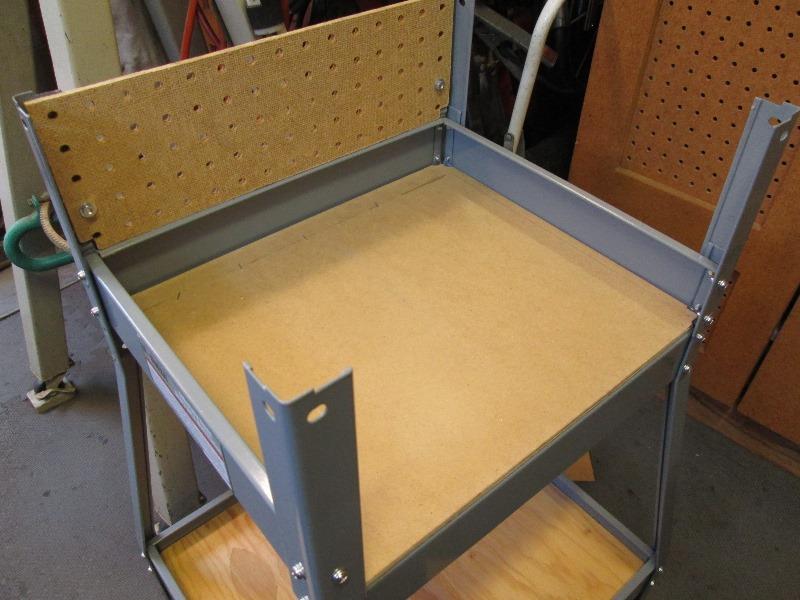
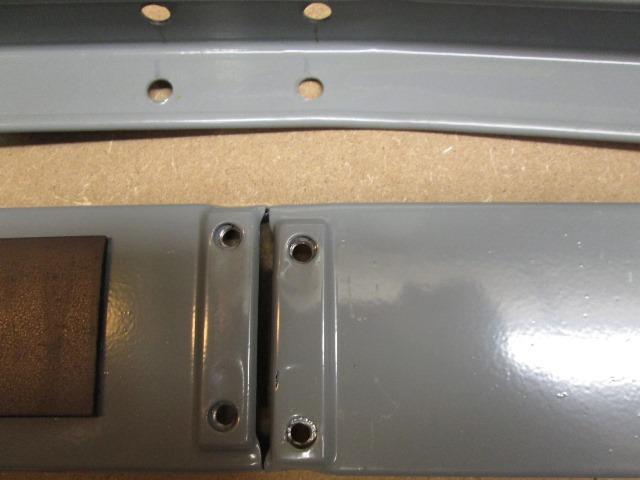
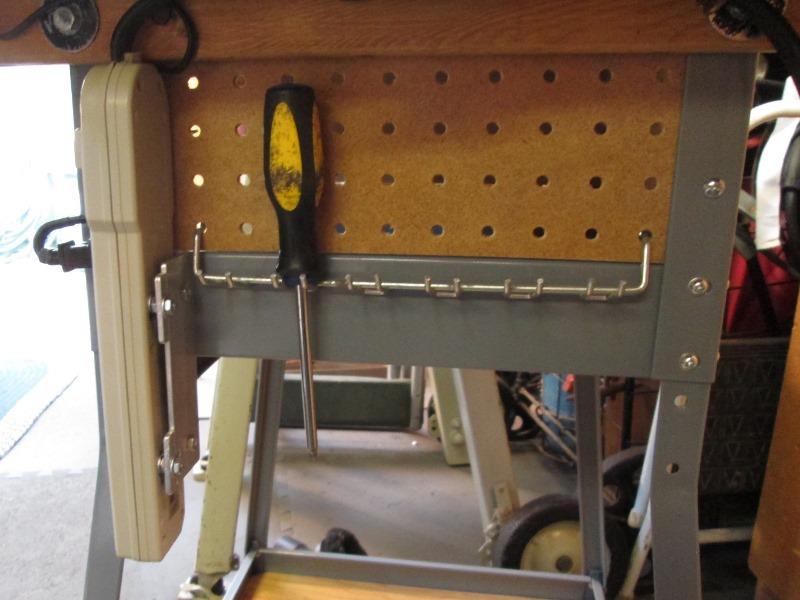
Decided to box in side and back of top with some scrap pegboard. Drilled thru height adjuster legs and used 8-32 nut and screw. Tops will be held by table top screws
Not realizing, where screws come thru in corners, nuts would be closer together due to extra 1/4" thickness. Made it a bit more difficult to assemble. Used 1/4-20 x 1 1/2" bolts with fender washers outside of rail.
Wiring
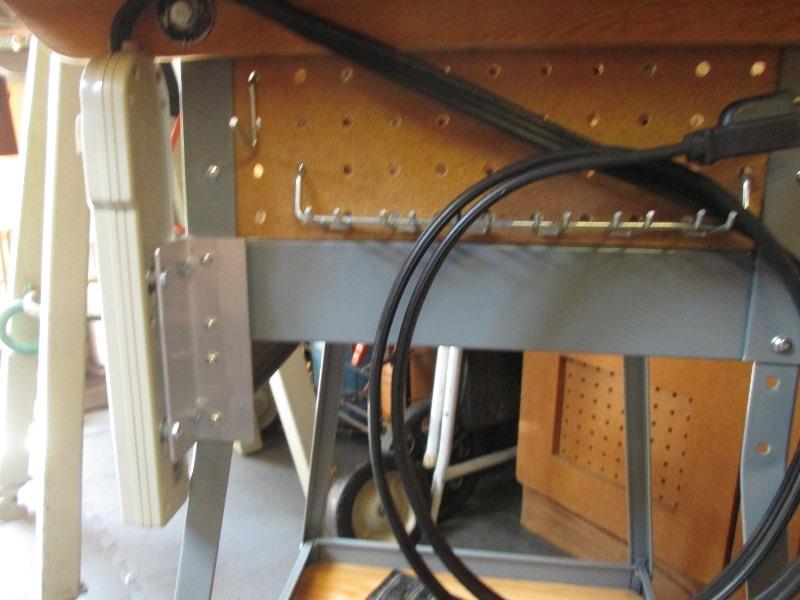
Added a power strip. Removed its 3' cord and replaced with a 6' 14ga pigtail from old washer. To the power strip slipped(4) 8-32x 1/2" truss head screws into its slots then washer and nut.Stud mount.
Used 1 1/2" aluminum angle for mount. Match drilled to power strip and to table leg screws. It was supposed to be flush to front leg but didn't take into account the 'tombstone' shape at top. Easer just to flip bracket than slot holes. If/when I come across scrap of 2" Ill replace, mostly so cords plugged in further back.
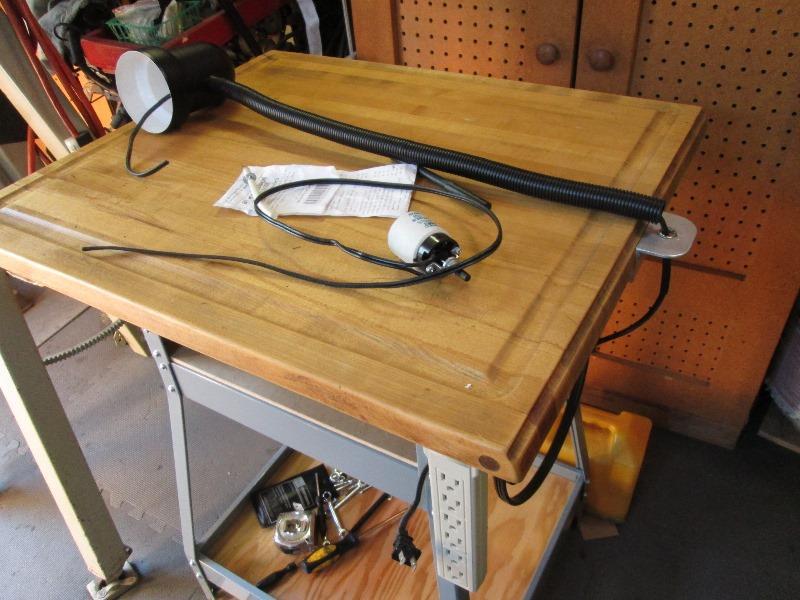
Adding lamp. 24" flexible goose neck Machine lamp, I had bought few of these awhile back, cheap. Intended to be hardwired they don't have plug so running new cord. Odd running new cord thru brackets nuts etc. Used a scrap of Al angle, notched the top (sides angle)
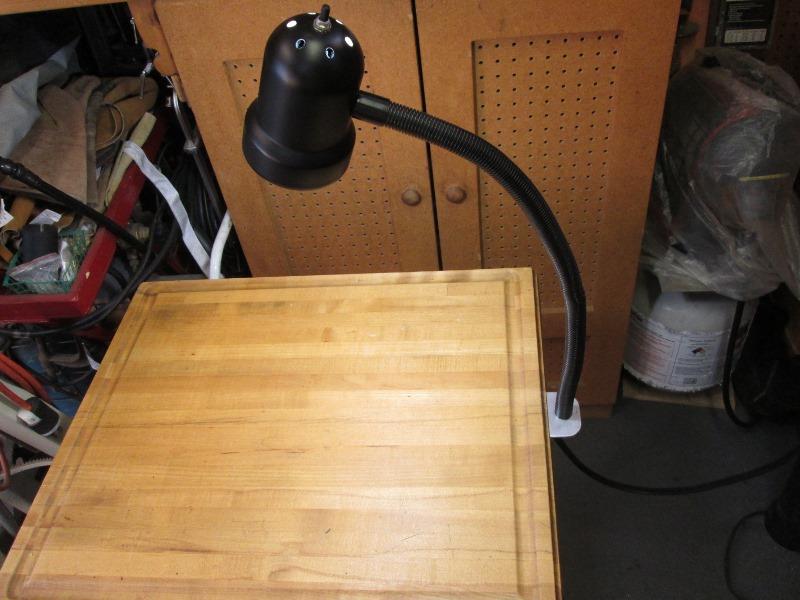
Wired. 40 watt LED, cool, clean, quite instant bright white...
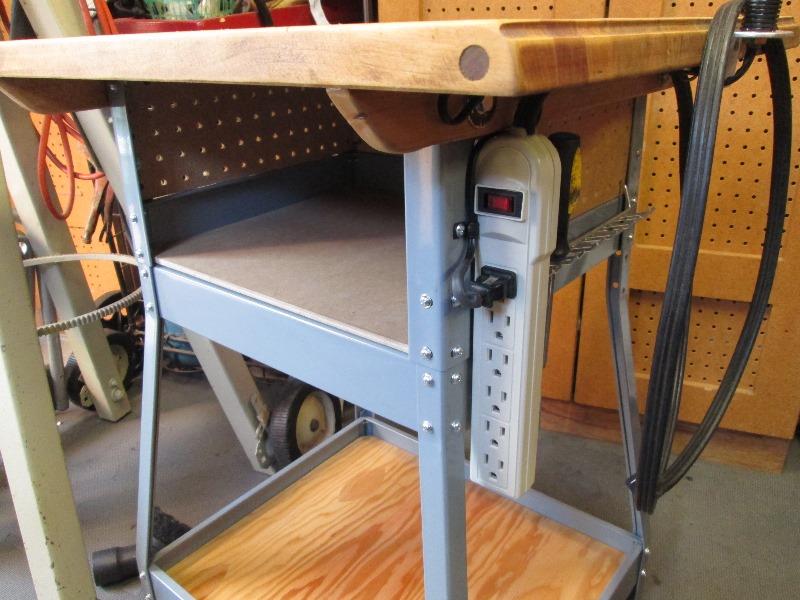
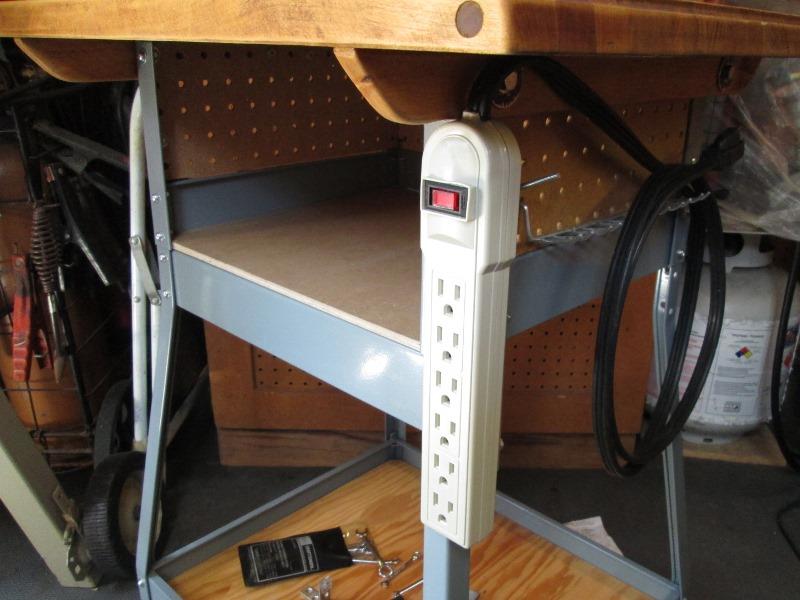
Sooner than later. Moved the power strip, twice. Keep hitting the cords plugged in. First I remounted so facing at right angle to front of bench but didn't like not seeing to plug in. Reworked the mount to place face forward but about 2 1/2" back.
Drilled and bolted thru the side frame, lead edge slipped (snuggly) in the gap between height adjuster and leg.
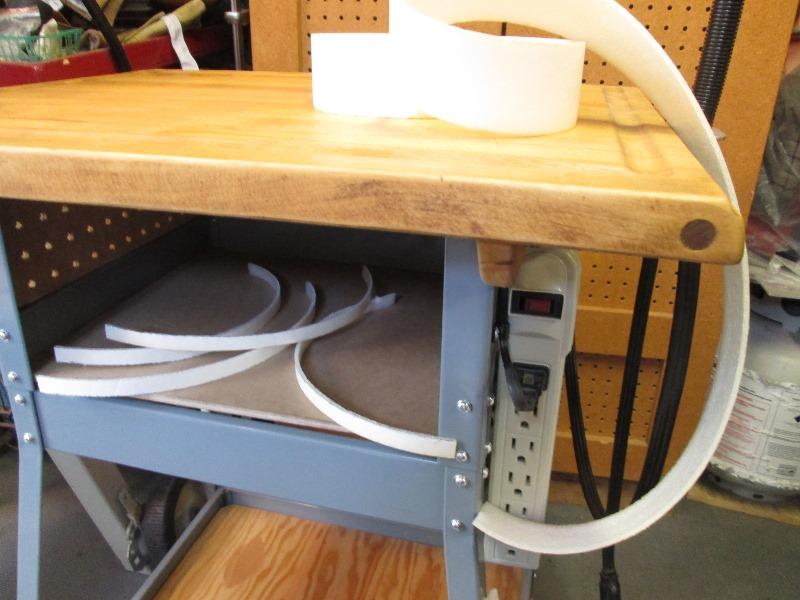
Regret not replacing the middle shelf- least little vibration, tapping etc and its jumping and making all kinds of racket. Annoying. Cut some old camper shell foam into 1/2"strips and taped to masonite.
Decided to move the front frame down under shelf on bottom like the top just to retrieve stuff without lifting over. Loosening the screws realized it could move down top screw to bottom screw hole, that would leave the metal lip on top of shelf, only have to drill one hole each side. Simple enough to start taking apart.
Almost worked. The 3/4 ply more than 1/8" too thick, tried slotting holes to raise the frame but couldn't get enough. Ended up having to remove the plywood and cutting a recess along front edge for frame lip. Actually better because its flush with frame lip-just extra effort. Adding a small 1x2 block behind & under front of shelf to set on bottom lip to support plywood as its not setting on anything now. Likely unneeded but the 3/4" plywood could sag eventually. Plus I could drill thru front rail into support to 'anchor' the shelf.
Glued/nailed block to plywood. 2 screws thru front frame into wood block, 6) 3/4" screws thru bottom lips into ply. Seriously took out ability to twist.
That's my table, may or may not help others, may or may not give some ideas. Few round to-its. Main one is getting some double lock casters on it. Soon. At some point possibly a half shelf on the bottom, lot of space. Drawers under top would be nice. I may just pick up some cheap tubs/plastic drawer boxes for small parts- but as I get to it.
Out of the box for the price, good start on table-I planned to modify from the get go. I did stumble on an older assembly post-apparently the frames etc used to be labeled as to orientation, would have helped considerably. But I wasn't to thrilled with the lapped frames etc so mute point now that its done.
Casters another project which I may document as they wont be a 'bolt-on'. Still pondering, assume it'll will need a perimeter frame to support
Last is a backboard with shelf- was planned but not sure now. Would make the table more intrusive. If I pursued it will be removable and adjustable. I may cannibalize old Craftsman chair for its back and the adjusters, just bent tube that slide into tubes. Bolt a board and shelf to it-done. Probably wont happen, I have more than enough 'lay' space nearby.
Back to top of this page
Casters added! Worktable continued
Back to Our shops mods/additions section