Modify Harbor Freight tilting fixed height weld table.
Primarily added ability to increase/adjust height. Then added small shelf to toss tools.
My mods:
Add plastic shims under tilt adjuster plates 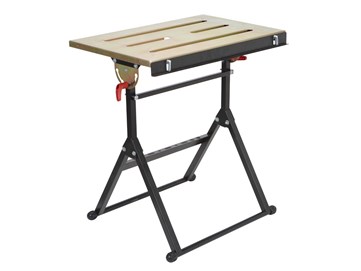 Specifications:
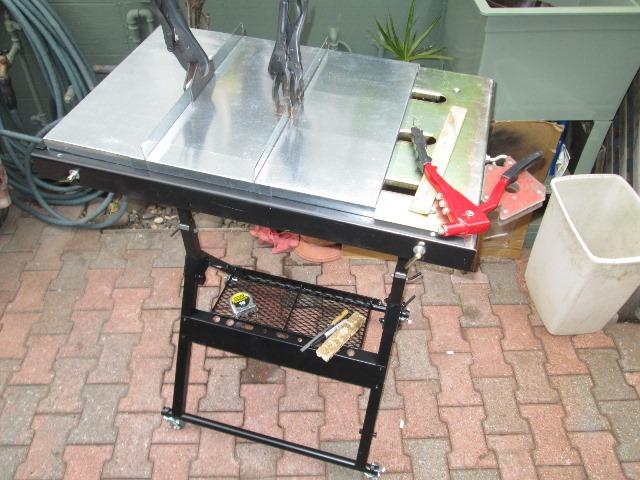
Harbor Freight #61369 Adjustable (tilting) weld table
Table Top 30" x 19 7/8"
Table height 32 7/8"
Rated 350lbs capacity- At 150# I wouldn't sit on table?
Table tilts 0°, 30° & 90°
Table legs fold for storage
Add locking/swivel casters (raising min ht to 35")
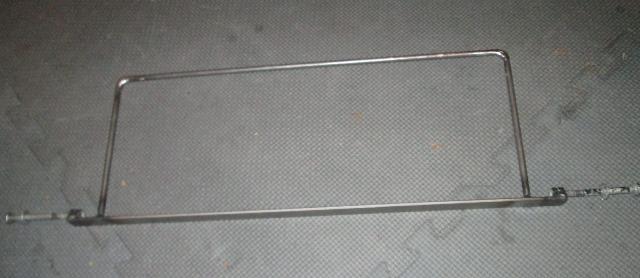
Slot & notch side guide rail
Add height adjusting posts +/- 6"
35"min to 41" max at 1 1/2" increments
Add debris tray under table
Out of the box-this section. Observations, assembly and other mics..
Add casters
Raise table Add adjustable height extension
Mics. Pins, table tilt washers, slot fence rails
Added leg retainerWheels cause legs to not stay in storage position
Add shelfLower shelf flips over for storing
Add debris tray Just slide in tray under slots
For price of materials and actual real needs decided building substantial weld table isn't going to happen this life time, But my little 14" square plate table that gets clamped in vise just isn't cutting it anymore. Though I'm sure it will still get used on occasion. I have looked at these before, Harbor Freight weld tables. For the price would make a (small) dent toward raw materials to build a nice table, but the real issue is simple no place to semi permanently seat a table-it also would live outside. For the price, portability and ability to fold up for storage, kind a hard to beat or make for cost and solves most concerns.
Went to get one few months ago (hour+ drive) but left 20 off coupon at home-they wouldn't give it to me for sale price so to show them I didn't buy. No I lie, actually I almost did, pondered it for an hour but spending the extra 20 couldn't get past. Figured maybe go on sale next trip or Id come up with something else. Plus I know or have yet to buy anything that's not self contained that doesn't require some modification, either to make work or how I think it should.
I look at some H/F products as raw material :). "Hobby Freight' anyway, table went on 'sale' again, picked one up. Honestly surprised me, given cost. Room for improvement though-typical lack of quality control. Only real main issue was the tabs for attaching the legs were welded a tad off center so one pair of legs holes didn't line up. Minor file to align. Instructions were good, however parts lists doesn't quite match as others have noted. Though improvement to what was originally supplied, changes aren't reflected in parts list-takes a little guessing.
-
Item 2: small washers, instead of 8 there are 4 (there are 4 larger washers not on list. Use large washers between table and table bracket, use the small washers for fence bolts)
Item 7: The general M8 bolting washers- there are only enough to do one side at each bolt, suggest picking up 12 more to add under head and nuts (5/16").
Item 8: M8 nuts, nylock except 4 which standard (non nylock). I was going to use to attach table bracket to angle adjustment bracket- but picked some more M8 nylocks.
*Not really a problem but fence edges overlaps at corner/bottom edge, one will need filing to bolt flush. (I'm actually going to add holes and tack another pair of nuts and notch fence so no gap in corner)
*Center slots are over open end of table vertical posts. Not a problem unless hot debris causes issue with adjustment bolt. I used a plastic tube covers for now, will eventually weld cap on tubes
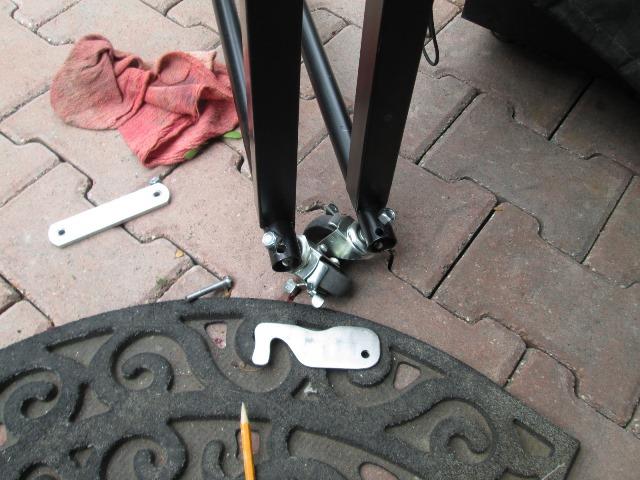
*Lastly is the adjustment knobs-because of the VERY slight engagement (1/32") of the stepped washer in adjustment plate holes they need to be pretty snug. Better or different handles down the road. For now I bored out 1/4" washers (OD matches diameter of stepped washer protrusion) to add each side for positive engagement into angle bracket holes. A pain but table wont fall. I may drill a mid hole and use lynch pin to ensure table locked-I don't trust the stepped washers or plastic handles-especially as it wears.
That's my critique. Many things could be done to make more functional, bottom line for the price, portability and storage nice table. Great starting point to customize, but it works. My only real complaint is table is just simply way TOO short. So I addressed. Hey I have a welder.
So the Harbor Freight table, to save cost and effort, as usual became another project...

Parts is parts.. laying everything out making sure I had everything before trying to assemble is when I noted discrepancies. Identified what to use where and to pick up at hardware store.

First during assembly, as noted aligning leg holes due to brackets being weld on a tad off center only snafu. Everything else went to together easily. I had to unbolt the legs swapping position, thinking possibly they were different before noting the welded tab was rotated. Small file to enlarge leg hole, fixed.
I cut up some plastic (milk jug) to make shims between table bracket and angle brackets. Just makes rotation a bit easier while keeping snug. Possibly saving paint and stave off rust. I would have shimmed legs if there had been room.
When I dropped table onto legs is when I noted the open top of vertical tubes is under center slot in table. This allows material to fall inside tube, problem because of pivot and adjusting tilt bolts. I had some plastic caps, inserted for now -eventually Ill weld caps to top of vertical tubes.
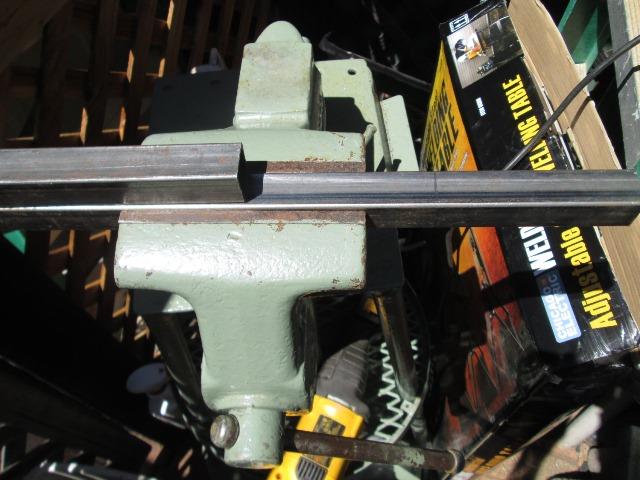
I used table to fab up some small 'thumb' bolts for my plasma cut table I'm building. It also breaks down for storage but top bolts required a wrench though they only need to be finger tight. Making the thumb bolts-just welding flat bar to heads makes tool less assembly/takedown. However point is it became acutely obvious I need to address table height. This would kill me if were standing here couple of hours.. But using the table was nice. The slots nice for accessing and clamping.
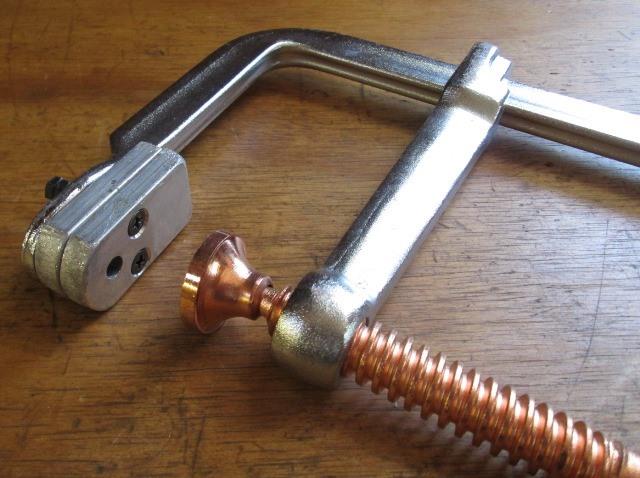
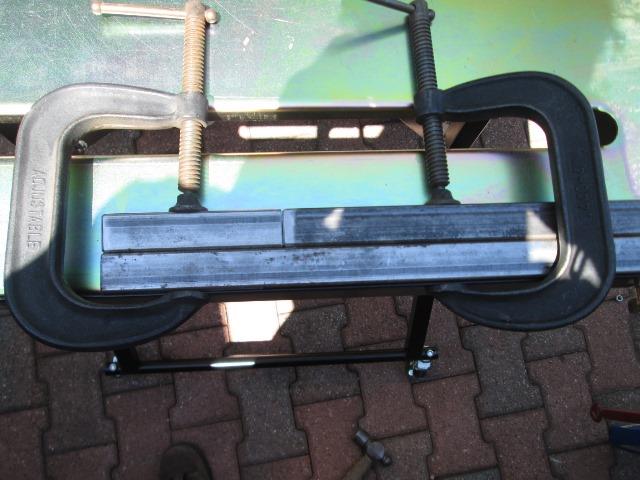
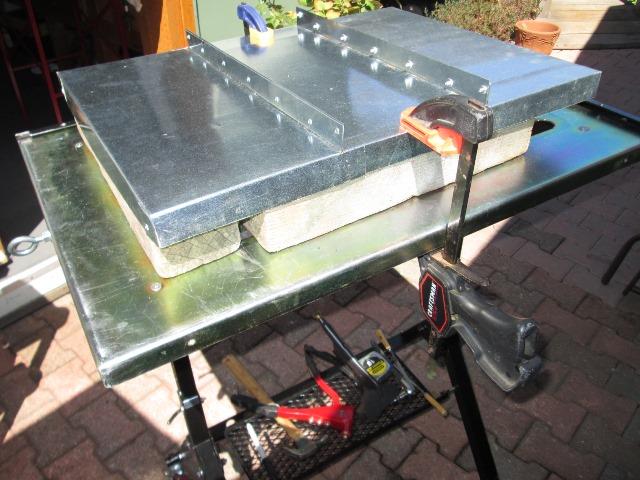
Though F clamp wouldn't work due to folded lips of table slots. Scabbed a couple of re moveable blocks for it to use with screw on top. F clamps just bit more reach-less intrusive sometimes trying to hold stuff you can get between like fingers. They can be aggravating but more adaptable-all about options, however usually Ill grab a C clamp first.
- But back to the table and they whole point of this page-adding to height of table.

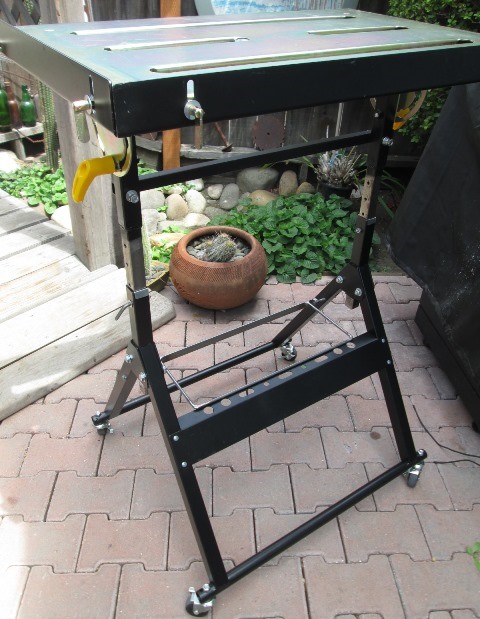
Using swivel locking casters at all 4 corners. Mostly so I can easily spin table in place , will make moving around easier. Removed the plastic feet and discovered there are already holes? Unfortunately they are drilled at angle of legs. Other than tweaking, causing wheels to act odd, cant use because of the locking feature (hit floor). Redrilled a bit inboard, and tapped tube for 3/8" thread. Threaded caster thru tube then used peened lock nuts as not enough thread stick thru for nylocks. My thought was threading casters might counter squashing tube. I may still sleeve later..
Works pretty slick, easy to move around & maneuver when welding for position. When I put table away think I figured why drilled at angle. When legs folded wheels hit each other, wont roll. If installed at angle would roll when folded though may not when open. Funny. As my concern its rolling in place/ use rolling folded not an issue-just odd. Either way if casters added needs a retainer to keep legs together. Ill add a piece of flat bar pinned to one leg (done), drop catch on other leg. Or maybe just a snap buckle strap..details. but wheeled nice.
The additional height from adding casters however virtually made no real differences as far as welding. Still bent over quite a bit working small items.
Back to top of this page
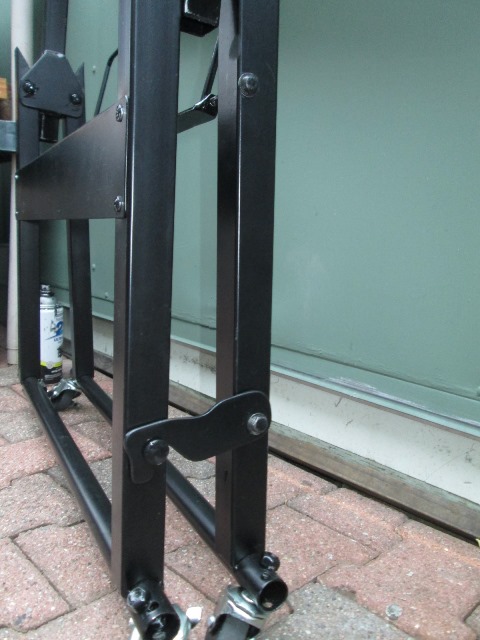
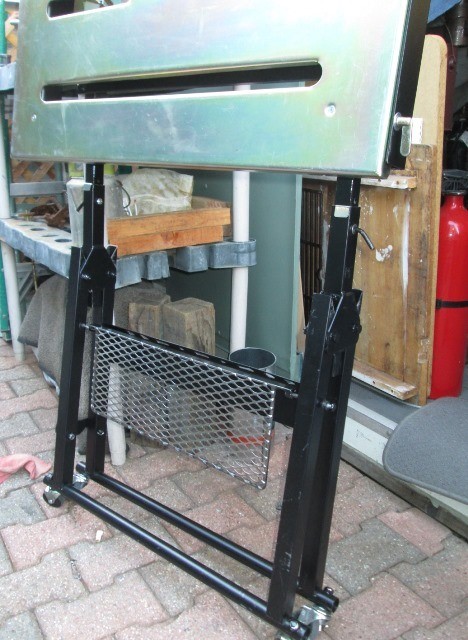
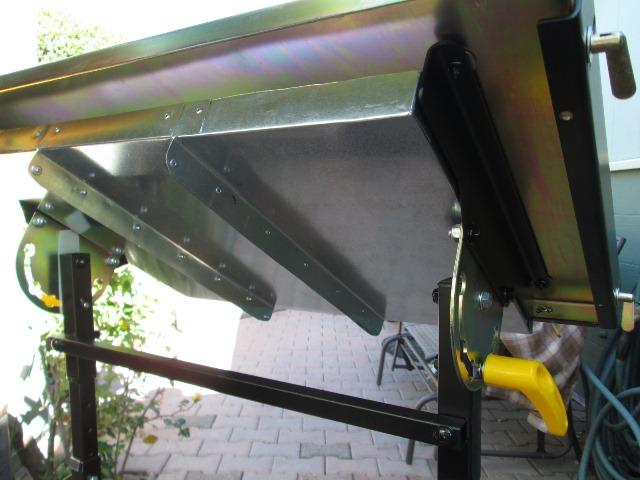
- Final, raising table turned adjustable height
Eye balling what I thought I was going to do was add pieces of 3"-4" flat bar welded to table bracket and bolting to angle bracket. Or just make an entire new extended table brackets. Which would work, might need additional cross brace. But looking at scrap material no plate or flat bar. I did find 2 pieces of 1" tube, one 12" & one 20" long.
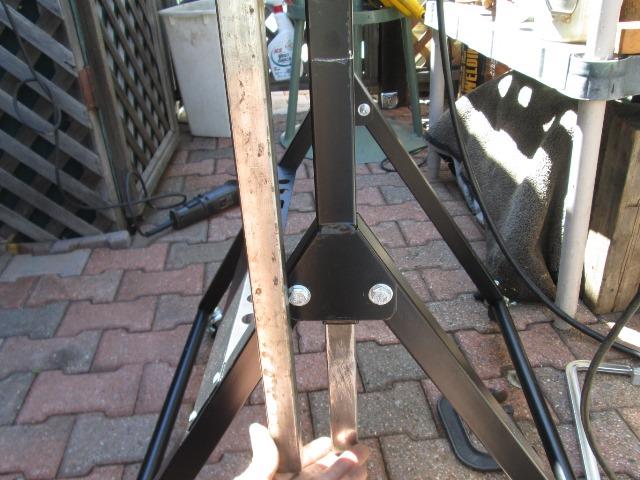
That would be even easier. Simple, Cut verticals, insert tube and weld. Simple is good.
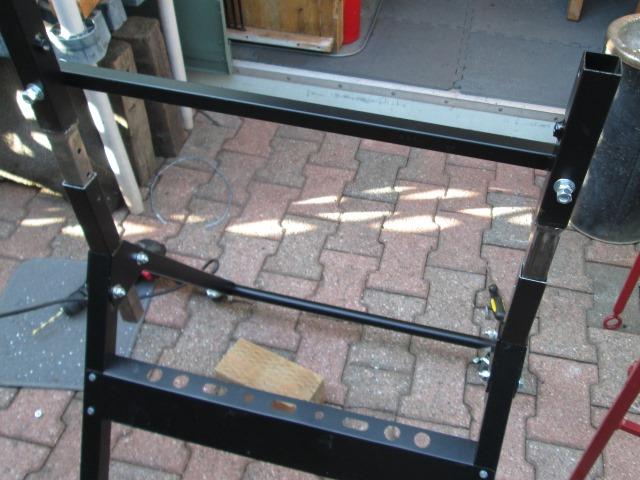
So that's what I did. Plugged in the sawzall and cut. Here I'm trying to get height, as one piece of tube is only 12" trying to get height with maximum insertion into both ends of cut tube. Butting up against the bolted cross brace I was going to remove it, drill tops of new tube and rebolt to hold tubes in place. Then reinstall table top slide assembly up until I got height I wanted and tack the lower tube. Then weld out. Wasn't until at this point that it dawned on me that I could make adjustable by pinning lower tube instead of welding! Hokey Smoke
Problem is the one 12" length...I could get more tube. Hmm laying it out...
If I cut off half the difference between the 2 pieces, weld it to the shorter piece Id end up with 2 16" pieces. That would give me, with tube inserted butting up again cross brace bolts ability to raise table up to 6" and still have full insertion thru lower tube (to minimize any movement as it is a bit undersized). "Proof of Aliens"...
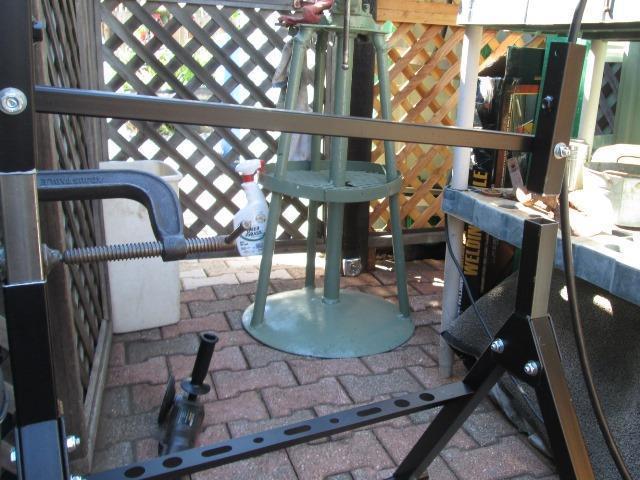
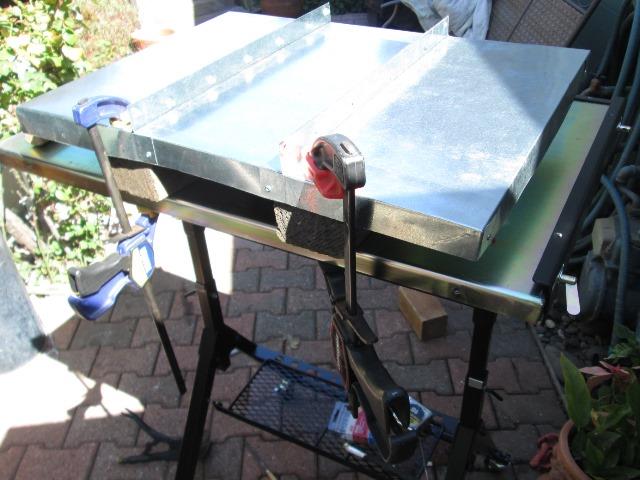
Beveled ends & jigged up on new table. The fence is nice, added 2 more clamps to secure down to table then welded face. Found new use for slots, nice, rolled tube over with weld bead spanning slot, clamped & welded opposite face. Welded remaining side. Ground faces flush. No twist!

Decided to weld with legs assembled. Sat table top on another stand. Here I am jigging up, preparing to weld the wrong end! Good grief.
Got it. Debating if I should drill and plug weld. Could remove bolts, possibly weld enough thru hole to ensure weld isn't worked...maybe with stick welder.
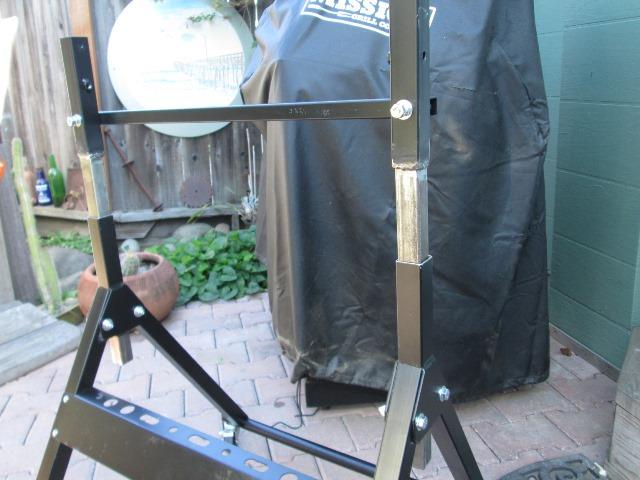
Really wanted to do this on press. Other than disassembly (again) a lot of movement so drilled by hand. Starting with legs fully inserted drill thru inner/outer tubes. Then slide up 1 1/2", making sure both sides at same distance drilled inner tubes again using outer existing holes to place. Did this till fully extended. Match drilled. Slipped in 1/4" bolts. Range is 6". Stoked. Simple is good-adjustable better!
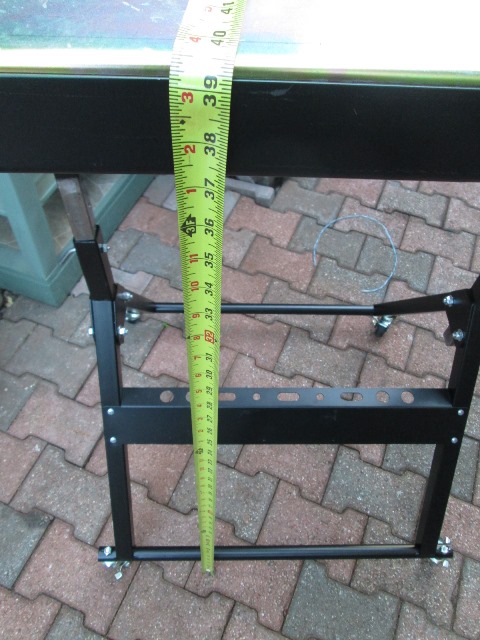
Set at about 39 1/2" where Ill probably use. Can go up another 1 1/2" to 41" or back down to 38", 36 1/2" or 35" (or 32 1/2 if I removed casters) . On the adjustable side though and have casters (for shorter person) could cut off some of the lower vertical (compensating for caster height) and get full range of adjustable settings, But I'm done! Adjustable table height.
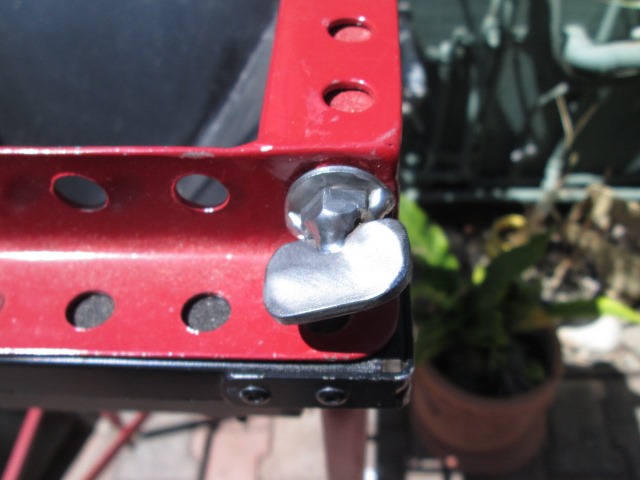
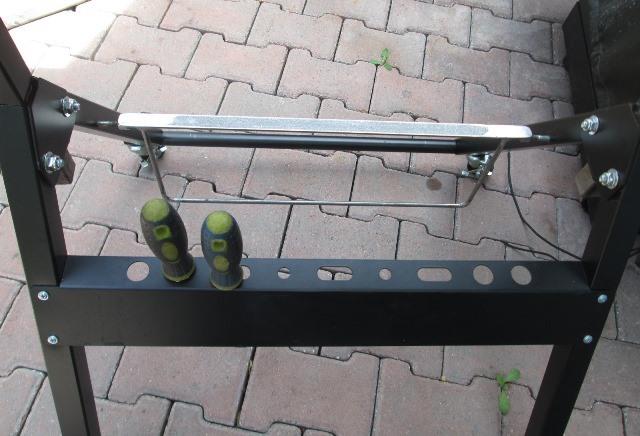
Mics.. detail pins, adjuster washers, slot fences and torch holder
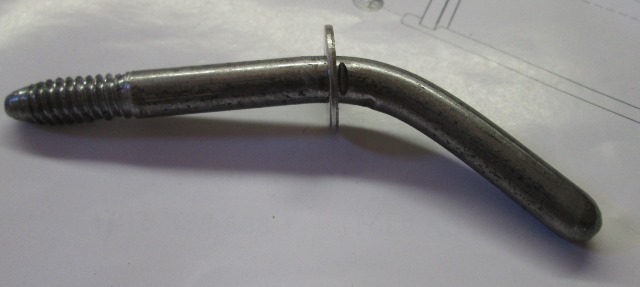
Bent, tapered and threaded some 1/4" flat bar for height pins. Pinched to use a washer. May get some lynch pins with spring loaded ball, for now using wing nuts.
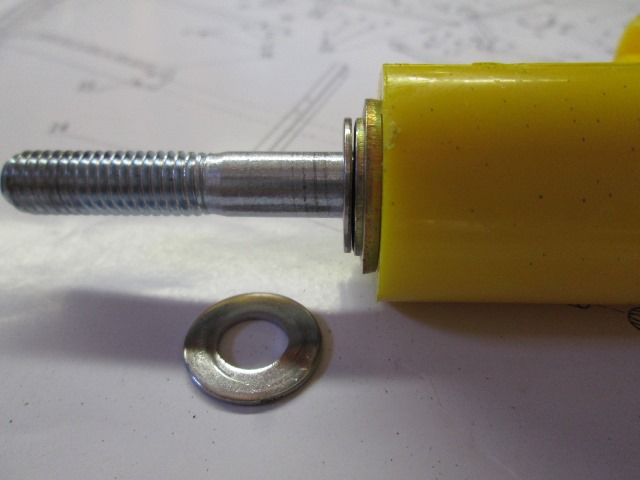
Just picture of filed out ID of added 1/4" washer for better engagement in the angle adjustment brackets. Also decreases tightening needed for engagement, save the plastic handle. Need to try and fuse to stepped washer. Works well-just takes "more" wiggling to remove when using. OR..as I'm writing realized simply staking bolt so when adjuster unscrewed 'pulls' the washers out of adjuster brackets (whether or not you add additional washer). I'm adding tack weld, then file flush so outer washer is fixed. You could add washer between stepped washer and plastic handle to still have free spin. Down the road nicer handle/ knobs and easier positive engagement/disengagement is planned.
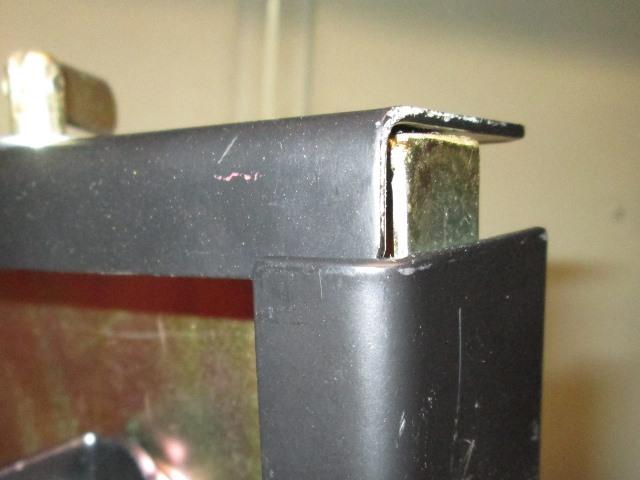
Last 'issue', if fence used legs in they overlap & interfere with each other and wont set flat. Minor filing of one edge will address. Or just use legs out.
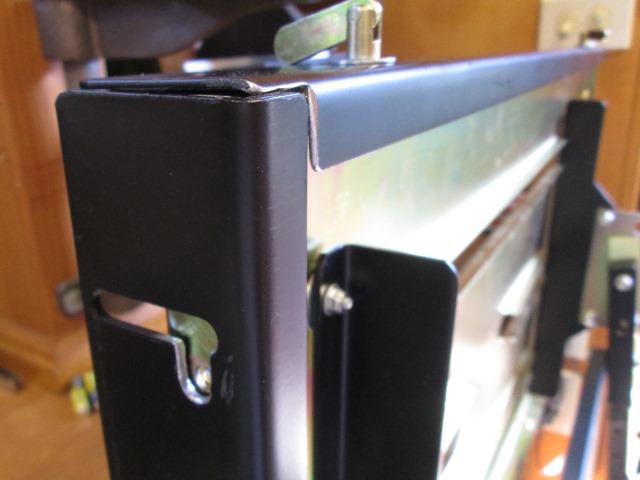
Then decided to notch front fence and add horizontal slots to existing vertical slots to on end fence. Allows closing up corner gap in fences if needed/wanted.
Table done though want to add simple torch holder but may make something the bolts on to one end. Probably with small tray to catch some of the small stuff that seems to end up on table ( and thru slot), chalk pencil etc. Anyway that's my table and adjustment mods so far. Pretty simple.
A thought on the fences- I would have never added if building from scratch, however in use the fences are really nice. One is due to table outer edge being round working with thin gage, metal on edge kept slipping down, using fences with bent leg in on top allows keeping edge from slipping down and still have stop. Just handy.
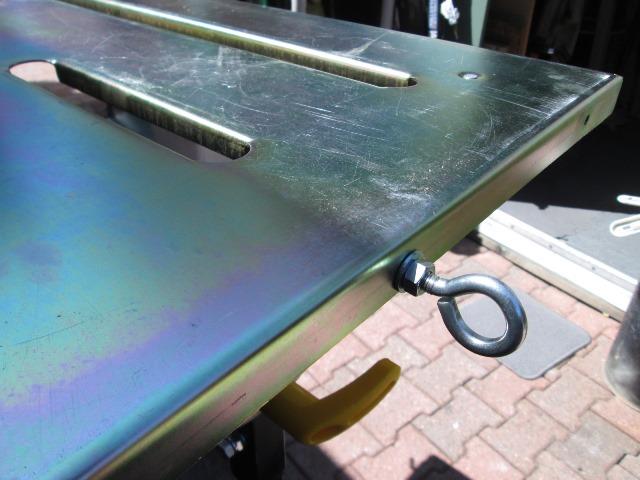
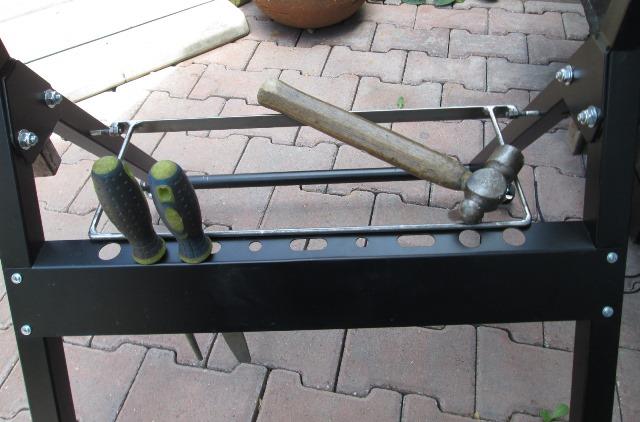
One more...temporary torch holder.
Quick and simple, keep laying torch head down-what's that sound? as welder is spooling out wire. Drilled and tap table edge and at ends of fences. Using a 5/16" eye bolt for some place to stick the torch till I get 'around to it'. I am making a small shelf to set between legs. Pivot between rear legs, swing over & set on front 'tool' tray (leg brace). Simple round bar frame for grate or expanded metal shelf. Finding with the larger work surface I keep laying stuff on table. TBD
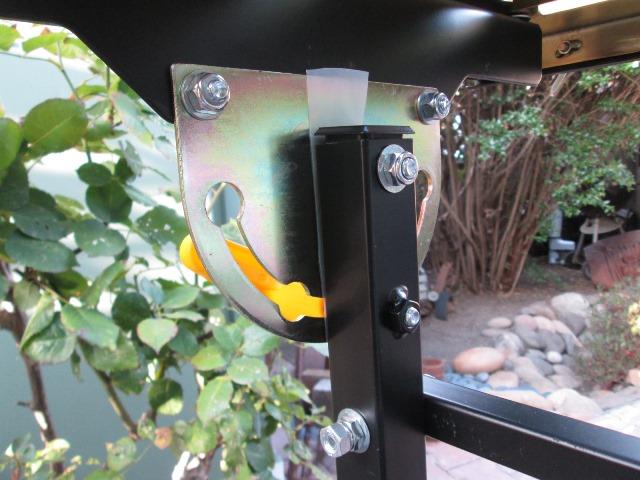
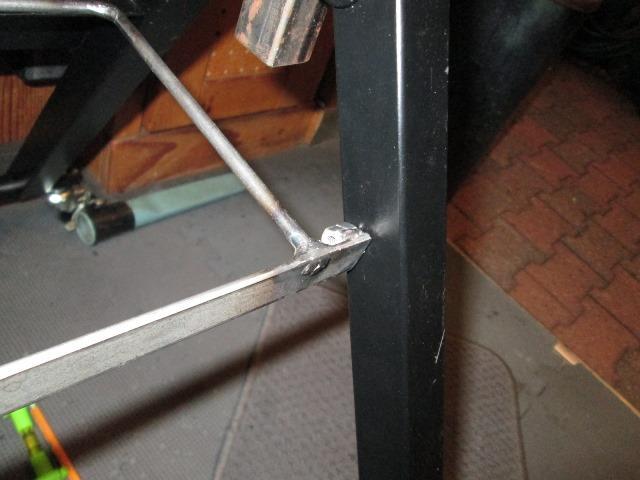
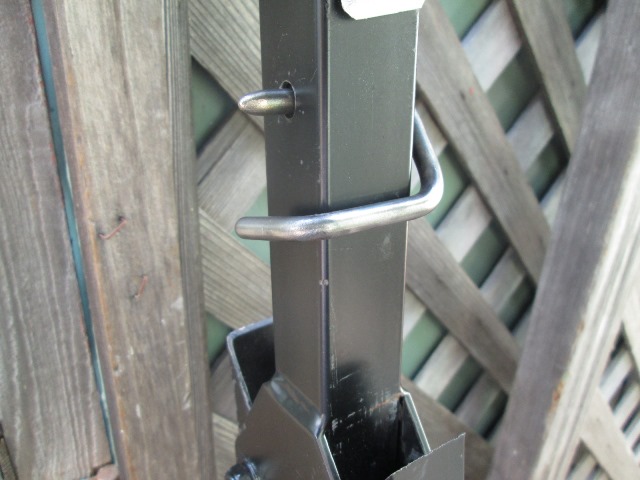
Retainer to keep table legs collapsed
Due to the wheels the leg wont stay in the folded up position. Been using twine to tie legs together. Playing with different materials to make some kind of stay, found this scrap of 1 1/"2 x4 1/2" flat bar. Perfect. Shaped it a bit, drilled pivot hole off center and mounted a bit higher than pin to ensure stays engaged.
Was going to weld a pin but just used a 5/16" carriage bolt with a washer under square.

Touched up paint, painted most of the bolts.
Kind of fun modding simple table. I'm sure Ill be scabbing more stuff to it as needed. Might be replacing the tube cross brace with flat bar for hanging grinders, definitely something better for torch. One is folding up some sheet metal to make a tray catching debris from center slots, or at least shield redirecting so not falling on center shelf or hanging grinders. Also save not having to cap tubes where hot material may foul tilt adjuster bolts.
Like this..
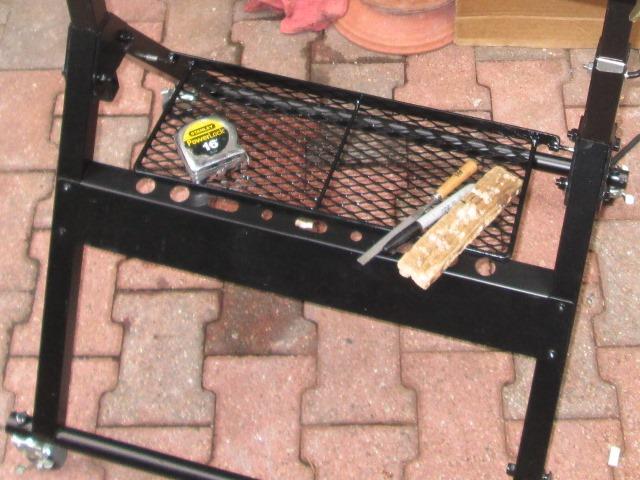
Add flip over tool shelf
Swing shelf..used flat bar on the back side, welded 2 nuts each side, bolts will go thru legs into shelf. Dang, think this might work, Just scabbing together, but getting late I got in a hurry.
After putting tools away held up to drill holes-oops. Welded nuts were supposed to be on back side of flat bar, top was to be flush for shelf material. Short of cutting off and redoing think if I flip upside down it will work, raises nuts so bolt hole should ok due to angle of legs. Will put flat bar edge above shelf. Maybe it will appear the ledge was 'planned'...
I just stopped. Clean up tomorrow and decide if worth redoing or use as it is.
Well, I must be angularly challenged. Lined up and drilled legs with rear lip up, but when I went to bolt I checked, flipped over and shelf reached front and was level so bolted leg down (as planned) worked? Don't understand-but Ill take it. Make tacking on shelf material a lot simpler with perimeter support. Anyway shelf bolted on. Front 'tray' still usable, good for files that Don't like weld splatter.
Just swung up and over. Seeing it finished I should have run the flat bar longer and bent the ends. Works fine, just the long bolts looks odd. Probably weld on some sleeves for the heck of it when I add expanded metal to shelf, maybe.
a puzzle
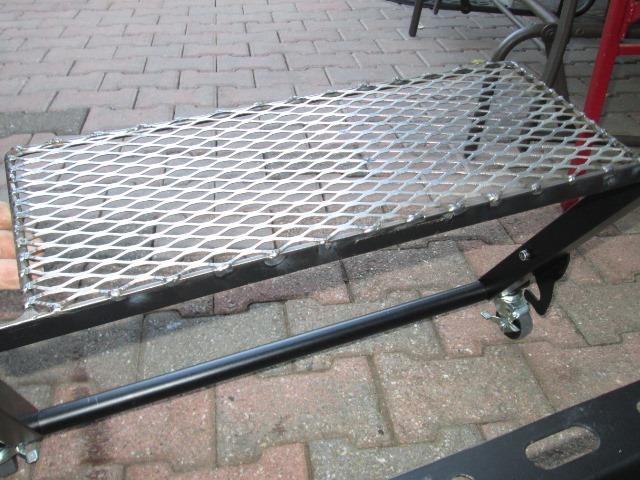
Update: Welded expanded metal- flush to top as planned.
However as shelf will go on either way, I'm going to use like this with edge up. Keep pencil/sharpies at bay.
Minor to-do. Need to add at least one spreader before I paint. Used 18ga expanded metal to keep weight down, its only 7" deep but it flexes/sags enough with weight to pull in centers of flat bar and round bar. Kind of surprised me.
Having another place to lay stuff worth the effort I think- I like it. Flops over & hangs when storing. Flip over if wanted.
Spreader added, cleanup & painted. Handy. Though sized by scrap material I had and wanted to stay away from legs, easily could have been 2" wider. If pivot bolts on side of tray could have extended out back another 2 or 3". Next time if I mod another table.
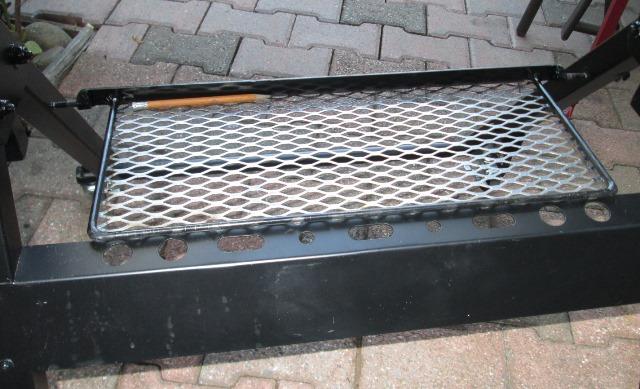
Debris Tray
A tray that slides under table to catch falling debris and sweeping off table.
What I had was a roll of 10" galvanized. flashing. What I came up with was 3pieces to make a 23" x 17" tray. I have 23 1/8" between table brackets. Distance from table bottom edge and top of tilt brackets plates about 1 3/8" so tray can be 1 1/4" deep. The 17" just random number to minimize material but cover slots in table. Drilling some short pieces of angle, using tilt bracket bolts to hold for tray to set on. But first bending up tray- assemble to ensure it fits works.
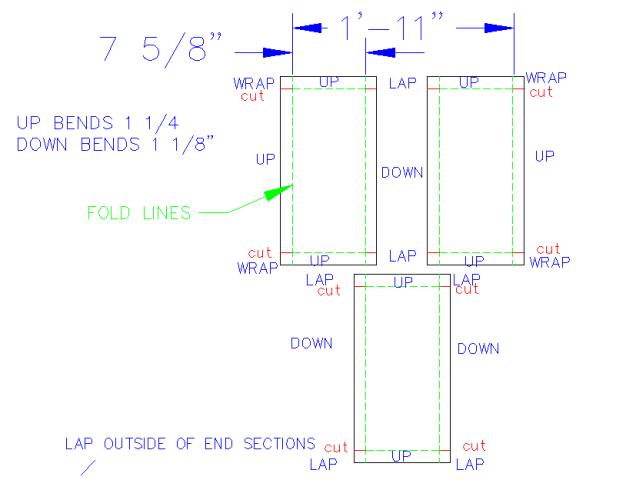
Lay out for material
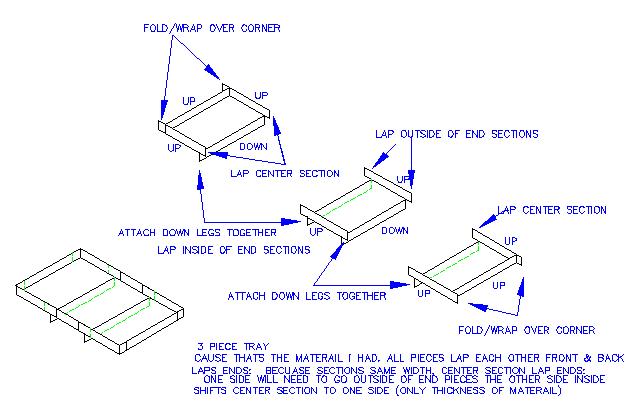
What I think will work...
Really like bending playing with the simple bender I made- figuring out the bends & numbers & sequence though is a challenge. Lay it out, if each piece 7 5/8" wide with 1 1/4" perimeter fold gives me 1 1/8" to join pieces. Decided to bend center folds down, wont divide inside of tray up, might be a little stiffer. All corners cut only in one direction to bend over lap the corners and other pieces.
After bending the 2 end pieces checked and I was larger, each piece had 'grown' by almost 1/8". Trimmed off 1/4" from center piece before bending to compensate. Cant get a handle on allowance for bends...

But bent. Some of the bends, corners, I had to rebend in opposite direction. Ready to assemble. Set up on weld table with fence legs flipped over. Worked slick to hold square and away from table top edge. Really could use a spot welder. Have to drill by hand and as I cant drill in place/assembled to match drill due to inside bends. Ill have to drill one flange- then mark and drill matching flange. Good luck with that.
Rather painful, well time consuming not really that bad and yes I had to enlarge or file most of the holes to align rivets. Using rivet washers (#6 flat washers) but opened up holes under the head side.
Centers riveted! Jigging up back support to drill the laps. All the time I was doing this all I could think of is this would have been 5 min job with spot welder...
Last 2. I actually got on line and was looking at spot welders. Cant justify the cost, but this little tray was 2 hours of drilling & riveting. But man-would have made mince meat out of it. Especially for holding stuff together even if some rivets needed. That and some things I think of making its the assembly that makes it not worthwhile. I think a spot welder is in the works if I keep playing with the sheet bender
Project at hand Br>
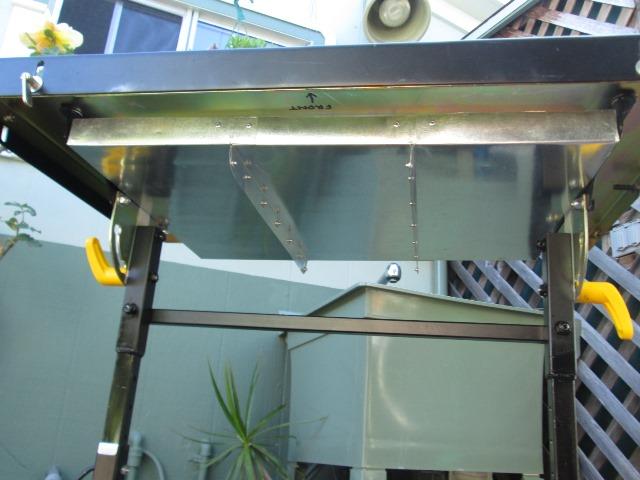
Hokey Smoke- it fits! I Tray ended up at 23 1/16"...to fit a 23 1/8 slot- WOW it sets on top of the tilt brackets- without out additional support, Simply shear luck. I was trying to keep under 23" to ensure it would fit, when I trimmed center sheet to compensate for how much the ends grew I didn't subtract that amount (just shy 1/8" each ) from it. I will still add side supports later but right now it works setting on edges of tilt brackets! Couldn't repeat for the world. So though likely some angle for greater surface it could be anything just to make sure tray doest slip down.
Other thing I hadn't allowed for is when tilting. But tray is stopped by fence with only small amount below table edge. Sliding tray out, its JUST clears the table. Cool. But just to keep tray from sliding back & forth when I next have table and welder out Ill drill a hole thru one table bracket & end of tray tack. Tack a nut, probably to tray & use thumb screw. Kind of nice, something falls thru easily slide tray to retrieve instead of searching the ground.
Welp that's my Hobby Freight welding table.
Usage updates
Table is awesome-well not so much 'this' table but having a dedicated table specifically for welding is almost more of a tool than just a work surface. Never thought of table as that. The ease of setup etc just a lot less time spent trying to jig stuff.
In use and wear my adjustable height has gotten a bit loose, mostly the difference in tube sizes. Getting a slight bit of wiggle from the tubes using single pin so possibly incorporating some cinch knobs which I should have from the get go. Located cinch knobs at the top rotated 90° to pins, move the pins to bottom. Thought the length of insertion would work-wrong so I get to rework. Minor if I cant live with it or gets worse.
At some point adding a removable sheet of plate. Sometimes its nice to weld items TO table, like for bending etc. and I wouldn't to this. I could utilize a serious table though most of my stuff is small fab work. If I had room Its still on my wish list.
Bottom line out of the box does what I wanted. Mods are just me. Though really I only added this page because of the simplicity of raising with some 1" tube. I surprised how often just as an extra work space I grab this thing.
Usage updates II
Made new height adjustment pins. The original pins I ended up not using the nuts to secure. I had thought nutting would tighten legs but slop is in opposite direction so using the nuts does nothing other than holding pins in and making one more step.
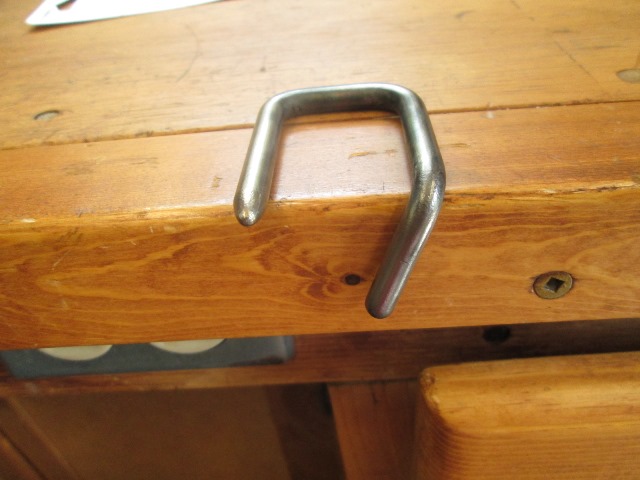
Heated and bent 1/4" rod after taper end around 1" tube.
Work nice, self securing, could use lanyard. A lot simpler to use
Did find some old 1/4-20 knobs. Next time I have welder going, and motivated, drill a clearance hole thru one side of external tubes at right angle to and below pins. Weld on half 1/4-20 coupler nut for more thread engagement to each leg. Already have a strip of sheet slipped between. Should solve the free looseness just snugging knobs. Maybe-the slop bugs me cause its there, but its really barely noticeable. Good rainy day project when so inclined.
Back to Our shops tool mods section