Add Automatic Drain Valve to air compressor

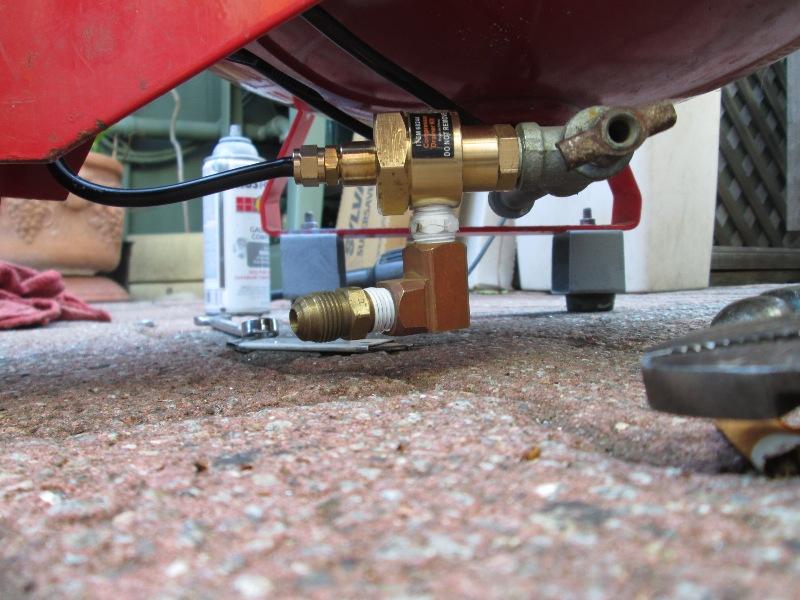
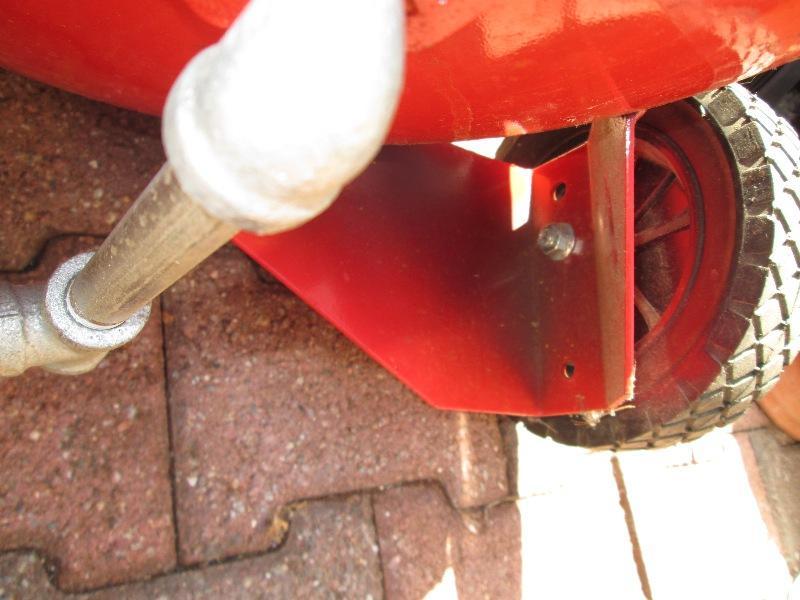
Bought quite a long time ago is an automatic drain valve kit for my small oil less air compressor. Works-5-6cfm 22 gal tank, runs all my air tools, staplers etc, though sometimes wait on impact or cut off. Even painted a few cars with it. It does make a ton of water. Usually filters take care of, depends on run time. Small sand blaster was first item it wouldn't run.

But to the point- I'm just really lazy about draining the tank, saw this auto kit for cheap at H/F, figured it'd have to help. However mostly due to lack of height under tank I never got around to installing. I did add an elbow, short piece of pipe to extend existing valve out thinking maybe I would drain more frequently if I could reach easily. Needless to say- not or at least not often enough.

Have a small plasma cutter on its way, it needs dry air. Though filtering etc I figured Id revisit the auto drain again, kinda make sense starting with semi dry tank might help- that's humor. A real compressor would too.

So took a good look at the compressor

auto drain

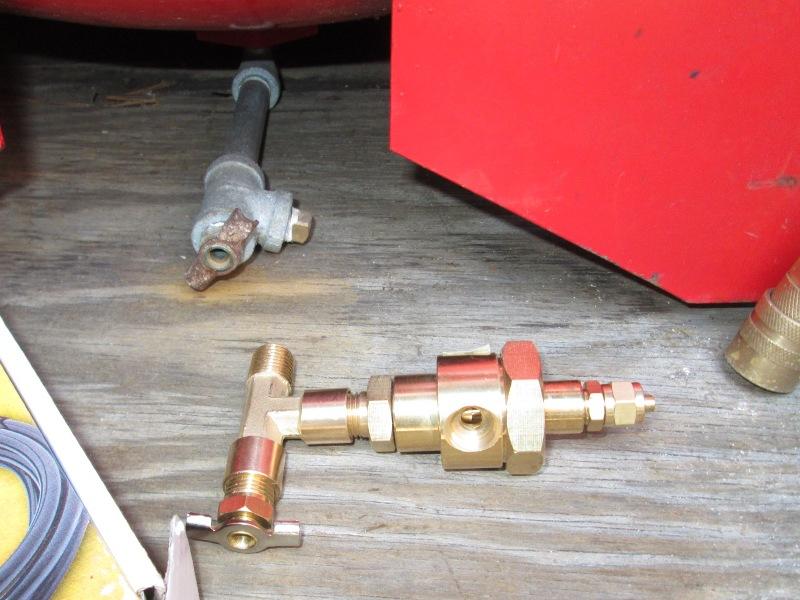
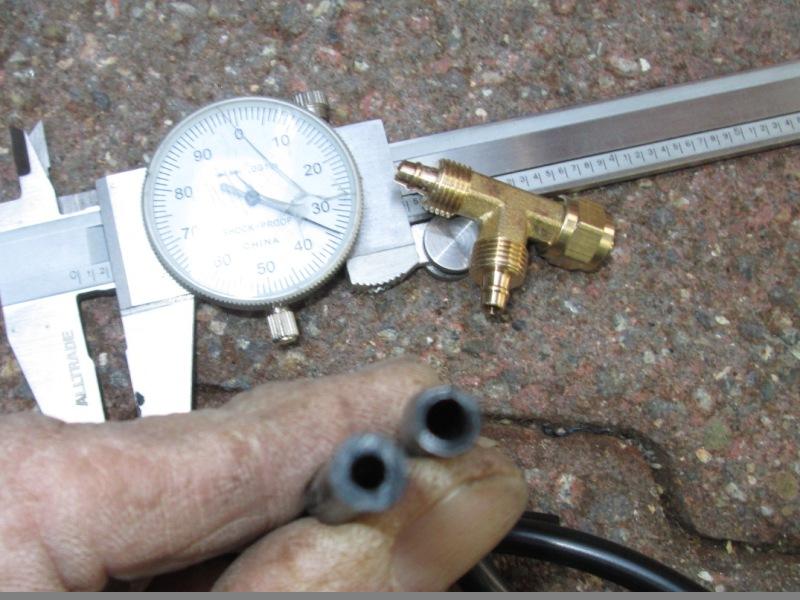
Well that's not going to work. Still not enough room. But what I did see was the plug on tee. When I extended the manual drain I added the tee because I had it but not a coupling. If I removed the plug I could simple add the new valve to side- not have to start back at tank IF I could raise the tank a bit. Save a bit of plumbing. One of the things I've read is how many folks split the included tee, plus have an extra replacement valve. But tank needs to be raised

auto drain

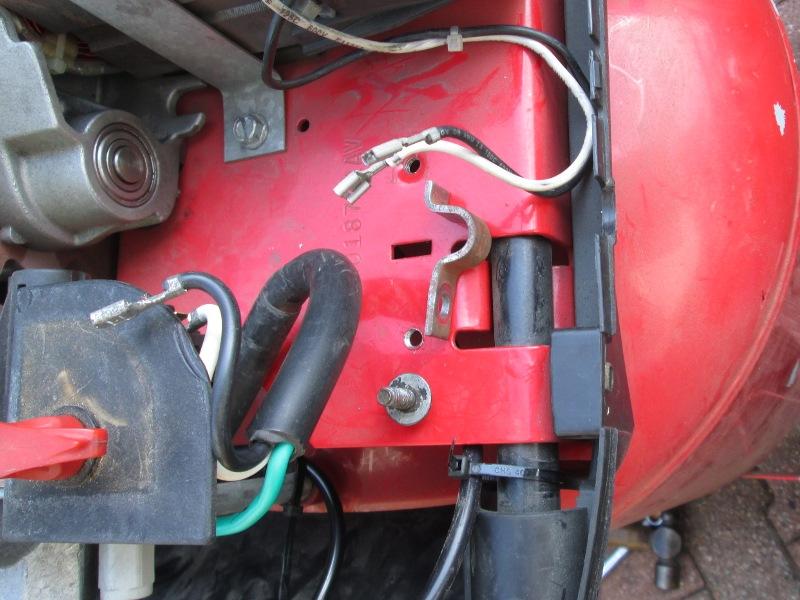
So pulled out the compressor from small out building. Flipped it on its side. Well it only took a minute to see the flanges wheels are bolted to would easily allow moving, drilling new holes. All I need is add spacers under the fixed feet.

auto drain

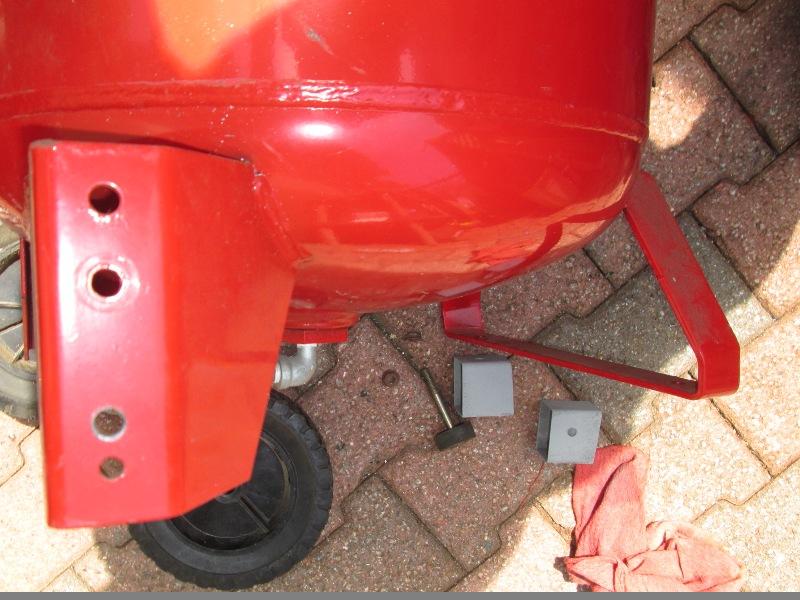
Had some scrap 2" thin wall square tube, Perfect. Drilled new wheel bolt holes 2" down in tank flanges. Drilled the tube spacers for 5/16" bolts.Shot some zinc primer on the spacers.

auto drain

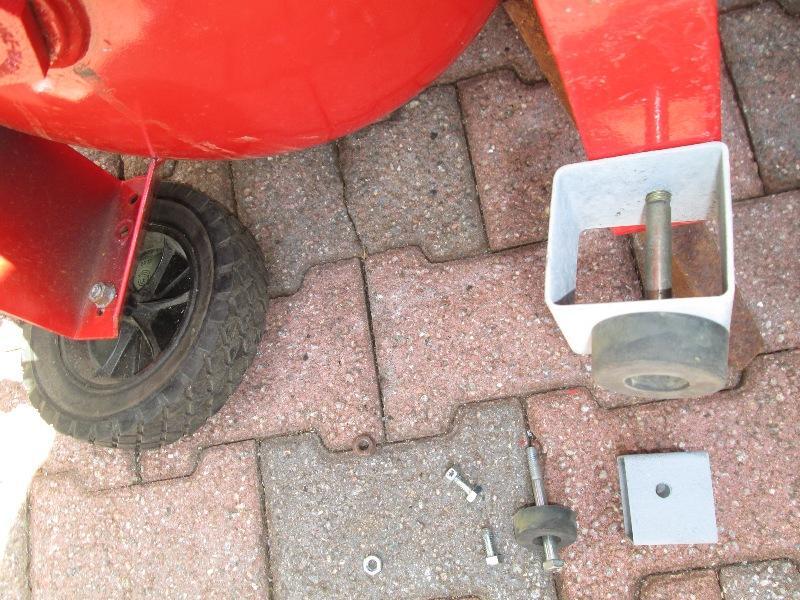
Luckily I had some 3" long 5/16" bolts. Bolted it all up. On the wheels, it uses shouldered bolts for axles. When tightened down the wheels can still move side to side 1/4". Though I rarely move, bolt head was grinding into plastic so added washers to both sides before reinstalling wheels.

auto drain

Stood tank back up. Simple, took all of 20 minuets- don't know why I hadn't done few years ago. Though extended drain still good idea and easier, if I originally had this much room underneath...

auto drain

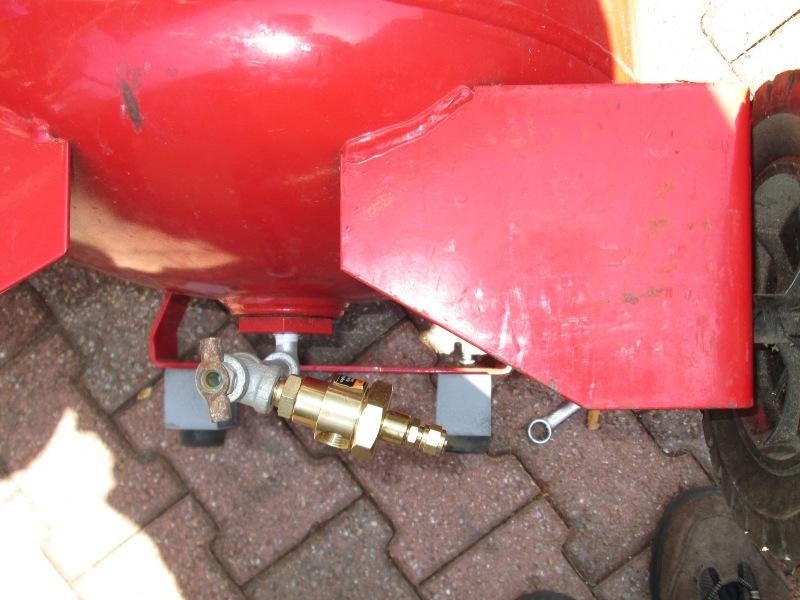
Loosely threaded on the new valve. More than enough room for new valve. Don't want to back off but tee needs to be more parallel

auto drain

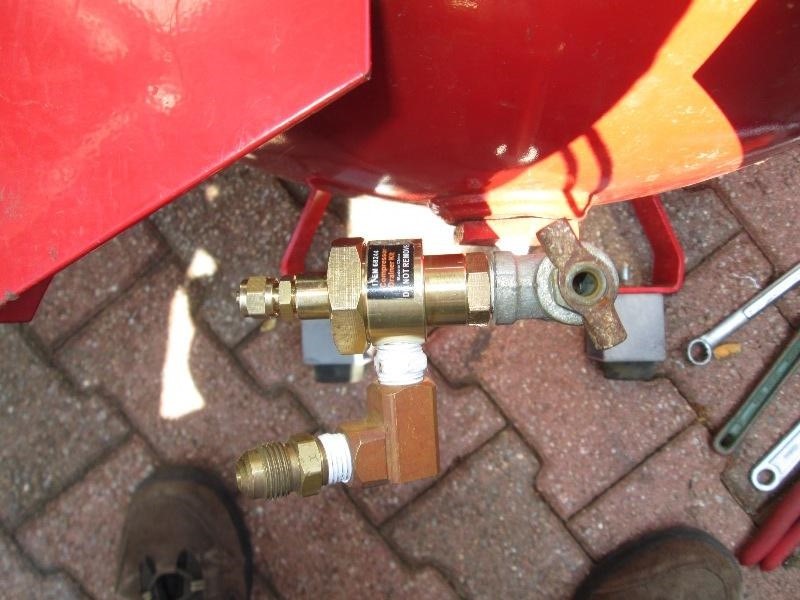
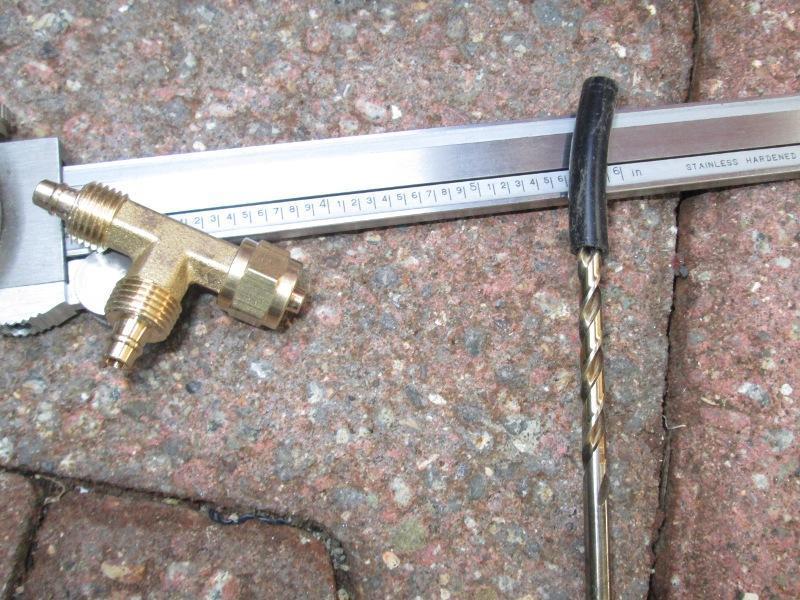
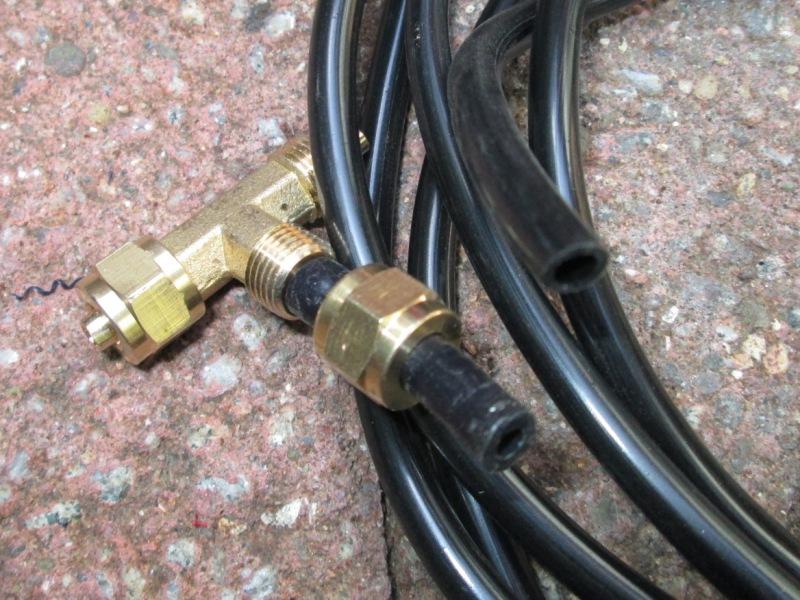
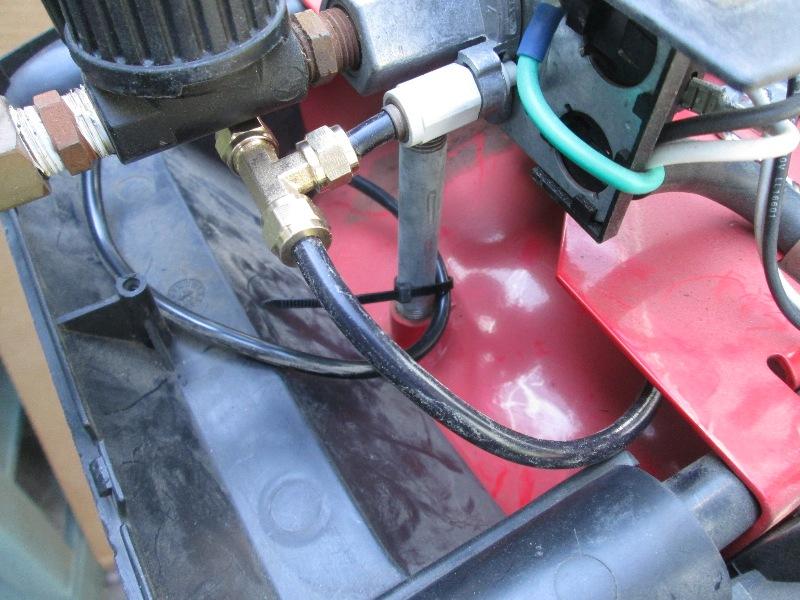
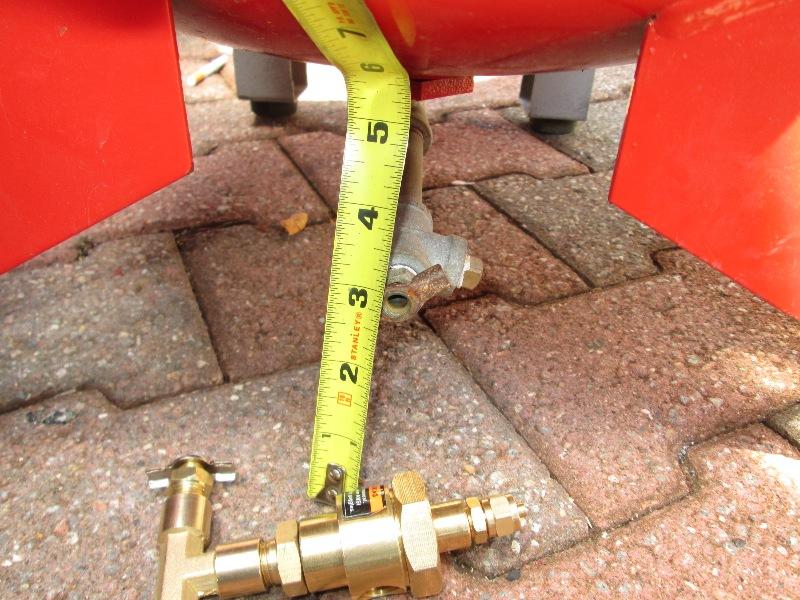
Rotated tee tightening half a turn leaving just a bit of slope. This will work better for extending the drain line. The added fittings is stuff I had on hand, will let me run a piece of tube (or old gas line) to extend. But Primarily added so the threads in valve stay clean. If the valve fails/doesn't shut off I can easily plug or cap without stopping to re plumb. It also points the air inlet to the side that would be more protected for the small tubing, Compressor sets in corner.

-------FYI--------

So Compressor is "lifted", valve added, alls that's left to do is splice in the tee on un-loader line and run to new valve.

I'm taking a second, Just a heads up. I looked up this valve On-Line to ensure my installation was correct-. It operates basically when the compressor shuts off and turns on, the pressure difference in the Un-loader line causes the new valve to very briefly open, pushing out water that may have accumulated. (The compressors unloader line purpose is simply when compressor shuts off- it dumps the pressure in line so when pump restarts its not against line/tank pressure). Still use the manual to drain tank but with the auto valve constantly 'spitting' with compressor cycling it should help with water accumulation. (though doesn't replace line filter).

I found other folks had issues installing these cheap valves. One is assumption the valve is assembled-its not, Both large hexes need to be tightened, one side has o-ring the larger hex tightens against diaphragm inside- check them, Good & snug- but don't reef on em.

Second is the supplied plumbing tee that installs on tank- its pretty thin on the female ends, easily split. Nothing special about it. Should it split a simple galv.. or brass T w/nipple from hardware will work. Fortunately mine already had galv tee

Lastly and most important is splicing into the compressors Un-loader line. The supplied tubing, as shown below, I gather is metric. Its smaller Outside Diameter than the 1/4" found on most compressors (.235" OD verses .250" OD). It also has a thinner wall so larger Inside Diameter. Install the supplied tee and new tube as far away as you can from pump(heat). The supplied tube is more susceptible to heat as its less rigid, softening and coming loose. Supplied tube uses insert fittings that insert INSIDE tube with nut. It will NOT work on fittings you push tubing inside. It may work with standard compression fittings using small brass sleeve inserted into tube and then plastic pharaoh- though unsure unless you can find pharaoh with .235 ID. Unless your compressor uses same style of fitting/tube size The issue is somewhere you have to make a transition between different sizes tube and different styles of fittings?

Which is what I did, made simple transition pieces. Many just change it all to 1/4" copper or 1/4" tube by replacing the tube fitting on end of valve (it unscrews from valve) and replacing the supplied tube tee and tubing with appropriate style. I'm thinking many don't realize though tube size difference, 'insert' the undersized tube into existing 1/4" insert fitting-tube gets warms and blows off...or install the supplied tube and tube T close to the pump outlet, (which is usually easier as its more open but its too HOT. Fortunately I read this-and adjusted my install. Doubtful any will find this info buried on my page but just including it.

My 'Fix': installing the tubing

auto drain

The difference..left is the thick wall 1/4" tube on my compressor, on the right is the thin wall .23 tube that's supplied with kit. Intent is thin tube slips over fitting barb, the 1/4" uses OD fittings. They are not interchangeable..

auto drain


So I'm splicing in the new tubing T as close to the opposite end of unloader line as I can from pump. Placing new T at end of line so if there's an issue (or this doesn't work) have enough original line to reconnect as factory.

Unplugged my 1/4" tube from unloader valve, cut off about 1/4" to get clean sealing OD surface for reinsertion. Then I cut off about 1 1/2" off of original line. Using a 5/32" 'new' drill bit I hand spun and bored ID of 1/4" tube about a 1/2" deep, enough to slip over new tee barb. Needs to be a sharp/new bit as its the flutes cutting out ID

auto drain

Modified tube slipped onto barbed tee, with opposite end the will go back into unloader fitting. The other end of original line that goes to pump line (still connected) I also bored to fit new T, open end shown. Even with lined bored I need to heat with hair dryer to slip on, just wanted to ensure it didn't split but it fits. Worst case it fails, afterthought I remembered I have some 1/4" airline fittings and tube- just need an adapter to screw into valve. But I think this will work.

auto drain

Tee installed! After I ran to valve I came back drilled holes in tank metal flanges, lower plastic shroud to install several zip ties, immobilizing the tube and tee.

auto drain

Connected tubing to valve. Again drill flanges for zip ties. Tube is secure and fairly tight against protected side of tank. I probably may (and would have if Id thought about it) install a piece of conduit to side, run tubing thru it- just to ensure it doesn't get ripped off but another day.

Plugged in the compressor- with my finger over valve outlet reached up & turned compressor on & off. Cool! Psst-when it turns off, Psst when it comes back on. Pretty cool. Tank should last longer-less water build up. Other than the tubing discrepancy very simple upgrade.

Reroute power cord

Since I had the shrouds off decided to address the power cord. It exited to the right side, my outlet is on the left side-cord always about an inch short. Easily and often gets hit and unplugged.

auto drain

Flipped the cord and rerouted to go out left side. Drill & tap another hole for clamp

auto drain

Reattached the cord clamp-gained almost a foot of free cord. Worth the exercise adding the auto drain to address the cord, Snap the shrouds back on, roll 'er back into place.

Conclusion-valve works

Well the little valve works-opens when compressor stops & starts. However my real conclusion is maybe later spending a few more dollars for one that has an adjustable time function. The momentary opening of this unit is too brief. That and water (undrained) collects behind manual valve at end of tee? Not sure if switching auto valve to end of tee would solve or not, but it seems its opens enough to push water into pipe but doesn't reach the auto valve and collects. Require some replumbing-well see.

Back to top of page

Back to shop tool mods

Back to Our shops home page