Lucky enough to finally get a table saw awhile back. Its a 10" saw, small table on a folding wheeled stand. Love it, perfect size for no room shop,easily moved around and stored. Long story, actually also bought a plastic storage box to store it. A few feet away is a light pole with switched receptacle. Outside of fence on small patio just works out well and where I use. Not a woodworker but just DYI'er that does enough to justify. However acquiring a saw wasn't on the agenda,even a little.
Recently built a simple crosscut sled for it-whoa-bees knees to use. Anyway in laying out had several tools and parts out. Typically tools and stuff I lay on the roof of storage box. But this was continuous back and forth, laying out, cutting wood, retrieving and placing stuff back on shed I finally stopped. I need a shelf...
Decided to show it and couple of simple mods that makes saw easer to use, and how, sheer luck, I ended up with table saw in the first place.
- Split into sections as stuff added to this page, mostly for my own reference.
- The saw shed place to store saw and accessories and how I ended up with a Table Saw
- Add split 110v receptacle One side hot with motor turned on for vacuum
- scabbed together shelf place to throw tools, tape, pencil etc
- Extend on/off switch
- Grounding saw This saw was not earth grounded...
- Zero clearance throat plate For cutting narrow stock

Long story but we were in Sears one day-Margaret burning up some coupons, I happen to wander over to tools ? They had a stack of table saws on sale dirt cheap. Looking at it, would have worked but it was pretty cheezy, actually kinda scary. Mines is a far cry from a quality machine but as cheap as the one on sale was I couldn't do it. Gone this many years cutting stuff with skill saw on a milk crate.
Salesman came up about the time wife found me. She looks at saw & says 'that's pretty cheap' and I replied 'ya but so is the saw'. She asks the salesman what would be the next up saw. In disbelief, assuming she was curious, we wander over to the models on display. Several saws, all on sale, a bit more money but not much more saw. Then I spied this one. Kinda in between there really nice saws and junk. But about twice my budget. Margaret asks where I would put it to which I replied 'that's an issue-it'd have to set outside'. Meant time salesman asks a few questions and says ya know lets walk over to the register. We walk over and he gets on the computer, Margarets tapping away on her phone.
Me I'm realizing buying a saw I cant afford to set outside and to ruin is dumb. Salesman is rattling off different incentives and coupons he can apply, Margaret is answering some question he asks while still on her phone. I'm a bystander at this point. Margaret holds up her phone and asks will this work? Picture of this shed on sale. Im like yes, but on top of the price of saw this is getting silly. Salesman hands Margaret a printout, says I can give you that saw $174.45 off the sticker price. Margaret looks at me and says that almost pays for the shed. If that's the saw you want I think you should get it.
I'm without words. Like... what just happened?.... I'm trying to add numbers, make sense & justify all this, Margaret says its getting late you need to decide. We can stop by home depot and pick up the shed, then stop and get take out...
umm...
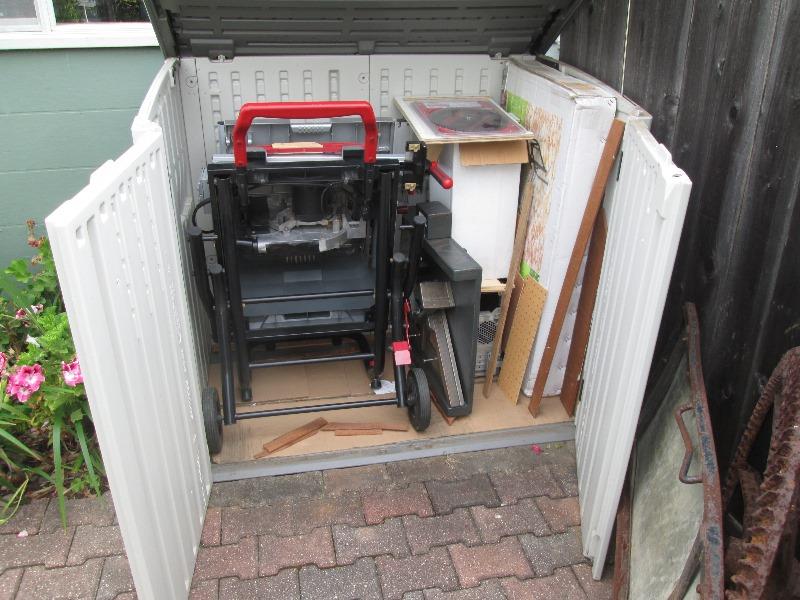
So that's how I ended up with a saw and box to store it. Simple bolt together plastic shed. About 4'-5" wide x 32" deep x 3'-9" tall. Has floor with slight ramp edge. Easy in and out.
Back to top of page
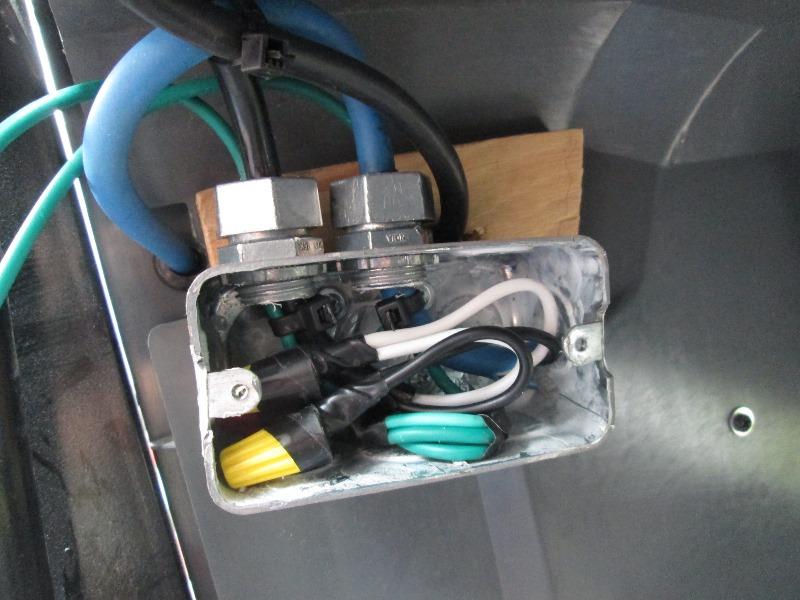
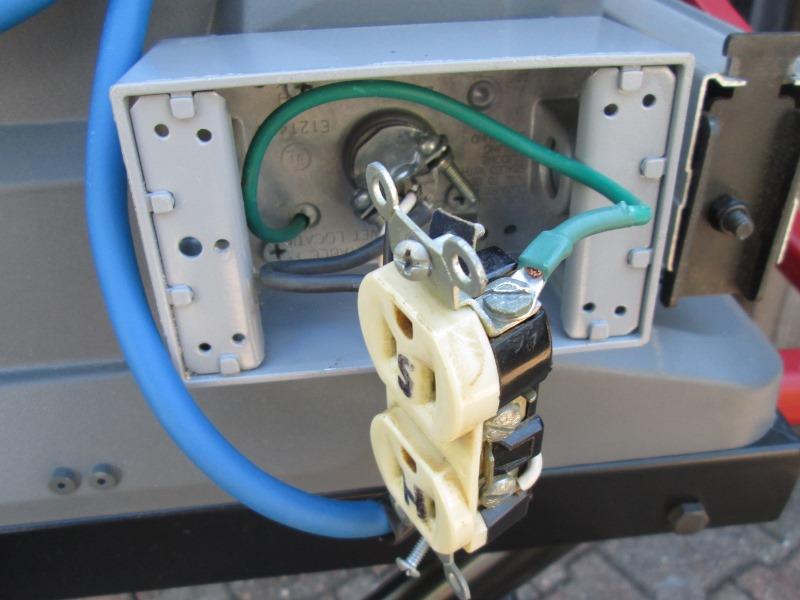
One of the 1st things i did to saw was add a split receptacle to saw cabinet. I use a small shop vacuum for dust control. It has a remote but still inconvenient to turn on/off with saw use. One side of receptacle is hot, the other is hot when saw turned on.
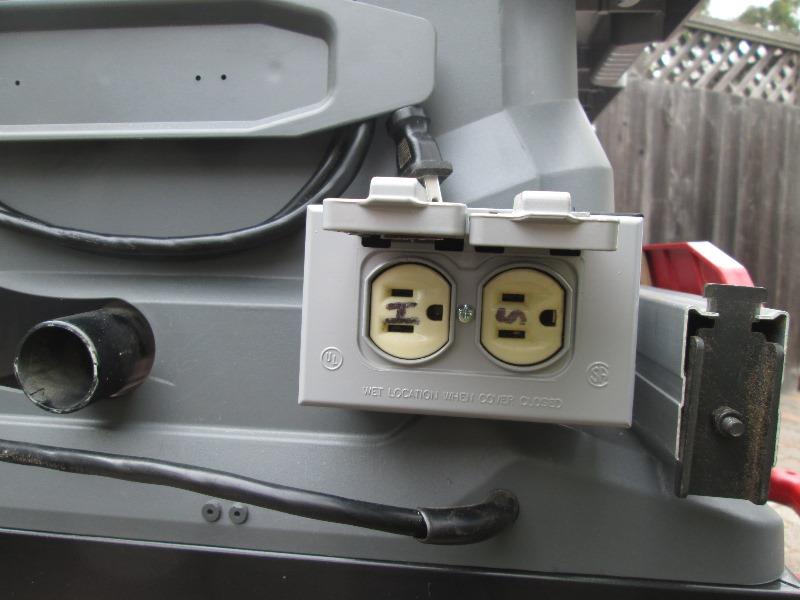
Used a wet location box attached to side of saw. From the saws switch box added cable to feed new box. Tapping saws switch for constant and switched power. Worked out well. Plug in the vacuum and turn it on. When saw turned on vacuum comes on also. Normally saw is between me and the light pole its plugged into so the hot plug also convenient.
Back to top of page
As mentioned building a crosscut sled had all kinds of tools etc laying about. Even normal cutting usually have some measuring tools square etc, either laying on saw or roof of shed. But seemed I was walking back and forth retrieving stuff as much as making progress on sled so stopped and threw together this shelf.
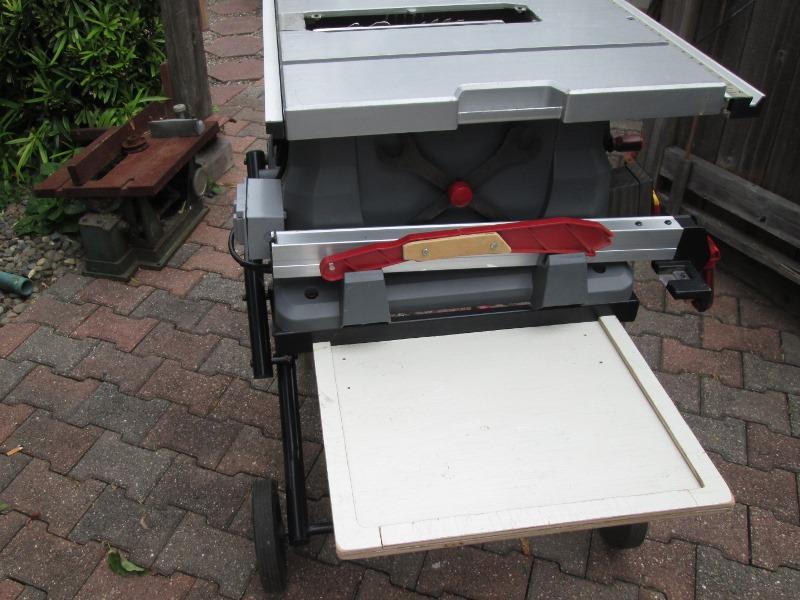
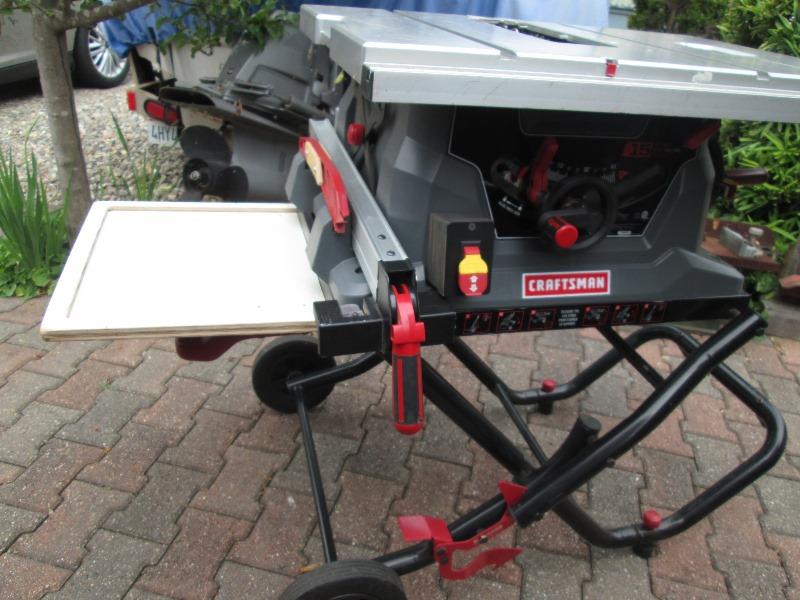
In the shed was a piece of 3/8 resawn plywood siding I had removed from shop to install window...Saw cart has handle that it could rest on..so started cutting.
Cut a square about width of saw. Ripped some 1 1/2 strips to make a perimeter top edge so pencils and stuff cant roll off.
Just noted my old Craftsman table saw setting on the ground in picture. I used that for many years, lot of board feet run thru it. Yard decoration now...
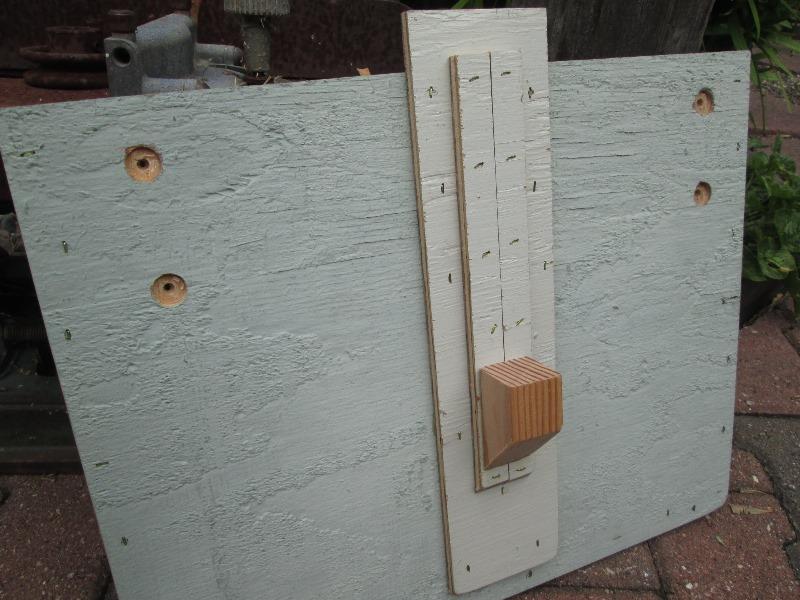
To hold the shelf and stiffen the board cut a strip to place in center. Its longer than top so will slip under the bottom edge of saw cabinet. To hold from sliding out counter-bored holes to match the saws handle attachment bosses, honestly though, it was so bottom of shelf sat even with bottom of saw cabinet for the center piece to slide under. I was going to add a block to outer support to keep it from sliding out but the counter bores work well. Added a 2x2 block to couple more strips and attached to shelf to support shelf at outer edge
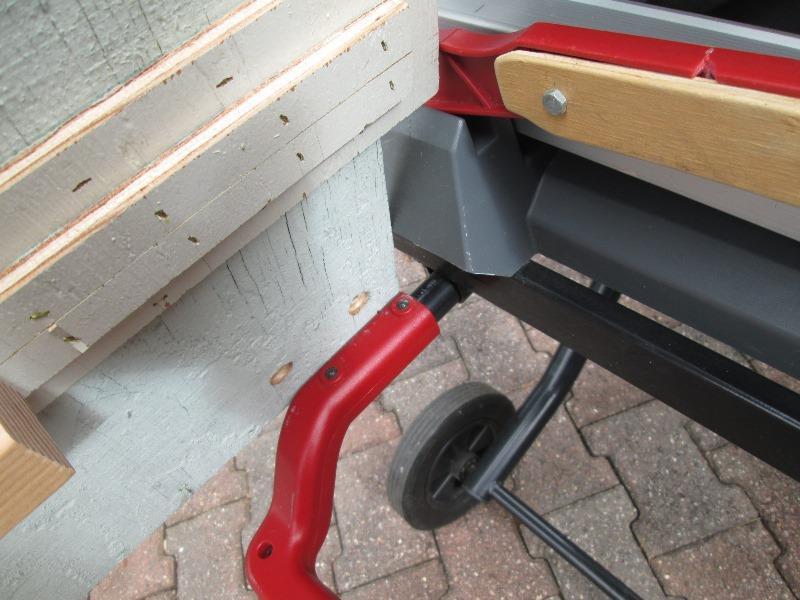
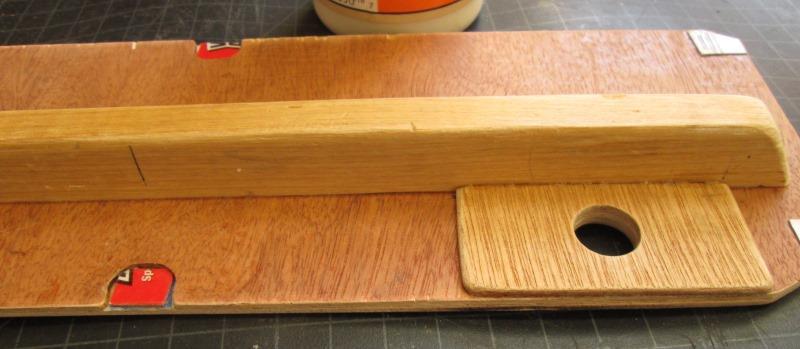
Just showing counters bores that handle bosses set in. Shelf has to be tilted to about 30° before inner bosses clear. Still may add a small block to tongue that slips under saw but really not needed
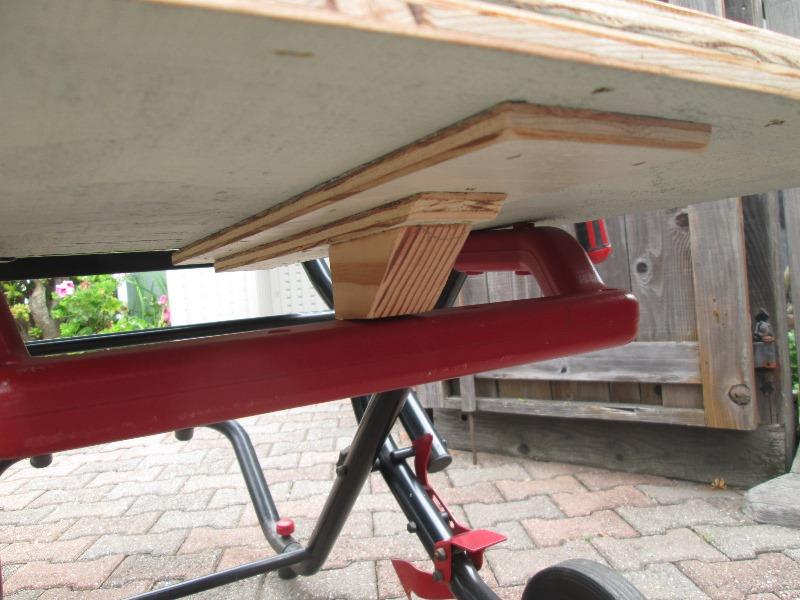
And showing center support at outer edge resting on handle
That simple
Very handy, easily taken on/off. Not going to rebuild it but had I an idea this would work I would used nicer material. But free quick and functional
Back to top of page
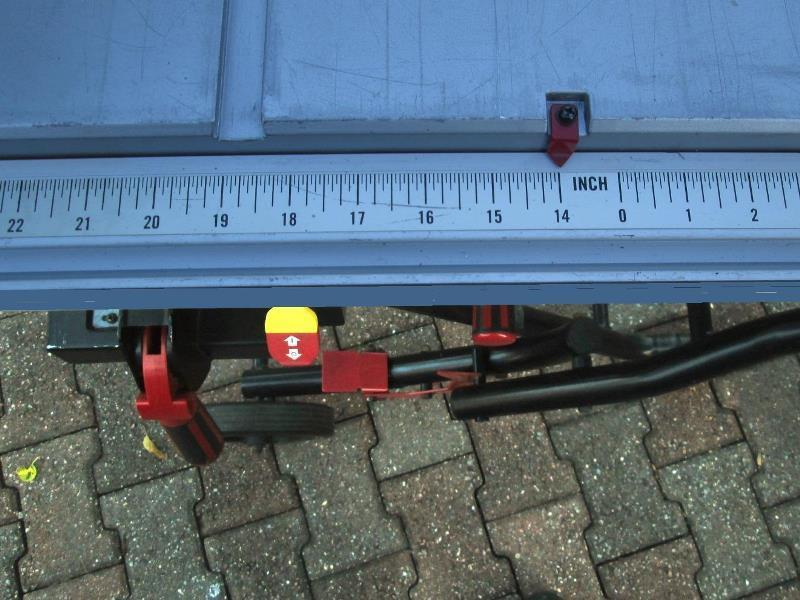
One complaint with this saw is the on/off switch. Mounted on the cabinet it sets at bottom of cabinet. I can not see it when standing at table.
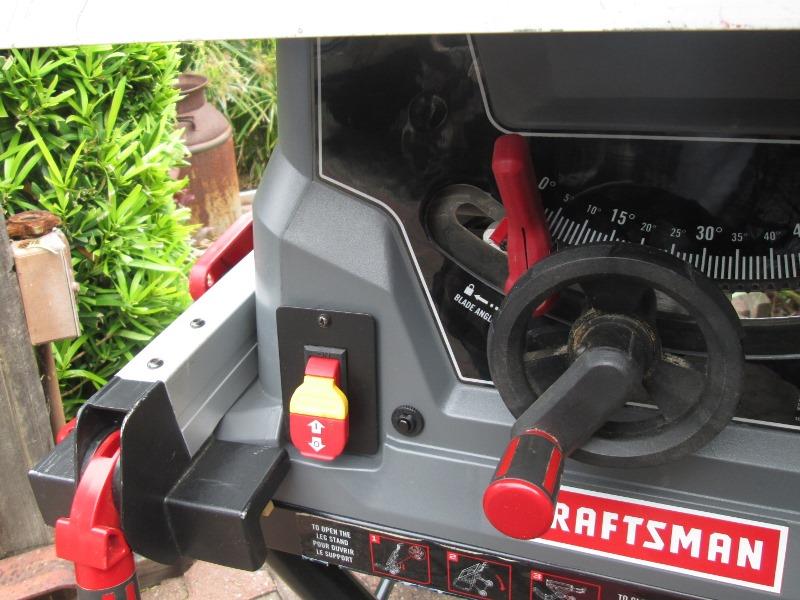
Other than awkward, down right dangerous if things go awry and need to stop saw. I literally cant see it and groping around when I can't let go of material has more than once been an issue. I have to bend over, as I did in this picture to find it. Always assume I'd get use to it but its simply in the wrong place, too far down and back.
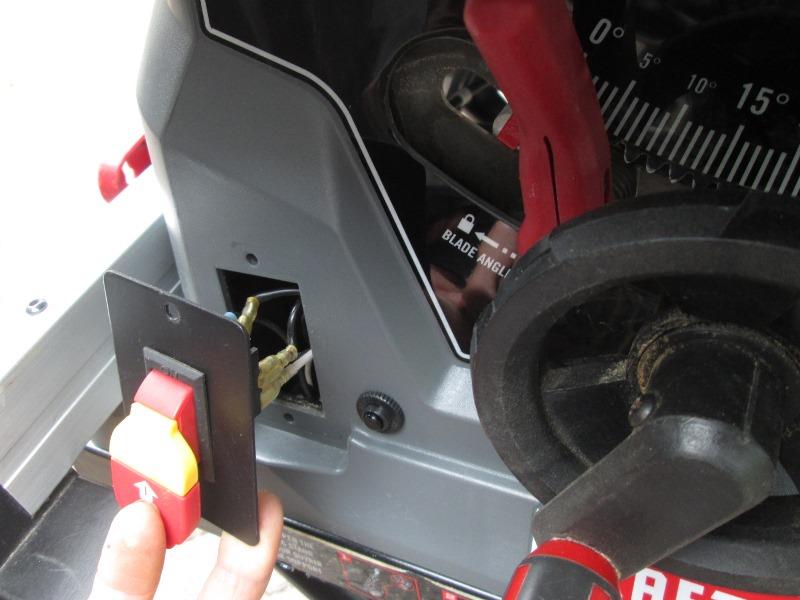
My thought was to relocate higher up. But might be worse back up under table. Running longer cable I could mount switch in a box to under side of table where its face flush. Pulling switch loose to see how much free wire, it came out about 2 1/2". On the back side underneath loosening the cable clips I can pull out further to make connections. Meaning simply making a box to extend the switch plate would place switch in line of sight, way easier to use (and less effort rewiring).
Should note: I made box but external mount boxes are available, weather tite, wiremold etc. I wanted deeper/cheaper &angled
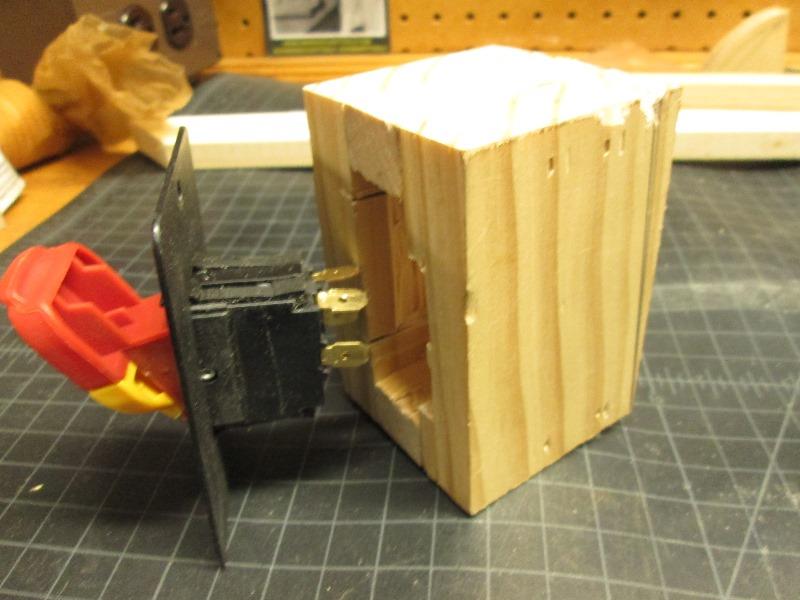
Made a box from 1x3 (3/4"X 2 1/2") that switch will slip into to it space it out.
Cut a piece for base that will mount to saw, the box will mount to it. That will give me about 3" stick out. Also trimming box with slight taper to angle switch up. I can see plugging in the switch is going to be a bear so will need to disconnect cables at other ends to get enough length. Connect switch mount and reconnect cables. Assuming worst case but doable one way or another- proceeded
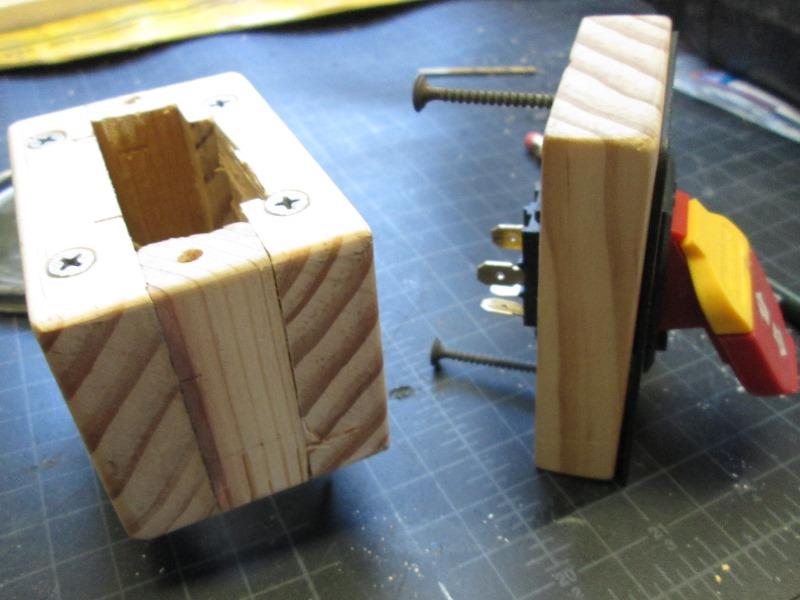
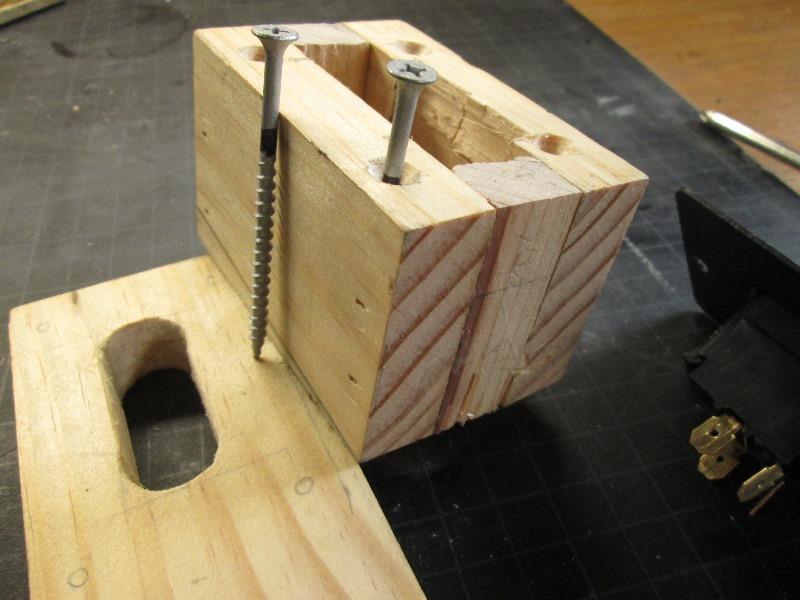
Sanding out the blocks plan changed with a MUCH easier way. Realized reversing the box and base, mounting switch to what was going to be base, attaching the box to saw instead, wires will reach switch. Switch spades exposed so connecting easy without pulling cable. Wow
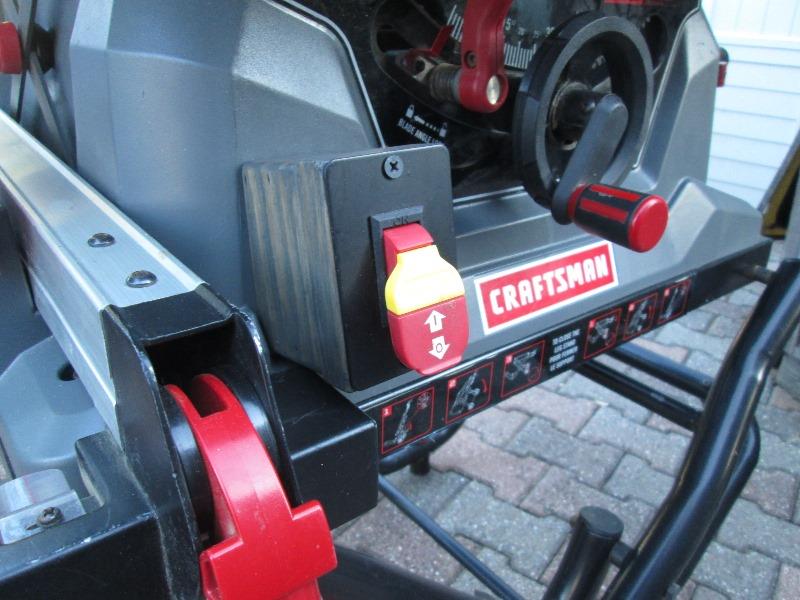
Finished sanding, lined the box with aluminum tape and stained. Mounted the box to saw. Placed switch thru top board and plugged it in. Mounted top board and switch using switch plates holes.
Well worth the effort.
I can easily SEE the switch standing, I can even more easily reach/find the switch. Its right there-perfect.
Just a view...
Profile. Amazed..every time I have used this saw the switch always caused me to bend over-search for it. Cool really happy with this.
Since I got away without rewiring I am going to address the other issue with this saw. Well not so much an issue but it is wired with a 2 prong plug and 2 wire cable, no earth ground. Which means my added receptacle box also is ungrounded. Never thought to much about it as my vacuum is also 2 wire but anything else an adapter needs to be used.
Round 2 it but sooner than later. Adding another electrical box inside of cabinet as junction box. Cut existing power cord from switch to reach it and run a new 3-wire power cord to from junction box. Allow running ground to external receptacle box so its grounded and a ground lead attached to underside of table. Wont change existing wiring but allow grounding.
Back to top of page
Started to put saw back but went to the hardware store.

Picked up a 25' 14awg extension cord, box, cover, 2 cord connectors. 6' of 14awg green and some stake ring terminals.
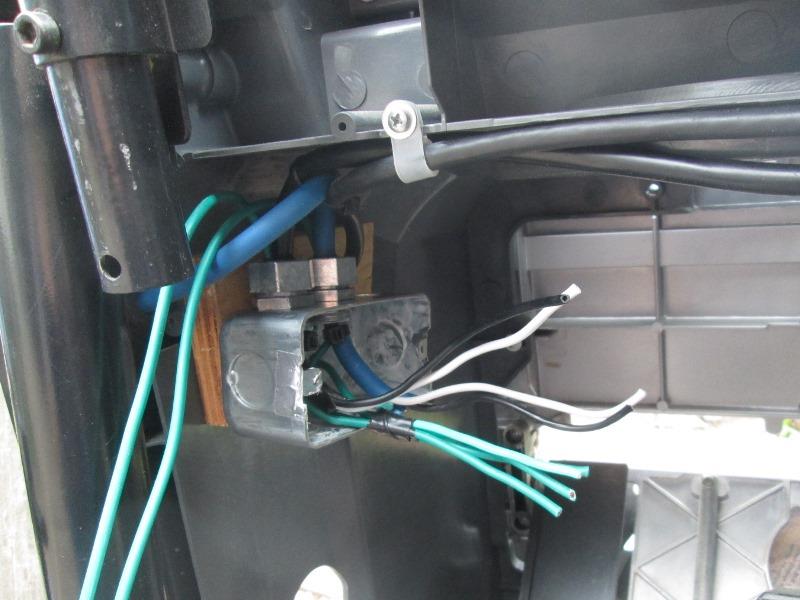
Installed the connectors to box. Used caulk to seal all the other knockouts from dust. Cut saws power cord and removed with enough left to reach inside box. Cut about 9' from 3 wire extension cord (replacing 7' of 2 wire), way cheaper than wire and plug and nice formed plug. Routed thru cord strain relief and pushed into box. Drilled a hole thru exterior box into new box, cut and fed about 12" of new ground wire. Fed the cuts ends of remaining 14ga ground wire into box (I'll cut to length later). These will get ring terminals, one wire attached to table and 1 to motor frame.
All nice and tidy. Something I've never done before but taped the wire nuts against vibration.
Wasn't till I posted these pictures realized I forgot to add 5th wire to ground this box. Could make a jumper from table ground to this boxes cover screw or tap box. Or more likely just open up box, add wire as there is a screw boss inside already. Plus move the line wire, hadn't seen but its right where cover, albeit short, cover screw enters, doh
Routing ground wires...
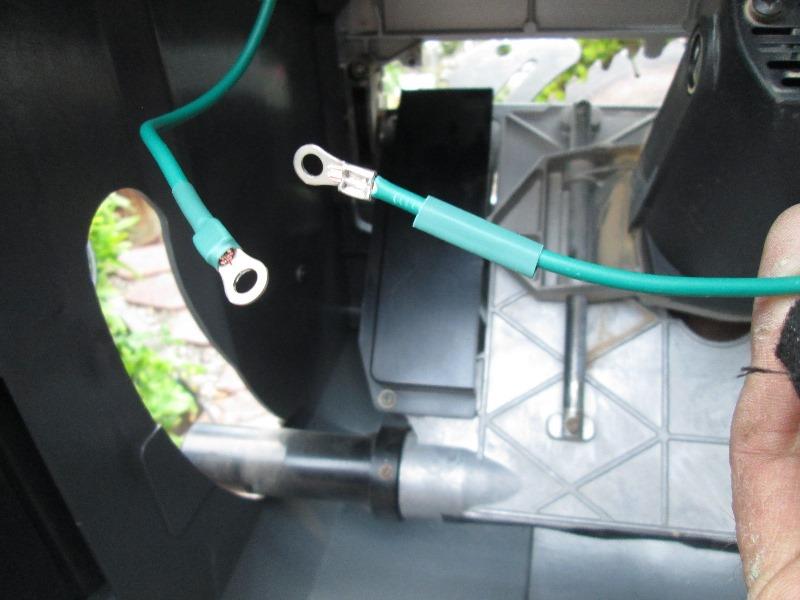
Staked and shrink wrap to minimize flexing at sheath cut.
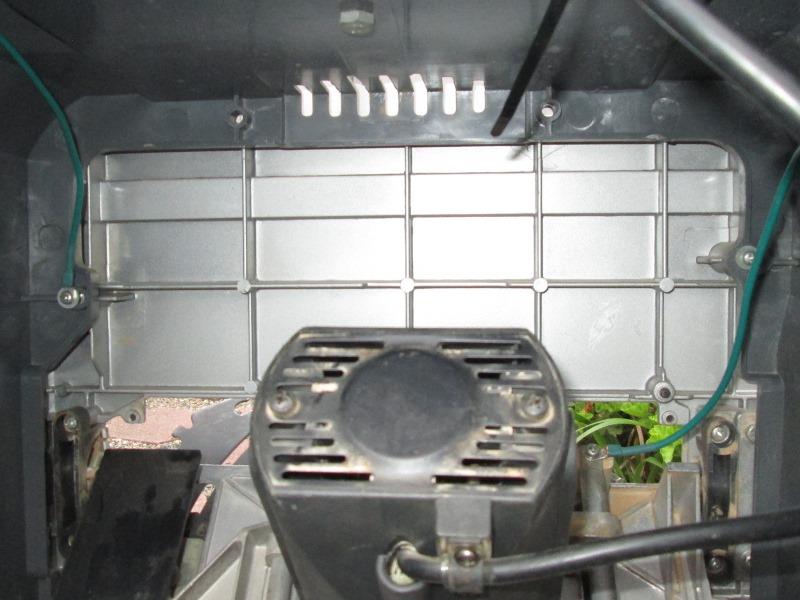
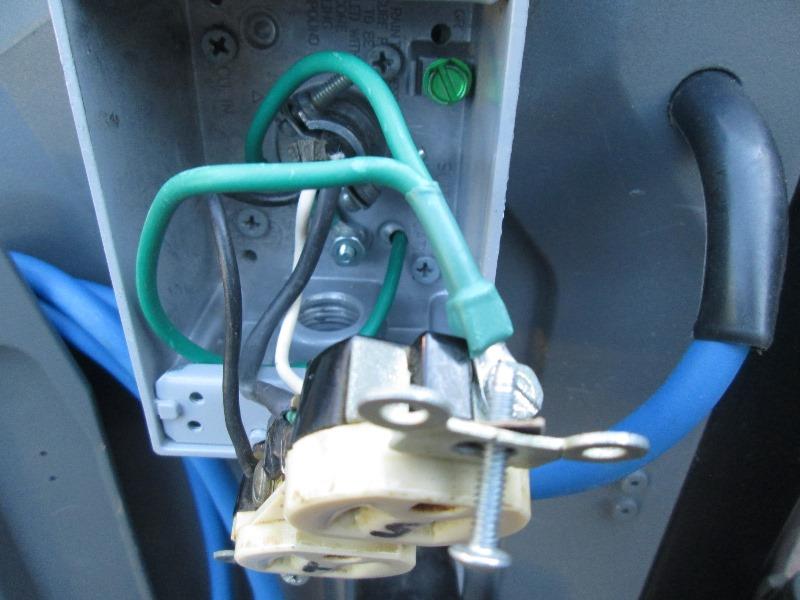
And ground wire attached to table and motor frame. I should state the obvious, Its is very unlikely that motor could short in a way that could energize table or the motor frame. The prime motivation was to add ground to the added receptacle. It just seemed silly though not to ground everything else since I was here.
Oh which I should show I guess, added ground to receptacle
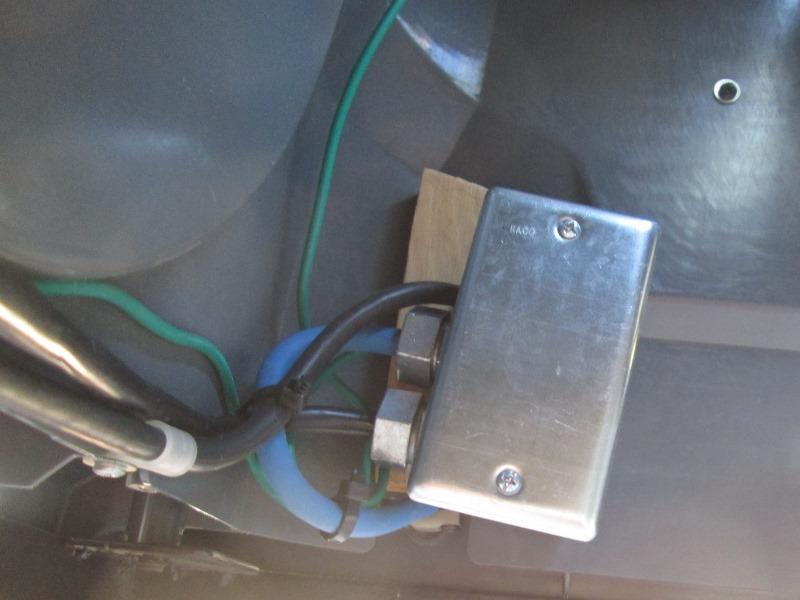
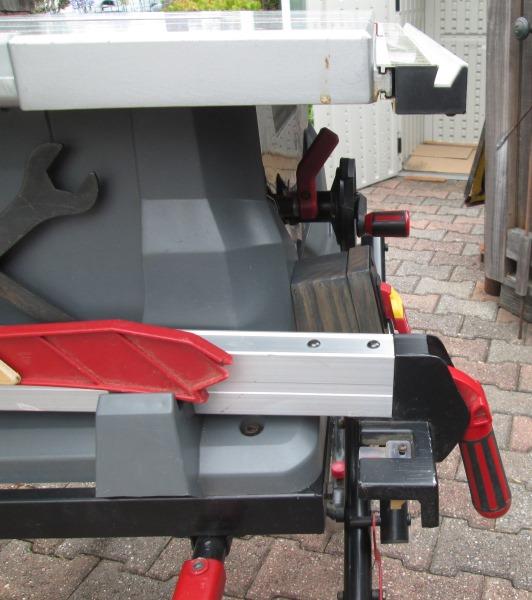
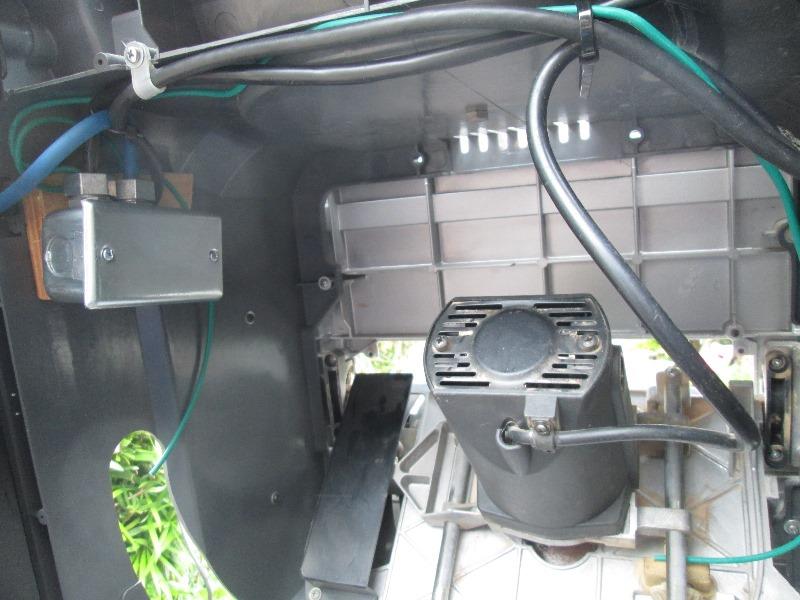
Just picture of added box with saw setup, as all the other pictures were with saw standing on its end
Some things better left off the round to it. Added ground screws and wire between the 2 boxes. Took all of 15 minuets. Tested everything with multi meter for continuity between power cords ground pin and table, saw motor frame & blade, boxes etc. We are grounded.
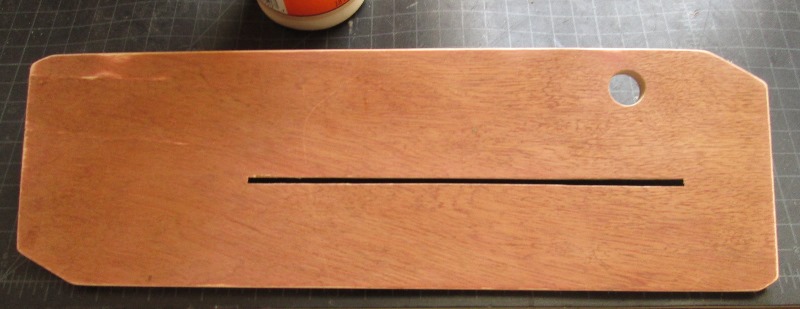
Factory inserts have an enormously large gap around blade. It allows for tilting blade from 90° to 45°. While the adjustability nice without changing inserts it also adds a number of issues. Several times cutting narrow or thin stock the saws throat plate gap is large enough material can wedge/bind. Or worse cut offs falling into gap. Especially shorter pieces. The gap as wide as exposed table to support it. Mostly ripping material. This saw uses thin, maybe 3/32" +powder coating, steel insert plates. They set on 4 flat head screws in the corners of table hole. Doesn't lend itself to easily making replacement inserts. Though can help with chip out when cutting, a zero clearance insert will solve any safety issues.
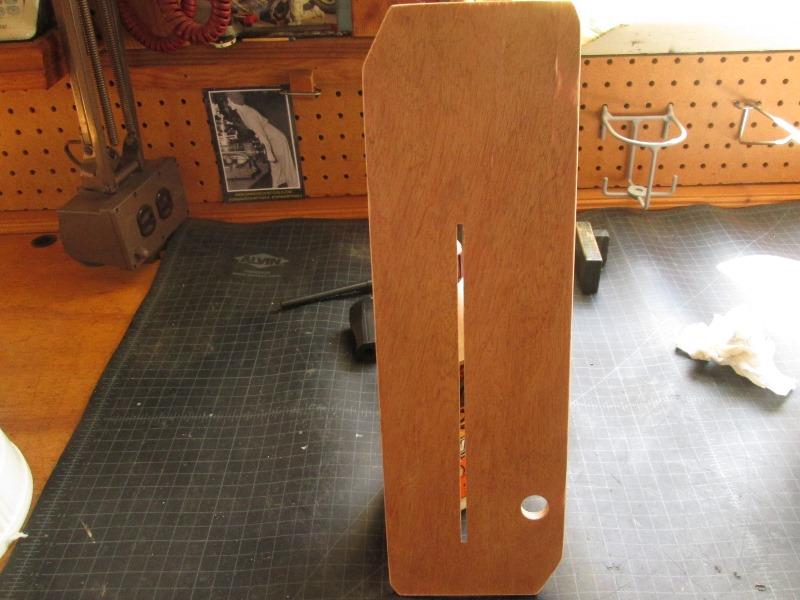
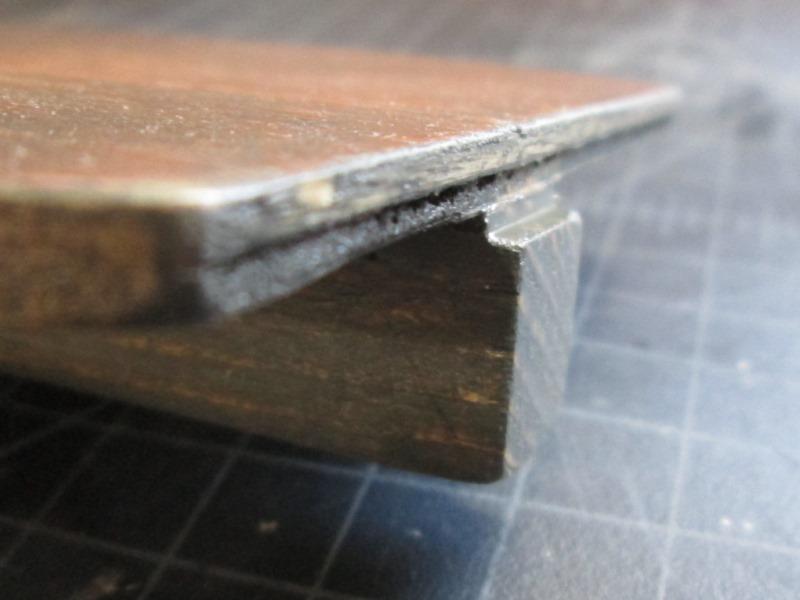
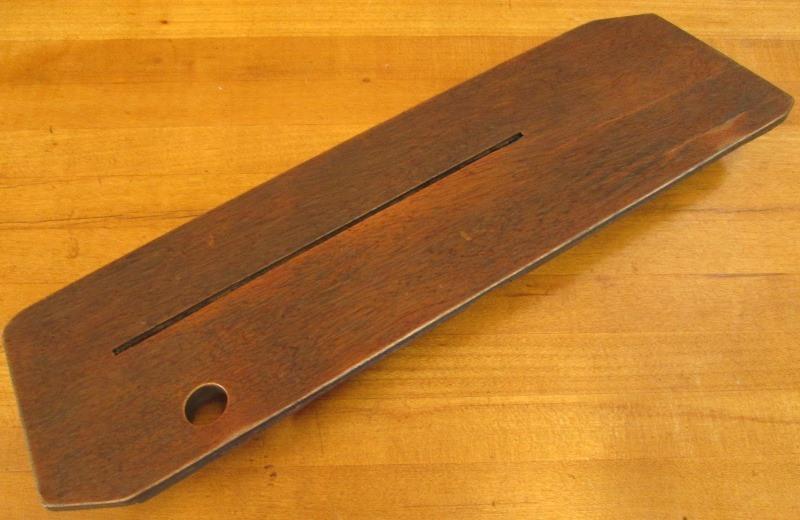
My take with material on hand. Had some 1/8" 3ply plywood (actually closer to 7/64"). Glued two pieces together opposing grain orientation for a 0.21" thick piece. Which with adjusting screws removed is pretty close from top of screws bosses to table top. Trace existing plate and cut a bit larger then sanded to fit saw throat. Had pictures of fab but they disappeared. Here it is after cutting slot.
I had to use a 7 1/4" blade to start cut as blade wouldn't go low enough. Clamped to table with fence and slowly raise blade. Stop and switch to 10" blade then raise again. I only came up to about 1 3/4" and without riving knife raised. Not sure, be easy enough to allow but may weaken insert, so I may cut further back but glue in an 1/8" piece to keep material open acting as riving blade.Only time I've had kick back is ripping material that's long enough to close behind blade, scary, so riving blade or something to keep kerf open a biggie. TO be done.
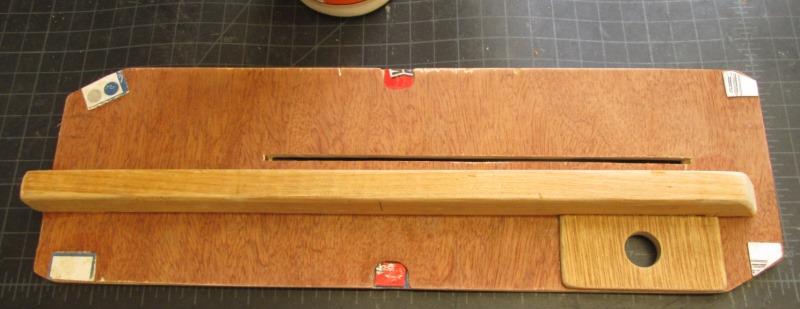
I had routed out 2 notches to match saws center support bosses. My saw uses screws that stock plate sets on to adjust height. Once saw cut made where I could fully set new insert and screws removed new insert was about 25 thousandths too thin so material would catch on table edge. 'Shimed' with some stiff cardboard, glued in place they will get coated. Used a piece of 1x2 to help stiffen and slow warpage and to act as anti lift in rear. I added a backing piece where finger hole cut.
Though generally uses of insert would be with fence close enough to hold down, I ran the stiffener a little long to notch so it inserts under tables edge to keep from lifting at back of blade.
Stained and varnish. Useable but need to address the riving knife. Soon as I get some more material making another(or 2) for angle cuts. One for 45° and another for everything else which wont be zero clearance but considerably tighter than factory plate. Maybe. A better design at least as far as changing would be to counter bore where I could leave on the adjusting/leveling screws. Really better would be matching existing metal inserts. But wood easier to work.
Plan is to only use where planned cut is unsafe. Otherwise zero clearance inserts ideally would always be used.
Back to top of page
Back to Our shops tool mods section
Back to Our shops home page