Air conditioner in shop
Something always wanted but could never justify. Shop when sun out will always be 20° warmer than outside. Other day outside temps hit 90°, inside shop was 112°. (Our normal, anything over 80° is hot). Started looking at ACs again.Hmm doubled in price since I last looked. I dont have a window to utilize so its needs to be thru wall. Shop is only about 120 sq.ft. so a 5000BTU unit should work for the most part. Bought a Midea 5000, mostly for cost, available local Walmart. Spent $30 extra for unit with remote as it has 3 speed fan and other features over the manual control. However its a window unit.
Point of this page isn't about shop getting AC, its primarily about adapting window AC unit to go thru wall. However most of it ended up details installing ours
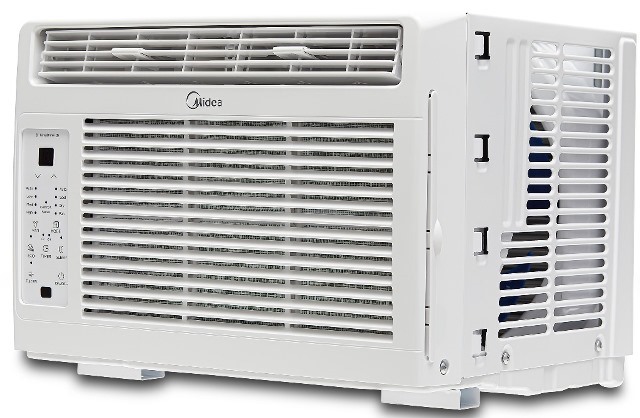
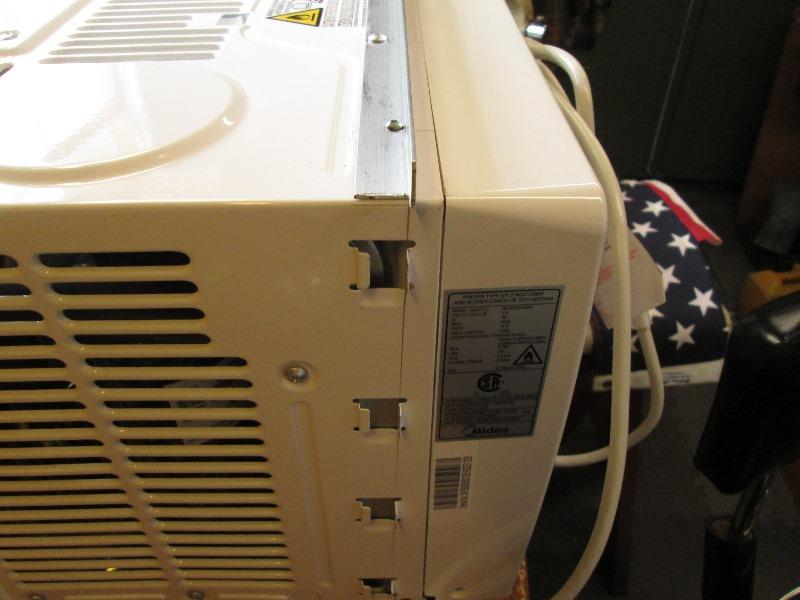
Couple of points, most window units are shaped like this, the hole required to slide unit thru will be larger than what's inside. front has feet. Second is the depth, note how close louvers are to front. Window units are usually cheaper but some creative mounting needed
Seems simple enough but a few gotchas. There are units designed specifically to go thru wall, I couldn't find small 5000 btu (cheap), Just FYI.
1. Window AC unit is designed to set on window sill, then top window closes down to top of unit for vertical height. Problem with cutting hole to slide unit thru, hole in wall will be about an inch to large once thru as the face inside is about 1" shorter than case that slides thru hole.
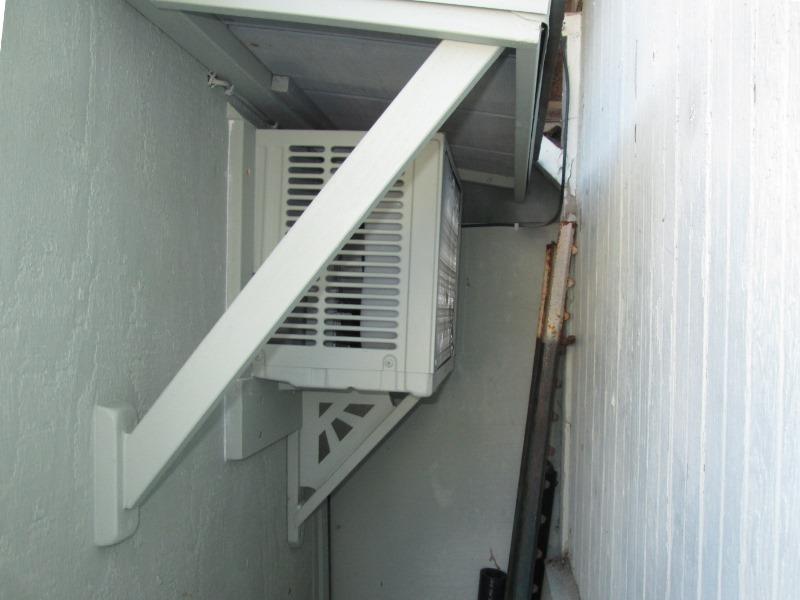
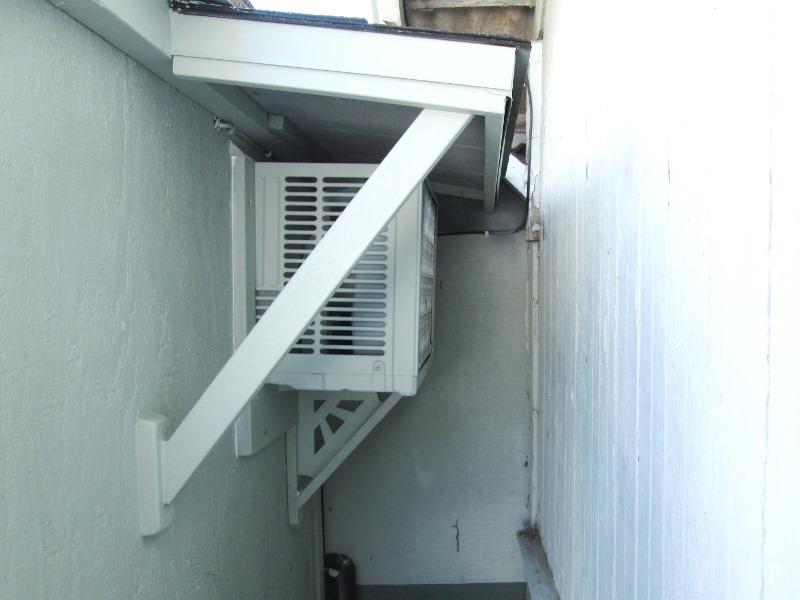
2. Window AC units case are very open outside, internals are exposed to elements. Especially the top where leaves etc. can fall in and get caught by open fan. Thru the wall units a bit better designed and usually use a metal sleeve. Where I'm mounting I plan to build short overhang roof to protect from debris and also from filling up with rain water.
3. Wall thickness. Standard home wall thickness will place outside louvers on case in wall. My shop walls are only about 1" thick so non issue.
4. DONT cut hole before having unit on hand. I found many, many stated dimensions of unit and precut hole because I had a lot of pre-work to install unit. I knew better but trying to get a jump ahead. However these stated dimensions ARE NOT size of hole needed to slide unit thru, at least on mine. I had to go back and remove about 3/16" to get unit thru. Once in position yes numbers are correct and my hole is larger than AC once mounted.
5. Pretest unit. When unit arrived I set on bench to verify it worked, and how it sounded. Would suck to install and then find issue.
Our install
Looked at a couple of places to mount. Decided in this corner likely best. As I dont know how effective small unit will be as far as actually cooling shop, mounted here would blow cool air across east bench and at south bench.
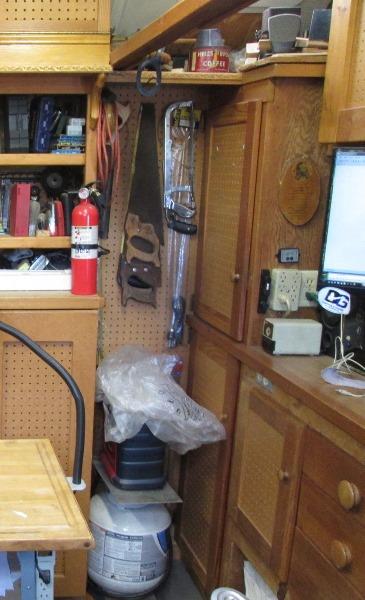
Also it places AC outside on north/east wall out of sun and protrude into are beside garage. Just need to remove the pegboard to access wall.
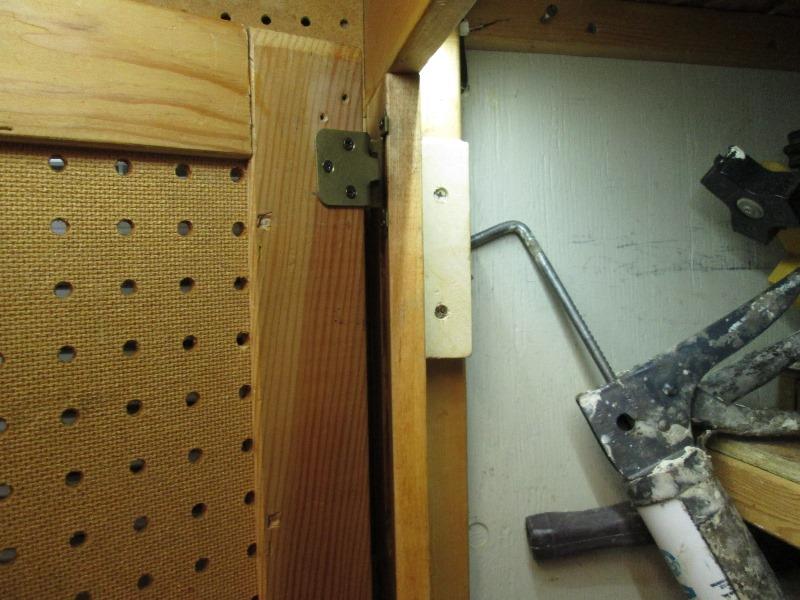
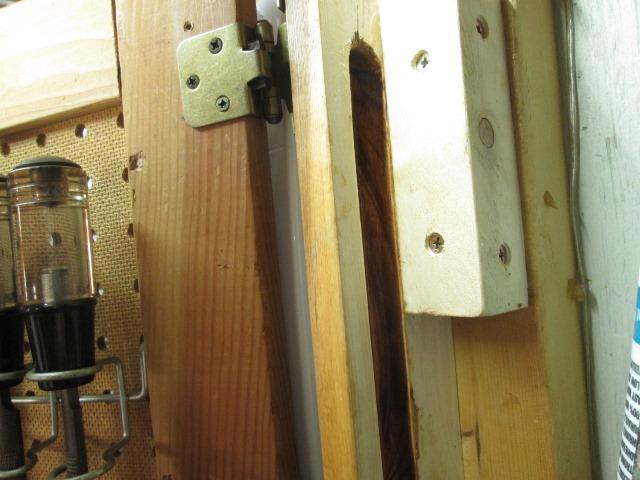
The upper cabinet door is a problem as its hinged right in the corner and wouldn't open but address after AC installed.
Removed cabinet doors, all the tools on wall and the pegboard exposing exterior wall.
There is an existing plug on side of north cabinet I thought would be convenient and was going to use but decided to add a new receptacle. I had recently run a 20amp line direct from source across this space for air compressor. Cut the 20 amp line, run direct to a new receptacle. Form it ran back to cut line that feeds air compressor and added a junction box.
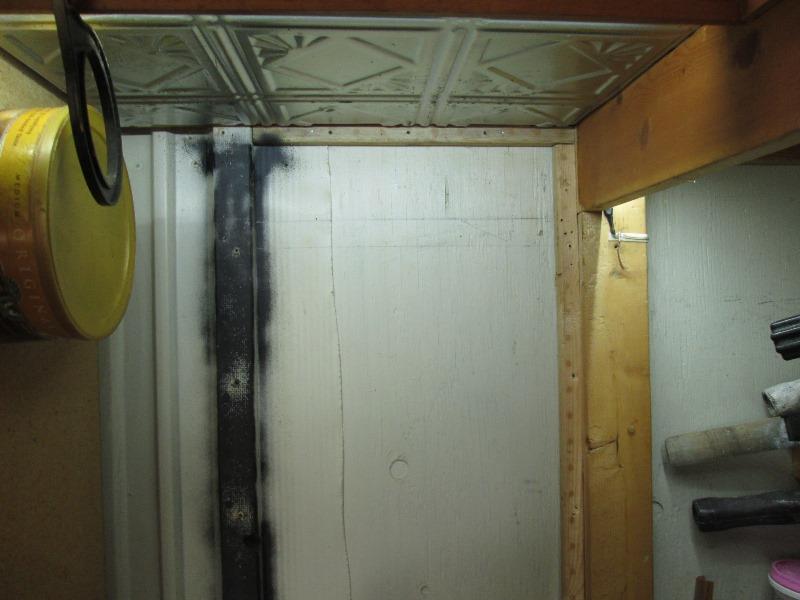
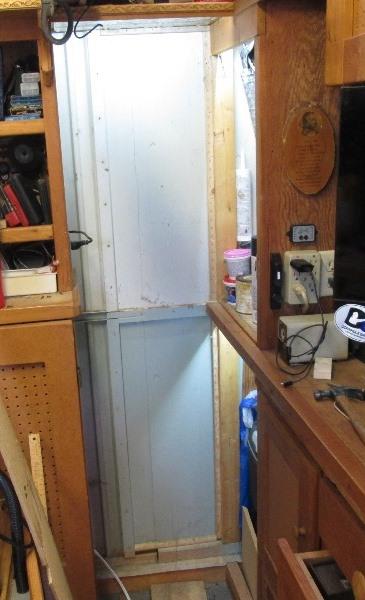
Layout to cut. The 1x2, (now painted black) is where the existing metal shed wall is spliced to 7/16 siding when shop was extended. I have to cut thru this. There is a horizontal 2x4 on exterior that also joins and 1x2 sandwiches walls. Not concerned with any structural compromise but dont want the metal flapping free once cut.
Hole cut. I added a piece of 1x2 on edge to metal. Used cut-off wheel on metal and finished the siding with oscillating saw.
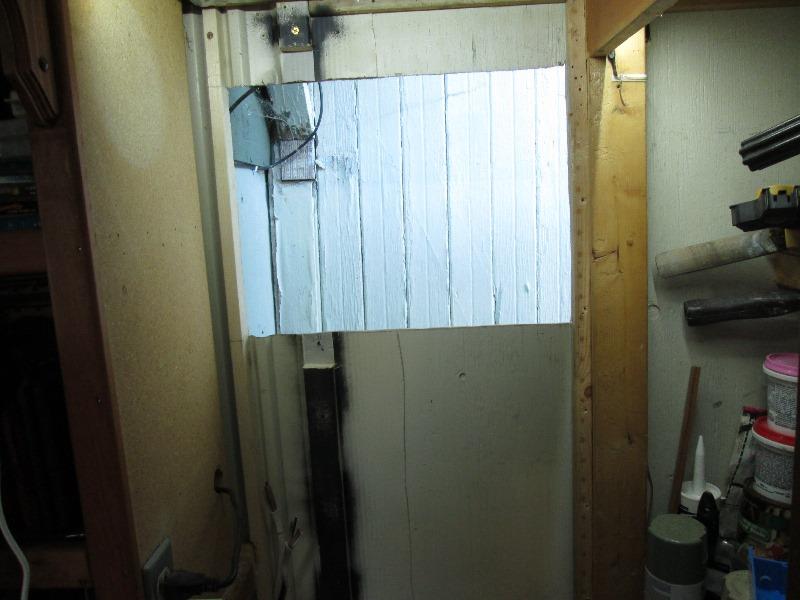
Glued and screwed spreaders
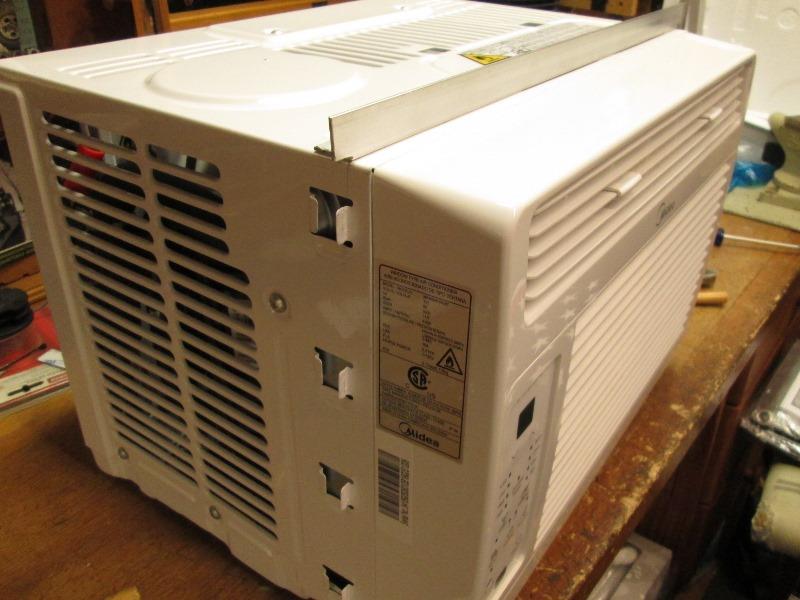
AC arrived...To mount using my own top support using 3/4" al angle. On the sides bent the tabs that were intended for side curtains. Note the raise area at rear of AC sides, and also at top. When I went to slide into wall hole it wouldn't go due to these. I had to re-trim hole larger about 3/16".
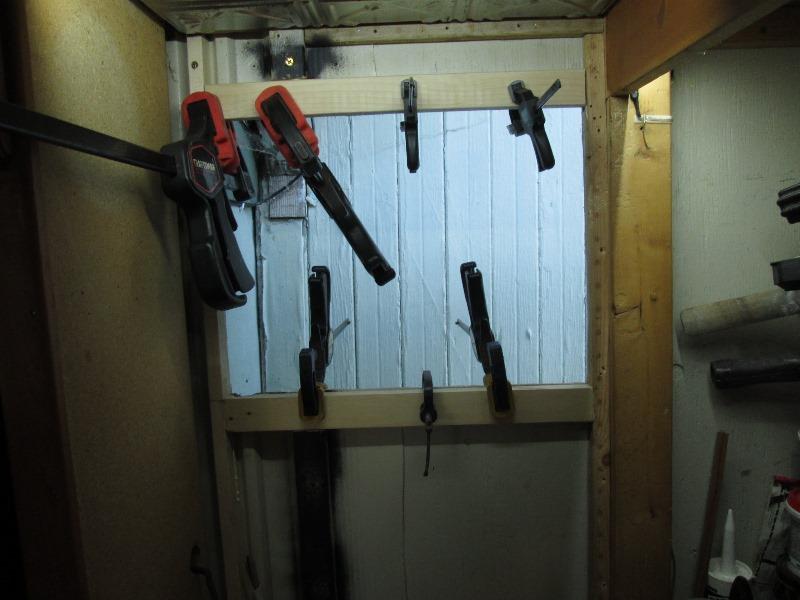
All this shows is aligning top angle with the bent tabs for placement. Top angle is primarily what stops AC from falling out. Doesn't really show but the tabs also are spaced so that when AC at mounted at correct slope, they are level perpendicular vertically. Meaning placing them against wall unit will be at correct slope for draining.I had set up temporary support outside before I realized this.
Nice fuzzy picture but in.
Outside I had set temporary brace to insure set at correct slope (and to make sure it couldn't fall out). I'll make a support under AC similar to what's on garage. The purpose of AC at slope, other than to insure water Doesn't run back inside is to collect it at deeper end where fan picks up to splash onto coils. Helps it cool. As I'm adding a small roof over the unit, I used recommended slope. Many, when using a window AC mounted thru wall, will set AC at steeper angle to make sure water drains away.
Back inside
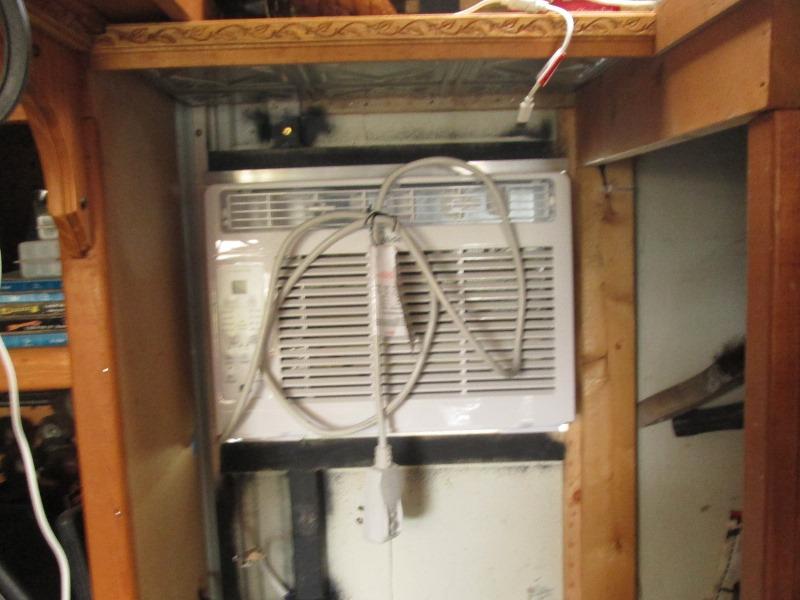
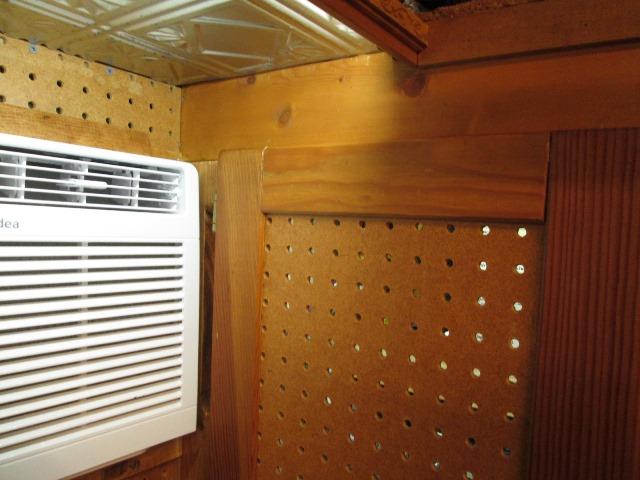
Plan, once mounted was to remove AC, cut pegboard, remount then slide AC back in. However pegboard would need to be over cut like shown. Trim would cover but there would be 1/4" gap between final trim and the AC mount tabs. Some other reasons, but I decided to cut pegboard to fit with AC in place. It will sandwich top and side stops. Top angle stop is getting screwed to wall.
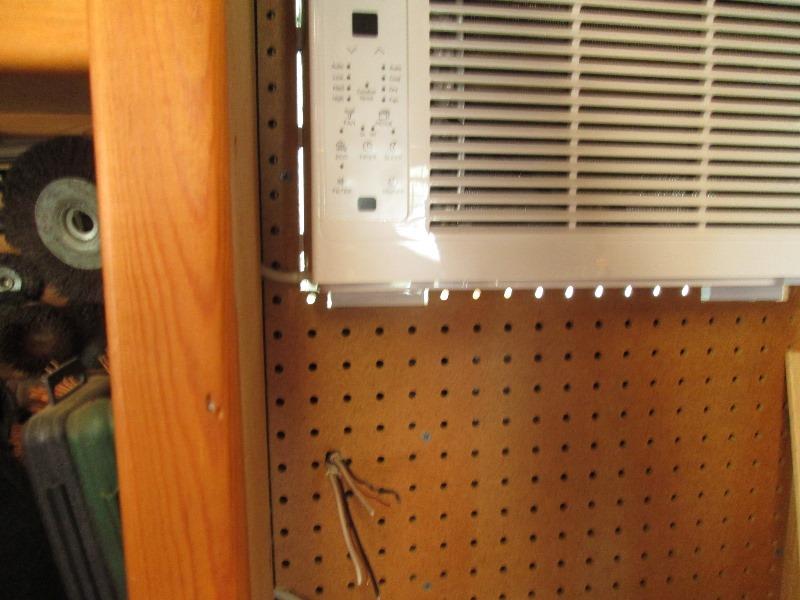
Pegboard back up. Does mean I'll have to remove pegboard if AC should ever need to come out . Bottom feet protrude 1/16", slight notching of trim and then screwing thru trim into feet and wall will secure bottom of AC from moving in or out. Also act as stop to shove in insulation. When I trim exterior, though my impulse is to caulk the crap out of it I'm not. Again Im adding small roof over so unconcerned with leaking. Caulking would seal but make removal a bear. If needed, removal of inside/outside trim, pull the pegboard and AC will slide out.
Wiring stubbed out. I was going to cut in box then decided to simply surface mount. If AC removal needed I could un wire receptacle but probably scribe, loosen box, cut pegboard, frame to reattach. Then it can stay mounted and pegboard would be free to take on/off. What I should have done but trying to minimize, something that can be done later if required.
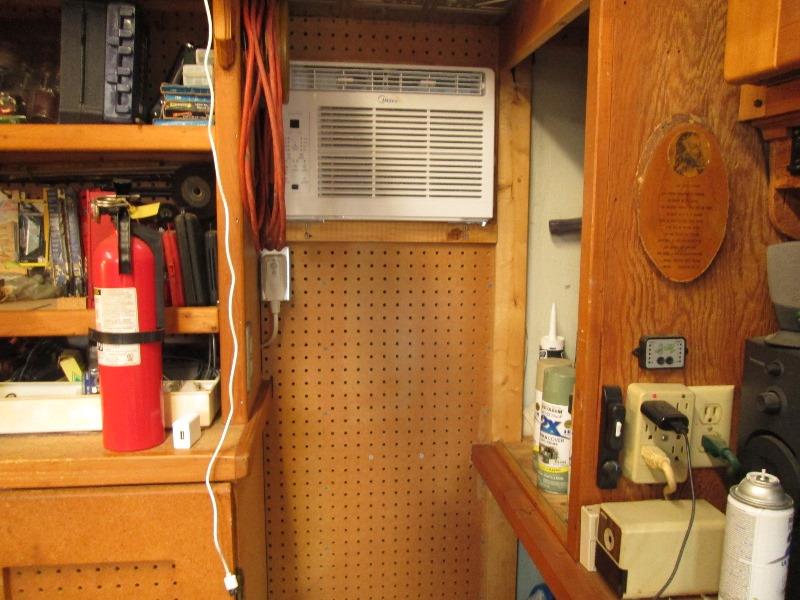
And trimmed. Ac pretty much installed. Got the shop back in some sort of being usable, surprised at the mess and disarray. Mostly due to what I had to work with, lot of fiddly details I hadn't foreseen. But pretty happy so far. Now to figure out how to rework cabinet door.
Rest of this page document details for my install.
A LOT of time imagineeering how to fix, seriously this was eating at me all the time I installed AC. but realized all i need to do is add face frame to left side, pushing hinge point beyond AC. Cut door narrower-done. Easy.
Well in theory.
Well extending face frame was easy. Mount 3 pieces of 2x2 blocks to attached new side 1x4.
Door a bit of work. Door needs to be about 3" narrower. Digging out the staples to remove side rail made a mess but not hard. Knocking off rail difficult due to glued dowels difficult but finally came loose with some serious hammering. Clamped door to bench then using block of wood against rail, dowels came loose without rail splitting. Then cut top and bottom rails 3" back without cutting into pegboard panel. Then cut the pegboard 3/8" longer to reinsert into rail slot.
Cool, door 3" narrower. Door will actually open full 90° against AC. Before it would hit stuff on the wall. I should do this to lower door, maybe, though Id cut top and bottom rails then pegboard and then remove pieces. A lot less potential to destroy door. But another project. Inside shop done.
If not obvious, can almost be seen above, on this AC the filter slides out the side. Cut large slot into face frame. There is enough room to 'carefully' slide filter out into cabinet.
Back outside...
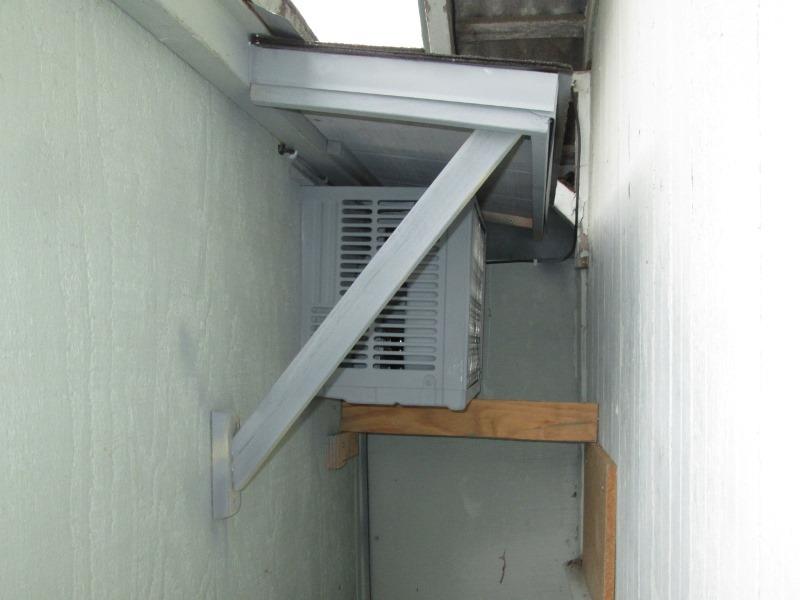
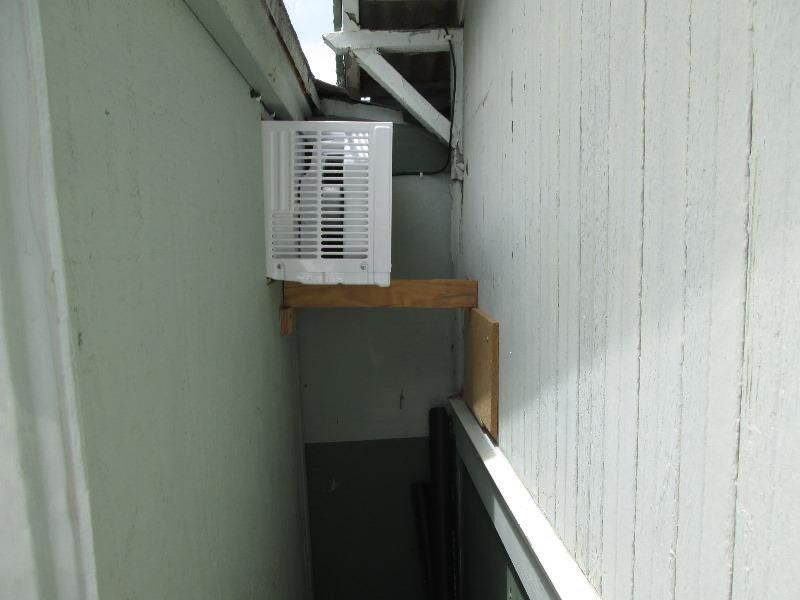
Roof. Didn't take any pics. Cut 12"x 30" panel. 1x2 side and front trim, and 1x1 at back and other side for mounting. The 1x1 pre drilled to screw to the existing 2x4 facia and 1x2 behind drip rail. Once panel made I installed paper, drip rail and shingled. I slipped galvanized drip rail under existing drip rail at facia and end upside down to cover joint when roof pushed up. Then installed complete pre made roof. Pushing up against existing drip 1x 2, ran screws up at outer edges of panel at either side of AC to hold in position.
Getting between AC and roof proved a problem to drive screws thru 1x1 into facia. I had thought I could use extension to reach screws. But bottom edge of new 1x2 facia and outer edge of AC required driver to be outside of trim. Garage to close so ended up using screw driver with my hand between roof and AC- about 2", (too close for battery driver) . Not fun but we got it. Added the kicker.
Sprayed the drip rails with some zinc primer and dusted the wood and end of AC. There goes my warranty but the stark shiny white was too much. Still need to trim the AC, add kicker at other side of roof (temporarily screwed roof to lean to shed) but shoved closed cell foam in all the gaps. Making small kicker to support AC. I dont think really needed but siding could bow inward with time. Then I'll paint all house color (including end of the AC to verify warranty status).
End of what might be useful as far as installing window AC thru wall. The rest is building support, taking apart and fixing 3 times because wasn't paying attention then addressing issues due to fixes. Spent more time than the AC install...
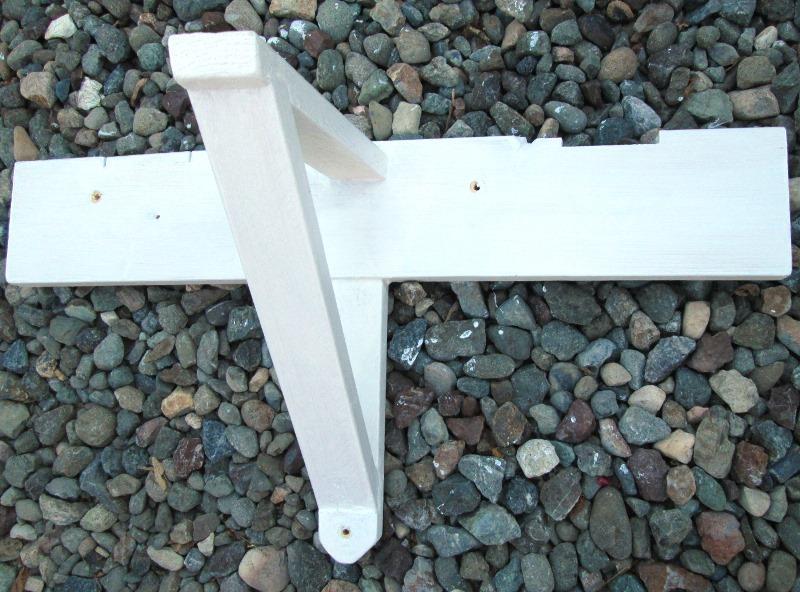
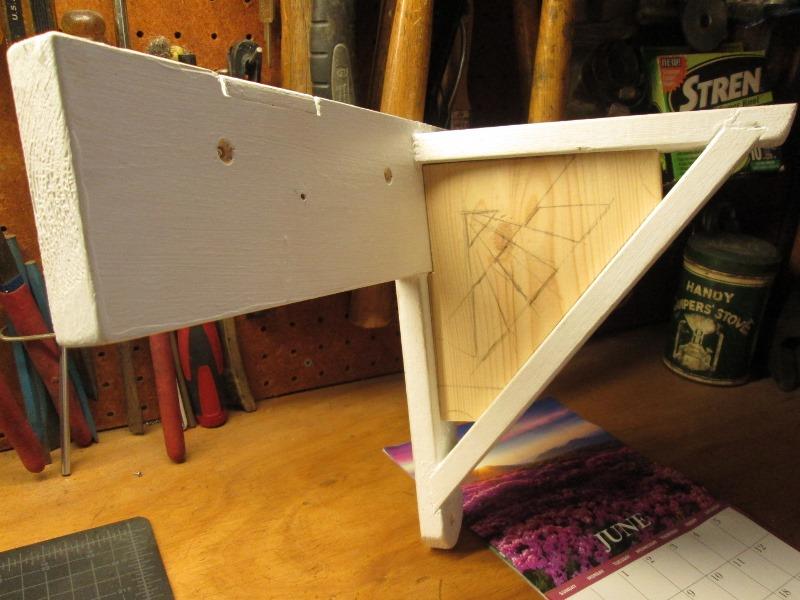
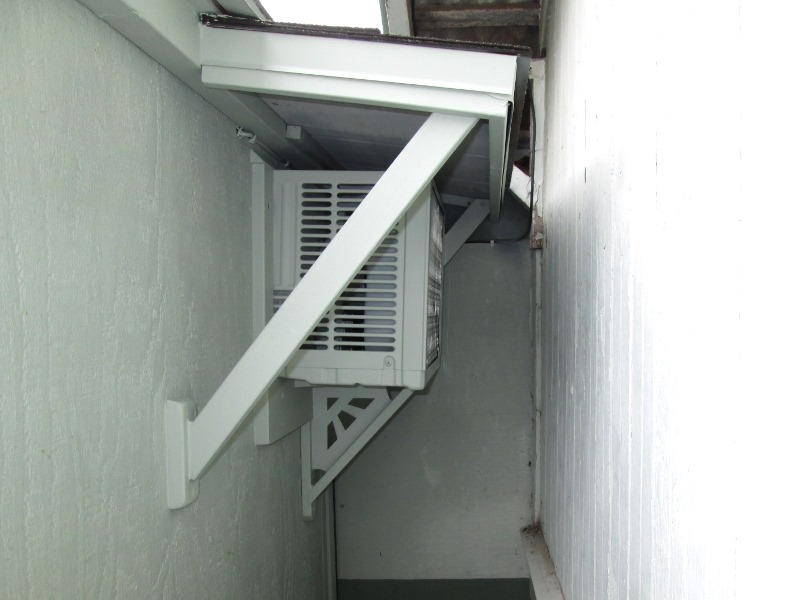
Got the AC support/bottom trim made, what a disaster. Picture is after taking back apart to fix. Wanting to match angle of roof kicker (that was randomly thrown on) introduced a bunch of weird angles. I notched both pieces of trim (hole bottom trim and support vertical) that mount to wall so they overlap. To the support top and vertical I added notches so angled brace is captured. However when I cut the notch on vertical I cut on wrong side...err.
To salvage I flipped wall bottom and vertical. Had to re-cut notch on top edge that butts to AC bottom. Thinking good save later realized the top horizontal support was supposed to be notched into the 1x4 and attached to its edge. Now with the 1x4 lap outside not enough material to hold, the vertical pieces lap thickness was intentional made thinner. If I drive a screw down likely split. This was all laid out but somehow got lost during build. Ended up lot of glue and staple to face then drove in a 2" screws thru both wall pieces into the top support piece. Probably ok but its changing stuff in mid stream and always bites me..
Got ready to mount and doesn't fit. The 1x4 trim piece that butts to AC was flush to the top support piece. The AC outer edge hangs down further than at the hole. With the support against edge of AC the 1x4 was 1/2" from AC. So took it all apart moved the top support down, which required re cutting the now too long angle piece...
.
Just didn't like the way top piece ended up butt mounted to back. I kept seeing if any downward force it could rotate out and pull away. Also now that top isn't notched into 1x4 like it was supposed to be, if hit at end whole thing would yield. Stuffed a piece of 1x6 to tie it together & notching in side supports.
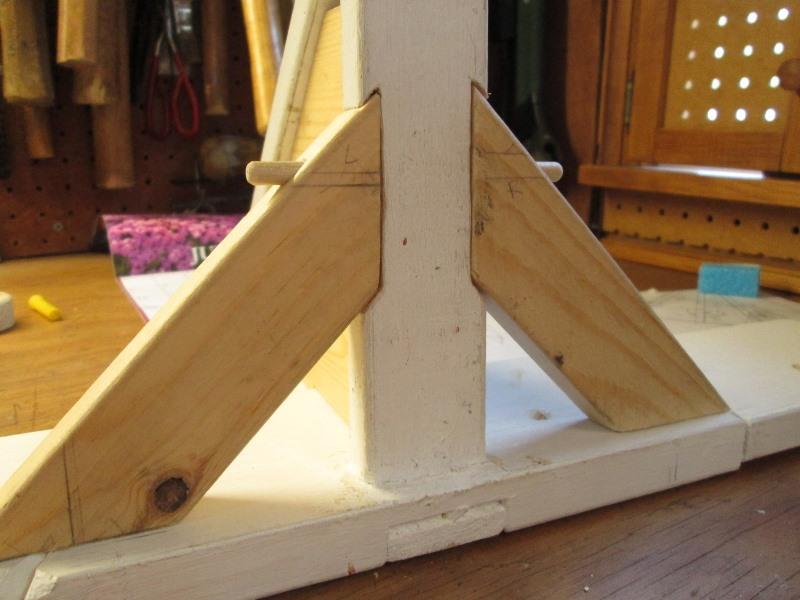
Notched in side to side supports. Screws thru 1x4 hold in and notches contain. Glued in 1/4" dowel to fix in notches.
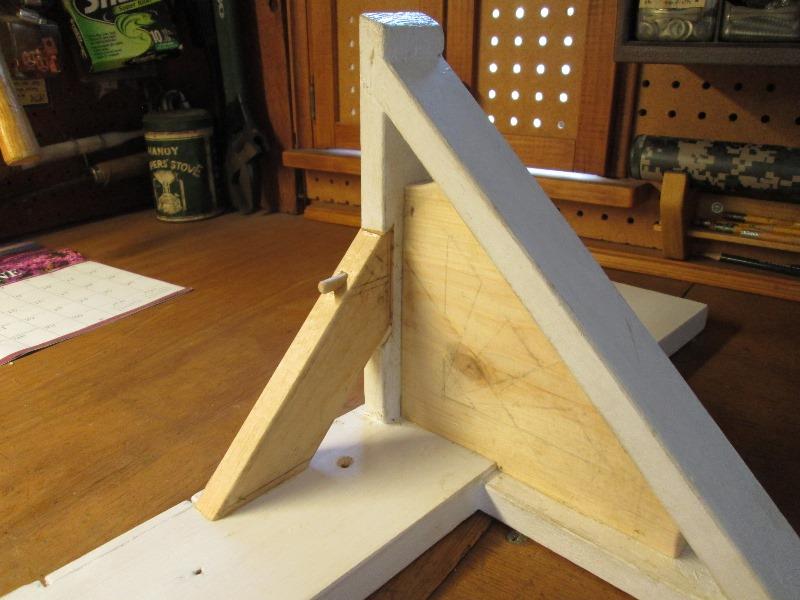
Getting ready to cut in a design for the heck of it simply decided I've already put way too much time into this. Screwed thru back of 1x4 into block, stapled the top and angle support to block.
Primed. Maybe tomorrow I'll mount....Not really liking the resultant solid center block. Could bore a 2" hole thru, maybe paint picture of a dead horse.
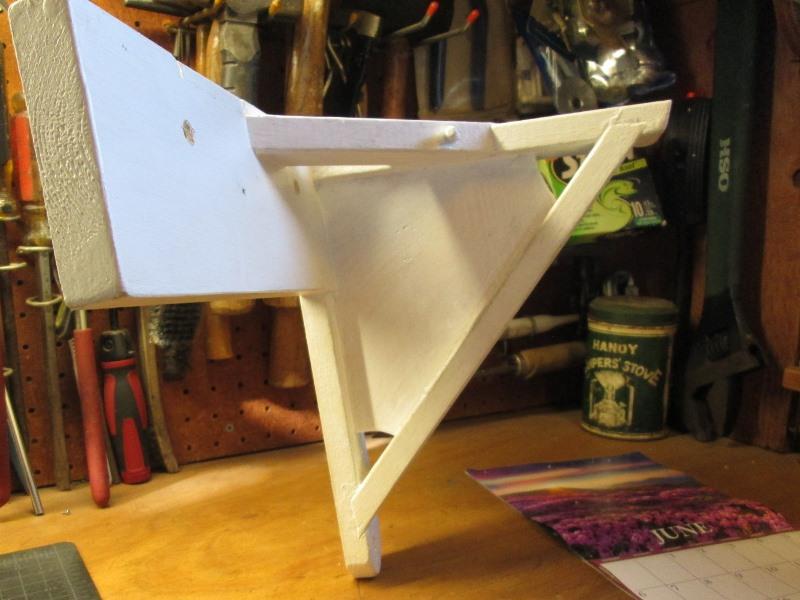
Done.
AC works well. At least I can be inside when temps climb. It doesn't actually cool shop much, maybe 10° lower. The heat generated by sun on the roof and the radiant heat off ceiling is more than the cold air generated by AC. Which I anticipated, but working or setting at either workbench in the path of cold air does keep me cool so overall worth the effort.
Done again, got back roof support kicker on, second coat of paint. Yet to do possibly, is gutter or at least diverter to try and keep some of the rain water out from between buildings. But thats a puzzle all on its own. Lastly inside. Due to dust and wont be used most of the year, is a cover for front of AC.
All in all nice project. The only thing I would have done different is add a manual drain before installing. Wont do it now because cant effectivly get inside to seal against rust. Issue is pan holds a lot of water that just sits there when not used.
Lastly covers.
Shop is pretty dusty so wanted a cover. Couldn't find one for this small of AC so ordered one with brown diamond and spent couple of hours re cutting to size. Looks like pooh but functional. Same with exterior cover.
Recut cheap plastic tarp cover to size. After got it made I'm hesitant about using the exterior cover. I'm seeing the plastic retaining moisture causing sweat creating more problems. Block from the ocean, Definitely help keep clean, keep nightly salt air out but... Maybe make cover from old bath towel then slip the plastic over. That'd keep the plastic off the metal.
Back to top of page
Back to Our shops mods section