Shop Articulating magnifier lamp
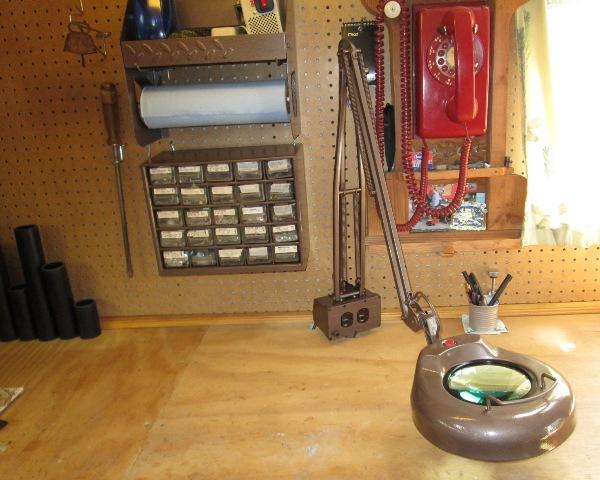
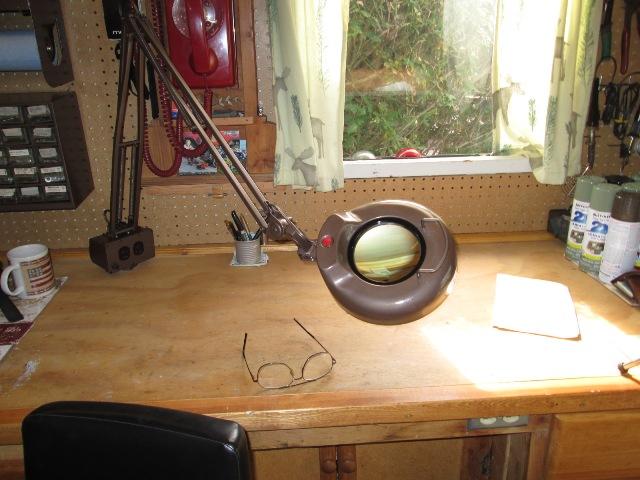
Whoo whoo! Ok just me, its just a light, but shown is my old drafting magnifier/lamp. This is after modifying it, basically swapping the lamp arm base 180° on the top of the mount box, which is why included on shop page. Figured many might utilize similar lamp but they don't lend them selves to mounting against wall, that and most have 110v receptacles on them. When mounted as intended on desk or table the plugs are facing away from light, normal as you don't usually want plugs draped on desk. But mounting on workbench plugs are pointing directly at walls, rather unusable. Which wasn't until after I got mine painted & mounted is when I decided to do this mod. All I could see were those plugs I couldn't use and how handy they would be. So I took it back apart to see if I could 'fix'. Couldn't have thought of this before I painted, just never occurred to me. Not a how too but just what you might look at, obviously details are light specific, mines a late 80s Dana.
At any rate-I'll start at the beginning, as I had no reason or intent to document installing a simple light in shop I didn't take any pictures before or of painting lamp. Wasn't until I decided to modify I started taking pictures.
- I've been wanting to mount my old lamp in the shop forever. I had thought I might make a bracket so it would hang on wall instead of bench. But never came up with i ether motivation and or a way to do it that wouldn't be more intrusive than just bench mounted.
More and more I was wanting (needing) the magnifier lamp mounted. Especially when needing to see fine details, holding a handheld glass out in the sunlight-or trying to solder small stuff. ya know...this is silly, I have a perfectly good light. So I drug it out to the shop.
Plan is to simple bench mount though I do want to paint. Removing everything on that wall I determined location. As it has a 4' reach it will reach both benches, though primary is where I solder.
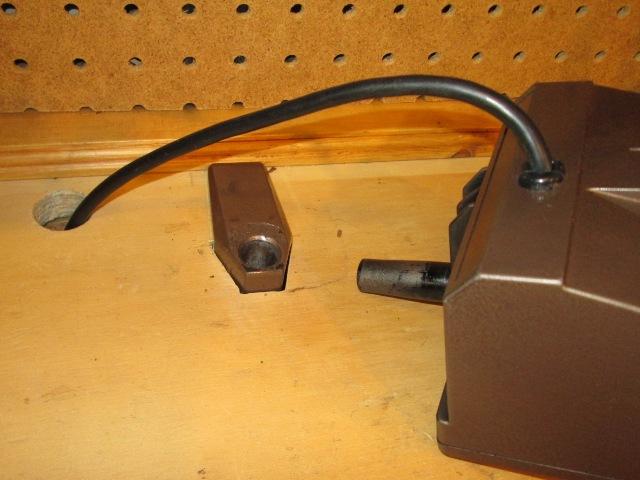
(Pictures are after modification, where cord is was originally front of box)
After deciding location for lamp, verify box could pivot and clear the trim at wall I cut hole in bench top, verify fit then drilled the cord hole. Currently it just runs to front of bench. later I'm tapping receptacle and add another inside cabinet to plug in lamp.
The lamp was very high gloss black, just looked funny in shop. Use some rustoleum hammered brown to blend in a bit. First I removed the magnifying lens. Not seeing how it was held in I removed all the screws on inner plastic, it also covers the electronics, though I couldn't fully remove it did allow me to see the outer ring that holds lens simply snaps in with 4 clips. I couldn't see those until I loosened the inner ring.
With lens removed I washed lamp with soap & water then with some Jasco TSP substitute. Yes I washed assembled, plugs and all, mostly as inner plastic ring/electronics cover, switch etc is all interconnected. Wet sanded with some 400 then washed again. Used compressed air to dry getting water out, then sat in sun for couple of hours. Masked the red switch, inside of bulb housing, pulled cover of receptacle, stuffed plugs inside and cover holes then reattached cover. I removed the upper 2 arms springs but not the lowers. Hung from my walnut tree and merrily sprayed the heck out of it.
Next day reassemble the light, put in the shop. Nice playing with it, this is going to be so convenient. I did note the paper towel holder (NOT one of my better purchases, it was previously reworked) and funky parts bin- Used up my left over paint and painted them too. I almost like the paper towel holder now.
Point in all of this is with the magnifier lamp finally installed, though I knew I couldn't use, having the 2 plugs there but unusable bugged me. They would be quite handy. Looking at it, it seemed I might be able to rotate the arm base 180° on the mount box, rewire so the power cord still goes out back. maybe...but I won't know unless I try
-
The arm base is riveted to box. They need to be ground or drilled out. Two forward rivets are under the arm pivot tube so arms need to come off. Removing the 2 lower spring not dissimilar to brake shoe spring-good deal of tension. Then need to remove the lights wire from receptacle. Oddly the receptacle is mounted to cover using a plate, to remove the wires you need to push in release clips which is on its back... which is under the plate the wires goes thru. A bit tricky with out cutting wires as you can only lift the attaching plate an 1". Fortunately I didn't cut wires, the fine strand wires have crimped on sleeves so they are not cut by the receptacles push in connectors.
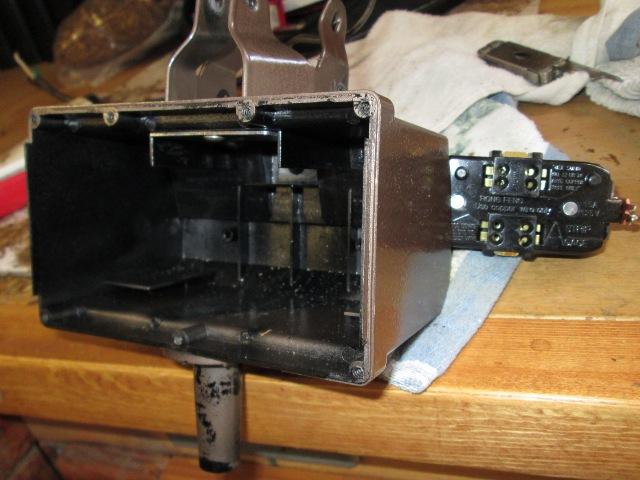
Here you can see the internal plate that rivets go thru holding arm bracket. Also in back the earless plug, its sandwiches to cover with a small plate that's screwed to cover. It has square holes allowing access to wire push in connectors but also covers the release pins?..aging don't cut the wires, if you need more room to release cut the cord sleeve back. I looked thru my junk to see if I had a brown receptacle and if I could swap for the black one. Most peculiar, never seen a plug like the one in lamp but the brown Eagle I found, though it had regular mounting ears, it has the same square connection bosses but also the 2 'lill locating nubs for the mounting plate. Odd, oh well I can swap to brown by cutting off mount ears, Ill have an earless receptacle if I ever build something that has panel face. Don't know what the advantage is-if you ever need to change plug you have to disassemble to get to the back? Interesting but off topic
Carefully set up box in drill press, drilled out rivets.
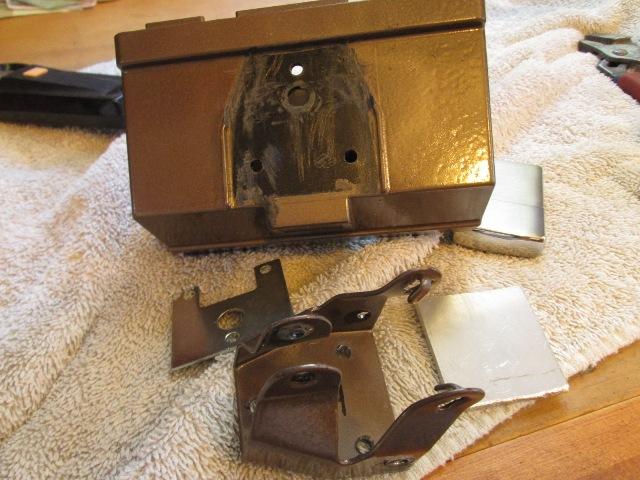
Next the top of box had a raised lip that matches base profile and a boss that sticks thru wire hole of base. Cut off the hole boss, using dremel shave off part of the raised lips that contained base, allowing it to rotate 180°. No picture but redrilled the box with basically same hole pattern as shown but mirrored. Also shown is replacement for the original backing rivet plate. It had a notch that matched square boss on front of box, I assume some models of lamp had something, circuit breaker or something mounted there, as I'm flipping 180° i want a full section across.
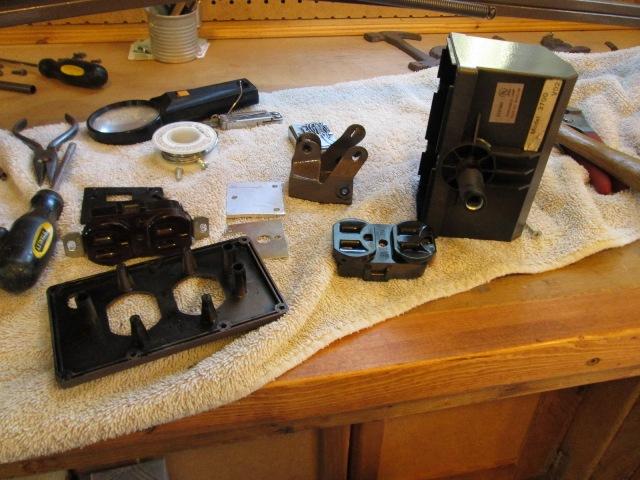
Parts is parts. On the left is cover, receptacle and its attaching plate, you can see the posts on cover that plate attaches to. Center is old & new rivet plate, arms base & old earless receptacle then the box on right. FYI- You'll note the cover, other than 7 screws, also has interlocking flanges. There is NO strength to the box when cover is off-If you need to do any thing inside box - remove the lamp from box- weight on box without the cover likely will crack the box.
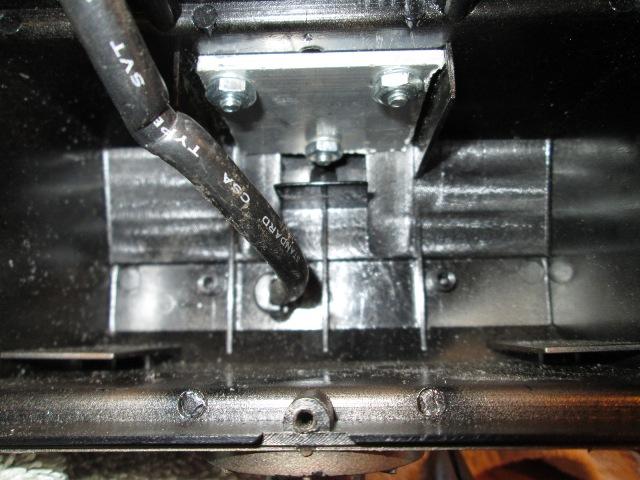
Box with arm base and backing plate installed, getting ready to match drill the lamp wire hole. Not sure what I'm showing, can see moved power cord to what is now back of box. Once wire hole drilled disassemble again to file hole round. Reassemble & rewire new receptacle.

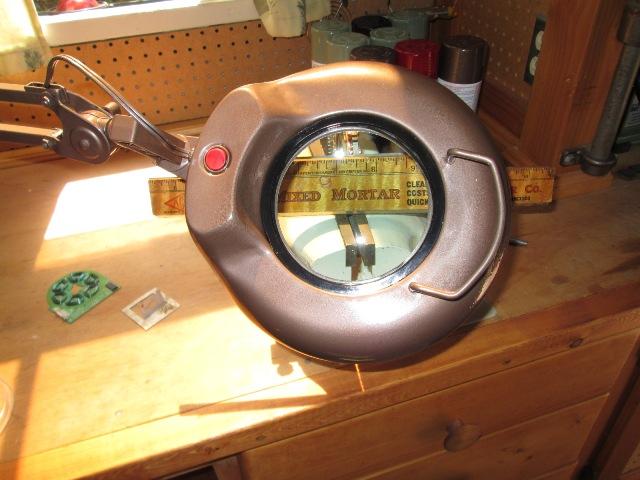
And installed!. Cool- sets 2 1/2" further back, plugs on front and useable! It may come back apart though because once I started eye balling & enjoying this completed project I saw what I hadn't. The earth ground terminates at receptacle. There isn't any path (nor was there previously) from the metal arms or light to earth ground. It would be simple enough to run to one of the base screws- I'm just confused & curious why it wasn't done before. Unless its because of the exposed metal parts-more likely to use something else outside and touching light might be more hazard if ? Something to check out-probably a non issue as most lamps are just 2 wire but its all the metal and the fact there's an earth ground just a few inches away that make me curious why not?
Regardless; this was one of those simple fun projects, though I ended up backtracking, picked up the p/t holder and parts bin in the repaint, just ended up way cooler than i anticipated. Both function and appearance- Just stoked.
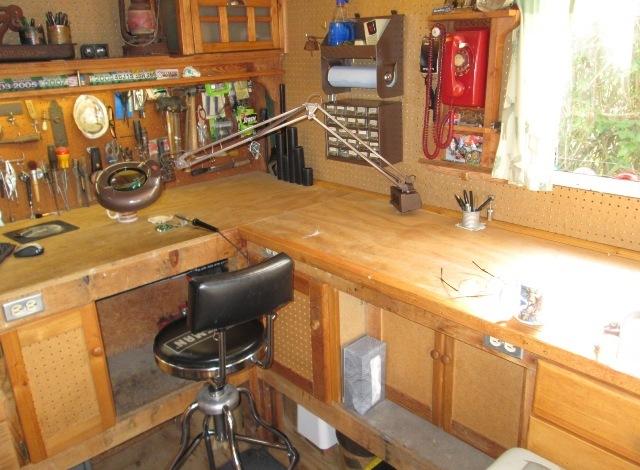
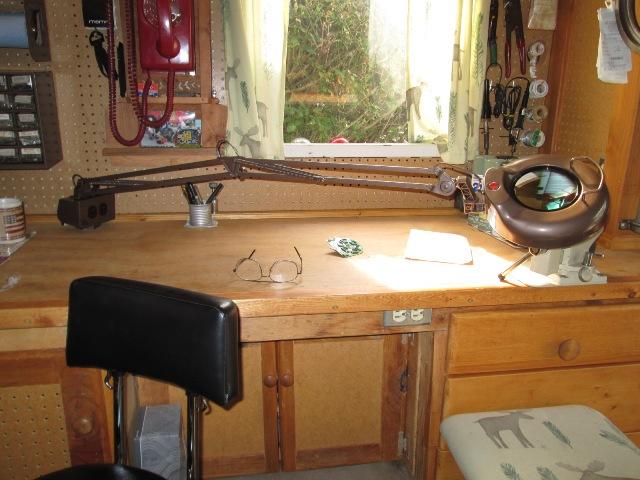
Swung over to where I'm usually working...
Swung way over to where I usually solder because of open window..
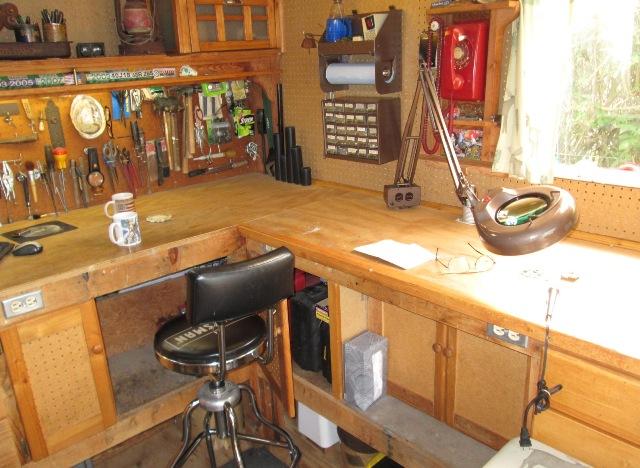
I'm liking this a lot...
Didn't realize but it will reach the small vice. Don't know when or why I might use like that.
Kinda cool... wanna see it again?
Probably not, and moving gifs can be annoying but like I said in the beginning-just for me. I had forgotten how big this light was. If this gives someone an idea before painting or installing unlike myself-
so much the better
Enjoy
Back to shop mods & additions section
Back to Our shops home page