Move & convert interior sliding doors to exterior slider.
-
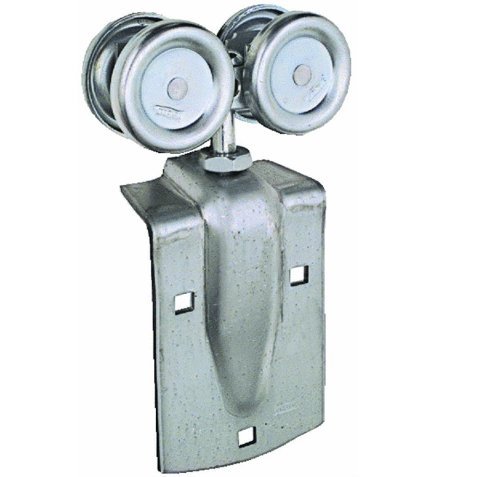
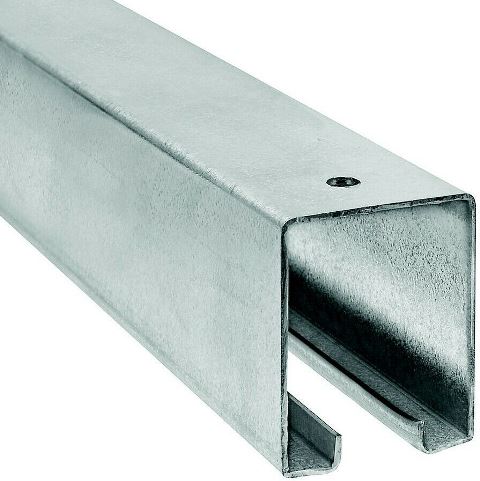
Using off the shelf hardware, and reusing exisitng doors. The trolleys & rail I used were Stanley from local hardware.
This may only benefit those who have a metal Arrow or similar metal shed. Specifically those who are using 'garden shed' as a semi permanent building. Of those I assume very,very few would consider adding external sliding doors. And even then Im starting off with an already modified building. Being that Im trying to relate how I did this after the fact, will probably not be clear. Though basically just bolting up external rail, attaching doors to trolleys there was a lot of 'details' to work thru.
Things to consider- brackets are made to hang the trolley rail, however they don't really lend themselves for conversion as they would be bolted into the gables, not lending any strength to building. Unless rail also hung on gable panels, the offset of gable would push the track & doors away from building another half inch, might be good if you build doors. Rail mounting, don't want water getting behind. Attaching the rail directly on wall up against gable allows tying walls and gable panels along with the original door track. At least my conclusion was stronger & simpler.
Doors- I seriously looked at building a single door, making the passway narrower-offset to one side, though larger than one existing door. In my case though would be issue due to drill press sets at opening. Height-not a consideration for most, if your walls are mounted at floor level-typical, your existing doors will work, the rail and hangers lowers them. Building or reusing old doors need to address the gap between trolley rail and top of doors. I had to extend mine but my building sets 3 1/2" higher than floor. Existing doors, you need to swap doors left for right, add header or backing board for hanger attachment.
This describes how I did mine, it is not THE way to do it. Many ways, actually quite simple if you really look at it.
Mine a bit more convoluted due to raised above floor level. Secondary is Im adding or framing in the door opening. I want/need some vertical support for roof, for more wall rigidity at opening. Just not a lot of structure. I have added weight of roof. Most wouldn't be doing this. Also by adding to the door opening, decreasing its width does give more overlap of doors. The new external door track will also be adding to structural integrity of building.
Couple of thoughts on the metal sheds
The internal sliding doors are problematic, especially if your building sets on a wood floor. The perimeter bottom building frame that walls
attach to is also what the doors slide in. Meaning any water hitting door, running down enters this track. Water that does not exit via the drain holes (which are dumping on floor & or usually plugged with dirt) will travel to the corners and leak thru the joints at corners or any seams.
That said, if you build a wood floor (or even concrete, or beams) and use dimensions supplied with instructions, the amount of water, a lot, entering building from door track will be the least of your concerns. It is intended you build floor that ends up with approximately a half inch bigger than building. Why? I have no idea. Problem is there's is no way to really address this "apron" after erected. Anyone erecting one of these units SHOULD assemble the bottom perimeter floor frame, period. Check, square the frame and measure to the flange edges. If your using plywood on top of floor structure use flashing to cover perimeter edge. Well enough rant-this old shop was my first erection of a metal building, originally I followed the instructions to the letter-Obviously these are not intended as permanent structure but a bit of forethought they can last longer.
On to converting the doors...NOTE: this was done 4 years ago-most pictures after the fact.
-
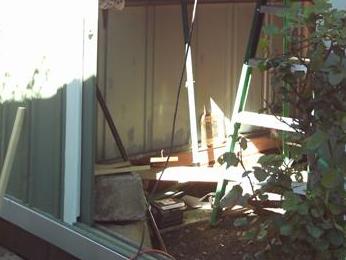
When I rebuilt shop, as shown above, I built full perimeter frame of 4x4s on top of 4x6s. Floor is hung off lower 4x6 and flush to it, the building sets on the top 4x4. I used the existing building bottom sill on top, which for several months meant I had to step over the door sill. When assembling the 4x4s frames I had made allowance as far as how they were bolted together with the plan the top 4x4 at door opening would be cut out and removed.
I went to extraordinary effort trying to ensure water couldn't get in until I could do the external doors. Caulked all seams, drill cut trough at drain holes, caulk lil dams trying to keep any water in sill at the door and have a chance to drain but to no avail. 1st rain there was water standing in the shop, once inside couldn't get out.
Started looking at the doors. Really had no clue how to do this. I want to reuse existing doors if I can. Local hardware had some simple track & trolleys to hang doors. so as a starting point I picked up 10' of track and 4 trolleys. The doors after removing the 4x4 on floor are going to be 3 1/2" too short. I assume I can add something to extend.
Next I need to cut out the 4x4 sill and the building sill. But I need to add or frame in the door opening. The existing doors have a flange bent at right angle, the building door opening has flange bent in so when doors are closed both acts as stops and semi seals outside. The opening has no structure other than the stiffness of the bent panels. So im adding vertical 2x4s at each side. These will set on top of the 4x4, and the buildings door flange edge will get screwed to them. A plan anyway.
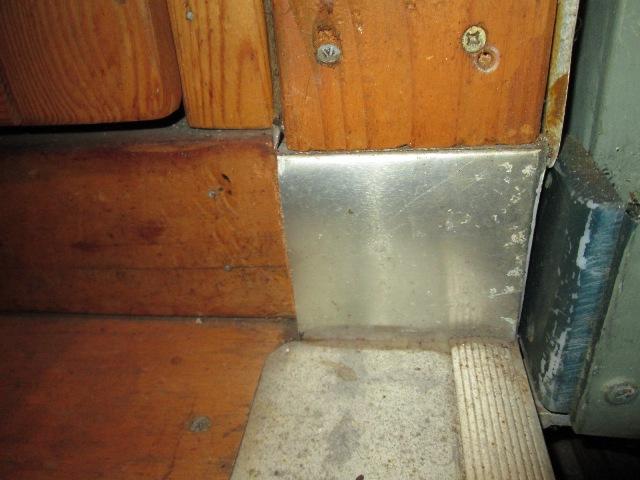
Cut the existing metal sill flush to door opening. Then measured out 1 1/2" from opening and cut thru the 4x4 AND the 4x4 flashing. Next I cut several pieces of 4"x8" long aluminum flashing bending into ells. I wrapped the ends of 4x4 3 times. First setting on floor and bending up over 4x4, second tucking behind outside flashing turning in over 4x4 end. Then lastly tuck under top edge of outside flashing and folded down toward floor over 4x4 ends. Each was bedded in big stretch caulk as I went. All this does is carry any water down past the 4x4 to 4x6 joint. Even then this all will end up behind the doors. Way over kill. Lastly the cut out length of 4x4 flashing was set on floor wrapping the floor to 4x6 edge. Used an aluminum step trim on corner that's attached to face.
Next sat the cut to length 2x4s on top of 4x4s after notching to butt against existing inside top door rail. The original upper door track is staying as its also is what exterior sideing is attached to, its structural. Screwed building flange to the 2x4s.
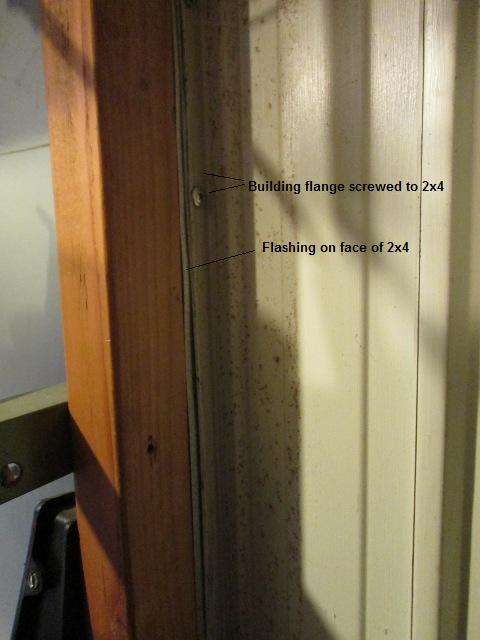
Just showing building door flange screwed to 2x4. Once i had them attached I removed. Add a full length piece of 1 1/2" roof eve flashing to cover face of 2x4. You can just see the edge under building flange. Again the it runs long overlapping bottom floor flashing,
Trying to show edge of flashing behind door on the right. The 'drip' rail of the flashing also helps water from migrating sideways behind external doors. Where the building and flashing meet outside is caulked. Again its all behind the doors once installed.
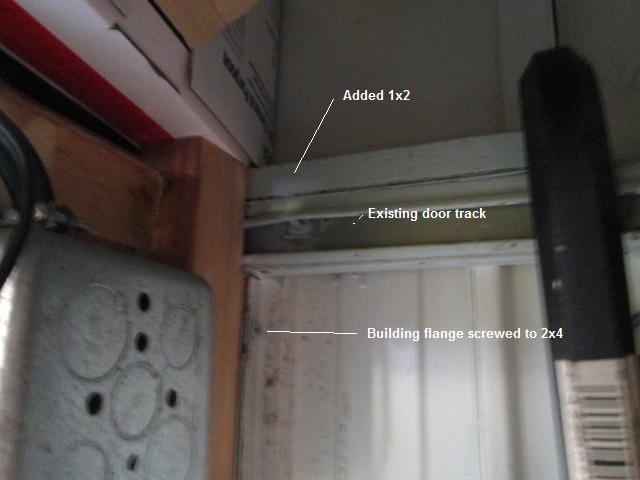
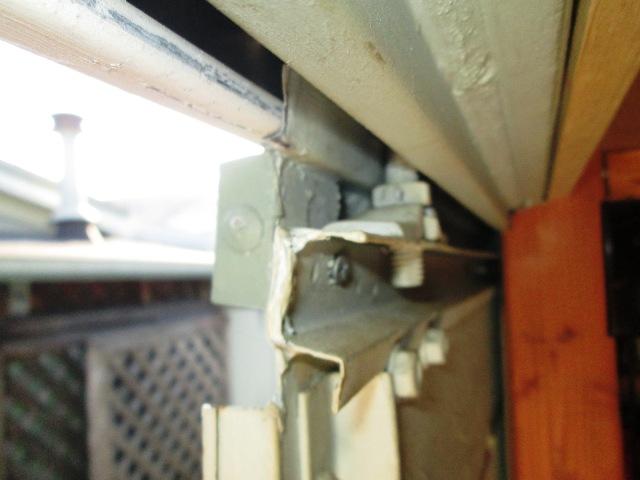
And detail of backside of 2x4 top, fuzzy pic. It supports and is attached to the existing rail. The external track when add will be screwed to the existing rail thru sidling. To the top of the rail I attached a length of 1x2, mostly to back up screws from new outside rail, will go thru old rail & into 1x2.
Same vertical 2x4 from opening side. So now I have Vertical 2x4 at either side of opening. Stiffening building, adding both wall support and vertical load support. When outside track is installed, screwing thru building panel into original track and 1x2s on top of track, sandwiching gable flanges, it will end up one contiguous horizontal beam. It will be supported, attached to vertical 2x4s. All this once done will be integral to and part of original building. Way over kill for the actual couple of hundred pounds at most it supports. But stiffer than heck. Again not needed to move the doors outside, but with added weight of my extended roof sheeting and asphalt shingles the metal panels were always under a lot more load tension than designed for.
This is opposite gable end the front is similar except the joint between gable and walls uses door track.
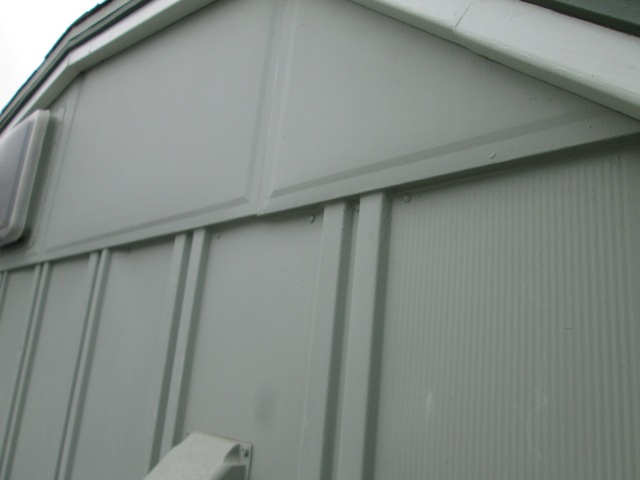
The new rail or track will be butted up against the folded edge of gable at top of wall panels.
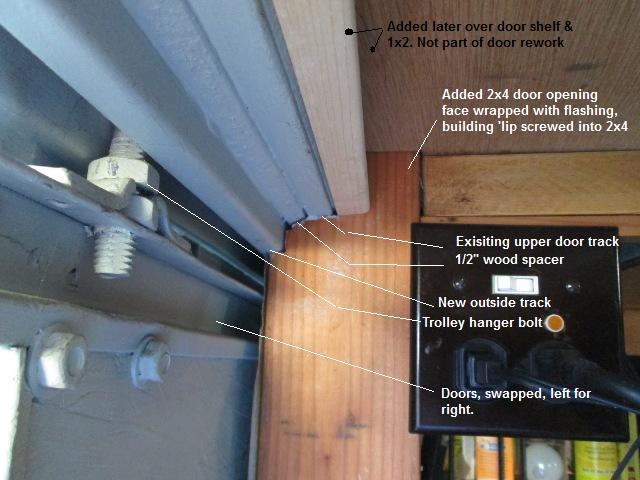
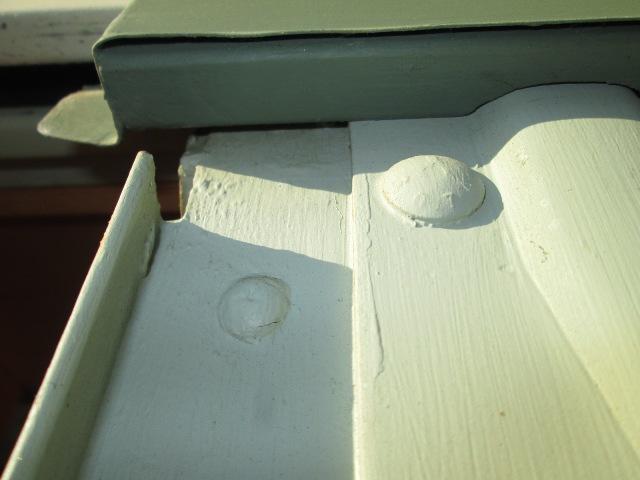
And the front edge. As you can see the original door track is inset so spacer required. Same distance back as flat sections of walls, where spacers also needed. Setting new track against the gable to wall corner will cause it to hang about an inch below the existing door track. Inside on top of old track are added 1x2s. But seriously stronger and more leak proof. Once track installed it ties the folded gable ends and tops of walls panels, old track and spacers, screwing up at angle thru new track and screwing into existing track thru to added 1x2s. It sandwiches everything, Second setting into the corner makes for a better sealing. When I get ready to screw track down I will apply a liberal bead of caulk along that inside corner and bottom of gable, so when done it will be sealed and bedded. Ill also add a bead at the outside corner but it will not be the primary and only way to seal.

Next was actually attaching. Cut full lengths of 1x2 to set on top of old track. These will be clamped in place until outside track is screwed to them.
Cut track matching angle of building. I drilled 7 thru holes in the front face of track, large enough to fit screwdriver thru, drilled a smaller hole thru back. These face mounted screws will pull the track tight to building but its the angled screws into block thru old track that are the primary attaching screws.
Due to doors behind under eaves and butting to trim need a way to get trolleys on & off. I can not remove doors unless I unbolt trolleys anyway so cut track 'just' wide enough to insert/remove trolley, trying to leave as much of the rolled edge as possible for strength. Because of how much it weakens I didn't do the other end. If for some reason I need to replace trolley I would have to pull all. Doors can be remove by unbolting the trolleys from the trolley door hangers or I could cut other end at that time.
Once track cut to length sat up & scribed a line bottom of track. Made spacers to mount against old door track and wall sections. Glued them in place and used a few truss head screws from inside.
Applied a perfuse amount of caulking to everything, edges -inside corner, faces of spacers-everything. Clamped the track and inside 1x2s in place . Then thru my drilled 'access' holes drilled pilot holes, screwed the track to building. Inside the old track I used some small squares of plywood inside the old track for additional screw holding & clamping force. Then I drilled quite few pilot holes thru inside corner of track and drove screws at an angle thru track and anything that was there into the 1x2s on top of old track. Who-who.
Just a view under the track. Cleaned up the caulking
-
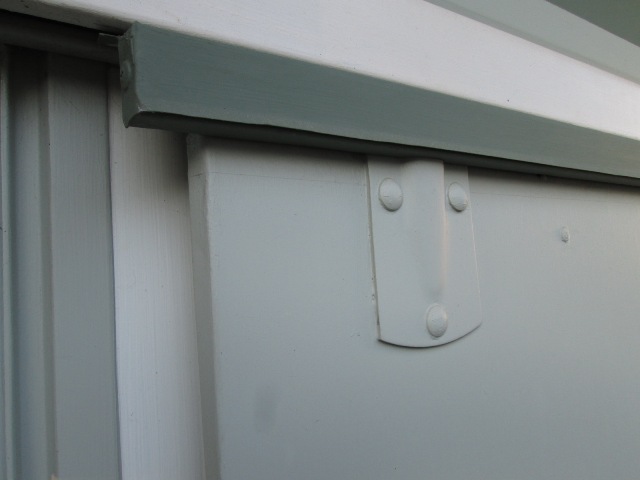
Doors pretty straight forward. The trolley hangers simply bolt to doors. An 'L' shaped bracket has a hole in top that bolt from trolley attaches to, Adjusting height as need with the 2 nuts.
My doors are simple flat pieces of sheet metal folded into a shallow box. A top flange that old hangers were screwed to, a bottom flange that rode in lower track, and a side flange with folded lip. The side flange when doors were inside were on outboard edge of door, the folded lip hit the folded edge of building and were what stopped the doors in closed position. Now with the doors out side, I swapped doors left for right. Places the much stiffer attached side flange at center.
The doors have a large sheet of honeycomb cardboard as filler. I cut & removed top 6" of cardboard and replaced with a piece of 3/8 chipboard. Using brackets as template drill thru the doors. Bolted the brackets to doors, again bedding them in caulk.
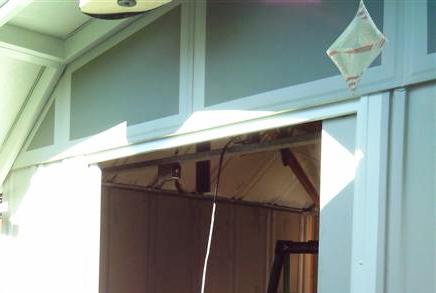
Slid trolleys into track, then hung the doors. Played with them a while-this is going to be so much nicer.
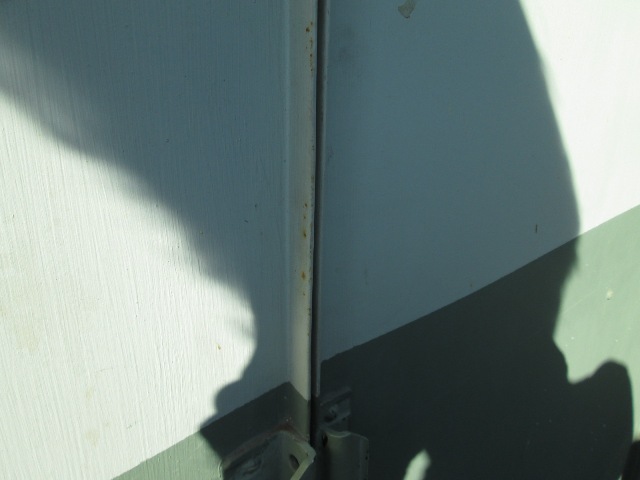
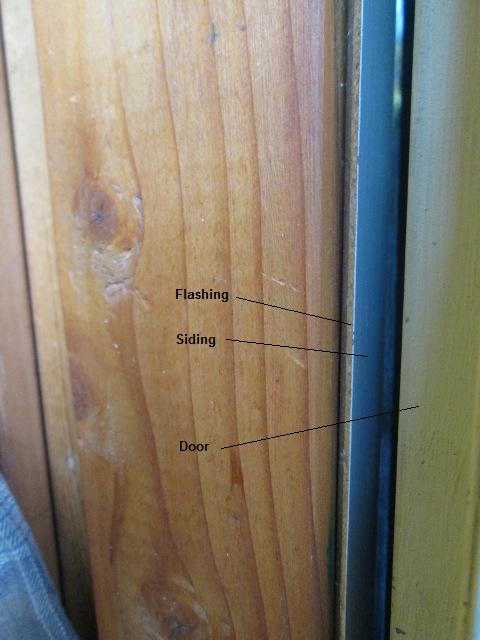
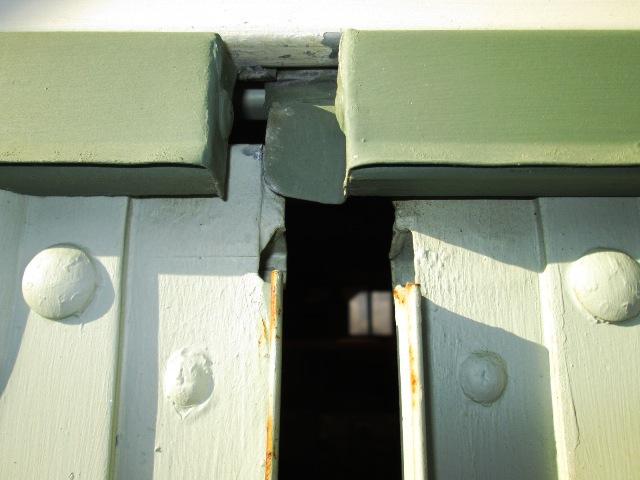
Showing the swapped left for right doors. Allows the bent edges of doors to butt against each other pointing outward. Keeps any water on face of doors being blown in between.
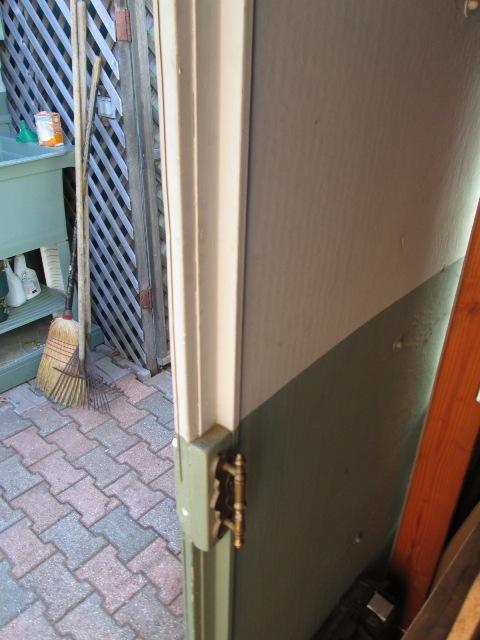
And doors inside. With the flange at center edge much stronger when bumping. Don't know how many time in the past I've had to try to rebend the doors flat. Added old drawers handle, they also act as stops if I 'throw' the doors open.
-
Now, if you hadn't realized, i need to address adding to the doors, they are 3 1/2" too short because the building is setting on a 4x4. Also by designed the track and trolley leave a 1" gap between top of door and track.
The gap at top I was simply I was simply going to run a full length of 4" flashing to hang over & cover the gap. To the bottom of doors I was going to something to extend length. However I could not come up with a reasonable and easy way to attach and seal the flashing to building after the fact.
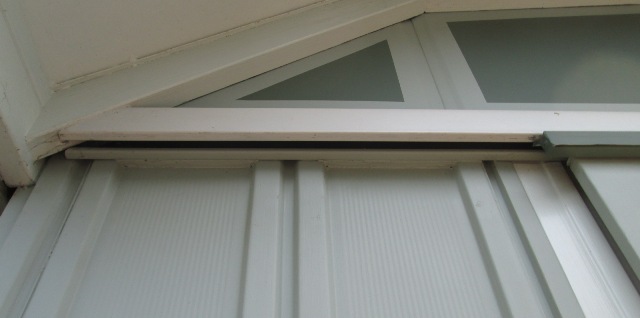
Another fuzzy pic but what I did was take a piece of eave flashing, and rebend into a Z. Attached a piece of 1x2 to top of door flange, capped the ends with couple of small pieces of scrap flashing. Set the flashing on the 1x2, bent ends over to attach.The Z tucks up behind track.
The 1x2 sets on the trolley brackets, about an 1/8 gap.
Made the top pieces offset so gap not in line with door gap. Bent a small piece so the right door slides under left door, covering gap at top of doors and between the 2 top of door flashings. Surprisingly 4 years later this has never leaked. I assumed at minimum rain might blow in the 1/8" gap between doors. Was always going to add a small 1/2" piece of angle to left door that would cover gap when closed.
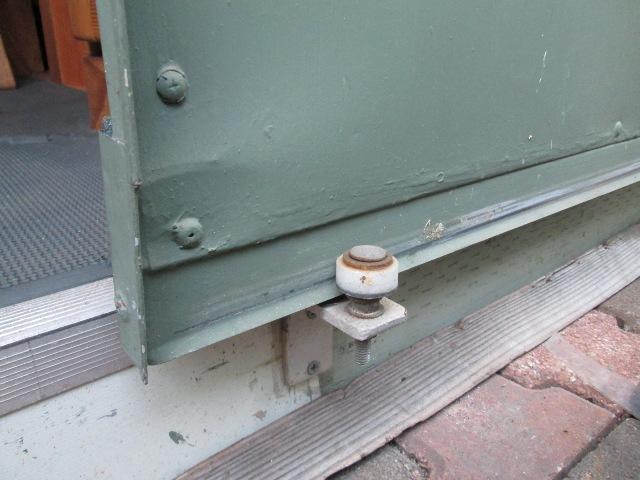
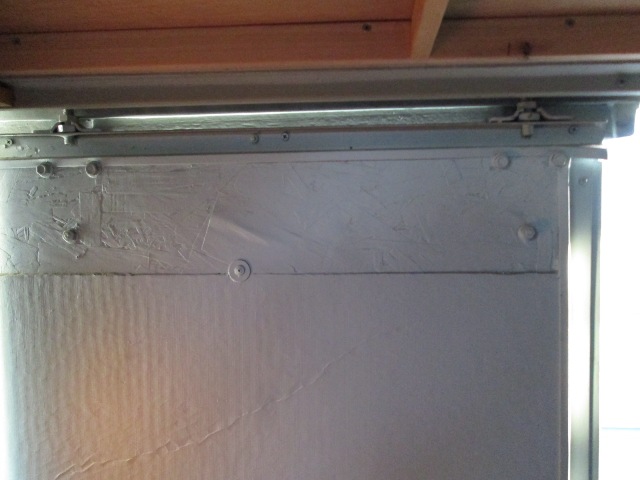
Extending the doors ended up way simple and a lot less than I had thought. Adding the track 1" lower than when laying out and the 1" gap between track an top of door (now covered) another piece of 1x2 added to bottom was all I needed. I did have to remove the doors. Bent another piece of eave flashing to cap 1x2. Caulked & screwed thru bottom of 1x2 and flashing into bottom door. Made little wheel stays.
To the inside of doors wrapped lower corner edge with some more flashing as they were cut to clear the sill as originally installed. Added blocks of plastic at lower corners as glides. A lot more caulking and paint.

This is all probably as clear as mud-trying to explain how I did something with pictures of it 4 years after finished. But hopefully that one other person out there that's considering this might glean some ideas of how it might be done (or how not to do it).
But kinda fun trying to remember. The doors have worked out really well and worth the effort. No leaks and a lot easier to use than the sliding track. Something I've want to do since the 1st winter this shop was originally erected. Even though I lost an inch of potential height with the new track, overall I still gained 4" between old door track and sill, and the new track and floor (no sill) as a result of the rebuild. New door opening at 72" means I rarely bump my head. Tomorrow, as I noted taking some of these pictures, need to chase some rust on the doors.
Back to shop mods & addtions section
Back to Our shops home page