Building a small portable cut table that comes apart for storage.
Have a small plasma cutter on the way...
 Specifications:
CE & CCC approved
Input voltage: AC220 V ±1 5% Single-phase.
Input frequency: 50-60HZ
Power factor: 0.93
ARC starting way pilot arc/untouched
Cutting amperage: 20-50 A
Max Cutting thickness:20 mm (25/32")
Rated output voltage: 100 V
Duty cycle: 60%
Efficiency: 85%
Weight:9kg (20 pounds)
Dimensions:
385x 155x 295mm
6 1/8"x 15 5/32"x 11 5/8"
Sounds like a while before might see- in the meantime building a burn table, well a small platform to cut on. This will be very cheap, simple quick & dirty to start. Eventually though...
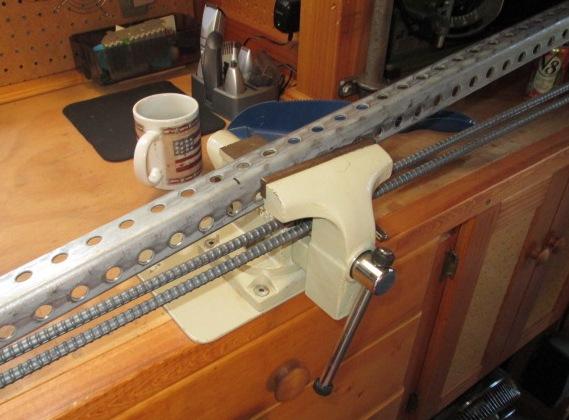
Id like to build a nice work table for welding on, open grate section to capture/contain bulk of metal cutting. For cutting with the plasma cutter, and gas torch. I'm seeing also incorporating vise allowing to cut over grate when using sawzall etc. And allowance for setting the chop saw on it...
Primarily started out just planning a simple surface to cut on with new plasma, quickly grew into to what I would like build. No limit to versatility and features that could be combined...whoa....
Well this about none of that. Very difficult to restrain myself... but currently all metal working is outside of my small wooden shop. Containing the mess to one area of patio/ (extended shop floor) is difficult. (Wood trim on the house is rusting). Grinders etc bad enough, getting plasma with 60+# of air blowing the debris just adding to that. So quick, cheap, easy containment is first. Also new cutter likely will be very handy when fabbing up new metal working table, so would be nice to have something temporary that will allow use without limiting myself because of the mess, proximity of house. Also this table, main task, is to build so it can be easily broken down for storage.
Basic would be a can or drum with a grate on top. Table frame with funnel under grate for collection next. I haven't got a plan though because of the options and what I could do. So I am forcing my self to start with a small square frame with slats. That will allow cutting. Then Ill think about adding simple legs and something for collection. Also allow time to scrounging material or get to metal supply yard.
For frame I was going to use 1 1/2"angle, slats I was going to use 3/16 x 1 1/2" flat bar which would be removable. As I am buying materials, all that went out the window because of cost. Rebar is dirt cheap, as this at best is temporary, just not spending a lot. Going to hardware store to pick up angle for frame saw some bent angle with holes. Its pretty light stuff but cheap. However the holes are Ř7/16" spaced 1" apart, would allow fitting 3/8' rebar-instant frame, pre spaced. So picked up 20' 3/8" rebar. 6' of the 1 1/4" perforated bent angle.
Nuff of the intro.
Lay out small cut table top
Material
(2) 10' x 3/8" rebar
(1) 6' x 1/8 pref. angle
Then laying out to cut realized material bit on the short side. So laid out by maximizing material cut lengths, mostly rebar to get size of table.
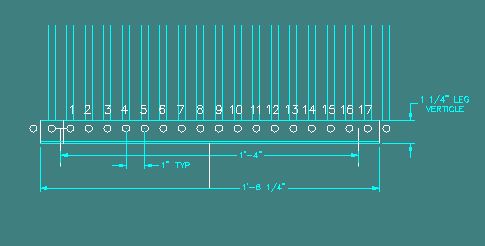
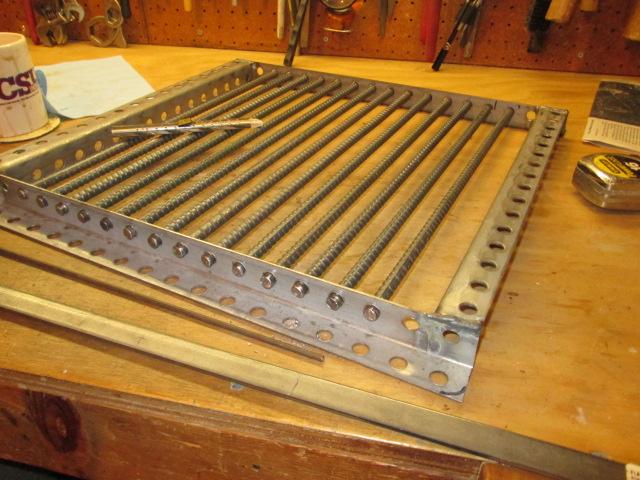
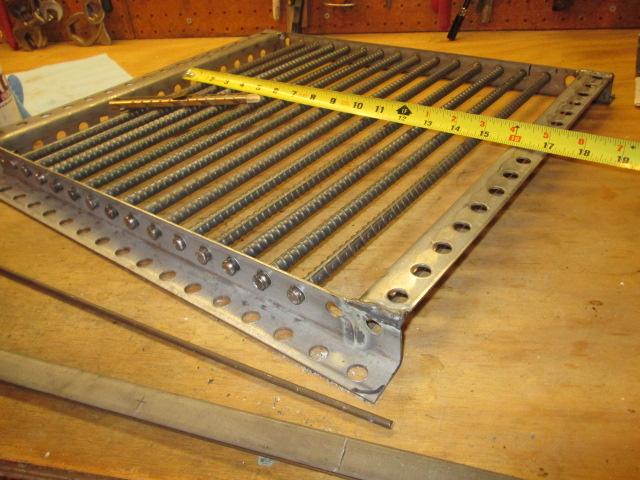
Spacing for width, I can get enough rebar to fill 14 holes cutting into 17" lengths and have a reasonable size table.
Made my head hurt. Will let me make a 16" square opening. Plenty to cut angle, it for the present will leave 2 unfilled holes. Overall table will be 18 1/2 sq. The rebar will simply insert thru frame holes. Fixing in place, not sure. I 'think' I'm going to tack on small length of round bar to ends of rebar, they will poke thru holes in frame. I could tack weld, simpler. Could drill and use pins..which would be nice more easily removable.Then I could move center bars when using chop saw so not unnecessarily building up slag on bars? TBD
But I have lengths to start cutting. Cut the rebar into 17" length, and angle pieces to length.
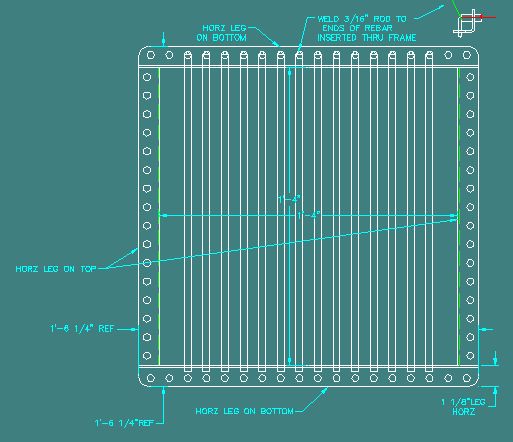
Couple of unresolved problems. before I can weld the frame. The grate will be 1/4" below edge of angle. Probably just cut up some 6-8" pieces of 1/4" round bar, bend into shallow arcs and throw on table. Might also extend life of rebar. But I'm still up in the air on the ends of table. Reversing the 2 sides angles with horizontal leg on top as shown would give more support for long material, be easier to add legs if I do. But make the corners kinda funny? Because of material length I'm committed to the 2 long and 2 short lengths so cant miter.
In case you didn't guess I'm planning this as I write, wingin it. Have no idea how I'm making a catch basin or legs.
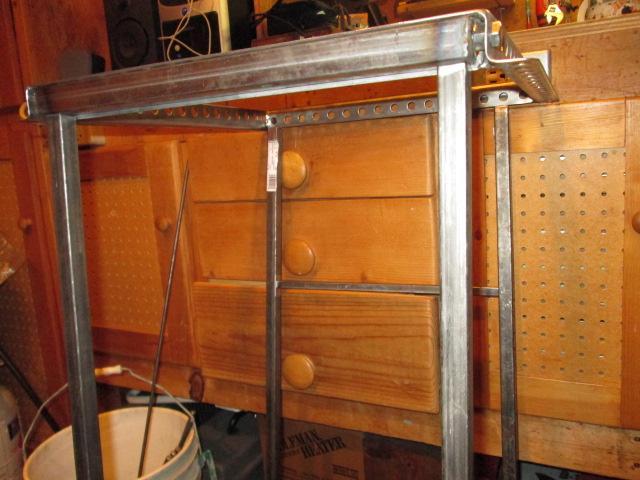
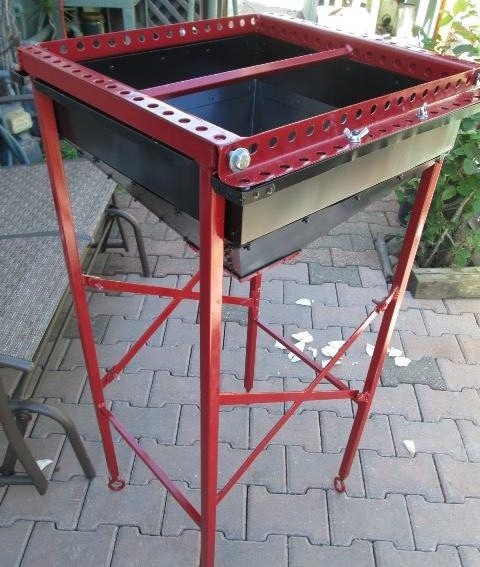
Frame cut & welded. Decided to stay with original plan.
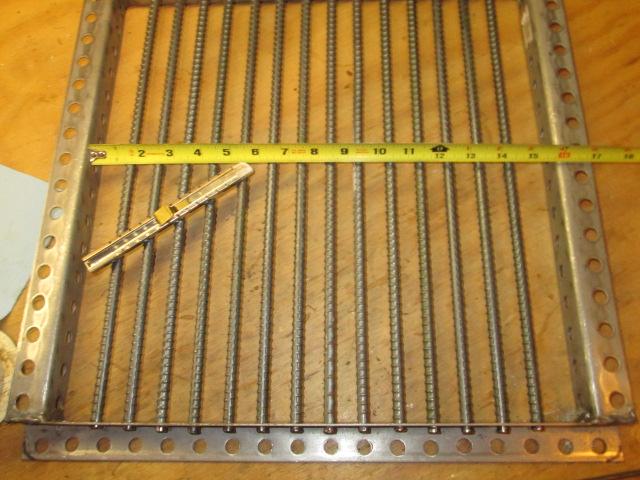
Makes the frame a little stronger as it boxes the corners. Be easier to lay long material-lends itself to more leg options. Cut the rebar and inserted. This would be a lot easier using real angle and flat bar...so far I've got $7 dollars invested though.
Eyeballing the capturing of rebar. I'm welding a piece of flat bar to sides, center spanning underneath rebar. Mostly thinking the rebar might sag once hot. Also realized, possibly later, flat bar slats, thin, might be used, notching ends to fit thru angle holes.
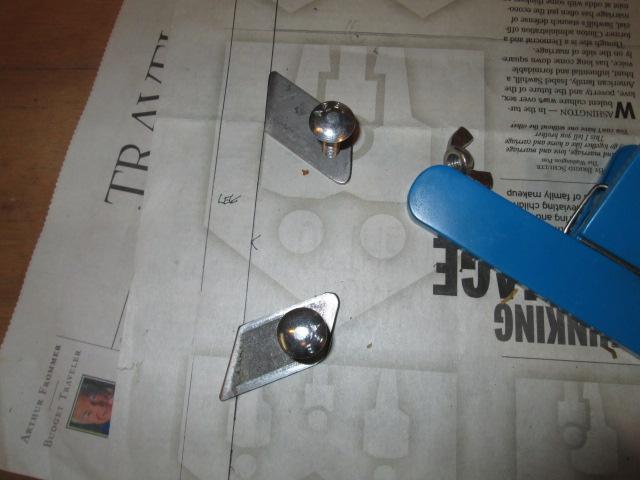
For now I'm just trying to get some ideas for easy containment of the rebar. I 'think' I'm just going to weld piece of 3/16" rod, across one end, to outer rebar rods, actually make a long 'U', plug weld onto angle as a stop. On the other side, make the rod removable so I can slide rebar pieces out as wanted.Something simple, just waiting for it to gel
Ground out the frame.

Started looking at legs. I want this to be easily disassembled for storage/setup. Plan sort of is simple tube with nuts welded inside that will attach to frame. Though square tube so its captured inside of frame. To it weld legs with cross brace. Cross brace should end up at height to support shelf that catch bucket will set on.
And budget went out the window/ Being in a hurry went to local hardware. I appreciate the convenience so when I just need small piece of metal I pay the extra. Otherwise any real quantity quickly pays for the 30mile trip to metal supply.
Material for legs:
12' (2 6' pieces) 3/4"x3/4"x.065 wall 14ga square tube, 4 36" legs
3' (1 piece) 1"x1"x .065 wall square tube, 2 top 15 5/16" spreaders
3' (1 piece) 1/2"x1/2" .065 wall square tube to 2 mid 14 7/8" spreaders
4- 3/8 square nuts, for welding into top leg spreaders
4- 3/8"x1" hex bolt, for bolting legs to top
8- 3/8" hex nuts,
(4) for welding to top to hold leg mount bolts
(4) for welding into end of legs for adjusters
4 3/8"x2" eye bolts w/nuts (temporary leg adjusters)
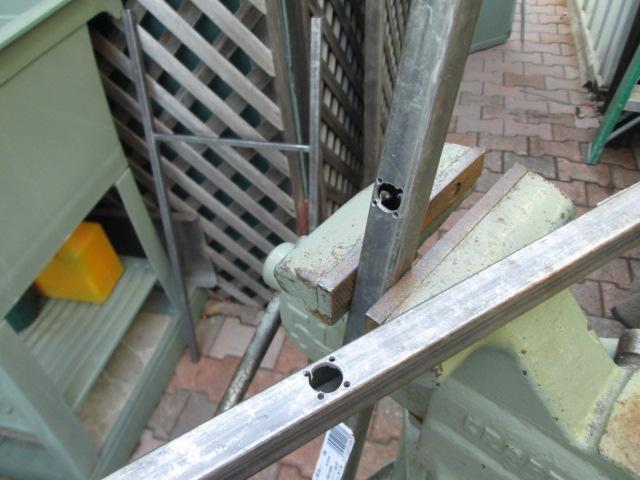
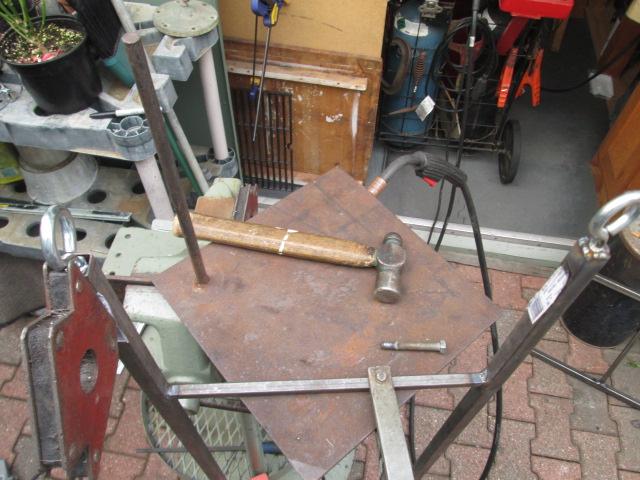
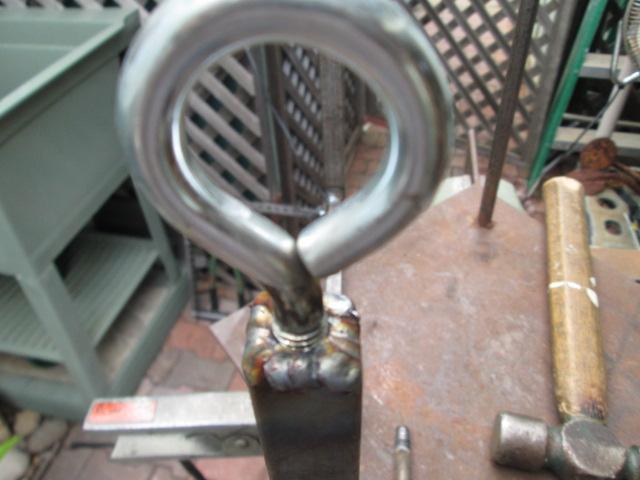
The 3/4" legs will be welded to the 1" tubes after top tubes are fit inside top frame. Fitting the top tube into frame. (16" between top angle legs minus 2 nuts=15 5/16")

Cut 1x1 to length, weld in square nuts, they are offset to match hole in frame. Places tube against inside corner of top angle.
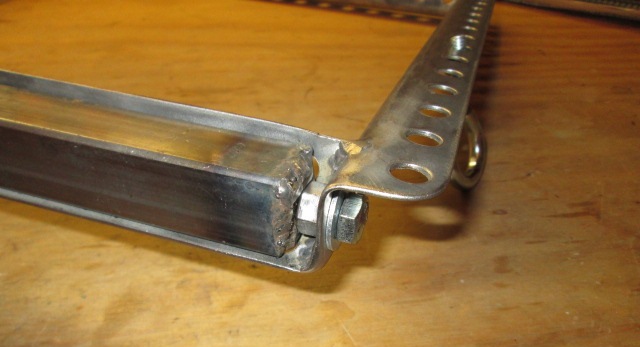
Shown upside down, set in top spreaders in frame, run bolts thru top angle with nut on back side and thread into top spreader. Ill face off ends of top tube later. Rotating inside nuts until bolt threads thru and into top spreader without binding-hmm bit of fun, tack weld nuts in place. Remove to spreader then weld nuts to frame. These hold the bolts for mounting legs so they don't need to be completely removed and also spaces top spreader from inside frame corner welds.
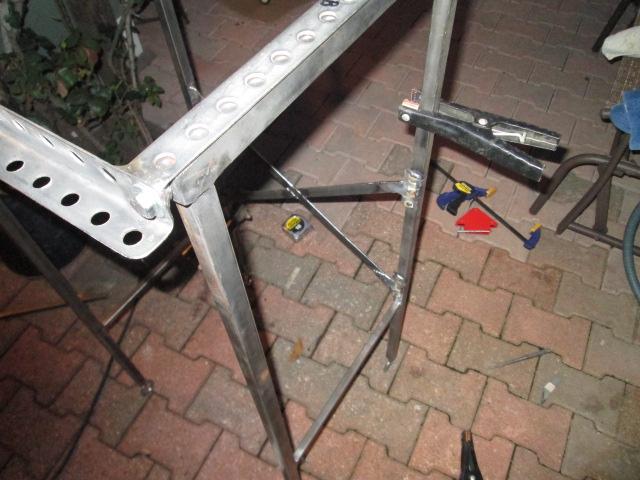
Next assemble legs. In my infinite wisdom I decided that broaching the legs and inserting the mid spreader would be a bit stronger than simple butt welding. Second set of legs, shown, I drilled small holes in corners to help with 'broaching;. 3/4" stroke with square file wasn't fun

Fortunately material is thin.
Just had to see...loosely sat the top spreader on top of legs, sat table on top. By golly this might work...Nice, originally legs were to be welded to outside of top spreader/mount tube. Liking the appearance decided to put underneath. (this would bite me big time later when I went to add the chute, because I simply forgot WHY the legs were to be on outside).
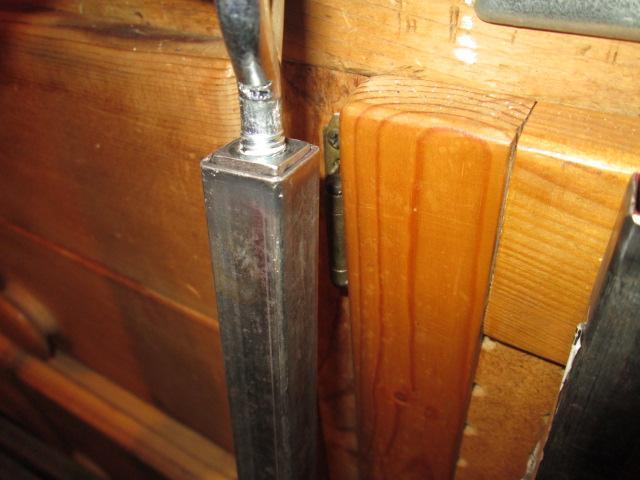
Welded the spreaders to legs. Then looking at the square nut inside the 3/4" tube for the levelers, not a lot of weld...square nuts are only 3/16" thick.
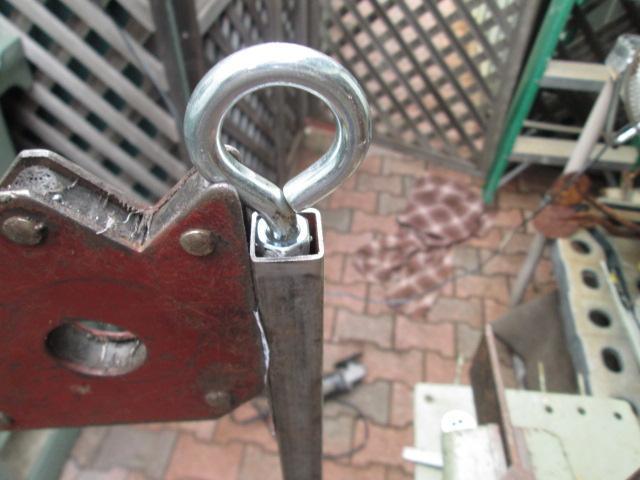
So changed to hex nuts for a bit more penetration and contact and one more thread.
Last one. Little bit of grinding, and sand it out.
Oh I have a plasma coming- I could cut a pattern into the flat bar. Could just add some opposing diagonals, pivot on one leg and bolts to other, simpler, self storing. Anyway to be done. The bottom shelf, originally it was going to just drop in but Ill make it so it captures the leg spreader bars, notched around the legs for resistance. Between it and the side plates should suffice. This making it so it breaks down and still solid a head scratcher...details
Unless using dictates fixing-the rebar I'm leaving loose so I can add remove as many as needed for given project.
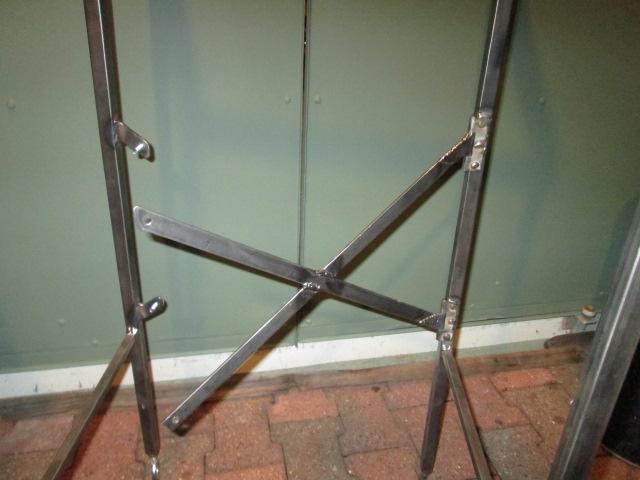
Leg stabilizers
Ahh...been round & round trying to come up with stabilizer. I ended up using flat bar X'ed. Because of 36" piece I want to use, 10" height is most I can get. Hopefully enough angle/spread to stabilize between leg sets. If X welded at center would offer a bit more resistance. Not sure where it came from but looking at how to easily attach stumbled on some old strap hinges. Thinking hinge X to one side would mean 2 less bolts, but more importantly it will be self storing-. Then tabbing the opposite side, though mostly to utilize material. The X at 10" height, 16 1/4" between leg sets, need (2) 19+" from a 36" piece. of material. Tabbing makes it work, plus with offset of hinge X will be centered in legs. Screen capture of rough cad drawing working out numbers
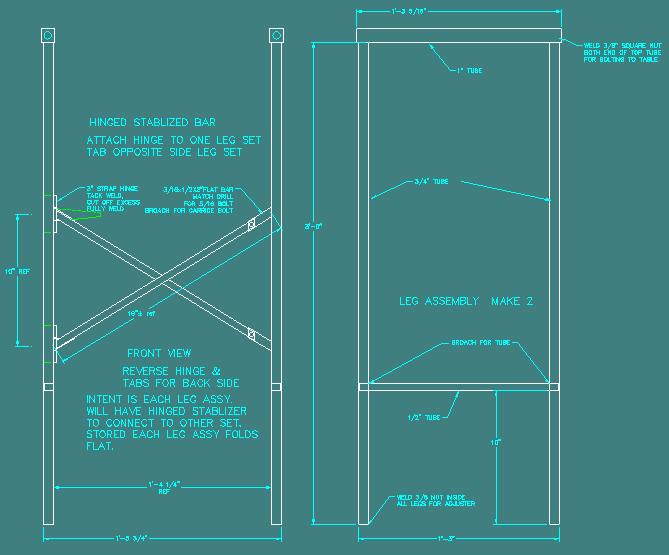
Well that's the plan. Because the table legs moves, making this up as I go, to actually make the "X" brace I ended up tapeing paper to work bench, drawing full size picture of 2 legs- 16 1/4" apart, and 2 lines 10" apart between. Cut and fit all the pieces one at time. lay on drawing then on to next piece. Not so fun- a lot of pieces, many back forth between patterning, chop saw, weld table, table itself, but we got it. Took forever, this simple fold up table is a royal pain. Can not tell you how much I wanted to just weld it out and be done. But I don't have room for another stand. Once done will be nice, enjoy the fabbing and puzzle solving but this thing is silly.
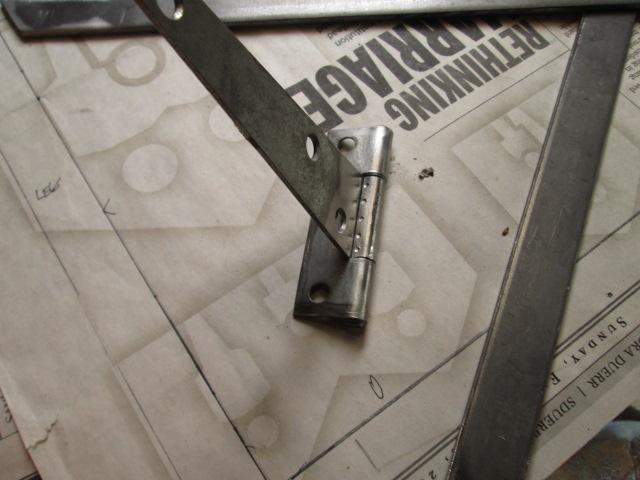
First thing I did was peen the hinges to get rid of slop
Laying hinges on newspaper pattern with the hinges 10" apart started laying out angles to cut flat bar pieces. Started with the long X leg, cut on the chop saw. Round and grind then lay on pattern.
Cut the 2 tabs out, placed on pattern.
Then cut the other leg of X, it will be 2 short pieces and the X will be welded together. With all the pieces cut, now to figure how to weld.
Decided to start with the long X leg and weld to a hinge, too many loose pieces.
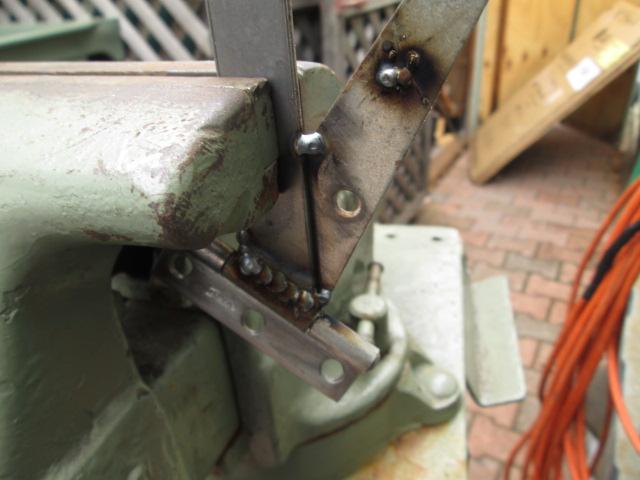
Hard to see but tacked flat bar to hinge, weld to barrel. I cut off excess with sawzall then fully welded bar to hinge. Lay back on pattern. Welded short section of X leg to the other hinge. Tricky part aligning so hinges don't bind but more drilling holes to match tabs. I ended up clamping hinges to legs. Use magnet to hold tab, once lined up I used a small clamp to hold the tab to end of X leg. Took to drill press and drilled hole, broached the hole and drove in carriage bolt. Secured with a nut. Then check against table. Hey it still fit. The other tab will be last but I need to weld the short X pieces to the long X.
Marked everything while clamped to legs, then removed, laid the pieces on the weld table and welded the X to together.
Clamped the hinges and X again back on legs, tab still reached, welded it on. Then set up to do the bottom tab but decided to weld on the hinges. Thinking Ill have more forgiveness in moving tab if I need to because welding hinges may warp stuff.
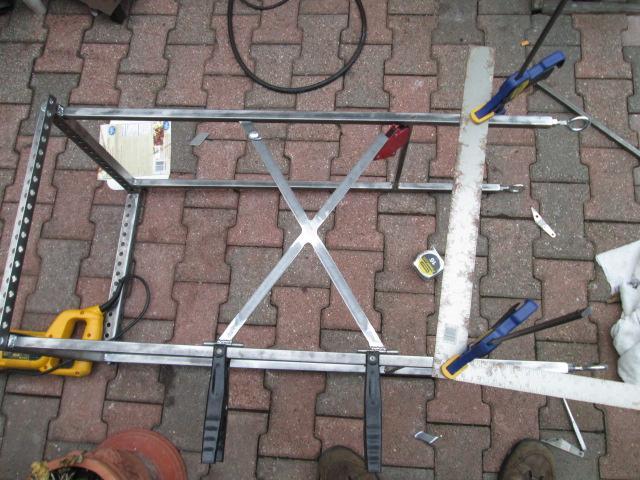
And hinges welded on. Wow, swung the x over and nutted to tab. With just the one arm bolted table is already stable, I was having doubts that even the X, both ends bolted would work because of the short distance. Pretty stoked.
Last tab clamped to X and welded to leg. Then drilled the last hole thru X and tab. Didn't broach, tomorrow, but secured both tabs to X.
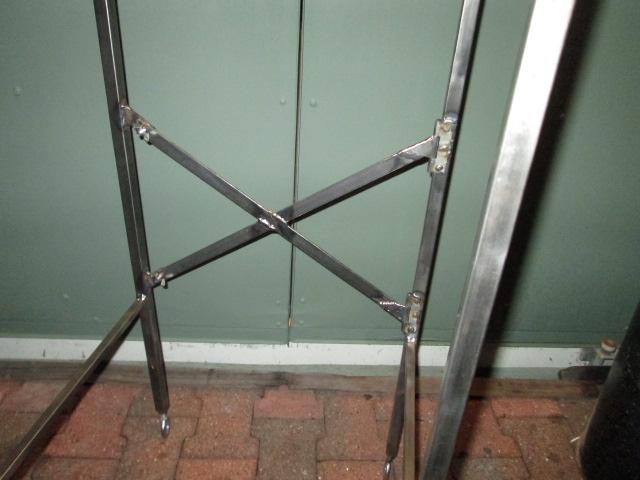
Simply nice. Leaned against the table, rock solid. In fact so much I'm not doing the other side as I planned. It would be way easier to do remaining side because I can work directly on table now instead of setting up and jigging 15 times. Now I know it works, have a clue probably take a half an hour to recreate, so maybe later. Table does want to slightly twist to the back side but once bottom shelf on, which will capture the cross brace on legs it will stop twist between the legs sets. Alternatives thinking about it, could just do tabs instead of the hinges. Hinges seemed like a good idea due to welding the X and storage but if the X isn't welded together the individual bars can just hang when broken down. The whole point is this table will easily fold up for storage. Dang it! I just looked, I have another pair of old hinges...hmm-. As I likely will use chop saw on this if I follow thru on the collector chute stronger is better. Could have done in the time spent thinking about it....
For now just clean up the welds, ground & round it all. Wire wheel it all again as its starting to rust. want to get some paint on it.
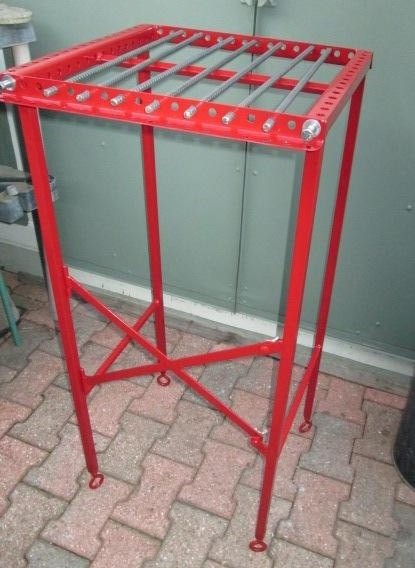
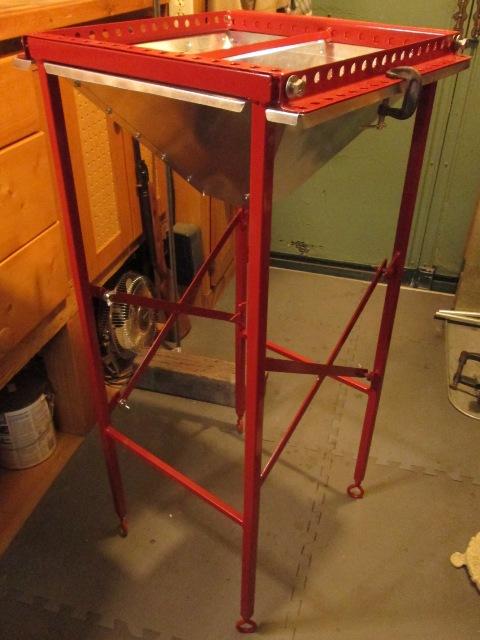
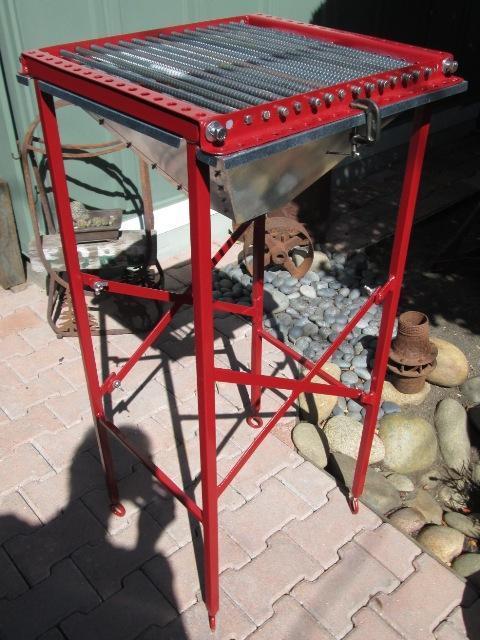
Painted! Had some old colonial red I haven't been able to get rid of. I hate red- Perfect. Did get the center spreader welded under rebar before painting. Scrap 1/2" tube turned at 45°, yup it got painted, it only stink for a little while.
But painted. After I add back brace, probably a holder for plasma torch head and burn some metal, down the road repaint will see a color change. Though picture shows a bright red (flash) its a fairly deep dark red, not bad. At any rate interesting project.
To do:
• make the shelf, again it will capture the leg cross braces, channel or just tabbed flat bar. Wasn't planned but now I'm thinking adding a second shelf, place machine on lower shelf..
• stop procrastinating and make the rear cross brace! DONE
• make the chute, simple 4 sided sheet hung from table. If I had a sheet metal brake Id make so it also folded up. But I don't- still pondering that...it could end up just a box...also depends if I make second shelf...
• Cut 3/16" disks for legs. They'll be about ř3" with half link of chain plug welded. Open the eye bolt levelers enough so they can slip in. So I can use or set table up in the gravel drive way. First project for the plasma.
to be continued-actually using the plasma..This table will likely be on ongoing project, adding stuff to it, clips & holders etc once I start using machine.

Since all the stuff was out-bugging me that I stopped short-so finished the back brace. Bit of clean up, obviously didn't get the paint as cleaned off as I thought. Hinges welded on fine as I wiped with acetone, but the tabs I just scraped paint, weld splattered pretty bad. They are welded but not pretty, course nor is most of it-anything else I would have ground out and rewelded- Oh well, clean it up, match drill the tabs. Surprisingly did get rid of most of the twist. Will no longer fold completely flat, Xs hit opposite bottom tabs, should have raised the added X an inch-just didn't see till it was welded out.
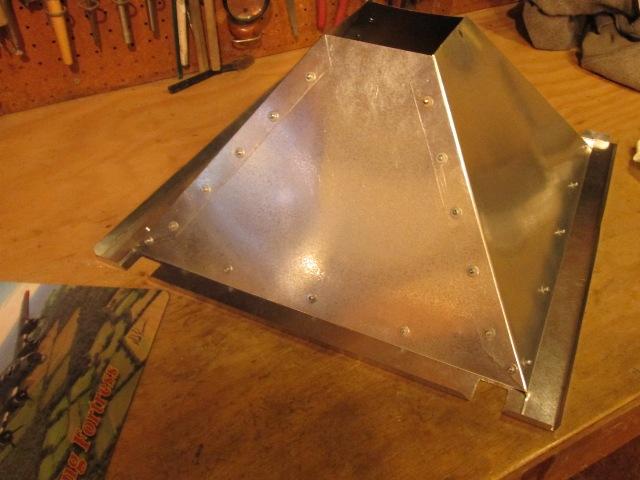
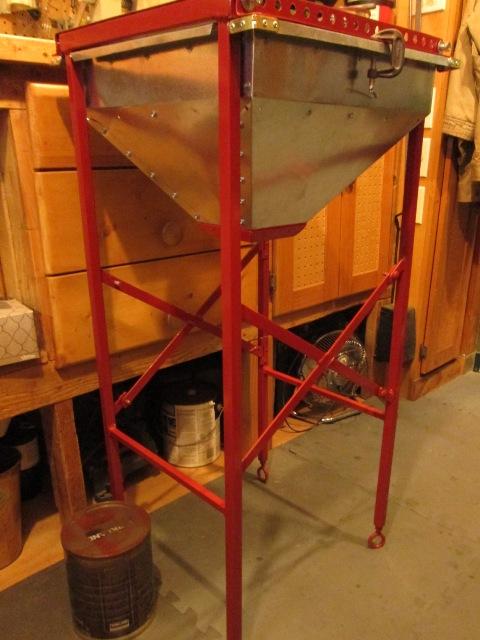
Building the hopper
And project came to a screeching halt. Picked up some flat bar and some round bar to make shelf supports, lower shelf to hold cutter, upper shelf to hold waste collector. Decided I need the chute first to ensure placement of top shelf. Well after an hour'n'half got one panel (of 4) bent hand bending. That ain't going to work. Plus I need to bend up some attachment angles. Stopped and built a simple brake...
Can be seen here at Brake build page do-doo do doo do dah...intermission music- 2 days later back on the plasma table....
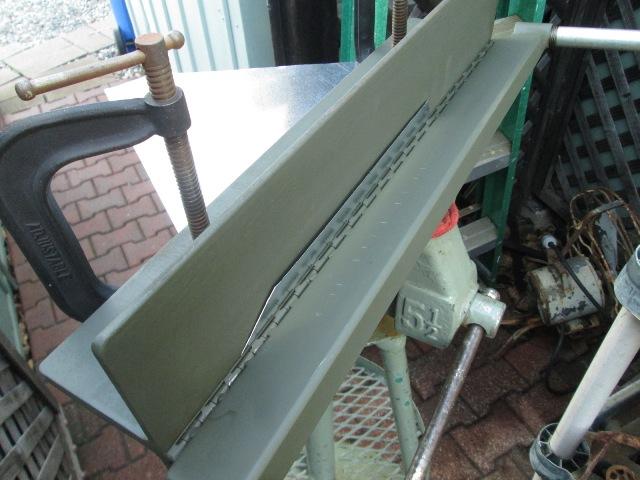
Bent up the 2 end panels of 4 sided chute, first one took 1 1/2 hours bending by hand, second one took 30 seconds.....
Riveted together. Now to cut some strips and make angles that will be Riveted to perimeter of chute and some how fasten to cut table...
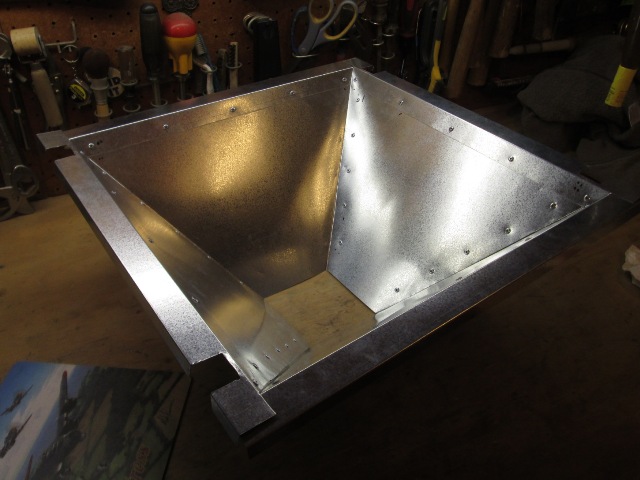
Cut 4 strips 18" lg x 2 1/2". Intent is to bend one side full length to match angle of chute/hopper sides to be riveted to it, with a 1" flat to mount to table, last 1/2" bent to 90° just to stiffen.
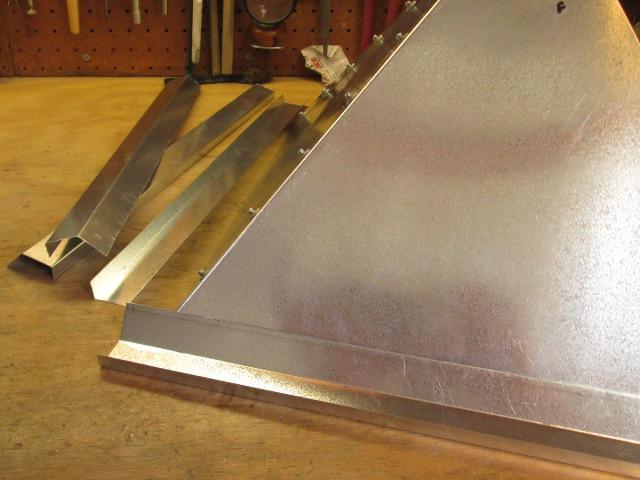
Basically a channel with a 1/2" 90° leg & approx 55°. I'll have to do some fancy notching to get around legs. I'm figuring as I go. Though I had to stop to make the sheet metal bender I am stoked, never had or used one. Amazing-just bent the strips. Straight-identical. Now to figure out how to cut & rivet to chute, and mount to table.
Quite a bit of trimming, match drilling. However had to back track. When I drew out the leg assembly to get numbers I decided to move legs under the cross bar instead of to face as planned, look better and a bit stronger...
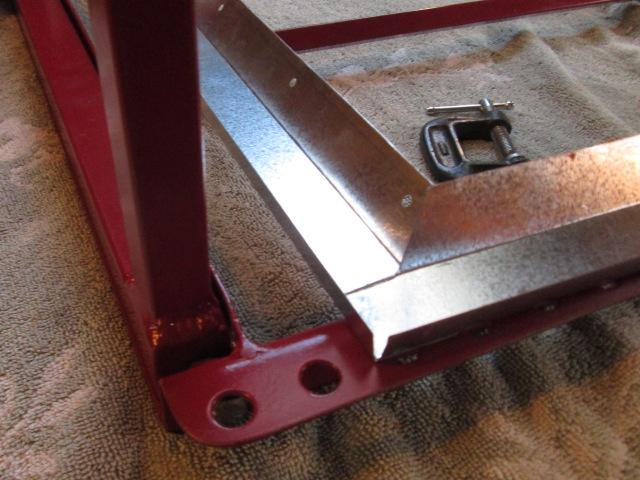
..I totally forgot the reason, it was so the hopper flange could set against the table and top of legs spreader......

Took the legs off to mark chute flange. Not much can be done, short of cutting apart and moving legs-not. So notching the flange to fit between legs. As the chute will hang by the front & back table flange all the sides do is direct waste, still would have been nice without notching chute flange.
I was going to, and now have to, add a flange at bottom opening. Mostly for when chute is in storage, keep it from getting racked. Since I cut up the flange it lost integral strength.
But I got side tracked playing with the brake seeing how small I could bend using assorted flat bar scraps as fingers. They will determine size and complexity of bottom flange-. By the time I stopped playing I was done...maybe later
Its coming along-when I get a minute I work on it-but I have couple of months before cutter arrives so no rush. Did decide to nix the shelf for collection container-pretty sure just a can that hangs.... Need to cut disks and weld half loops to them for the feet. Shelf for the cutter, then again I'm also thinking just flat bar bent at ends, spanning over leg spreaders to support the cutter. Definitely adding short piece of flat bar with nuts welded at end and riveted to top flange, use thumbs screw for holding chute instead of the small c-clamps.
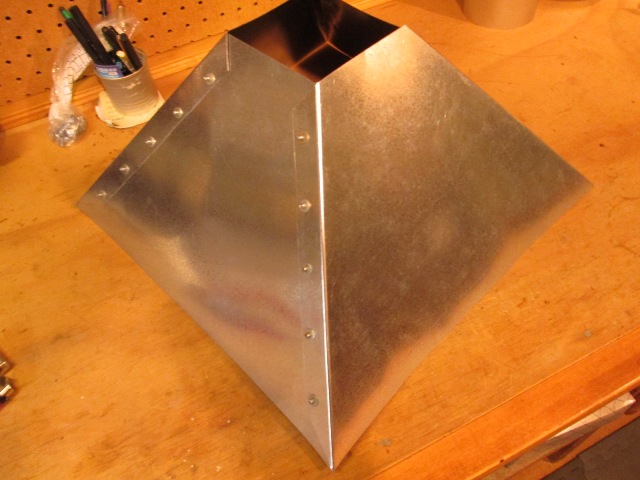
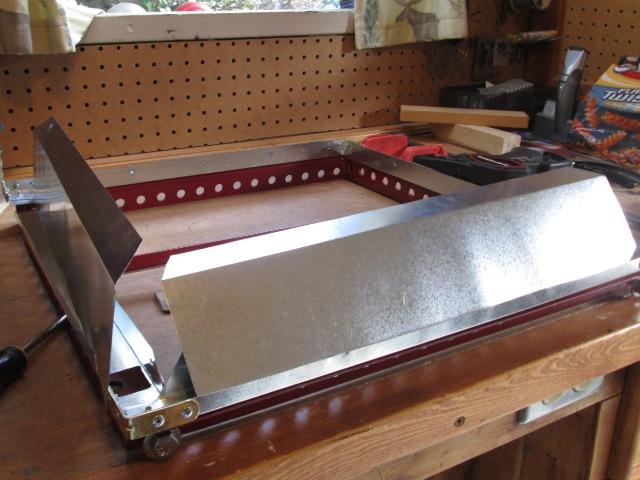
Got the bottom chute frame made. Spent way to much time trying to lay out to bend out of sheet-. As much fun as it is playing with new bender, much simpler just cut some flat bar and weld together. Rivet it to chute. Though was planned, required now since I notched the top frame, keeps it square and not work the top flange when removed. I added some old brass corners to top perimeter folded lip, the open corner just to easy to snag. Had I thought I could have left the square I cut out to fold the corner attached one side, folded it over and riveted. Still learning on the folding, envisioning item unfolded flat-to cut, how to make the bends-or in what order, kinda interesting.
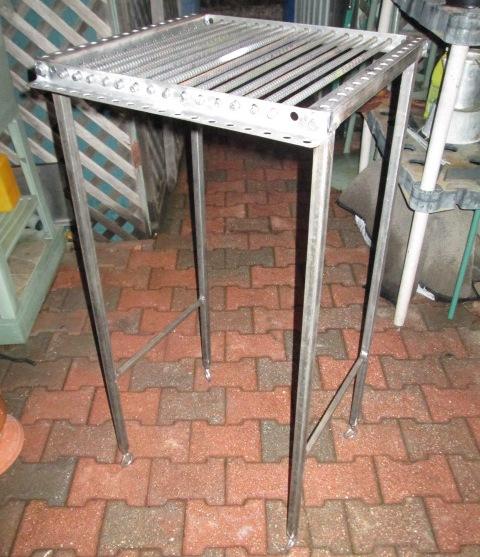
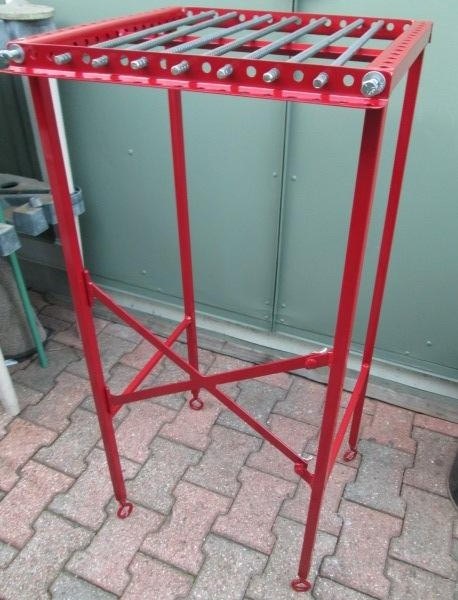
Just a picture in the sun.
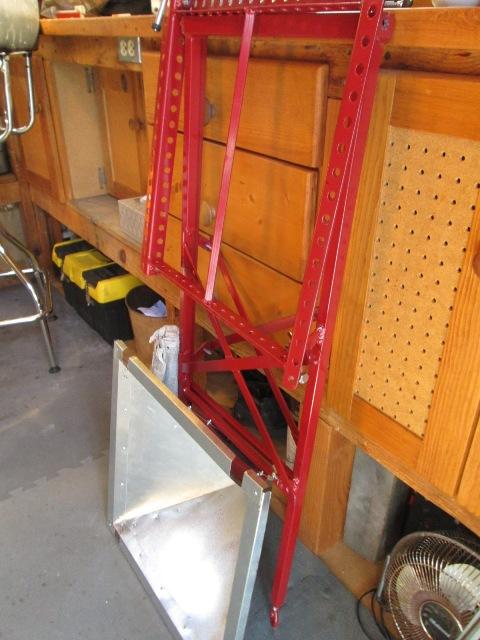
And the whole reason this ended up a bit more effort than really needed for a simple table. Ability to fold up for storage.
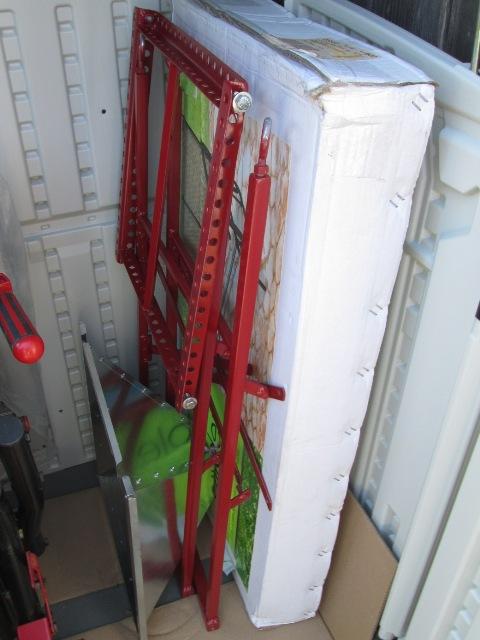
And where it will live. It takes couple of minuets to set up.
Few days later-pause

Making the flat bars to attach under chute to bolt to top (instead of the temporary C-clamps). Broached holes in 6" lg bar to hold carriage bolts. Getting ready to drill thru chute, then rivet bars under chute ledge. When assembling bolts will stick thru top , use wing nuts to secure. Then it dawned on me since the chutes lips has been notched to clear legs... the chute does not need to be removable or at least for use. Leaving top frame attached to chute really wont take any more room for storing-, less to assemble and would help prevent damage to chute when stored. Cool- so the notched chute will appear intentional and planned al along (thats humor). But in actuality it will be easier to set up take down. Chute can be removed if need be, just using nuts instead of the wing nuts. But it gave me pause....
The chute just seems it might be really too shallow- I can only hope it lasts a while. If I had used 12" instead of 10", 'think' might be more survivable with greater angle of sides. At any rate it was assumed/planned and considered a consumable like cut bars, replacing chute when if needed. Next one though will be deeper-so I need to figure that allowance in for catch tray.
Unless.. and the reason I stopped while adding the flat bars to attach chute....in the back of my head it would be easy to fold up a say 4" C channel, place between chute an top, to drop the chute further away from molten metal...now that I'm pausing, It might be worthwhile doing before adding the flat bar attachment. Did realize when I made bent flanges for chute I could have made taller to accomplish same thing, hindsight. Need to ponder. Found out the cutter is delayed another 2 weeks out- adding the drop may allow longer chute life....
lets see, 1/2 of 10" material would be 5", folded with 1" top & bottom legs would leave 3", chutes tapered sides 3" further away from hot shooting metal, still plenty of room for catch tray and shelf underneath.... more to follow
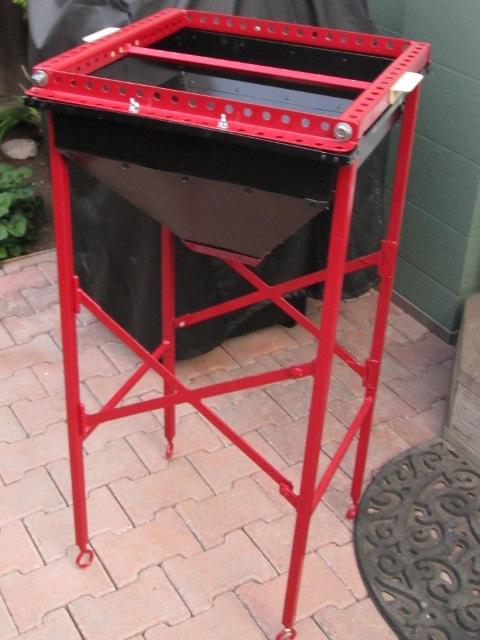
And apart it comes
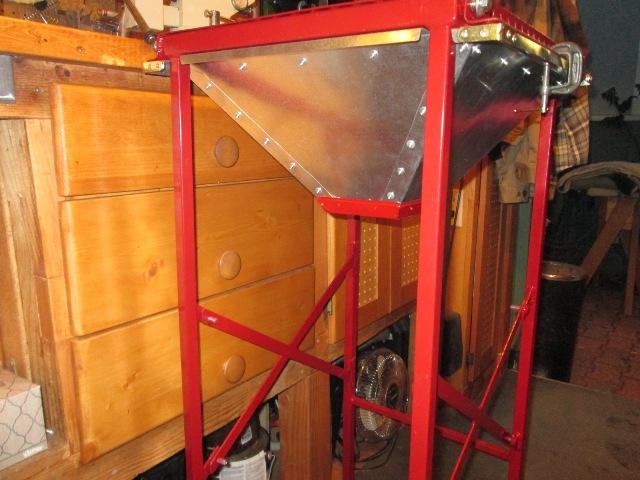
More I looked at it the more I didn't like how close the chute was to top. Overall its 8" deep. Ended up drilling out the rivets, separating the mount flange from chute. Decided be easier to make a piece to space between and reuse top flange instead of making another mounting flange. Cut 4 pieces 4" wide, 1" bent flange to rivet to chute, 3" up to attach to rebent the top flange lip (that was riveted to chute) to 90°. Easier said than done..
But effectively drops chute 3" or overall about 11 1/2" deep now. Really liking my little brake. Having never done sheet metal, figuring out the flaps and bends, simple a brain twister. Needless to say-a little frustrating for a novice in this field. Pic above just checking lengths before bending side tabs (almost see on left) that will join 4 new pieces making spacer 'box'. .
Now that its done- I can easily see this made from 4 pieces, certainly a lot simpler that what I did. Like a big envelope. Just holding together loose pieces trying to match drill for riveting a pain until a few were set, like working on jello. Cut up several different wood pieces to use as backer for both drilling and riveting. It came close to getting scrapped and starting over. Seriously. I should not have separated flange and chute and just added to it, long run it would have been easier-thought this would be simpler - oh well, does look better than if I had just added C spacer. But as rivets added and stiffening up- pushed ahead until I could get enough in to get back on table, ensure it still fits. Have 25 rivets left to do- just ran out.

Liking the extra depth, probably more likely to survive the shower of metal and less likely to blow back up at me. Worth the effort, I think, now that its almost done. Few rivets and back to adding the hanger mounts. Also needs some handles to pick table up. Then nail down a simple tray for waste. Hanger or shelf for the waste tray, shelf for the cutter.
Got the chute mounting brackets attached. Using the wing nuts for now. Used some Devcon metal patch to seal the rivet heads and inside corner seams so metal doesn't collect. Out in the sun this thing is blinding. Wiped down with some thinner from all the handling though I didn't neutralize the galv, just sprayed it out the chute with BBQ black.
Stuck on the collection tray. I WANT to add a shelf underneath for tray, I also want to add a shelf under that for cutter to set on, though that might not be a good idea due to dust. But the tray- nice would be something like a tin can that can easily be replaced. Id like it to hold water. Coffee can not big enough OD, needs to be a large OD but on 4" deep-.
So doing the handles. None to soon-bending the lip on the chute all to heck.
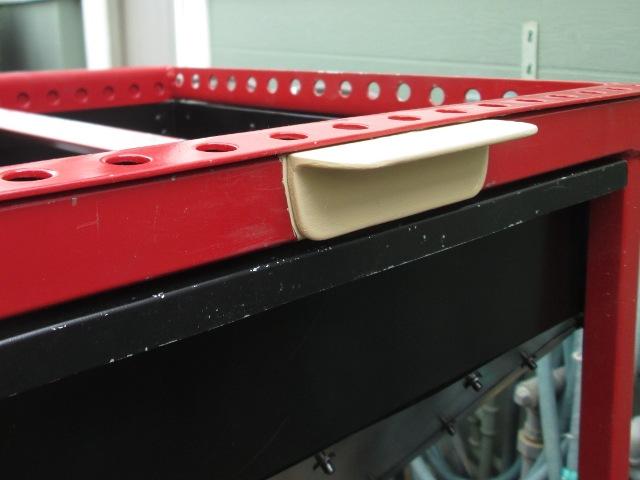
Shaped couple of pieces of 1" angle, drilled 2 5/16" holes and plug welded with 1" bead top and bottom. Not having anymore of the red I used some old textured tan.
Once/if I do shelves this is all getting painted again, maybe one color, ha.
It wont be red, only used to get rid of it, did I mention I really don't like red, however wish I had paid attention to what product/brand it was. The paint dried very hard and is adhered like crazy. For rattle can its pretty amazing. Unlike the BBQ black-already flaking off, where the over sprayed red was on the chute cant hardly scratch it off.
Still waiting on cutter to arrive,
--------------------------------
A big part of this build was a proof of concept, large part investing least amount of money. The other is I'm trying to design/build something for something I've never used. Lastly its just something that I can immediately use to start cutting on and wont take any floor space. Could be this whole top & chute fails, either rebar burns out too quick or slag sticks, thin 12ga sheet chute instantly burns thru or waste doesn't flow...don't know. But I'll find out. Unless materials I used work, but bottom line temporary. The folding stand/ leg assembly though does work, so will be re useable. More later-If I add...
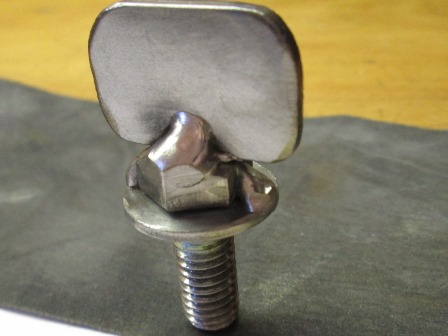
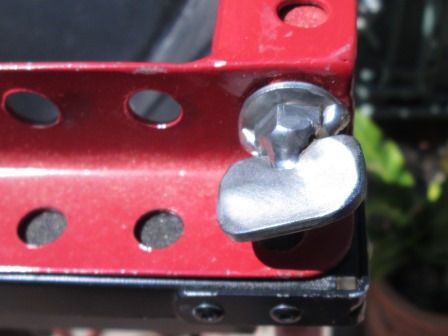
Made some washered thumb bolts. Well tacked on washers and added small piece of flat bar to existing bolts for 'tool less' use. Welding thumb tab across 2 flats still allows access to 2 pair of flats if wrenching needed. They only need to be finger tight for function but just in case.
Update:
Plasma cutter finally arrived, cut out the disks for the feet.
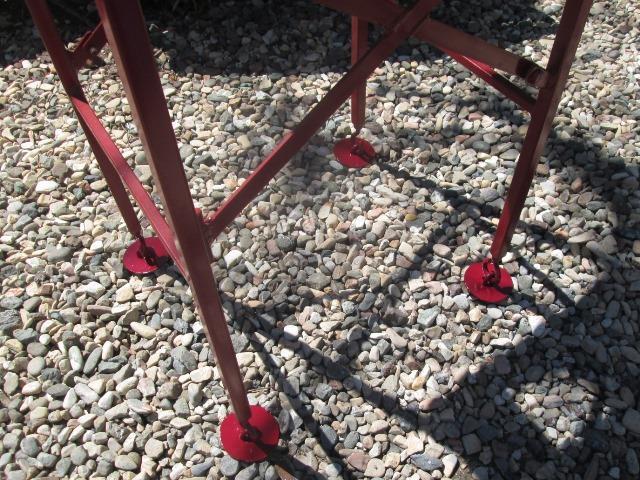
Plug welded some half links.
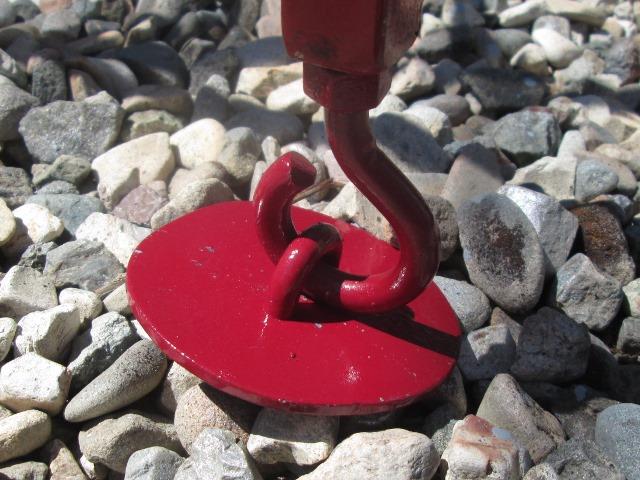
Table works pretty nice. Found I only use 3 or 4 rebar rods. Temporality I've been setting a small plastic trash can with a couple inches of water on what ever to get it to hopper bottom. Works ok-need to find a metal can and make the shelf which likely will be just some bent 1/4" round bar that sets on leg cross bar. Also need to make a small expanded metal screen for when cutting small parts off larger material. That and something to hang/park torch head...details. The original idea of mounting a second shelf below to hold cutter isn't happening. I did not know how much dust the plasma generates-want the machine as far away as practical.
Thats my table
Back to Our shops tool mods section