Converting campers taillights to LED
-
Well I've been wanting to do this every since we got the camper but could never justify the cost. Actually what I've wanted to do is replace them. The Bargman 84 series taillights have to be in my opinion one of the ugliest taillight fixtures you could put on anything-period. However the huge hole cutout to install them pretty much excludes doing anything though. If I were to replace the rear wall siding they definitely would be replaced with something else.
But a close second is simple LED conversion. LEDs put less load on truck, greater visibility, and just cool. LEDs remind me of old glass bubble lights.
At any rate the reason this got revisited is I stumbled on a fella selling a set for half price-literary-so without justifying spending the money I jumped. Well that and I noticed some water leakage and need to remove lights anyway.
Remove & cleanup old fixtures.
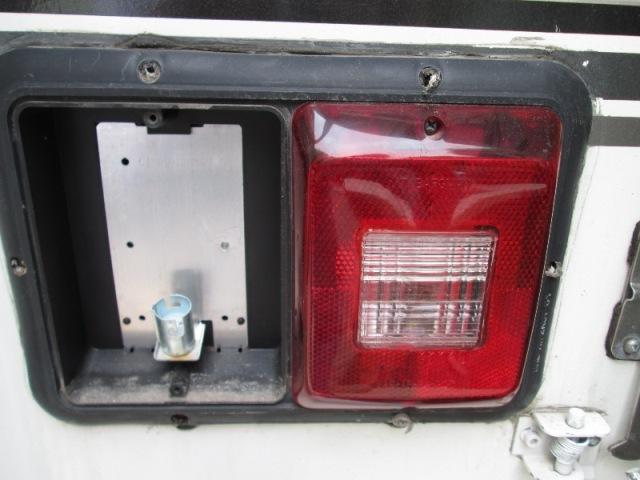
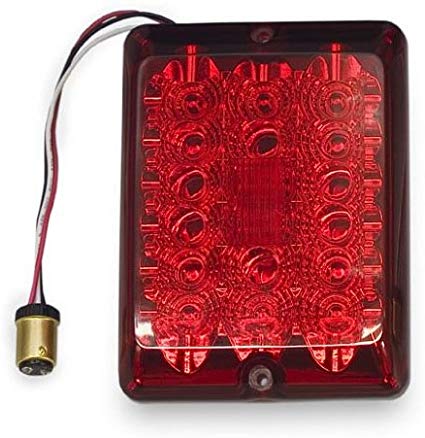
LED conversion fixtures are on order, new conversion basically is the lens with sealed led board. It plugs into bulb socket in lei u of bulb. They wont arrive for a while but I can go ahead and address what started this. Fixtures need to be removed cleaned and resealed. The housings are warping and corners are pulling away-leaking behind. Here I've started removing. I have some serious corrosion, surprised bulbs were grounding in the sockets. But more is where the socket is attached to the backing plate. Some corrosion and a rust trail. That's how they ground, thru the mechanical attachment to backing plate.
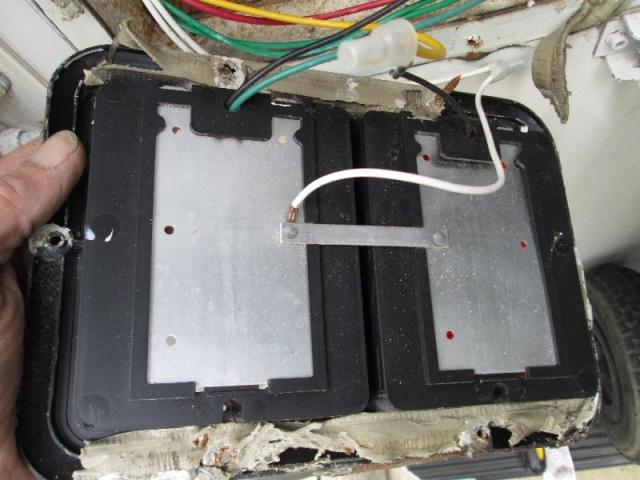
The backing plate has ground wire lead riveted on the back side along with a al bar that's riveted to the other light. Any of these connection points are source for bad connection resulting in loss of ground. Often what happens is bulb seizes, trying to twist out the whole socket ends up turning then ground becomes intermittent. Or thru simple corrosion/dirt between socket & plate. Better sockets will have a tab spot welded for direct ground attachment.
Clean old putty & caulk off camper and light fixture. Used some wood glue and wooden matches to refill old screw holes. I'm replacing all the mounting screws with some stainless, also adding 2 in the upper corners that are pulling away. However the amount of corrosion and warping of the housing started thinking maybe I should have just replaced fixture. Got online to see if housings available separately as Conversions kits are on order. There goes my savings. But looking around most folks simply solder ground wire to sockets-bypassing the bad ground path. So figured worth a try.
Easy- I wasn't sure about soldering to the metal sockets, but cleaned a spot with a small file and solder stuck like glue. My original intent was to solder socket lead to al plates but the al would not take solder for anything. So added a lead to the socket and passed thru backing plate to rear.
The leads will tie along with original ground lead to campers ground wire.
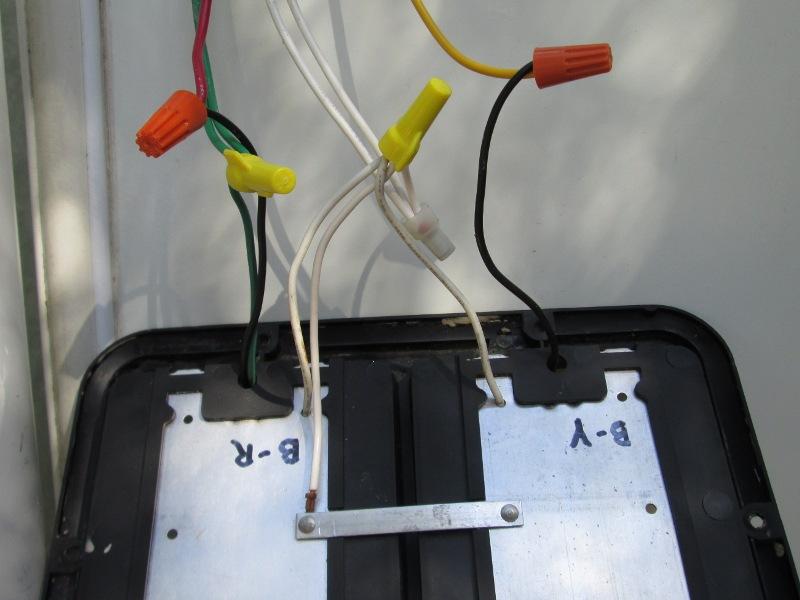
Wire nutted everything tested for function. Now to mount. One of the issues with these lights is they don't have a flange or face to seal. Its an edge, actually an inner and outer edge with a v shaped void. So I rolled putty filling the void, hopefully giving a uniform 'surface' for ribbon to have a chance to seal.

And installed-need to clean up putty. Shown are added corner screws. Once putty has stop oozing Ill add sealant to screws. On to the right taillight
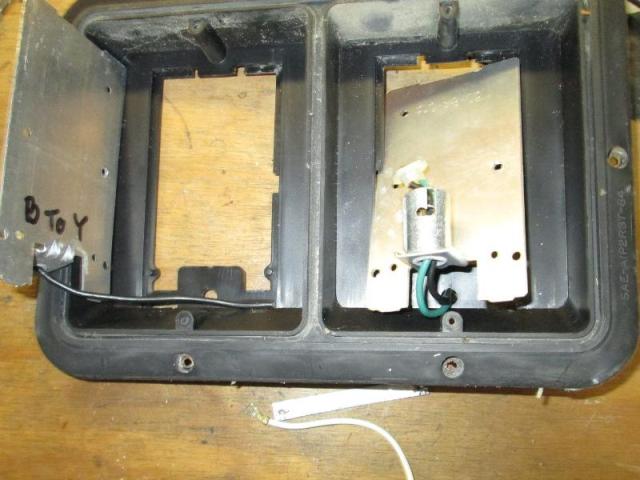
Well I wasn't going to remove the right light but decided to go ahead add the ground leads. No evidence it was leaking. But inside is way worse than the left light. All the ground terminals /bulbs & sockets badly corroded. I also noted light housing is upside down? The bottom of housing is slanted so water that gets behind the unsealed lens will drain out. This one the slant is on top and was filling up with water, due to dirt plugging up bottom of lens. Wow. Plus leaking behind.
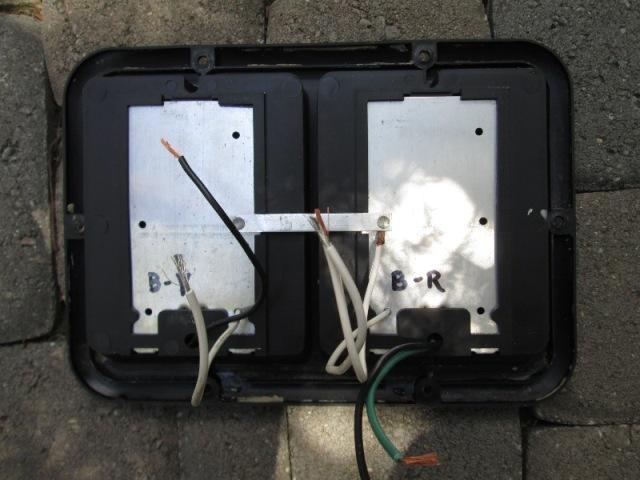
Required drilling out all the rivets to swap the tail and backup light sockets & backup plates so i could remount 180°. Minor but only caught accidentally. The backing plate with sockets attached are held in place by two clips on housing. Once cross ground bar removed they will just pop out by releasing the 2 clips, slide plate down out of slot. Cleaned it up, solder on the new ground leads, re riveted original lead and ground bar. I do recall whacking this light recently...

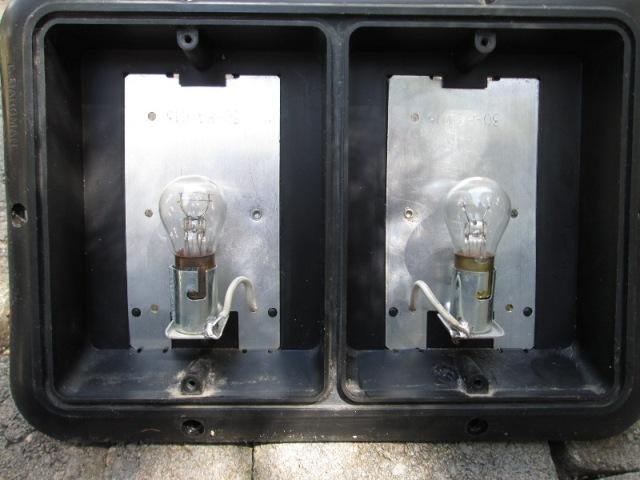
NOW were ready for plug & play. All clean & shinney, sealed and new supplemental ground leads. When new LED conversion arrive- simply remove 2 screws & old lenses. remove the 1157 bulb, plug in new LED, mount new lenses with LEDS.
NEW LEDS ARRIVED!
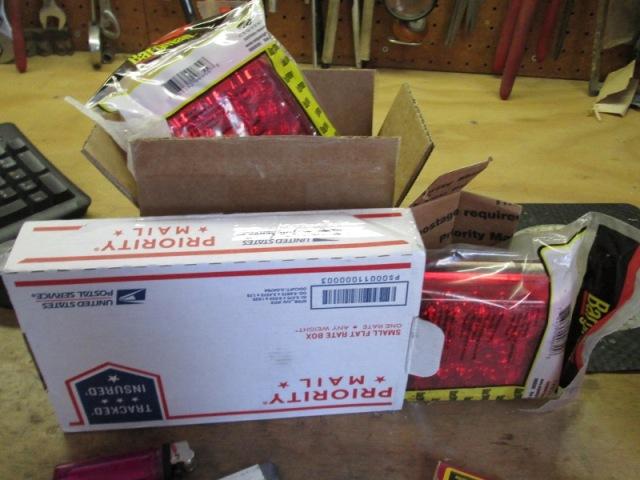
Wow. Lights were not suppose to arrive until mid next week at earliest, unfortunately until after we get back from short outing. Wanted to see the new lights. So went ahead rewired, cleaned up and reinstalled so when we got back I could just plug in new lights. No more than added pics to this page and mailman delivered both lights! Lights came from 2 different sources and arrived in 2 days! Supposed to be standard delivery of ~6/10 days, ordered scheduled for Wed.05/28 to 05/30 but both arrived today Sat 05/24? One was from NC thru Ebay, the other from IN thru Amazon, were in CA. I have no idea how or why they got here so quick. Not complaining, just bizarre.And stoked, guess what I'm doing!
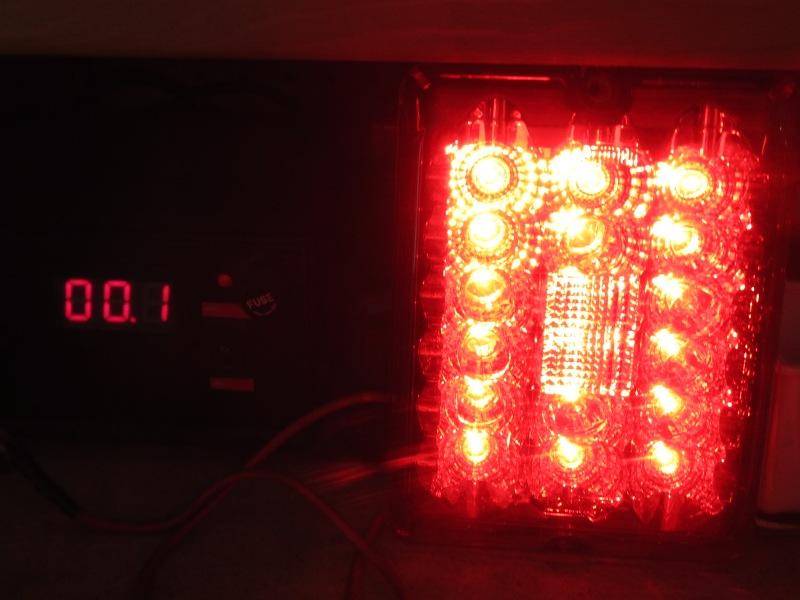
First verify both work before installing. Set up, turn on power, wow-put your eyes out. Brake circuit uses 0.1 amps-that's compared to 2.4amps when I tested the old 1157 bulb. Wow.
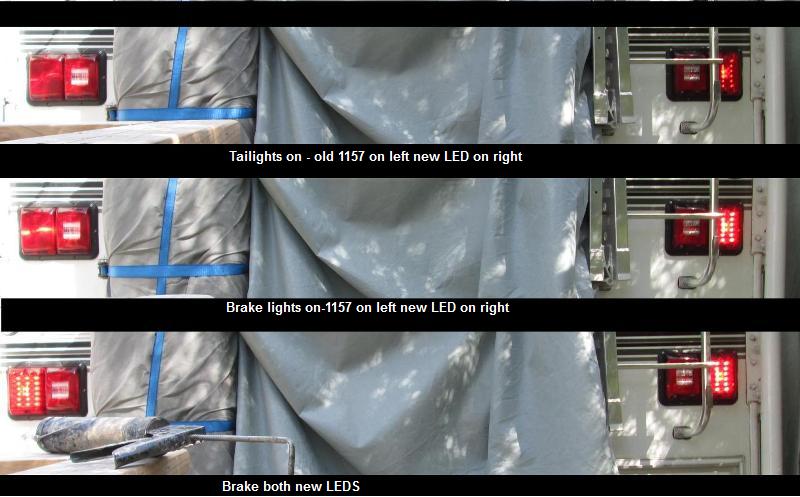
Installed new LED on campers right side to see the difference between LED and incandescent on left. With the sun on one side maybe not quite a good comparison, but still to the eye amazing visibility difference. What is cool because the truck was off to side to plug camper into bumper, standing to the side I could see both truck and camper left taillights. Turn on the blinker-at first it looks like there out of sink. Because the LED are instant on/off, makes the otherwise blinking truck lights look like they are glowing/pulsing. Actually seeing the time it takes for the filament to come up to full brightness, and then dim out when power removed.
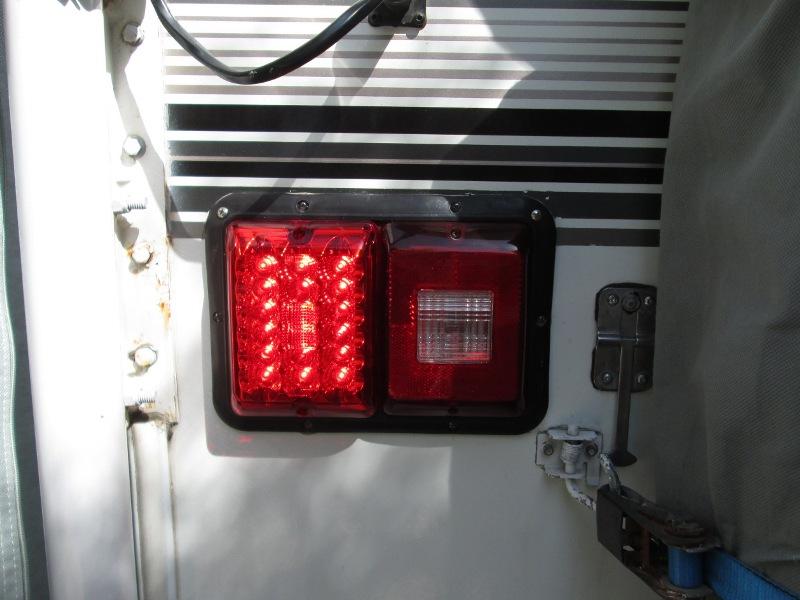
Nice- I like em. I put the old bulbs and lens in camper for back up. Was never a consideration-but now I'm thinking LED backup lights.
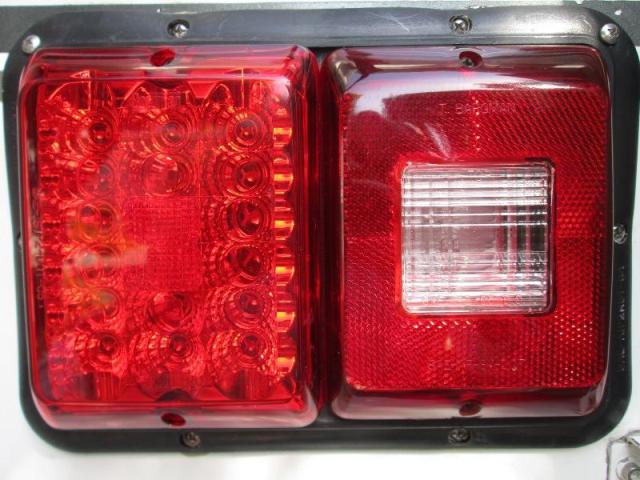
Sparkly...Then again I have actual sealed beam lights for backing up-these are only 'indicators', so maybe just LED bulbs for them..hmm.
In use on the road the reaction from other drivers to these new leds is amazing. When I turn on signal folks actually allow me to move, like previous lights were not seen or aknowledged only as a desire not intent.
Update 08/2016: swapped out 1156 back up bulbs with LED panle bulbs
update Backup bulb swap page
Back to Ourelkhorn Camper Modifications page