Add interior refrigerator fans
One of those gizmo things you hear about, that's supposed to help resolve an issue you didn't know you had.Interior fan for the fridge. Low volume fan that circulates air. Always heard they helped with cool down, consistent temp inside the box. Actually some reporting helped fridge reach cooler temps. But I learned putting the open milk, though handier to get to, on the upper shelf near fins instead of door kept it cooler.
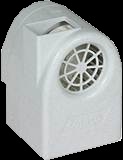 However few years ago was in RV shop, had one of the lil D battery powered fridge fans on sale. Picked one up, what they heck, had a couple of bucks burning a hole in my pocket
First trip it actually helped, things seemed a bit cooler regardless of location, noted a few degree lower temp on thermometer. But batteries died after couple of days. When we got home I put a switch on the lil box, thinking turning it off like in evening would help batteries last. It did, batteries last 3 days not 30 days. Gave up-the gain wasn't worth the batteries, maybe why on sale. Might have been an issue with mine a Camco unit (though not the lil blue one that most use . Stuck it in cupboard, forgot about it
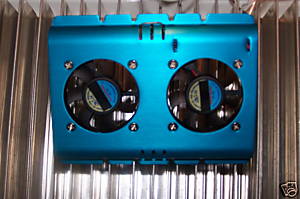 Seen the units sold on Ebay, guy takes some hard drive cooler fans, with couple of mods selling as fridge fans. Lot of folks swear by em. Just never motivated to pursue. Its a good option, just hook up power, clip it on.
When ordering parts for recently added exterior fans see page I had ordered this interior fan to try and help our fridge reach temps that other folks seem to enjoy. Ours has never worked that well. For the exterior fans project (as of yet untested) I went to newegg.com where I purchased the fans. While there I picked up an HDD cooler fan to use inside that was pointed out in a thread at RV.net. Same as what's being sold as 'fridge fans' but only $7 bucks, free ship. I know the interior fan helps, and knowing I would modify the ebay unit (paint the blue anodizing white and add switch) figured just get the one at half price. So I added to my shopping cart.
After finishing exterior fan project I started the interior fan. As the one on ebay uses an added alligator clip to attach to fins I needed to figure out how to install. Also wanted to wire in on/off switch .I also decided I could cut the mount plate in half and mount the fans apart instead of both in same place.
As the wiring seemed the easiest place to start I looked at the interior refer light. On the housing would be a good place for switch, sure be easier out and on the bench. Its held on with plastic rivets-couldn't figure out to release so cut them off, (hopefully figure a way to reattach) unplugged the wires (3?) and removed. Odd on the light there's a red power wire a gray ground and a black wire? that's also connected to the output side-directly to bulb. No idea unless when lights on it triggers something else in fridge-puzzling.

Took fans out and cut the aluminum mount plate in half. When I reassembled motors I flipped them around to change air direction. As a simple way to mount on fins wasn't apparent I decided I'm going to mount on walls either side of fins and have fans blow across. Cool wires can get tucked to the side and you wont see, fans will intrude into shelf less. Was going to strip the anodizing but Margaret really liked the blue-so we got blue fans.
Drilled the light housing and installed SPDT w/center off switch I had. Added a diode across the 2 on positions so I'll have off, one fan or both on. Solder a lead to the power in terminal of light to feed switch center pole. Cut a length a piece small ga 4 wire cable from switch that will attach to fans. Solder the green & black to ground terminal of light, solder red an yellow to new switch outputs. hooked up to power supply tested, nice less than 0.2 amps. Simple now to install.
On the little slots in fan aluminum plates, I opened end of slit with a 1/8 file making a hole to slide cable thru. Not really shown. Its a fairly sung fit that grabs the cable sheathing acting as a strain relief. Motor wires are very fine.
As its late Ill install tomorrow. Curious bout the 3rd black wire hooked to the positive side of light I looked up online. Well its from the ambient air temp switch. If its below 50 you turn on switch-which turns on the interior light, generating a bit of heat to cause the fridge to cycle. If you note an unusual amp draw check it by pushing the fridge light switch off with door open, if light stays on your ambient switch is on.Course now that I've added my fan switch I realized as we've never used ambient switch I could have use it for fan switch. Hmm oh well it would have been an on/off for both fans but an option verse adding a switch. Had I known I might have used though.
Ok Got the light reinstalled. Used plastic anchors. Works ok.
Set up fans-dang my wires too short. Didn't allow enough to reach behind fins to second fan. So I cut off and ran to 1st fan got some more wire to continue to second. Oh well hope I don't get busted soldering inside of fridge...
Odd the florescent bulb I'm using doesn't trigger camera flash but lighting looks so yellow.

Rewiring actually worked out better than my pre wire allowing to route wire more closely. Wire fits easily in water tray grove, up in corner with thermistor cable, then up and over fins and to second fan.
Nice, working out better than I was hoping. In the light were a couple of protrusion that pretty well secure cable. But from light to tray a small portion of cable is exposed. Should be a problem but since I'm already drilling holes in my refer side one more for a cable clamp wont hurt.
Mostly this pic is to document forever big ol honking drill inside my refer..
I did only allow 3/8 stick out of drill bit and am using very short screws.
AHHHSHooT
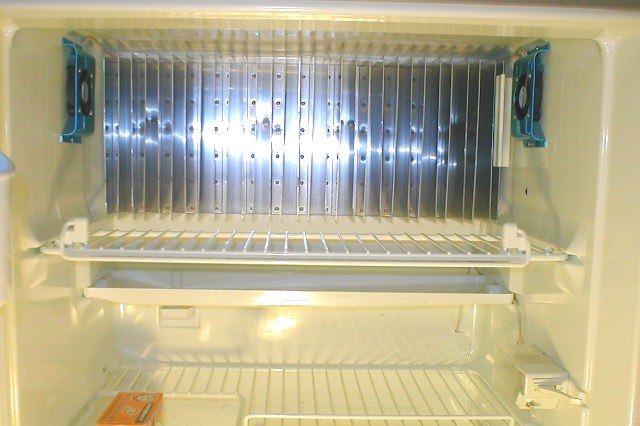
Just was ecstatic! Even though its a refrigerator turned out sweet Wiring which I was concerned with turned out clean. The fans are tucked out of the way, the switch operation works nice. Fans are pretty quite. Just the whole project turned out nicer than I expected. Love simple projects that work.
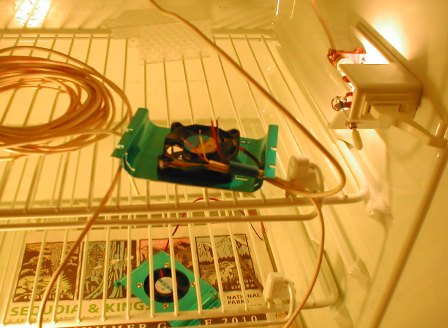
I'm hoping though as fans are not directly blowing into fans that will still extract cold from the fins. Should, when I had the lil box fan on bottom shelf it helped. These are closer so should be good. Just stirring the air would help.
But being curious I wanted to 'see' air flow. Lit a cigarette held it inside near fan. HuH? Fan is drawing the smoke into itself. What the heck! I reversed motor so they would blow out-this was verified when I bench tested....After puzzling, checking polarity decided no help for it, they need to come off. Take to shop see what's up. I no more than got last screw off, started pulling fan away from wall I could feel the air. What the HECK!
So I continued, put fan mount against wall the closer you get the less flow. Pull it away starts blowing. Fans are designed to set against a hard drive. So I flip over with fan running. got almost touching wall and lil fan is blowing air, but if you turn it around though, suction against wall kills them. Hmmmmm
Now what? Love it when a plan comes together, came out bitchen just doesn't work! .
Played with several ideas, making spacers for mounts nah looks hokey, puts edges of aluminum plate out in the air where they'll get snagged. I could mount the fan on the outside of mount plates, this would give it sufficient space to pull air. just sticks out a bit. Don't really like it. Then I decided since fans are cut if I hung from fins would still be less protrusion into fridge (like every one else is doing). Putting the motors back blowing like they were shipped, so blowing into fins would insure cold exchange, air would still circulate.
So back to the drawing board
As I now have holes in the side of my refer I looked at various ways to mount and utilize. The lower hole is a loss, just plug. If I could drill into roof some small simple mounts but I couldn't verify if possible. And I already have holes. Be nice to utilize. had thought about simply removing the fans from mount but from previous exterior project I learned the lil fans pull a LOT of side air. They need mount to separate air pulled and pushed, Finally a plan emerged using some left over aluminum angle make a full width support across and then I can mount using the existing fan mount & screws.

Several trips to camper & back I was able to cut & fold and got angle to fit.
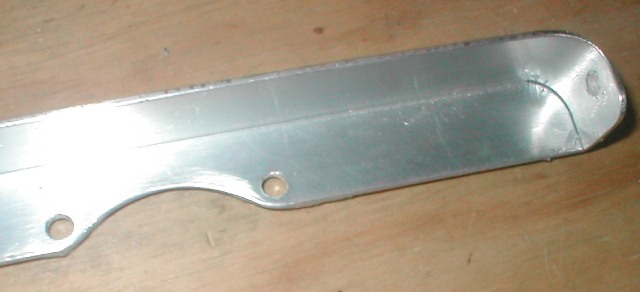
Details: Getting overall width & matching refer ceiling tricky. I used a short scrap of the alum. angle to get profile. Cutting between angle legs bout an 1" I was able to bend top leg down to match profile of refer roof to wall. Then I copied to one end of long piece of angle- . Did this on one side. Then measured from finished end 19" overall length(my finished width) and marked inside back leg. I cut the angle to 20 1/2" overall. Then separated the legs making a slit that ended bout 18 1/2 from other end. Rolled the top leg down so its outer edge matched the 19" line on back edge. The cut off excess from both pieces.
Wow that was luck perfect fit. I can use upper holes I had previously drilled to mount angle
Used fans to template the angle for position, holes and cut out profiles so as not to interfere with flow.

Taking inside I started to mount fans. But the angle, well though you cant really see it, looks like a piece of angle stuck inside. Also wondering bout blocking air across ceiling. So I took back to shop, drilled a few holes to address both appearance and air flow. I placed some 3m double sticky tape (un peeled fan side) where mounts sit to minimize any sound transfer, also cover entire back with masking tape to deaden. I had to use some 10-32 screws to mount fans to aluminum angle-supplied screws wouldn't reach thru the angle and foam tape, ran a tap thru. DONE

Happy fridge!
Add exterior fans & baffle to back of refer Exterior fans
Back to Ourelkhorn Camper Modifications page