Making door panels to add fabric to doors and water bottle holders
Turned to also making several small pouches, phone, charge cords, add USB ports. A lot of pictures.
- Sections on this page, done while doing the install-mostly for my own reference-really messy.
- Water bottles holder, passenger door card
- Drivers side door card
- USB ports, making storage pouches bag
- Finished
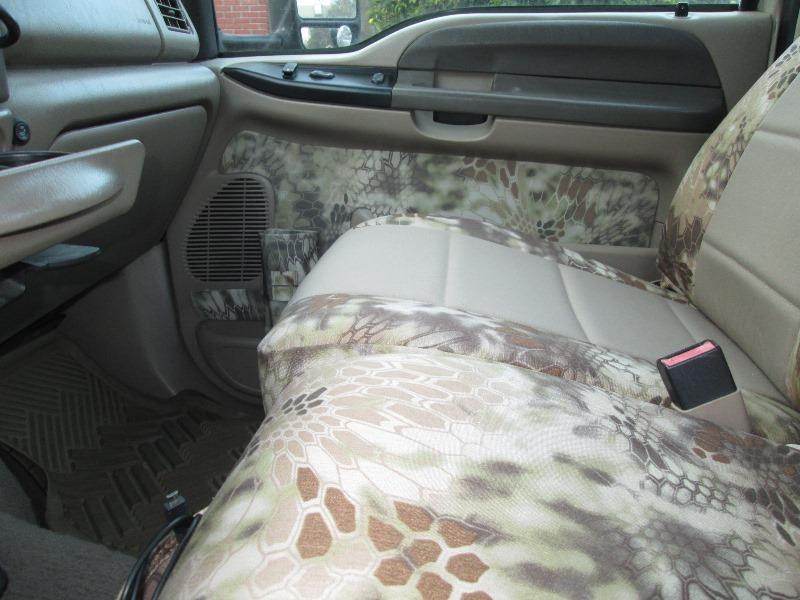
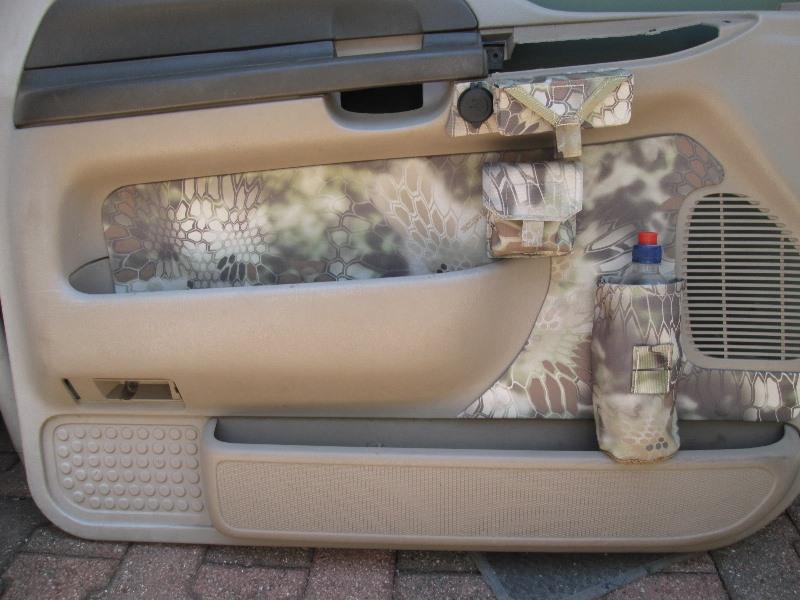
Eyeballing how to add water bottle holder to doors cant help but see would be nice if the Highlander fabric of new covers continued up on to the doors. Between the handel/arm rest and lower pocket. But the molded plastic panels dont really lend themselves to adding upholstery. So just adding water bottles and figure out how to hang
Holder would set between speaker and seat.
Water bottle holders
Found licensed fabric at Dutchwaregear -
https://dutchwaregear.com/product/kryptek-printed-fabric/
and matching Highlander 1" webbing at RipStop by the roll
https://ripstopbytheroll.com/collections/webbing/products/1-polyester-webbing-1500-lb-kryptek
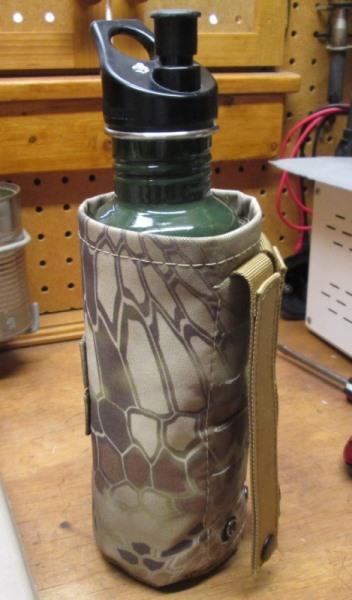
Started out making the water bottle holders with molle webbing to add to doors.
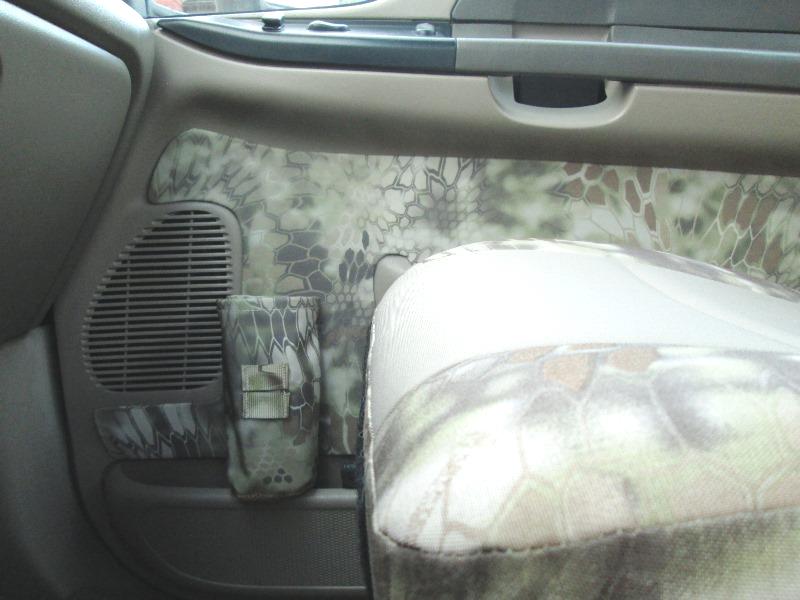
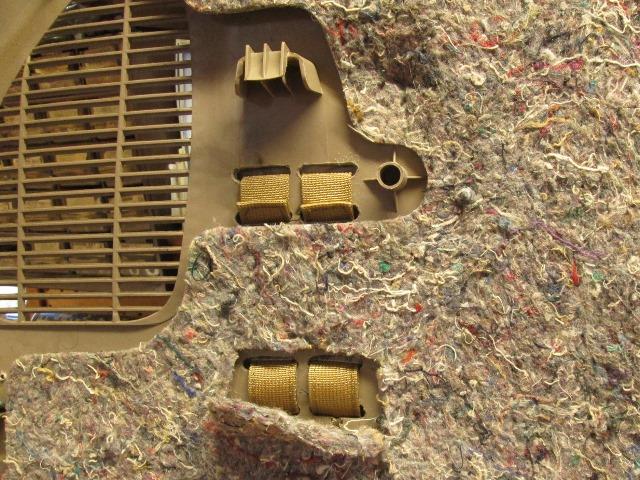
After unsuccessfully looking for an easy way to mount (pre made molle panel) decided to weave molle right onto the plastic door panels. (Picture is later after drilling for new cards)

Doors cut. Holder needs to be installed with door panels removed to weave but works well. However after installing the highlander fabric holder to door made the desire to see fabric on panel even greater. Decided some how Im going to add fabric panel.
So another project, making door cards to add Kryptek Highlander material to doors. Easier said than done.
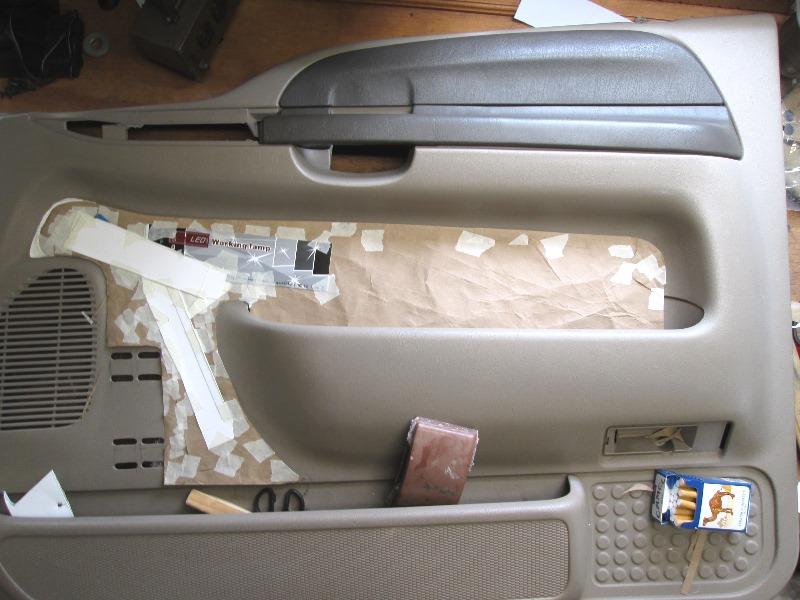
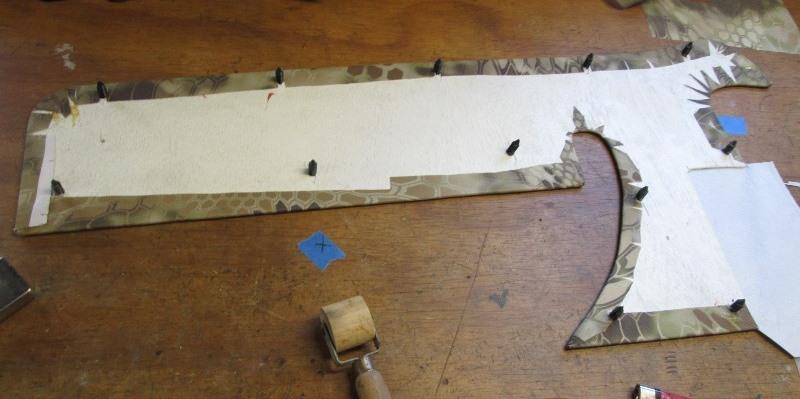
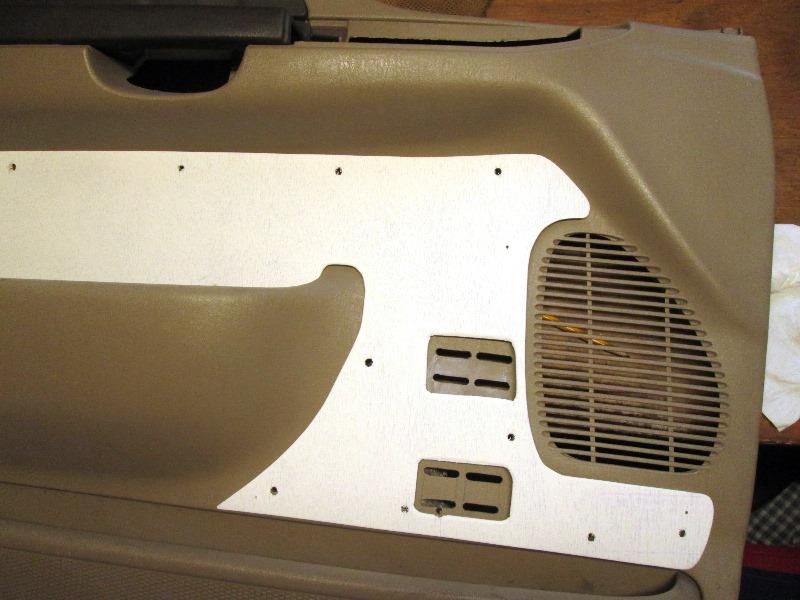
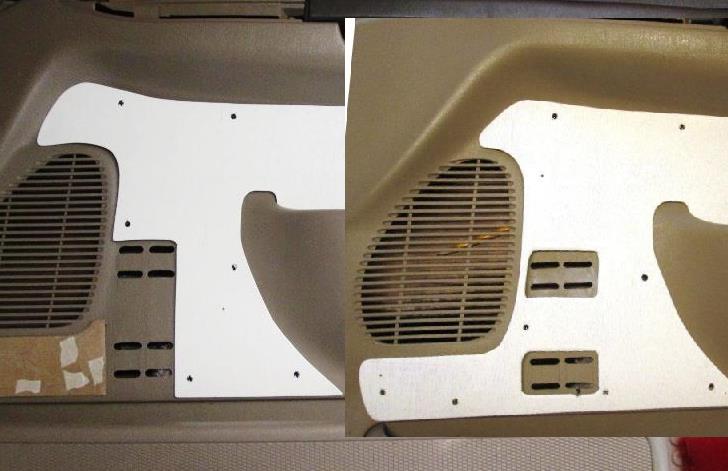
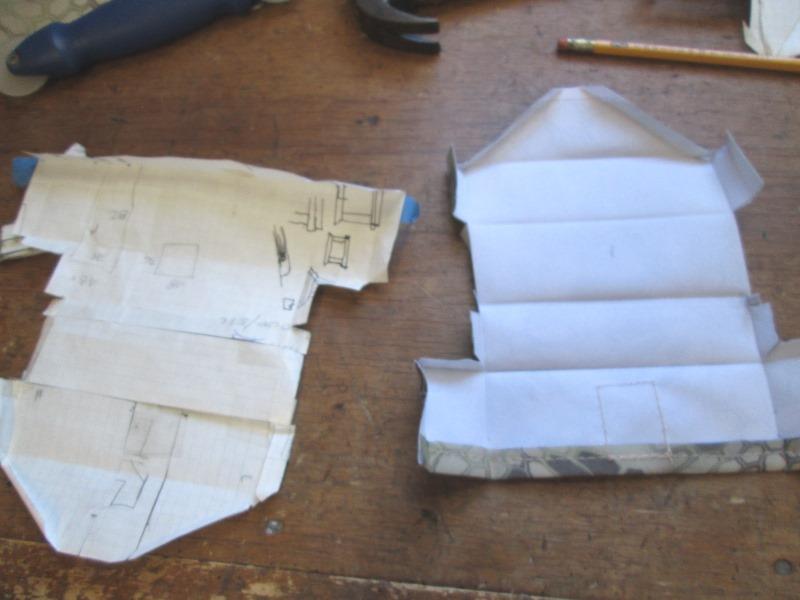
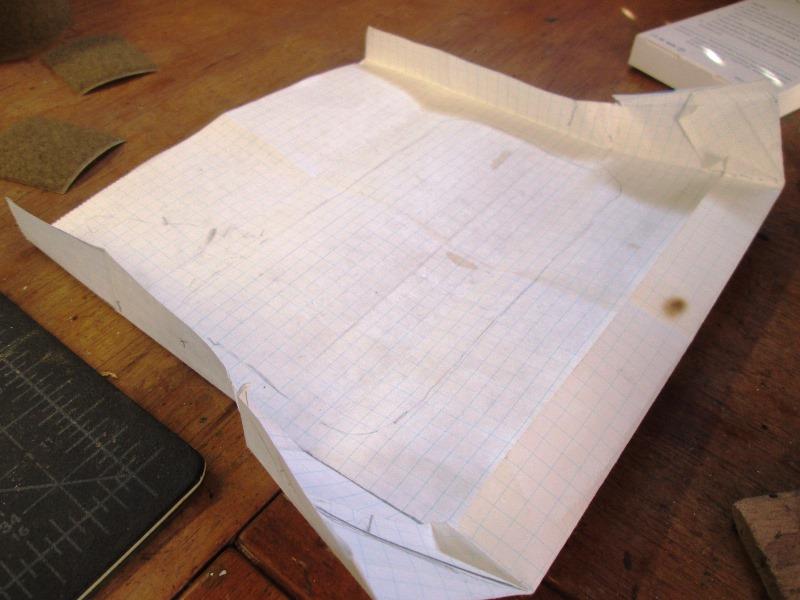
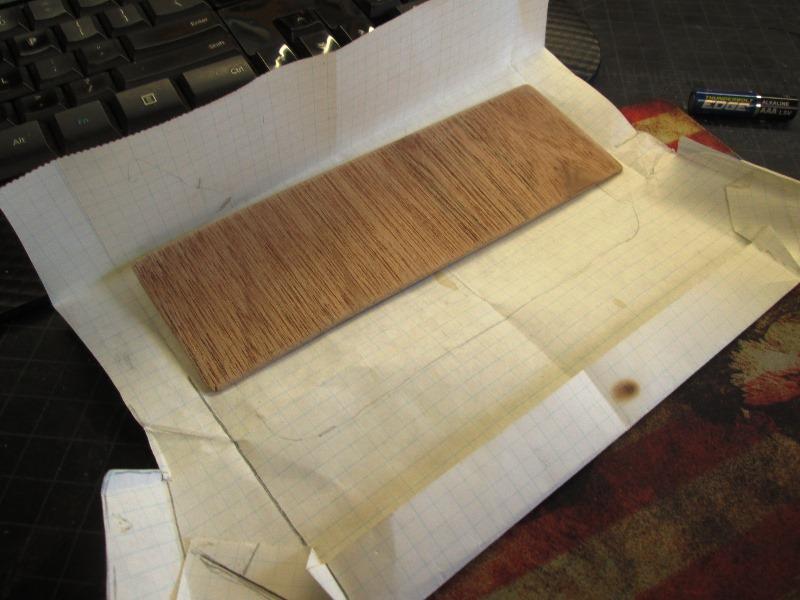
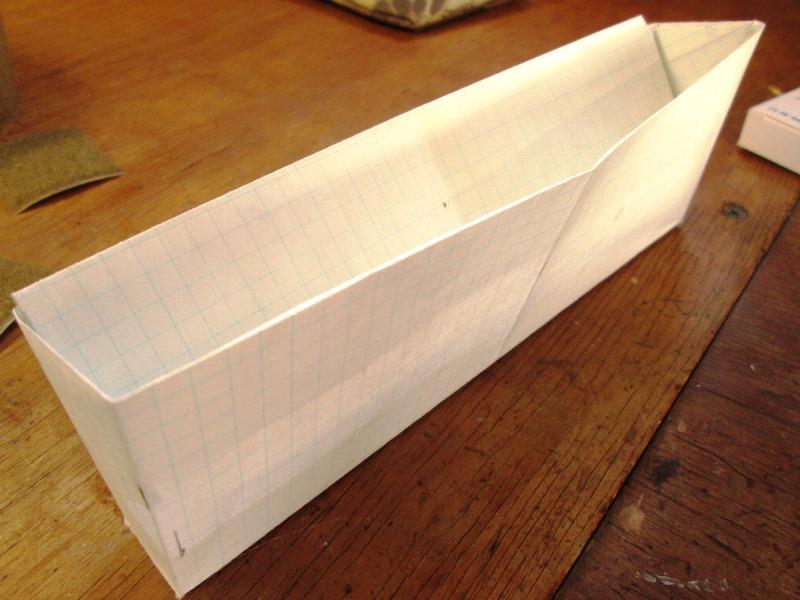
Spent quite a bit of time making pattern. Surface not flat and a lot of curves. Best I could manage. Using 1/8" plywood. Where molle slots are the fabric will extend without wood card due to extra thickness molle straps wouldn't reach. The feat will be actually covering this. Not using foam, glue fabric flat to card then try to cut and tuck around all the corners...should be fun.
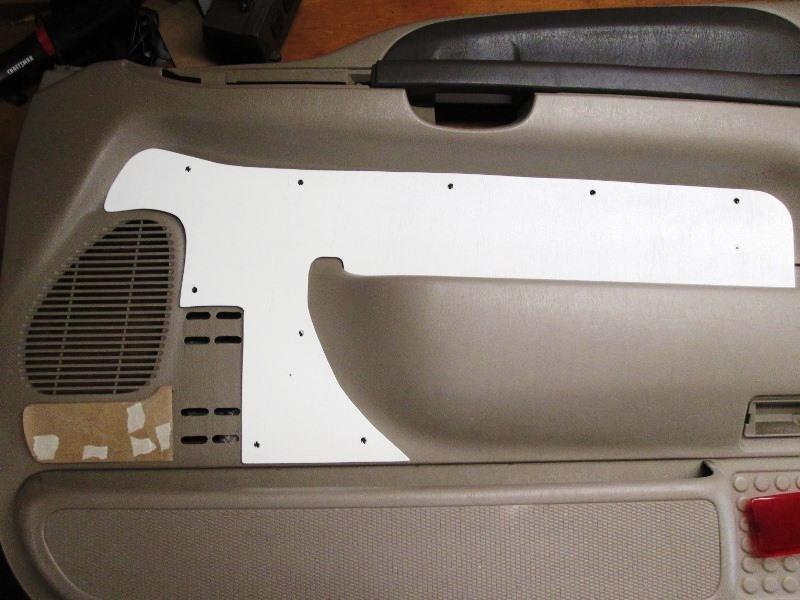
Main card cut and primed. Drilled for push clips and drill thru door plastic (this is semi permanent). Making a small card under the speaker, it will set on top of loose fabric that will cover molle slots tying together and hopefully help hold down. The plastic push clips to install the cards to panel will installed before or under the fabric. On the area with no card as gluing to vinyl usually doesn't last, likely surface mount couple of clips. They will be hidden by water bottle holder.
I have little confidence I will be able to wrap the card so it doesn't look like poop if at all. I mean 75% expectancy of failure. Plan B if this doesn't work is to find tan push clips to plug holes drilled in panel shown above.
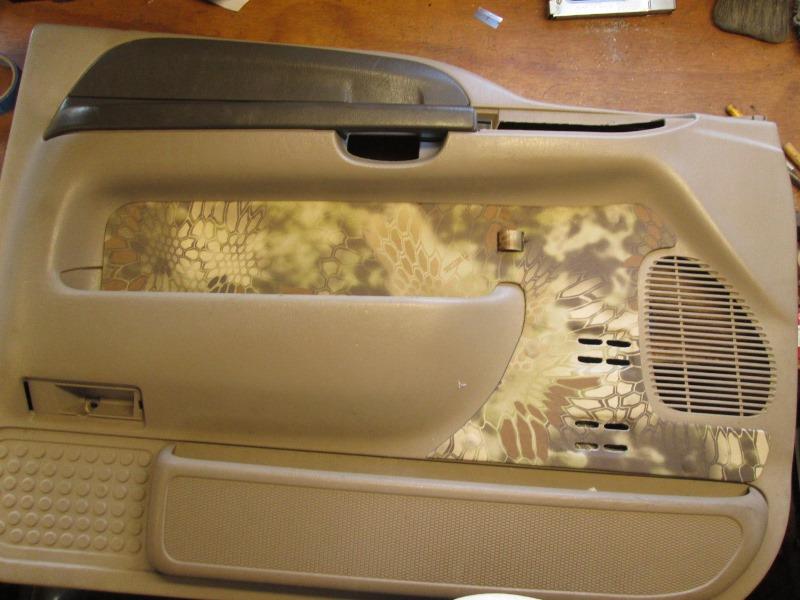
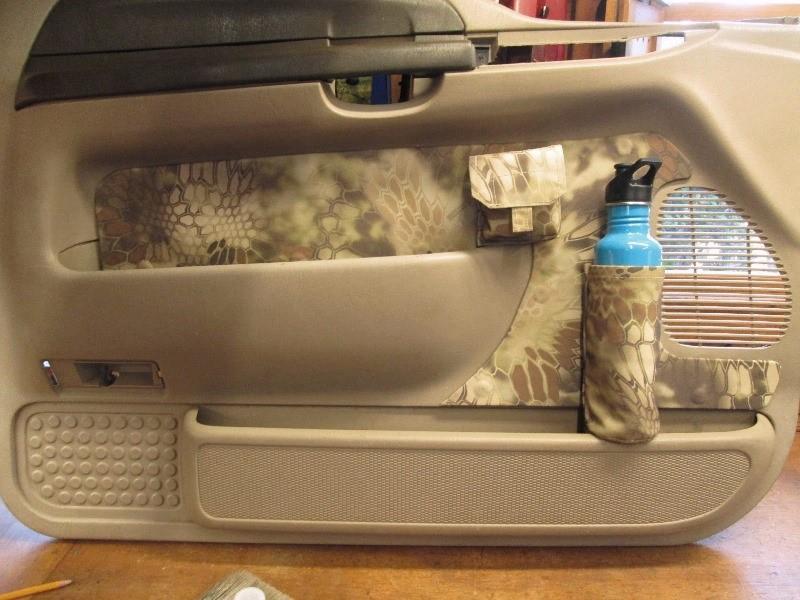
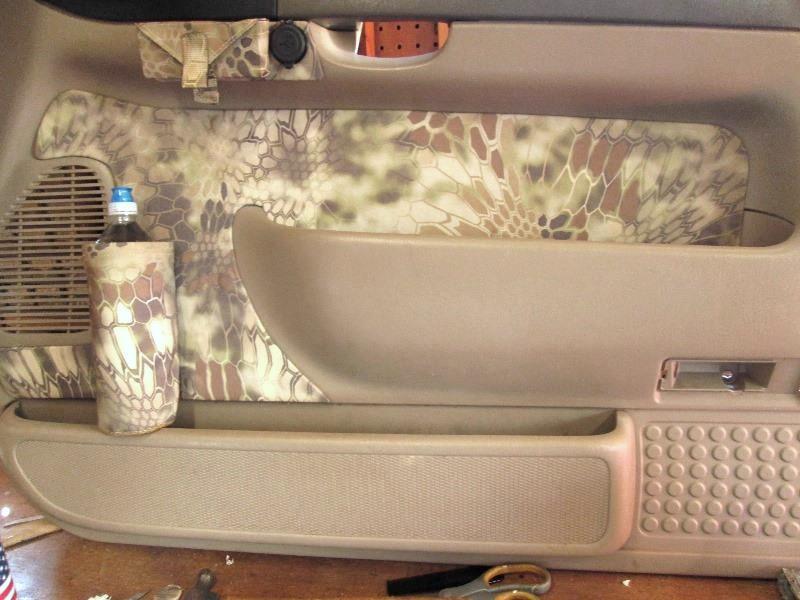
Hoo Hoo- Spoiler! took way too long but got passenger panel done.
This is what I see- so worth the effort..(I think). No pictures of the process, brief description.
Cut out the second small card, drilled it and door for clips then primed to dry while I tackled the main card
Aligning had me stumped. I finally decided that laying fabric down and 'roll' card onto it was the only way to get precut fabric positioned. If I had extra material easier would have been trimming fabric to size after gluing to board, would be a piece of cake, but I dont. Not like you can run to the store and buy these licensed patterns.
Lightly traced card onto back side of fabric. I sprayed 3M 90 glue to fabric and card. Then laid fabric down on table and starting at one end pressed the card onto fabric, flexing it and watching the trace. Once down flipped and with a block of wood under (push clips are poking out back side) rolled the fabric ensuring contact. Took back outside and sprayed perimeter of fabric and card that will get folded over.Tedious and intense at the same time. Cutting and folding to get edges smooth while glue is setting up.
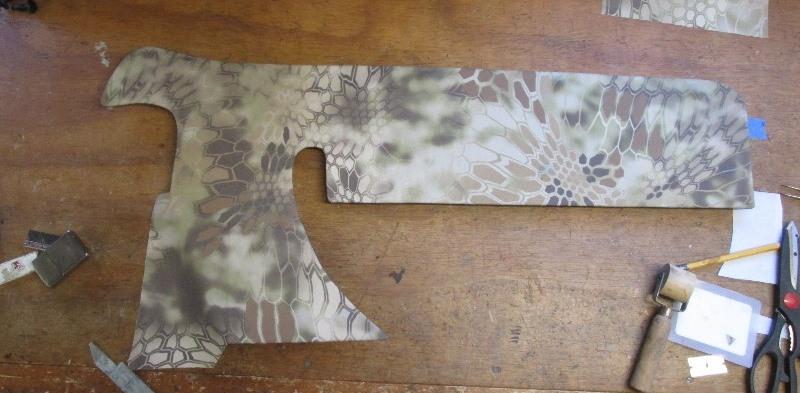
That it actually looks ok really surprised me. Not out of the woods yet, need to match the 2 cards and loose material.
Wrapped the smaller card. Loosely sat main card on door and small card, sketched fold lien on the loose material to line up with small card. Folded the loose material that covers the molle slots so edge matches edge of small card. Removed cards, masked off door molle slots area, sprayed door where loose material will be. Dont expect glue to hold long term on the 'plastic but long enough to cut out slots
Once glue dry enough on door laid a small piece of shiny paper to cover glue on door (so nothing sticks to it until Im ready). Pushed main card onto door, then small one down enough to see the edge Im trying to match. Once happy pulled the paper and roll fabric on to door. Full pushed small card clips into door. Wow
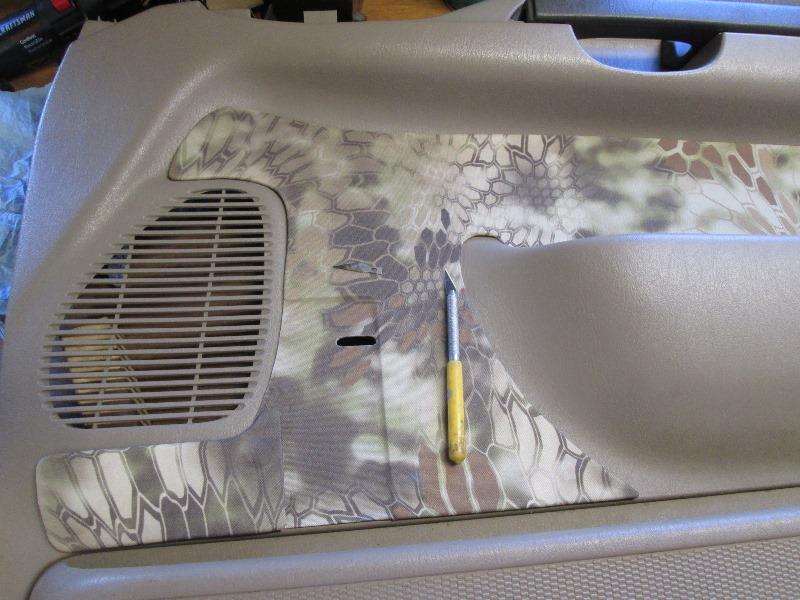
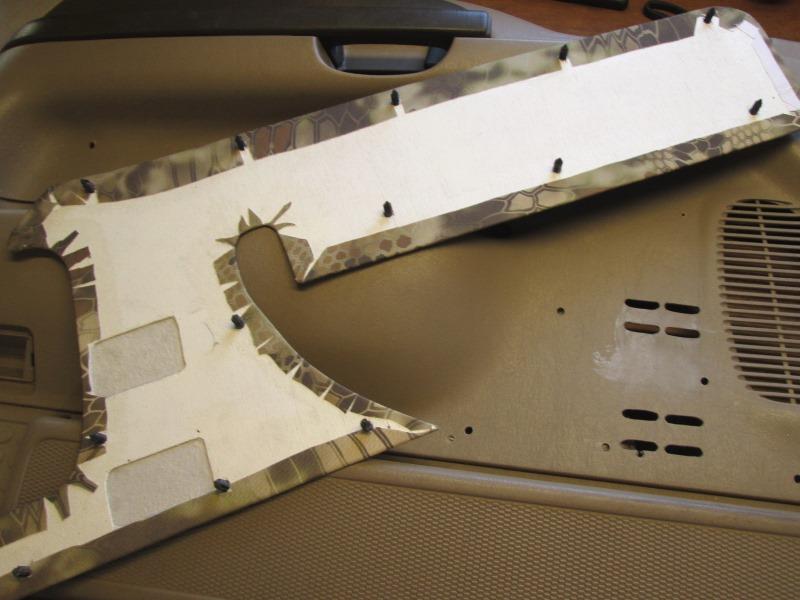
Trimming fabric to expose the molle slots.
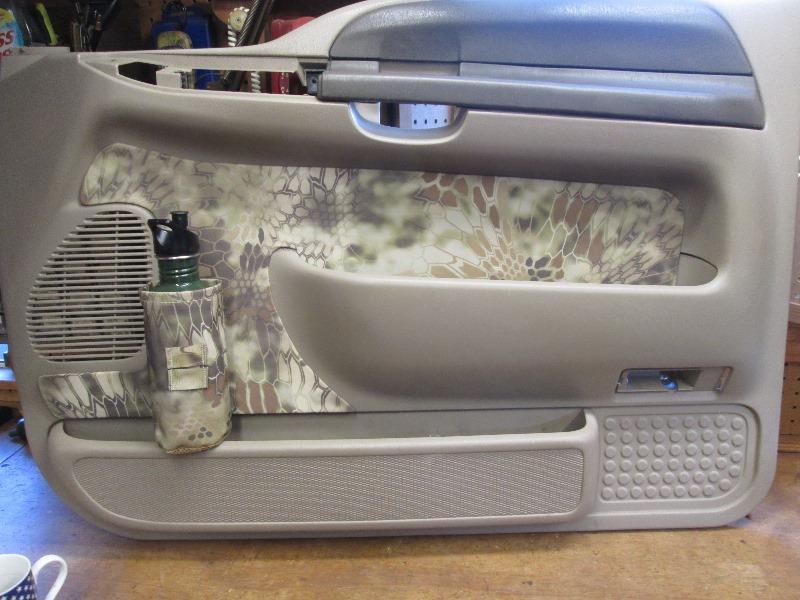 Stoked that this worked. On the drivers side I need to eliminate the 2 cards but not sure how. The water needs to be attached to door due to weight...some thought required....meantime install door panel back in truck
.
That'll work...
Water bottle that pushed me into making door cards.
 Likely replace the brown vinyl on door pillars with highlander fabric, or the taupe of the seats center section if i could find fabric. Or simply strip back to plastic. Truck use to have matching brown vinyl headliner but it kept falling, since replaced with lighter standard tan headliner material (fuzzy). Maybe but later-now need to make the drivers side...
- Back to the top
Drivers side door card
Its that thinking thing...Recut pattern to match. To Assume is to Error
Mirrored drivers side picture to compare lead edge..
I also extended pattern to make 1 piece instead of the 2 piece like drivers side. Cut out area to expose molle slots. ( this would bite me later, straps end up on top of card between 2 cut outs, thickness of card and straps push into water bottle holder, bottle wont fit) Need to double check slots, spacing on upper looks too close.
Yup second row of slots too close to top, all too narrow for snap on molle strap to pass thru...dremel time.
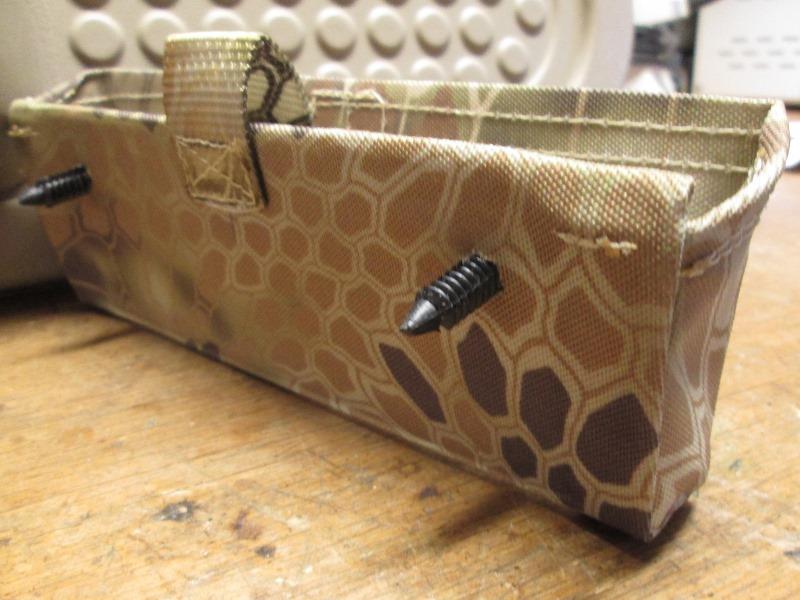
Wrapped.
A lot easier one piece. Add small strap for pouch.
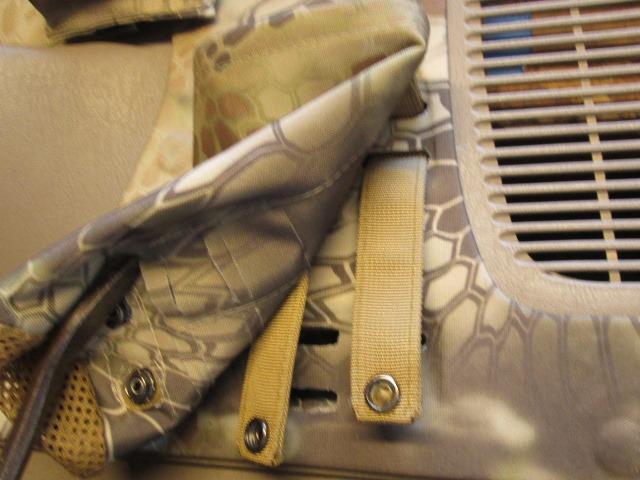
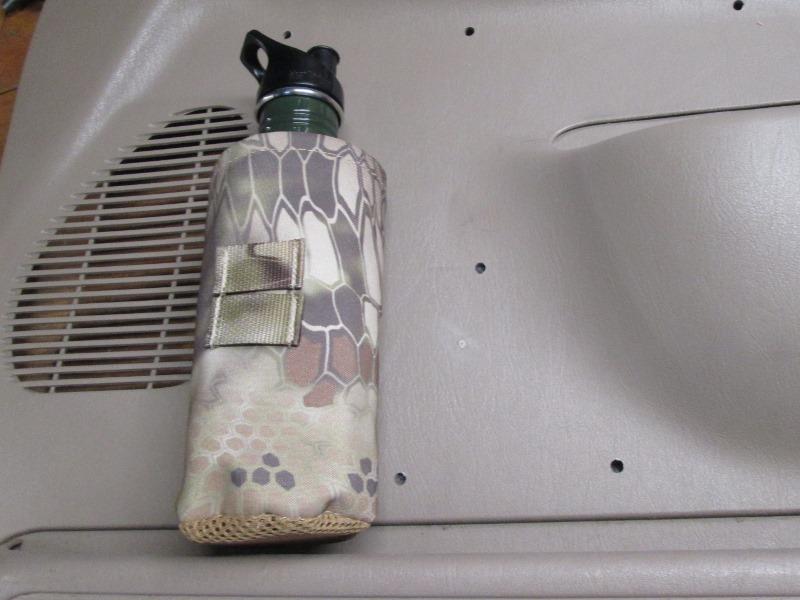
Weaving in the water bottle holder
These are semi permanent. Though removing door panel 'could' be removed.
Cool-Really didn't think I could pull this off. I like it.
Except, when I went to slip water bottle in its really tight. I mean 2 handed tight. When I had made this one I added a second vertical stitch on side seam. I went to out side about 1/8". Sewing inside out thought I was OK, wrong direction. Should have placed toward inside edge.
But what really stops bottle is the door card between the 2 cut outs for molle slots. I was going to remove but hadn't. When weaving onto door the straps come back out and are on top of door card, so extra thickness of card with the straps are pushed into holder..
Hmm fixes: IF I could get door card off remove the section of card between cut outs would solve but run risk of breaking push clips with no way to replace as they are under fabric. First is removed stitching see if that's enough..2nd Remake new water bottle holder. Just used plastic bottle which fit fine..OR swap water bottle holders....the passenger side was a little loose, hmm. Well that was easy-Drivers side holder works on passenger door, passenger side holder loose enough to work on drivers side.
- Note to self or what I learned when laying out molle attachment- molle is surface mounting, either surface of hard panel or face of webbing, no surface protruding beyond molle slots or webbing. The straps of what is being attached should be adjusted for the total thickness of what being woven thru. Which usually is the thickness of webbing. I tried to accommodating by cutting out extra thickness of card, wrong. Should have made the slots go thru both door panel AND card, lengthened the straps. (Or could have cut the plastic of panel behind card which would have worked but would have weakened panel, card would bear weight of water bottle)
Passenger side almost worked, the card only protrudes/interferes at the top because holder is taller than removed card. On drivers side I actually made worse by the portion of card between slots.
- Back to the top
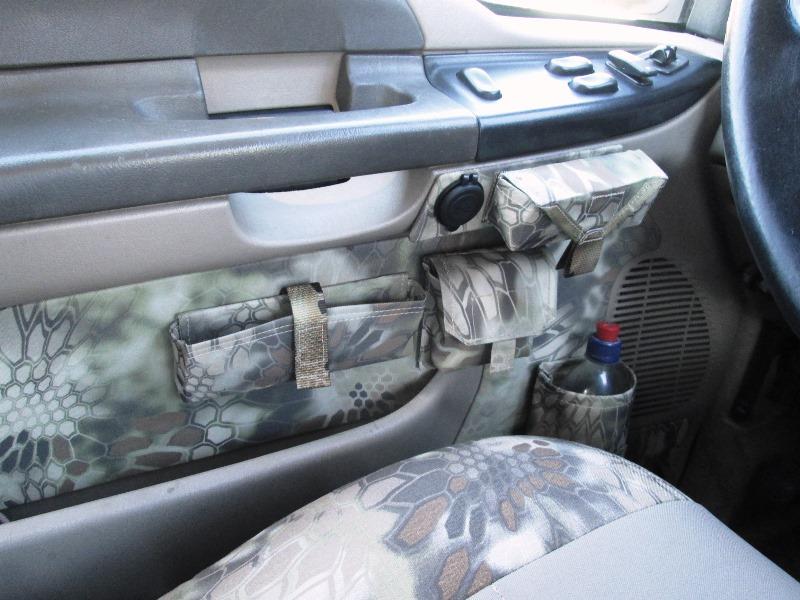
USB ports, pouches & bags
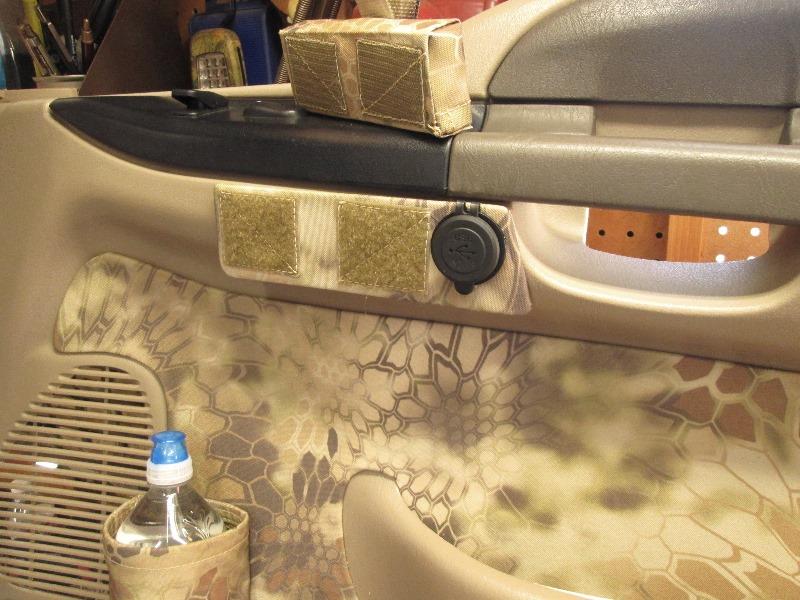
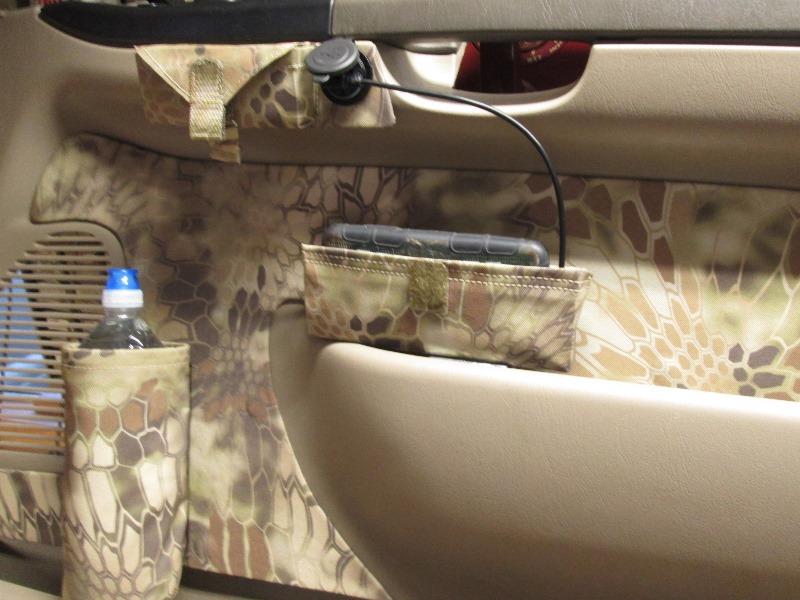
With passenger door panel off again went ahead and put a USB port, tied to door lock (always hot) though am changing to the power wire for windows which is only hot with key. They have on/off switch but off they pull 1.1ma in off position. Getting ready to make pockets for cell phone on both doors.
Added USB port to drivers door. Decided it would be nice to charge while phone parked on door.
So making small pouches for charging cords. Folded up a piece of paper...Sewed in a strip of plastic milk jug to stiffen open edge . Ironed folded edges to aid in sewing.

Not easy due to smallness sewing inside out.
Made drivers side first, lot of errors, should remake, crude but works. Hopefully do better on passenger side.
Used velcro to attach pouches.
Passenger side came out a lot better. If I have material left (and motivation) likely redo drivers side but first need to make phone pouches
Folded up another pattern. Phone will set horizontally.
As I'm doing this as I go attachment to door cards wasn't allowed for. Been nice if I had sewn in velcro. No way now. To attach this I'm folding a piece of 1/8" plywood after its sewn, flap at back will cover and get glued. Then use push clips to mount, will be semi permanent. I 'could' make a card wrapped and velcro like the cord pouches, mount to door card, then pouch would be removeable. But as it'd be as permanent so not sure worthwhile.
Front face angles out a bit for easier access. Longer than phone to allow charging cord plugged in. Think I need to insert a piece of plastic on front edge to keep shape. Really not sure about these. All I can do is try...
Actually not sure about any of these pouches. Was the plan, liked the door cards but getting a bit busy adding pouches. If I had some of taupe material (center of seat covers) I'd redo the USB card and cord pouches as its color is perfect match to the plastic door panels, that would help a lot. But haven't found a source for the Dura EZ care D29 taupe.
Anyway proceeding...if phone pouch turns out ok.
Took forever but done (one).
Push clips thru card & back of pouch for mounting to door. Material folds over, glued to inside of pouch to card so clips & card unseen. Also so fabric pattern shows on open pouch
Haven't mounted yet, playing with placement, Probably over an inch to right and up an inch. Checking out some small 12" right angle charge cords.
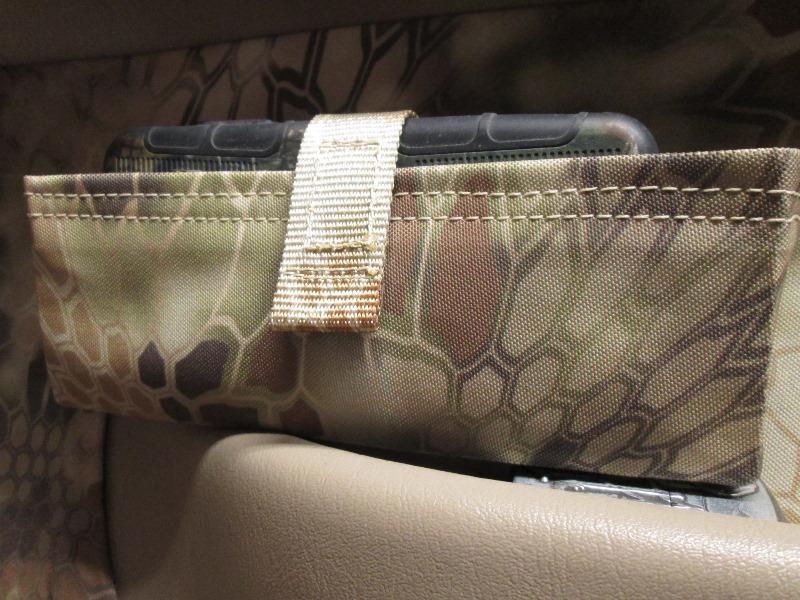
Margaret was concerned with phone jumping out so added a small strap to secure. Not in use strap will sit inside pouch.
Finished
Passenger side done.
Now to duplicate for drivers side.
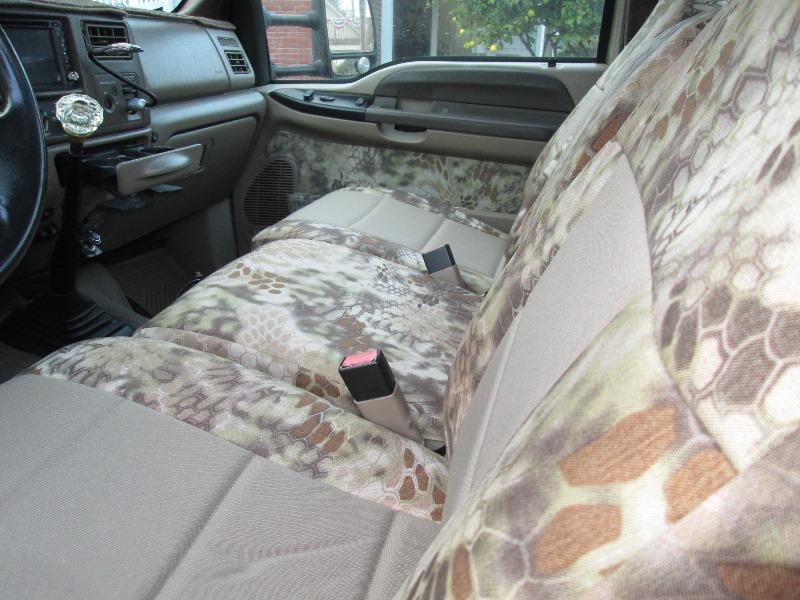
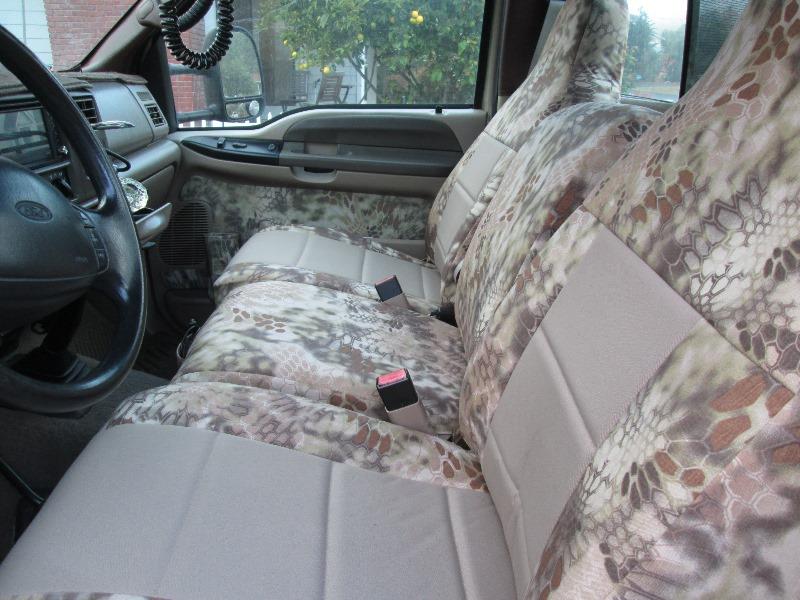
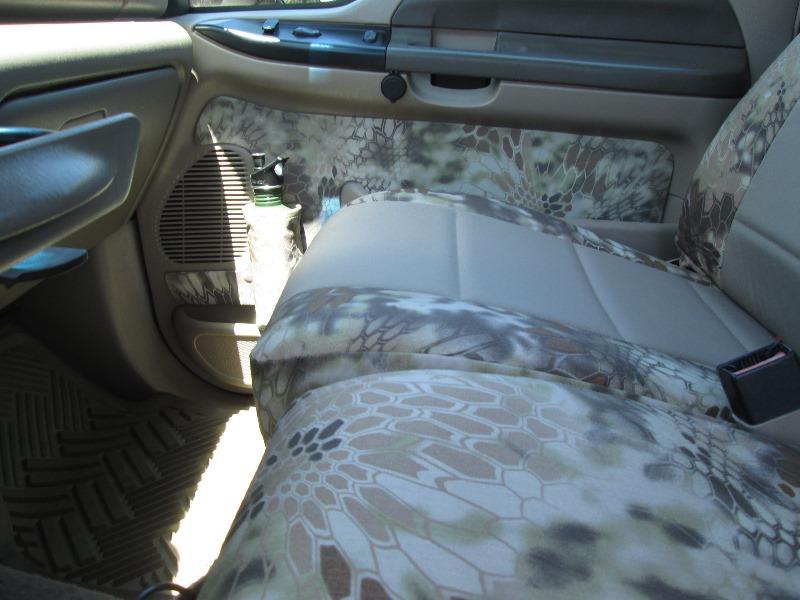
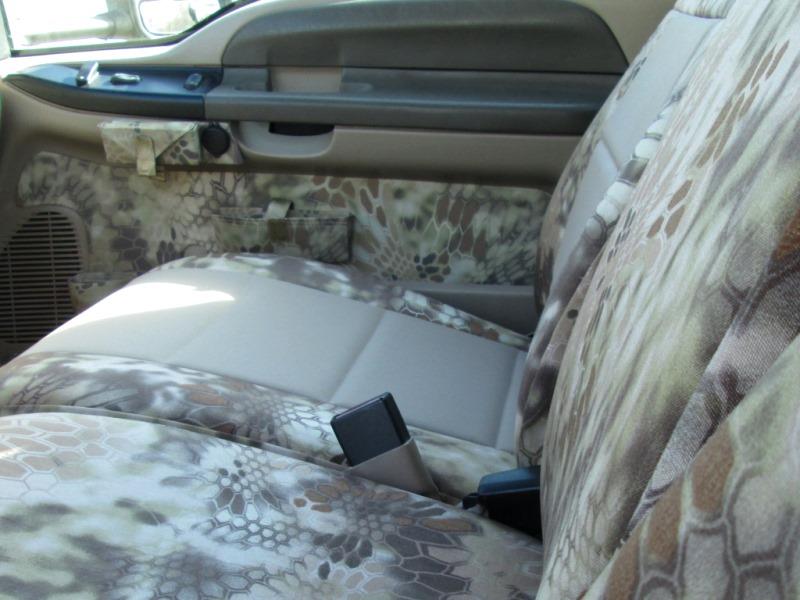
Well I like it. It is a bit cluttered in appearance but no more laying phone on middle seat then fishing it out from behind. Dedicated charger and place to put cord. Easily accssed water bottle. Place for my smokes. Function over form :).
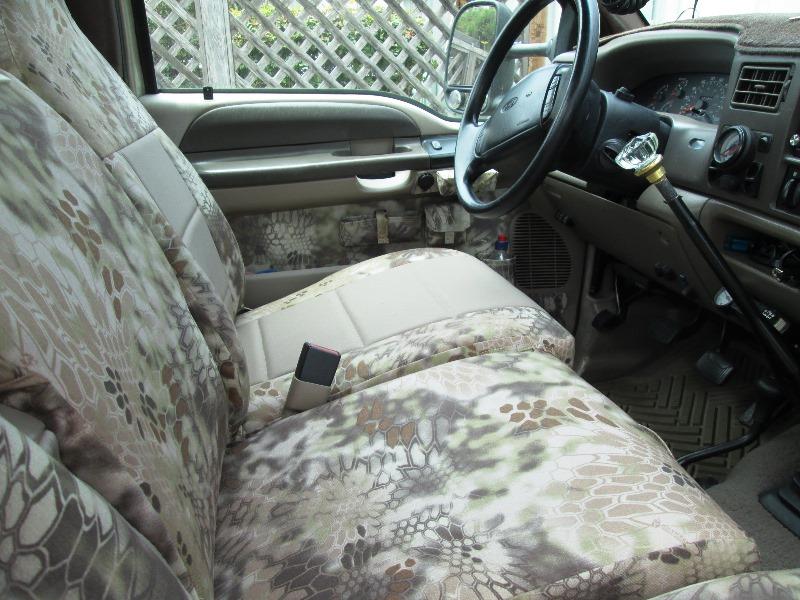
Looks better from other side.
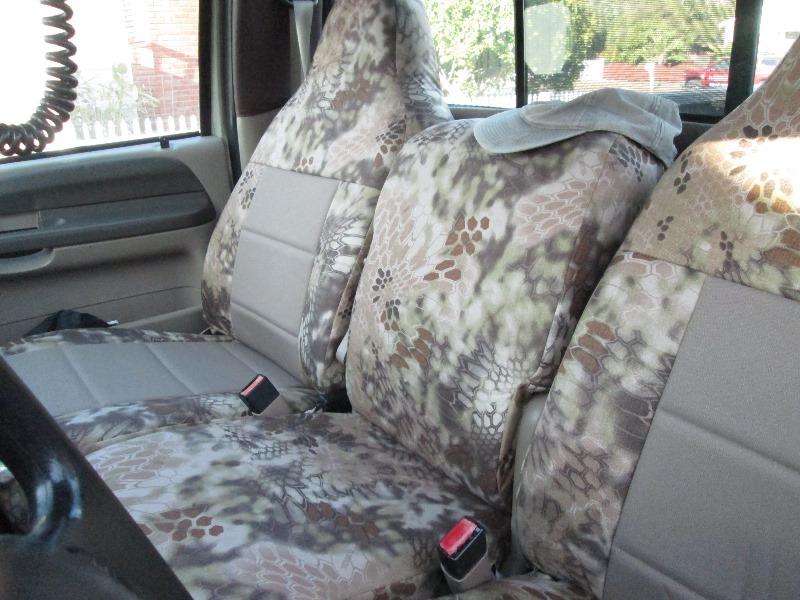
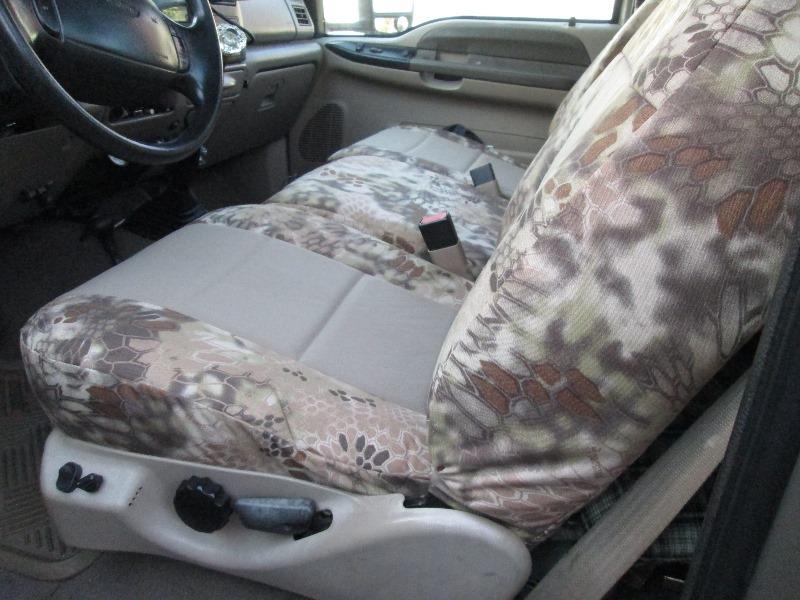
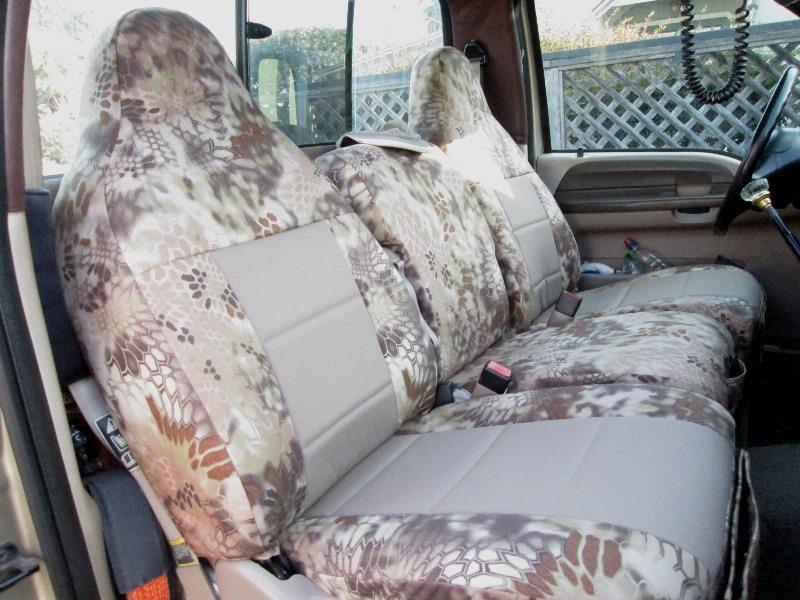
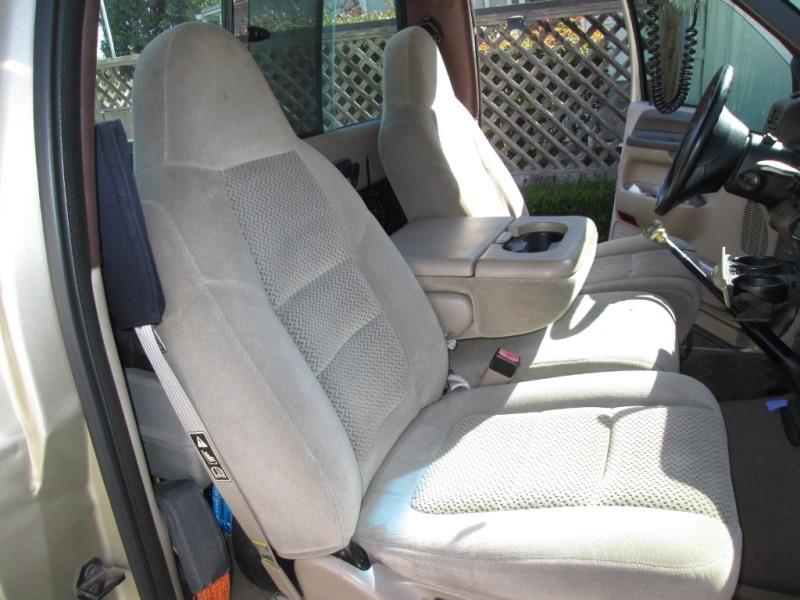 Just before shot of original seat cover
Back to our F250 truck page
Back to Ourelkhorn Camper Modifications page