Replace 2001 factory 110 amp 7.3 alternator with 140 amp from a 2005 6.0
Just simple alternator replacement on our 2001 7.3 diesel F250 using off the shelf alternator from a 2005 6.0 diesel Super Duty.
Picture of cradle with alternator removed..
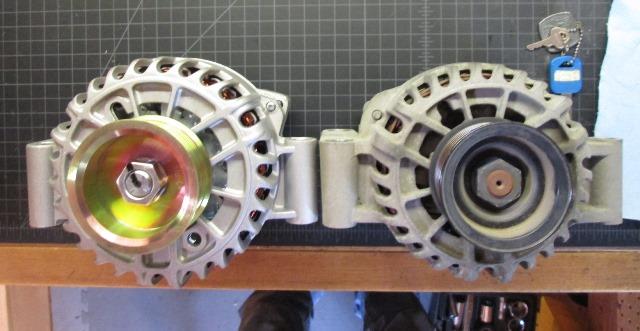
This is not a how to. The only point of this page is just to share the simple upgrade. For those not aware, using an off the shelf alternator from a 2005 6.0 Ford Super Duty into an earlier 99-03 SuperDuty with 7.3 you can go to a 140amp alternator. Reason, there are no off the shelf stock options for the 99-03 Fords w/single alternators as far as alternator amp output. 110 amp period-. You can buy custom aftermarket high output alternators. I don't need or can afford that.
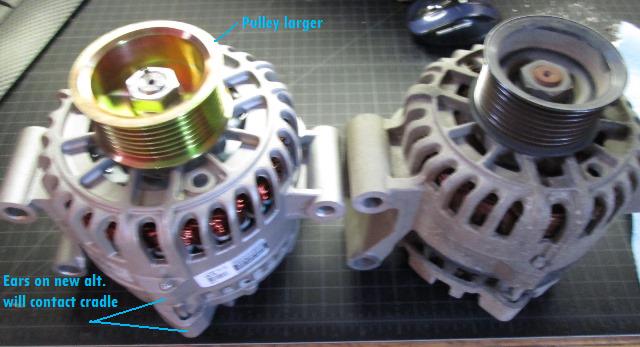
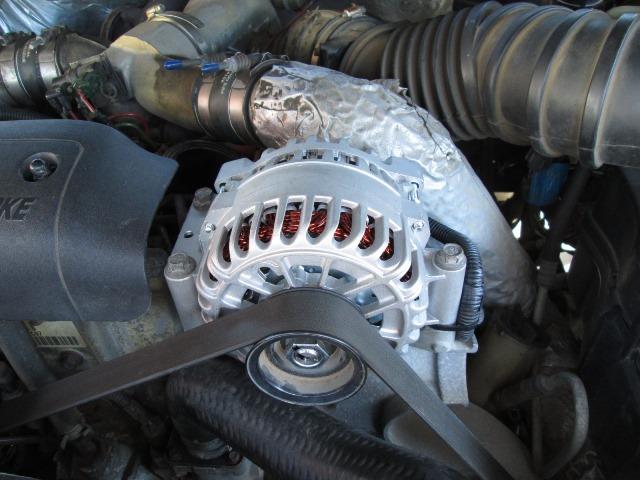
Since I need to change the alternator, upgrading amps would be nice. Without incurring extra money even nicer. Basically for the same price, whether new, remanufactured, from whatever parts house or supplier, you can get a stock 140amp alternator verses stock 110 amp. No brainer. Also the 140 amp from a 2005 6.0 diesel uses large case. Better alternator than the 99-03 small case alternator. Same bolt up, same wiring connections. As mentioned, only need to clearance between the alternator and the cradle it mounts to if installing large case/140 amp alternator. Again easily done using flat washers. I choose to grind out from bottom of cradle front and back webs.
There are other options but this is stop at any parts house and replace with 'factory' stock part when needed on the road. There are several after market USA companies that make quality high output alts, but pricey. Also very cheap import (ebay etc) high output alts. Either usually a 1 year warranty. This is kinda middle of the road-local parts house, cheap china made but few more amps -larger g6 case. Priced in between yet lifetime replacement. My justification. IF i were going 180-200amp+ Id go USA made aftermarket. But requires some wiring rework to utilize and just really don't need. All i need to remember is my truck is an 2005 with 6.0.
This IS the easiest alternator I've ever replaced.
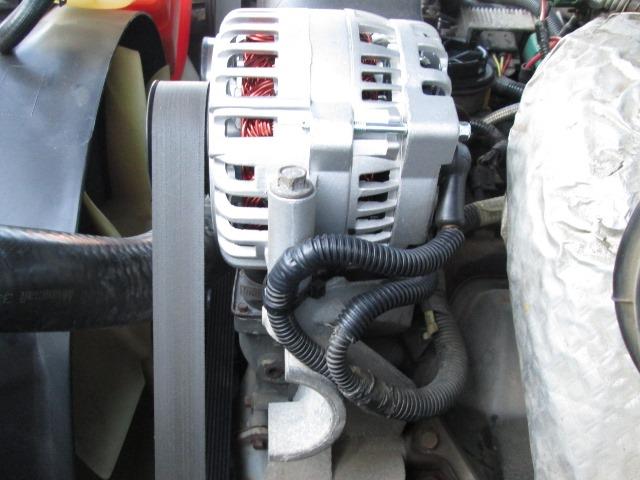
Disconnect the batteries, ensure the out put lead doesn't touch or ground out. I choose to disconnect the alt output lead from the starter solenoid so no chance of grounding. There are some downstream components that 'might' be affected or hot. The output cable (mines black with orange stripe) from alt terminates in 2 gray wires at solenoid, fuse able links.
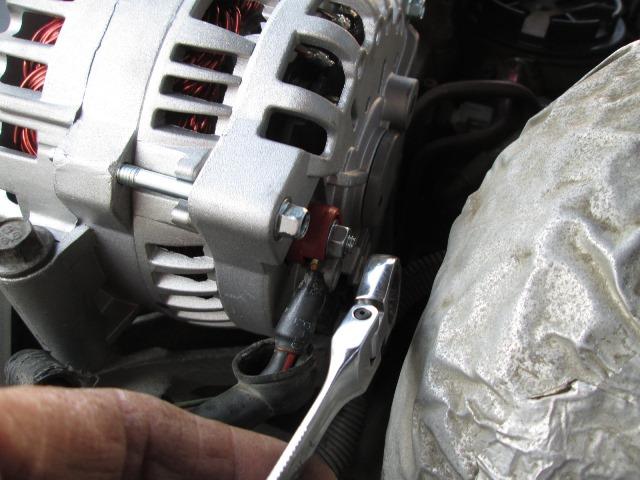
At alt., unplug the 3 wire connector by depressing tab on side, then pull back rubber boot and disconnect the output cable by unscrewing small nut.
Remove the 3 bolts holding alt in bracket. Lift alternator out. 5 minuets. Some will remove the bolts and then do wiring, makes it easier to access but I don't like unnecessarily working fixed wires.
Reinstall - Place a piece of folded paper, I folded 4 times, between alt and mount. If not grinding place washers between alt and mount, should take no more than 2 at each hole (USE SAME NUMBER @ each bolt hole). Paper should freely slide.
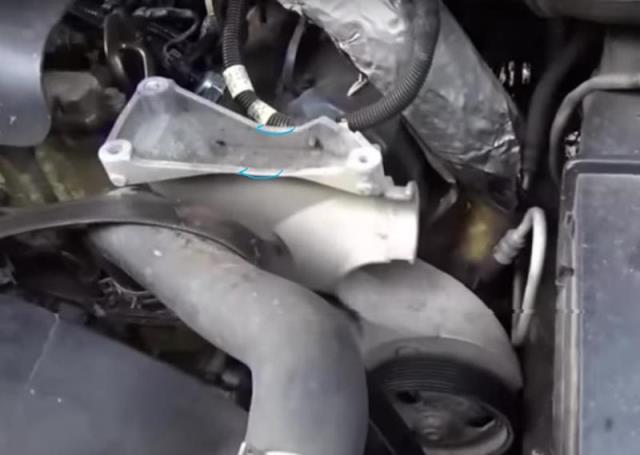
If grinding same, place paper between checking fit. Grind until paper can easily be slid out. Only needs to be less than an inch long, tapered to center. I think I removed about 1/16" from front web and maybe an 1/8" on the rear at the deepest points. But alternators bodies will be different and also the castings of the aluminum mount varies at the webs. So just what ever it takes so when alt. bolted down, case does not contact the webs of mount. Harder to explain than doing....
Bolt down, 35 foot pounds I used blue locktite, some use antisieze.
Reconnect the belt ensuring its on all pulleys. Clean all terminals if suspect. Reconnect power. Its not a bad Idea to turn motor over without starting & recheck belt on pulleys
Couple of notes:
Back to our F250 truck page
Back to Ourelkhorn Camper Modifications page