Replace Air lift air bags 2014
Not much here but been on the list for a while. Our Air Lift air suspension was originally installed 2001. Still holding air and working but getting pretty toasty. The embedded steel wires that band the bags between the bellows had split quite a while ago. The rubber itself showing severe signs of degradation. Kind of half expecting failure last few trips out. Just price of replacement bags I never seemed to overcome.
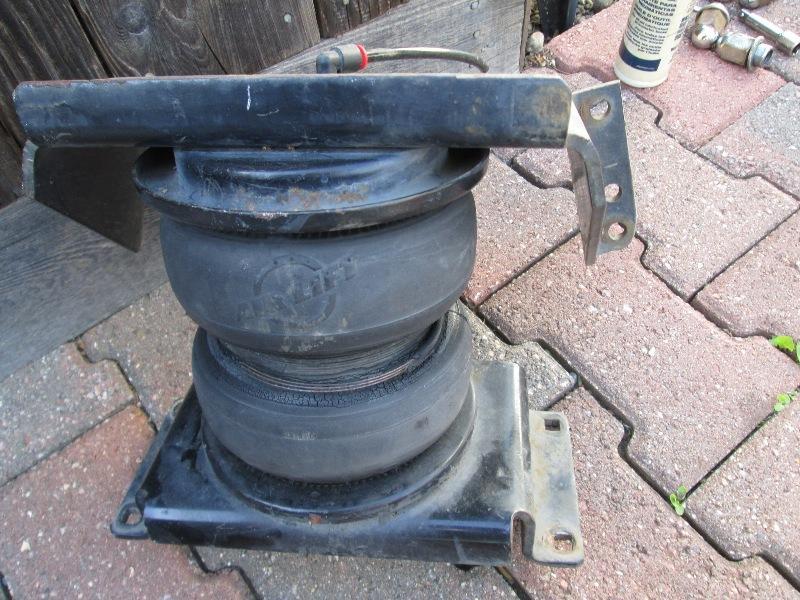
Old bags & brackets, later picture after removed, looks better in pic but in pretty bad shape.
Recent post on RV net by member stating he had removed his and would part with pretty cheap I jumped. Got em for less than half of a single replacement bag. Though used, assumed a lot better shape than mine. Also as I'm replacing before they actually fail, means I can carry one as a spare to get home. Which when we first installed the air bags was always going to get an extra, never did. We rely on our air bags. Many opinions on air bags carrying campers-love ours.
Anyway.. its been 14 years since I had installed them. I remembered it being pretty straight forward. Ours, 01 Ford, upper bracket bolts to outboard side of frame, lower bracket bolts to top overload. To simply replace the bags, the upper bracket does not need to be removed. Simply disconnect air line from fitting, on mine there's a tee a few inches from top of back so a bit easier to disconnect. But disconnecting at top of bracket, though tight-doable. Once air line off rotate the elbow fitting in line with the slot in bracket. Then unbolt the bag from top bracket. Again not much room, a ratcheting 9/16" wrench makes easy, open /box wrench will work. Next unbolt the U bolts clamping lower bracket, ensuring the elbow fitting is line with the slot in upper bracket pull lower bracket off while lightly compressing bag so fitting clears. Reinstall reverse order-guiding top fitting thru top bracket slot while sliding lower bracket onto spring. Loosely screw in top bolts thru upper bracket in to bag & U bolts thru lower bracket. Align the bag so its vertical (it will lean top toward front a bit) then secure the bolts-tight but don't reef on em.
That easy But...
The used replacement bags I picked up was a complete kit with all the brackets. As his brackets were just in a lot better shape than mine (ie not rusted from the ocean air) decided to replace all the brackets. This will allow me to address the one issue I have with upper brackets, the folded lip rubs on bed lip. I'm clearancing the 'new' upper brackets. Also the cans the bags set in, the outer lip is drilled so when used on top it drains, however when used on bottom the center holds water so drilled a small hole at edge. Cleaned with some TSP and painted just to 'look' new. Oddly, though his brackets were in good shape, hardware was considerably more rusted so reusing mine. Removing tires will make access a lot easier to unbolt brackets a lot easier.
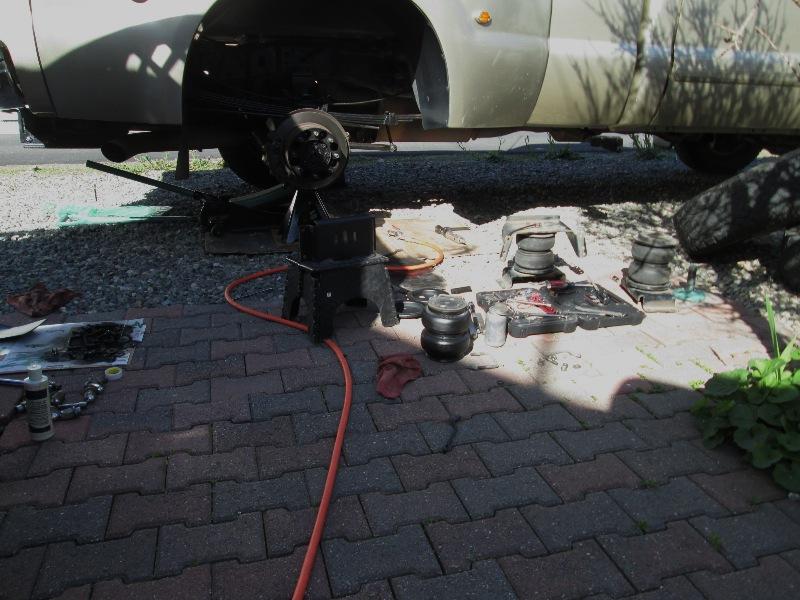
So jacked up truck, place a stand on drivers side & remove tires.
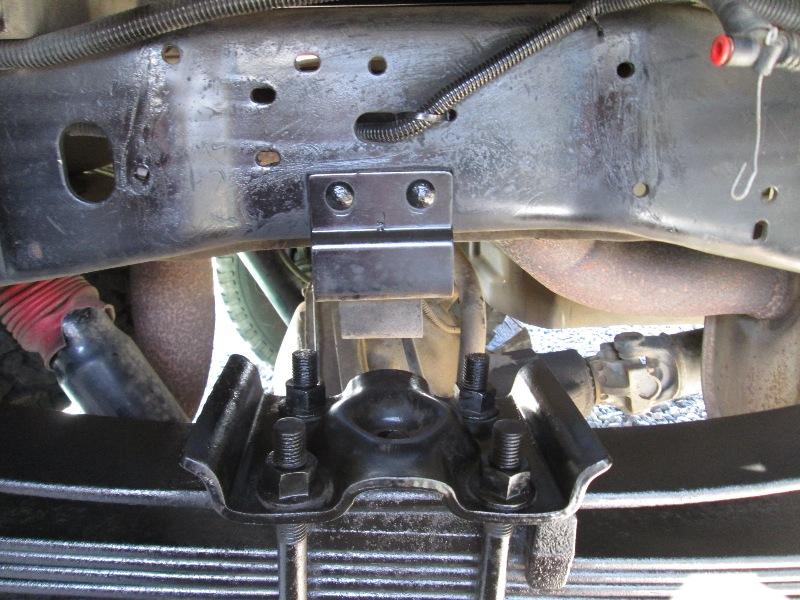
And drivers side installed. compared to pic below you can see I cut quite a bit of lip from bracket.Still enough to retain strength, I think. If a problem I'll reinstall mine with a bit less 'clearancing'.
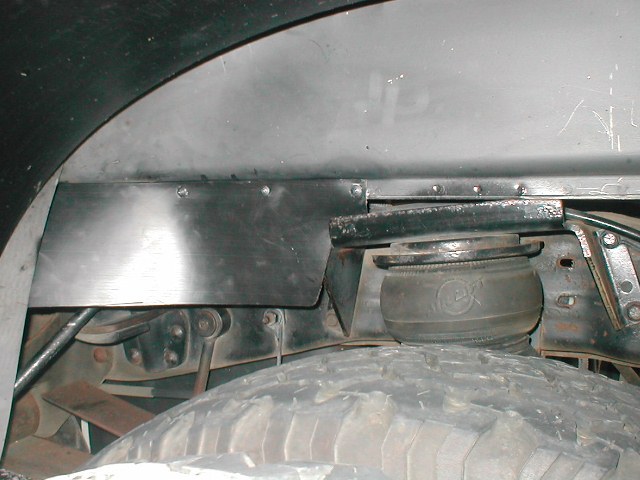
Older picture showing interference between top bracket & bed lip, one of the things this 'new' kit allows me to address. The lip of bed was setting on the old bracket lip, the passenger side bracket had slipped behind the bed lip, both made horrendous amount of racket when bed flexes.
Side note- my airline fittings have a red sleeve when depressed allows easy removal of air line tubing. On the 'newer' bags this sleeve isn't present- required sticking small screwdriver to remove tubing? I swapped the fittings, not sure how the newer ones work.
Even using air ratchet, had half of my tools out to make less work- by the time I started passenger side was wanting to be done... Removing tires, uninstalling my brackets, cleaning/ repaint nuts, bolts& hardware, reinstalling 'new' kit & tires made a lot of unnecessary work for my self, but about 4 hours later installed.
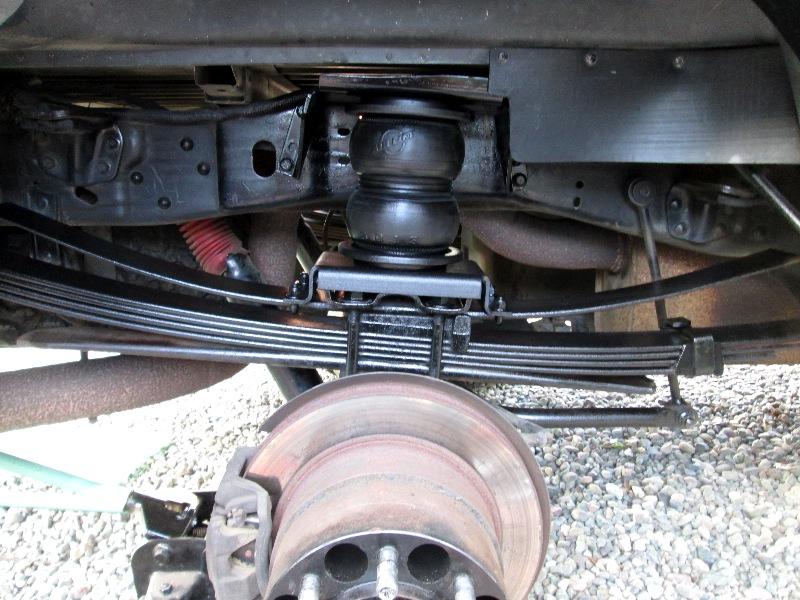
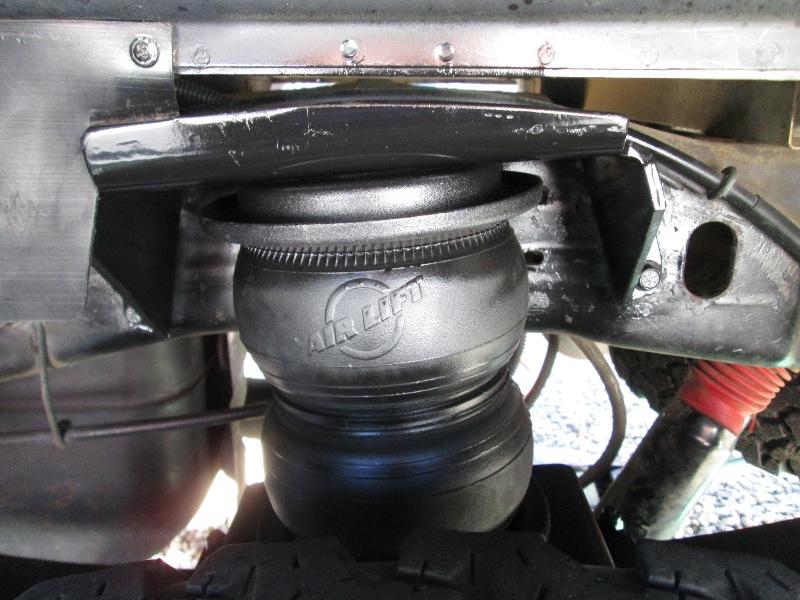
And finished. Cool-fresh bags, clearanced brackets and spare bags. Bumped up to 90psi let em set to check pressure.
Back to our F250 truck page
Back to Ourelkhorn Camper Modifications page