05/07 headlights on 99/04 Ford Super duty
Our 2001 F250 headlights lenses have yellowed and leak, tired of polishing/drying out, trying to seal. Look like pooh. Simple replacement would work but decided to upgrade. Primarily I want to see clear un fluted lenses on the headlights. Which would be a simple bolt on '02 to '04 headlight, they came clear. But I'd also like to change the full width orange turn signals to clear (with orange bulb and legal orange side reflector) Just a matter that I've always hated all that orange of the 01 earlier signals.BUT since I'm doing this, spending time and money decided I like to see the stock 05 to 07 one piece headlight/signals. Just look nice/clean & simple, not the 80s look of the 01, not blingy like some of the aftermarket stuff. Also could just swap 03-04 lights in, same lights -just clear LENS BUT no modification needed. In a perfect world- truck would have round glass headlights, but those days are gone. Plastic fantastic..here to stay
I sprung for 05 lights, but not the conversion kit. I also used aftermarket cheapo lights. It IS a fairly easy mod, upgrading to later lights, when done will be worth it (I hope). However now that I'm into it, some of the details- well had I really known what would be involved I would have gone '03-'04 bolt on. No mods required, less expensive and get the 'look'.
Main modification to install 05-07 light on earlier trucks is cutting the header panel behind lights for clearance. If not using conversion kit, second is need an adapter from the '99-04 H5/9007 bulb to the '05/07 H13/9008 bulb. If you order new headlights sold as 'conversion' kits it will come with plug adapters and possibly the bulbs. It, conversion kit, will also include straight side marker bulb holder, which I discovered after lights arrived. Earlier right angle holder wont work on the 05 housing. I sourced lights, adapters & bulbs separately to save some money. A lot. But Id recommend the conversion kits. Parts trickling in, not aware of the side marker issue- stretched out project over 2 weeks. Otherwise its an easy day or weekend project.
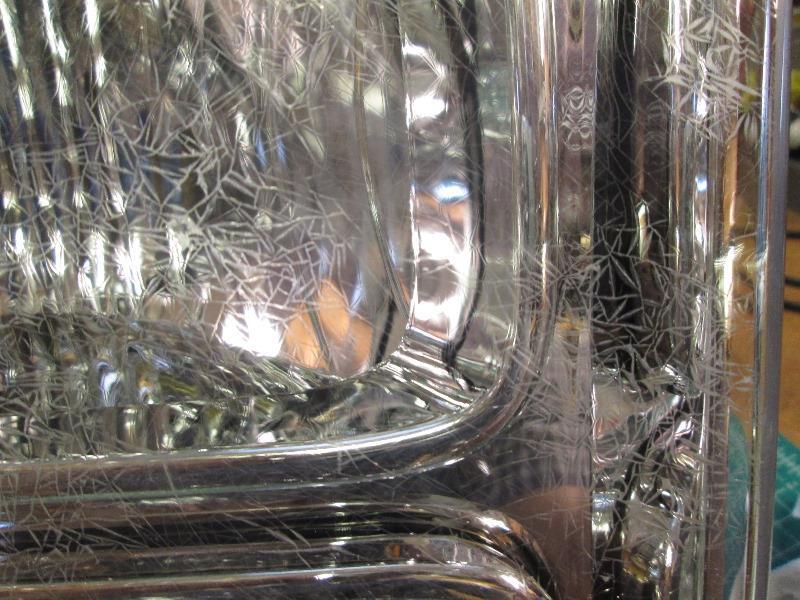
(UPDATE 03/2018-I had bought cheapest lights I could find-$90 for the pair. Looked awesome and have worked well but left light started crazing/spiderweb.
. Took some pics 08/2017, by feb of '18 could barley see thru it. Some type of coating/clear coat is applied which failed. Replacing with Ford part @ $150 for one light. If doing again Id go with the cheap lights-work is in the modifications required, its a crap shoot whether coated or coating fails but not uncommon. Easy enough to swap out to genuine Ford parts later once mods made. FYI. Bottom of page)
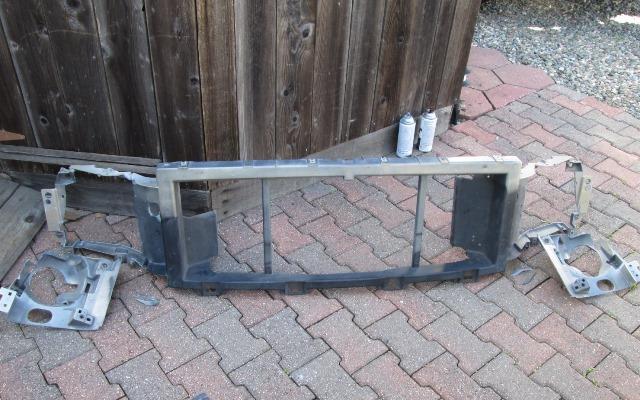
Issues-cutting the panel messy and a bit awkward to do in truck, I opted to remove the header from truck. Its a full piece across the front of truck. Most do it on the truck. But I also wanted to address some rust so justified the extra effort. Made cutting really easy though, got to clean up the front end.
There are a wealth of write ups on converting 99-04 Fords to 05-07 headlights. I'm documenting my install but more pointing out what others hadn't or where I varied. Ill add some links to other sources I used. Find as many 'how-tos' as you can-just makes it simpler should you decided to go this route.
Starting:The cut. Marking out where to.
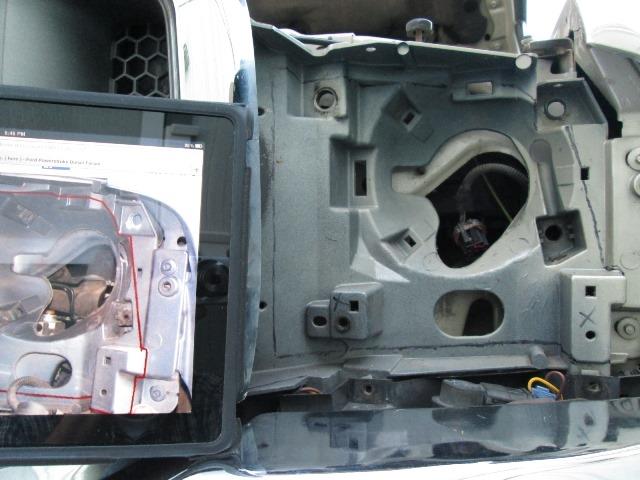
Here I opened picture on IPAD and 'traced out cut line. Basically a large square is removed. I found several pictures of before and after before it became clear. Again 'conversion' kits will offer some guidance/instruction. Ill add some links. I downloaded a lot of pics...visited a lot of forums
The new 05-07 lights are one piece verse the 99-04 2 piece. The new lights use the original lower signal light screws holes on bottom and 2 existing holes in top of header panel. Just use same type metal clip at top, though for 1/4-20 machine screw. Fairly easy to cut the panel, dremel, roto zip, cut off wheel. It IS fiberglass. Though cut off wheel will cut it like butter I opted to use sawz-all with fine blade. Just a lot less dust, though did use cut off to start cuts.
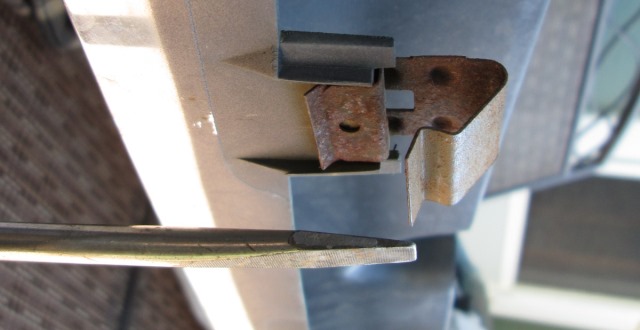
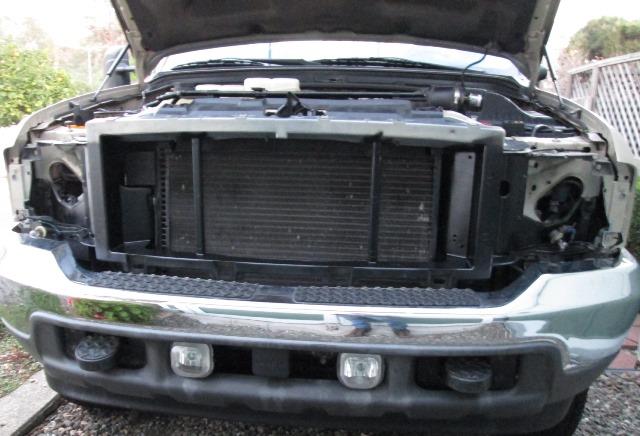
Remove grill (whether cutting panel on/off truck). Top is held by 4 small screws across top of grill. Bottom is held by 4 clips on grill that insert into header. Remove the screws. Then insert flat screw driver between bumper and grill and lift up on clip, gently pulling out on grill. Start one side and work across. Pointing this out because on later years you access clips by tilting top of grill out and accessing bottom clips from behind. DON'T! on an 01- cant access clips from above and you will break grill.
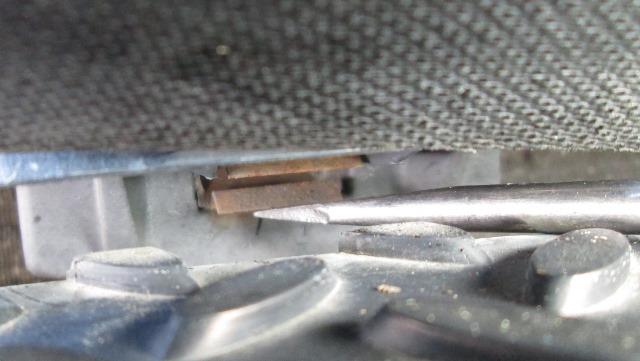
Inserting screw driver and pushing UP on edge of clip while pulling out (I have traction pads on top of bumper, holding foam pad to block light)
Optional: Removing the header panel from truck.
Again I need to address rust, but simply didn't want the mess of cutting panel on truck, plus easier to cut with it off.
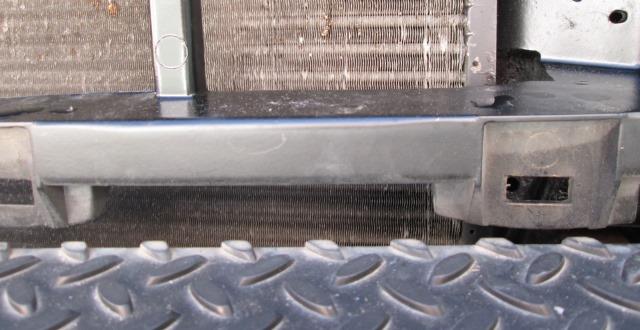
First, remove the top rubber panel between panel and radiator surround.
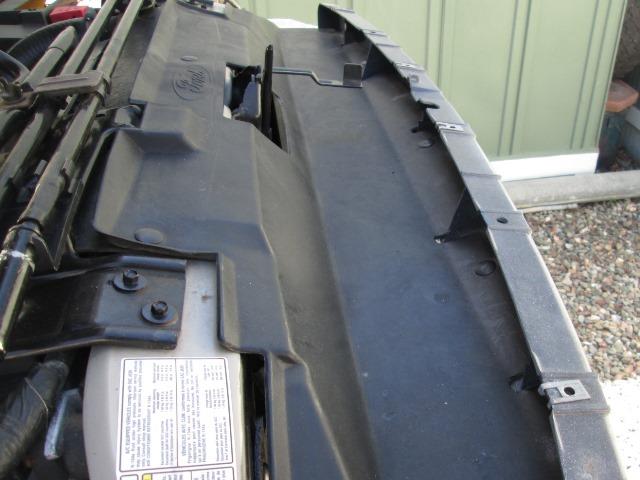
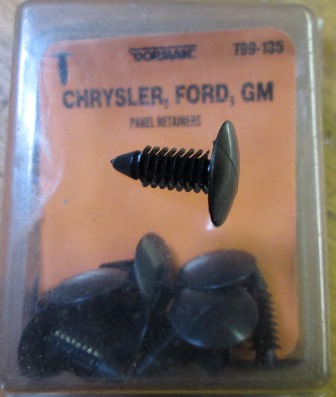
Though can be pried off with screwdriver etc, some, if removing panel some hard to reach as I'll show. Retainers cheap/easily replaced, local auto parts or hardware store.
I'd recommend if you don't have panel pin tool, make one. Broke first pin off after fighting, ruined another before stopping to make tool.
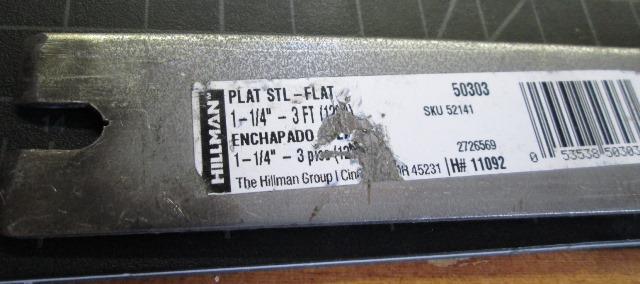
I had a 18" length of scrap of flat bar, bit thin/soft but worked. Drill a 9/32 (or file 'lil larger than 1/4") cut to slot and tapered lead edge. An actual tool will have a slight bend for leverage but I just used screwdriver or putty knife under when on plastic.
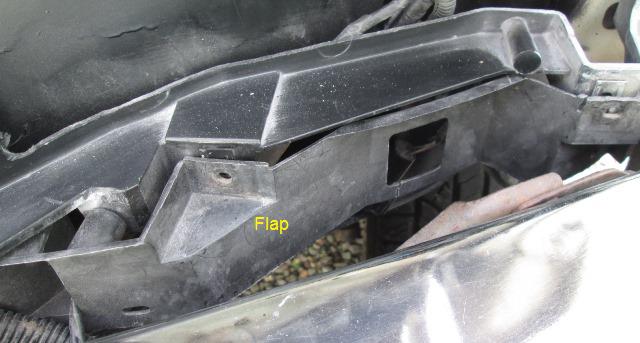
I was going to cut the flat bar but didn't to reuse and lucky because on our truck are flaps between AC condenser and radiator that are attached to panel.
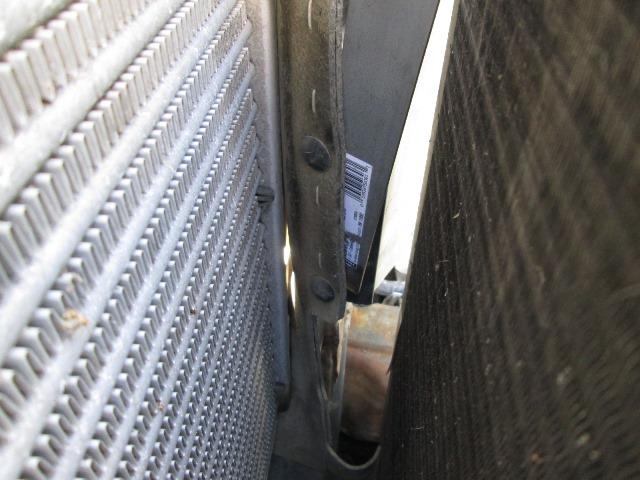
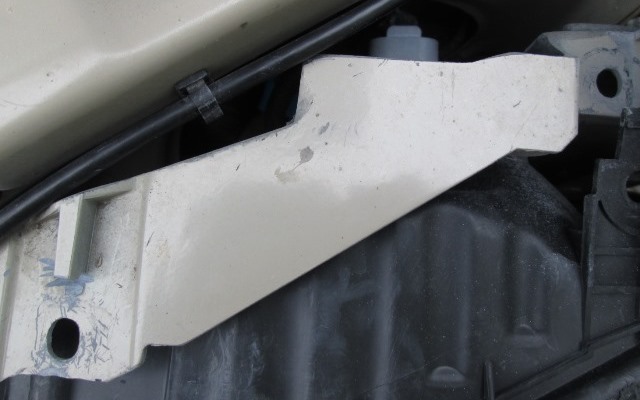
Once all the flaps/rubber unattached just unscrewing panel from truck. There are 8 screws holding panel to truck. 2 at left and 2 at right ends into fenders. There are also 2 metal flanges that panel is attached to (4 screws), either side of radiator.
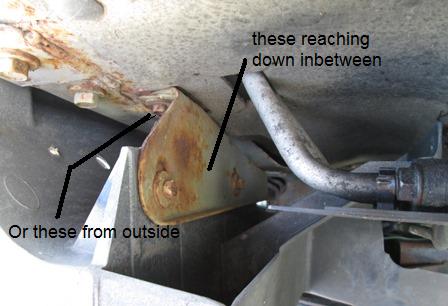
Only pointing out because all the references I found to remove panel, showed separating header panel from the metal L bracket or flanges, the 2 screws on side. Makes no sense? The metal brackets that header is screwed to are also screwed to the truck. Instead of trying to unscrew grill from bracket it is MUCH easier to unscrew the bracket from truck.
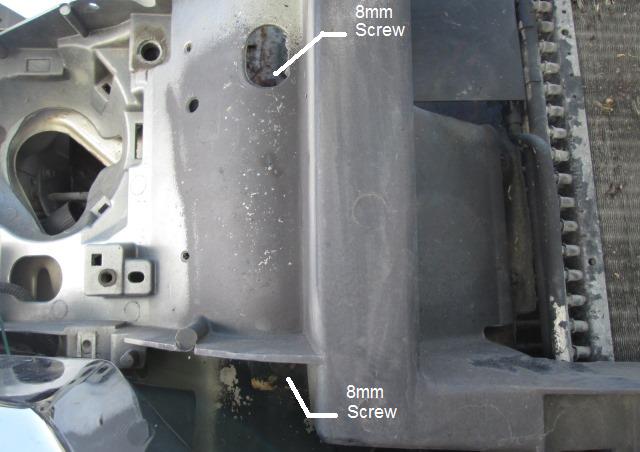
So just sticking ratchet thru panel removed the last 4 screws with brackets attached.
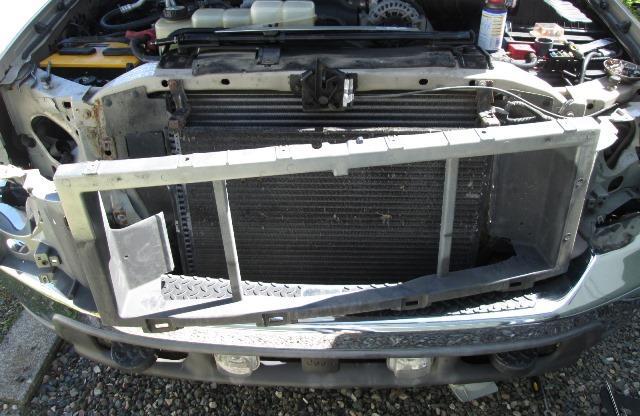
Whole point is free the passengers side, slide panel over to drivers side to remove. If you don't have AC or drop bumper it would likely fall out.
Panel removed I did some serious prep, removing rust on the truck. Primed with some zinc, top coated with satin black. Ill be painting the panel satin black once cut, ends are truck color, rest is a mix of truck silver and black over spray, Always visible thru grill
On to cutting panel for lights
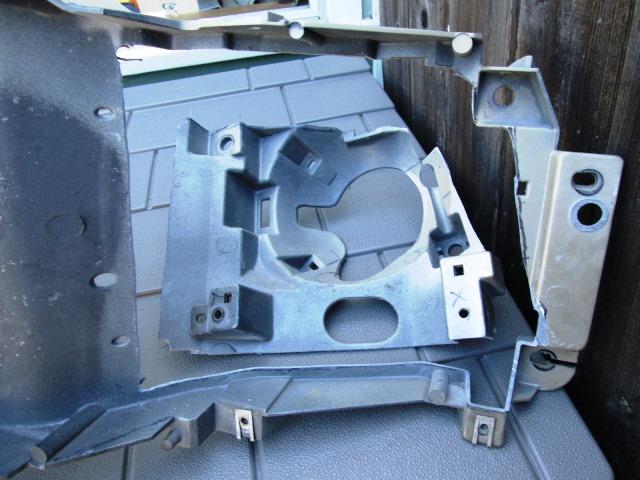
Painted all but the visible parts except ends that are truck color black.
Waiting for lights to arrive, yup did this with assumption..... There are several mentions of needing to loosen and lower bumper which I'm not doing unless absolutely necessary. Aftermarket front hitch makes it a pain. Also ther are some rubber shields under headlights that go across bottom that may need to be cut. Details.
Stop the presses, FedEx just stopped...
WHOO!Whoo!
Light arrived
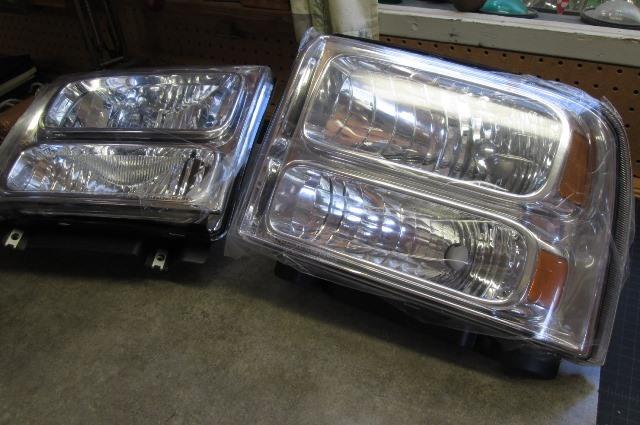
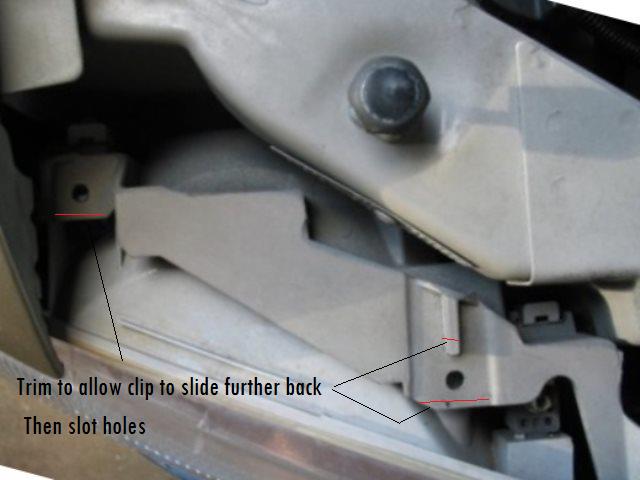
Passenger slipped right in, well after I figured out the rubber does indeed need to be trimmed or removed. The drivers side Ill need to trim about a 1/16 off a header corner but it also slipped in. Good news both went in without loosening the bumper. Bad news is I'm anxious, thought I had a couple of days.
Bulbs and adapter wont be here for a few. I also want to get some sealer as a preventive against these leaking.
Off to the parts house
Zip- Nada. Ordered online, should be here in a couple of days- Ford P/N F81Z-13411-AA- hopefully its right...
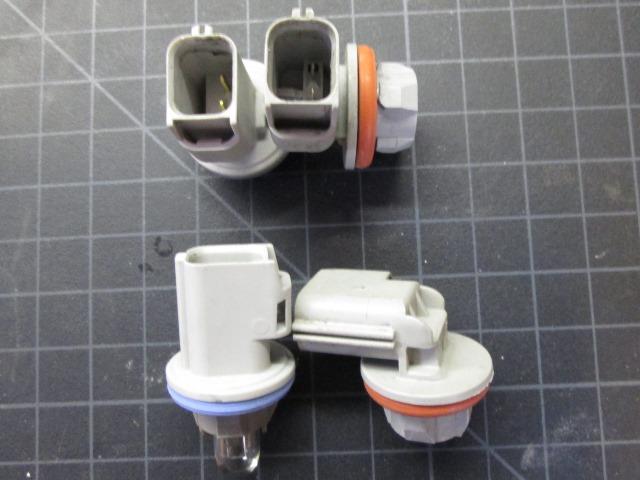
If your ordering lights some come with plugs. Pictures for the 05+ will show the straight side marker plugs. I saw the different straight plugs but it didn't register I needed those for conversion. MIne didn't. Hopefully my harness will plug into the new bulb holders otherwise its ordering plugs and splicing into harness...
Received and they fit, both lights and my harness
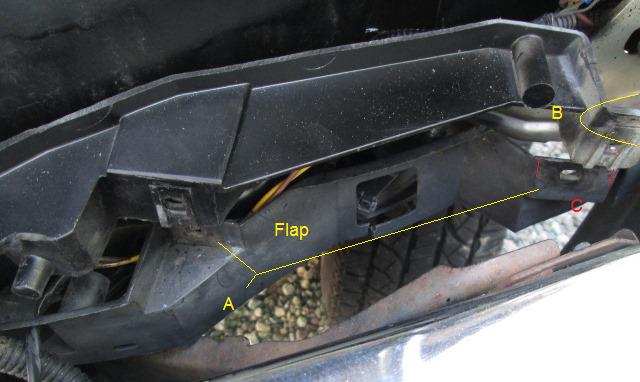
Last mod is the rubber flap under lights.
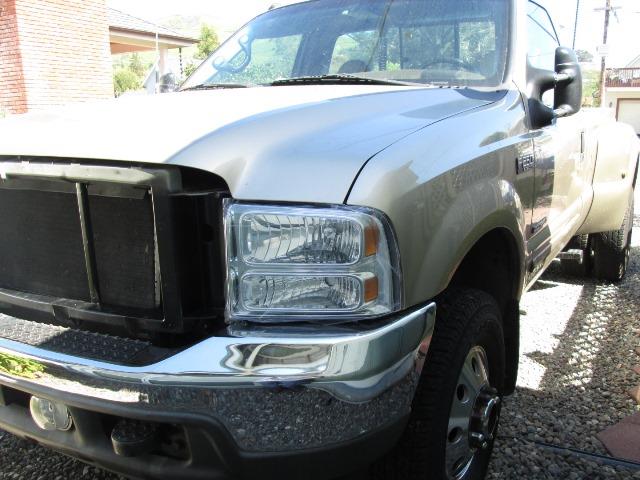
And lights installed!
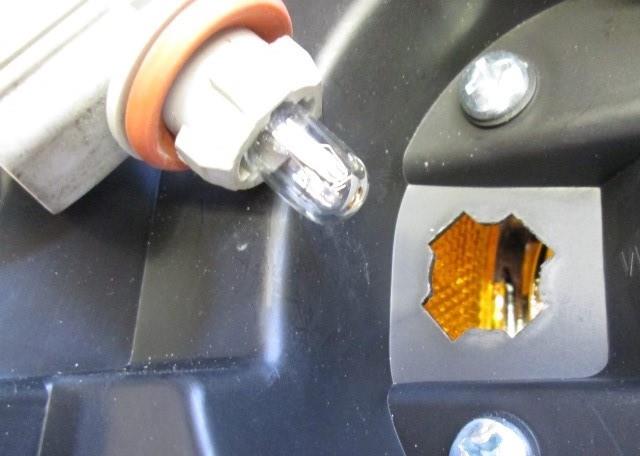
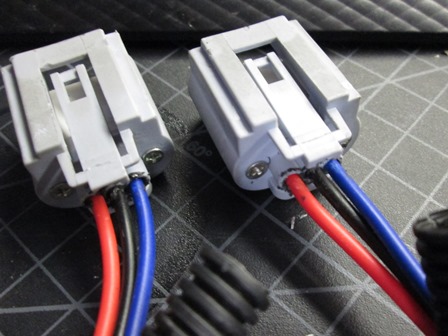
On the H5/H13 adapters I used some RTV to seal where wires enter plastic. Lightly coated all with dielectric, Pins and plastic. I'm pretty sure on this configuration headlights will need to be removed to change most bulbs, though did before.
I did have an issue with the passenger side wiring. Wiring on our Ford is really short- I had to reroute the signal light & up and thru the sheet metal to reach as hole for signal is higher on new lights. Also because of new location and direction it's clocked it hit the very bottom of hole thru sheet metal-held light out. No help for it I ended up clearancing about 1/4" with a ball peen the lip at hole for the signal light plug. Wasn't a problem on drivers side?
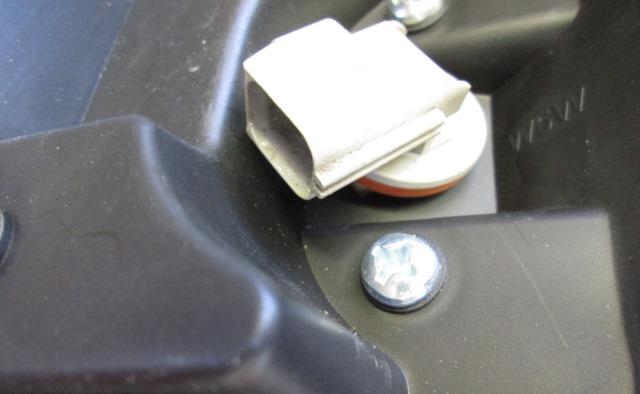
I'm really not sure about either of the signal light plugs that twist into new housings. Don't really compress the gaskets very tight. Time will tell.
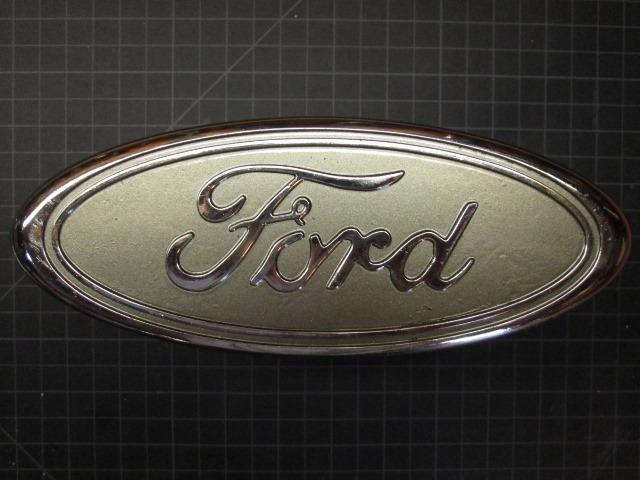
Re attached the grill. While out I had popped the emblem out to either polish or replace. Played with the lights-nice. Need to check adjustment tonight, see how bright fingers crossed. But they are shiny, clean and for the moment not full of water. All in all (if they Don't leak) pretty happy. Hopefully lighting will be better.
-------------------------------------------------------------------
FAIL....
Marked wall at headlight height, backed up 25' , beam was about 18" off the ground. Fiddled with it a while cranked the adjustment all the way up still at about 24". Discouraged. Took it for a drive on back hilly/curvy county road. Couldn't get over 35. Had to stopped several times when road turned or a rise, Simply could not see..
If it wasn't for the cut up header to install these Id be putting the stock lights back in-reorder 02-03 lights. Bummed to say the least. Not really wanting to go back to the 2 piece lights though I'm attempting to see if I can get the lights to lean back. It will mean that the perfect 1/4" gap between lights and headlights was a brief pleasantry. Just don't see any other way, to make these work is leaning them. I had read where some folk had this issue- lights shining 50'.
Didn't get any pics. I pull the grilled, pulled the lights, was going to add spacers under bottom screws of lights. Then it occurred to me, since lights mount to the header, could add spacers under the bottom header screws. Tilt the whole thing. That should move the lights quite a bit on the road. Nice if it was enough to turn the adjustment screw back down. Doubtful. Tilting the whole header though, if I need more then I can add washers under bottoms of lights So placed 1/4" fiber washer under the bottom header to fender screws, and under the bottom mounting flange screws where flange screws to truck.
That helped a lot. Goal is to 'need' to lower the adjustment screw instead of maxed. I planned on using spaces under bottom light screws to also lean a bit more, but looking at lights they 'could move back a bit at the top.
Marked the wall, back up the truck 25', light is on wall at same truck height!!! Who-whoo. I'll take for a drive first- but the lights need to be turned down! So appears I fixed them. But not committing till I drive it but getting close. Gap though of inst that noticeable. Hope the grill goes back on, checked but it does raise it .
Wondering if older trucks the header sags or if there is a difference in the vertical surface on newer trucks? I probably once I think I got it is add a small piece of flat bar from radiator cowl to header panel above lights. Be easier to adjust and secure, ....waiting for it to get dark.
SUCCESS!!!! Actually a bit high, though I can use adjusters to turn down, but bright white blazing lights!
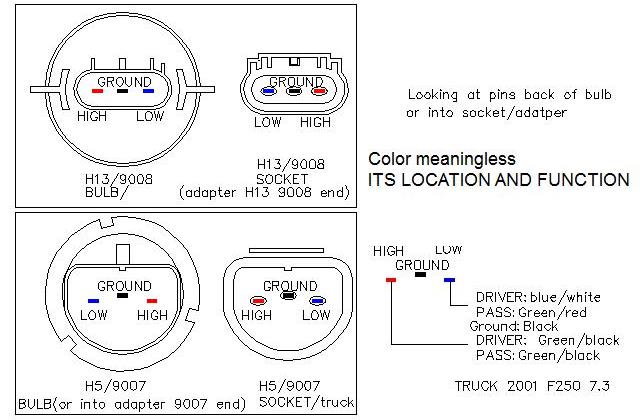
Except the high and low beam are reversed, Adapters for the H5/9007 to H13/9008, or the H13 bulb themselves are different. Minor, pull pins and reveres. Well it was the adapters- Hi/Low wires feeding H13 end were swapped.
Swapping high/ low wires to match truck
I swapped at the H13 end just to get colors match, VERY GENTLY/LIGHTLY unscrew two small screws that hold ceramic in housings. I had to split loom to pull wire and ceramic out of housing. Then insert large sewing needle into face of ceramic plug just below the pin hole. Push wire into housing while very lightly tilting inserted tip toward pin, releasing clip then pull wire out. Once both wires released pull into housing and out. Mine I started but pushed thru from inside rather than pulling on wire. Note the ceramic will only into housing one way and fully seat at small nub in bottom of housing. Ensure its orientated correctly before inserting wires.
Swap sides, insert wires into housing. BEFORE inserting ends back into ceramic use the needle to pull the barb back out. End should be open 1/16" or so, so it catches again when inserted (otherwise it wont stay in). Fully insert till they snap in.
Clear as mud-these pins are easily mangled very thin-don't bull dog it. Once wires inserted push the ceramic back into housing, VERY GENTLY/LIGHTLY replace the 2 small screws thru housing end into ceramic, push the ceramic in, don't use screws to pull it tight.
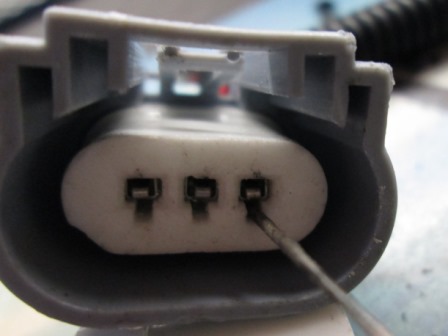
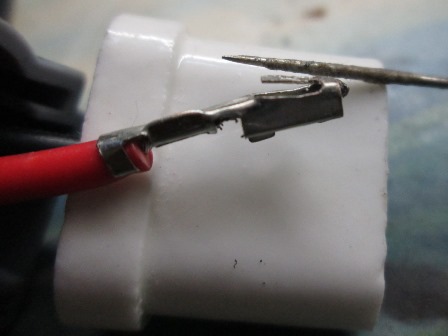 Where your inserting needle..........And what your trying to do

Well just a lot of silly simple stuff that kept this project on the annoying side. Odd how much it changes front look of the truck though-. Really liking both the appearance and function of the new lights-worth the frustration: not sure if I'd do it again though. But dang it looks nice.
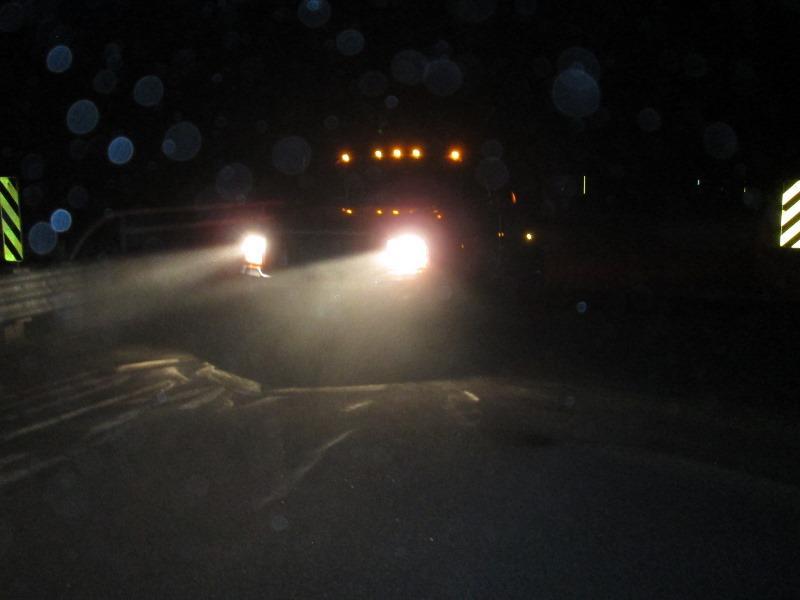
Even when all I can see is the road...
But I notice it, playing with logo-but its done.
Paint using truck color..
End with some pics ...
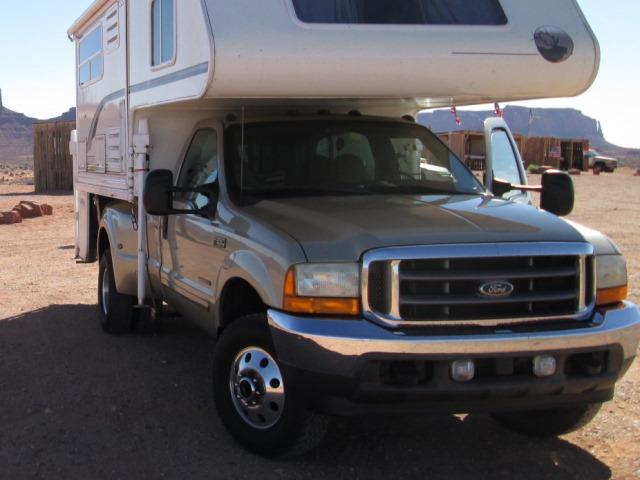
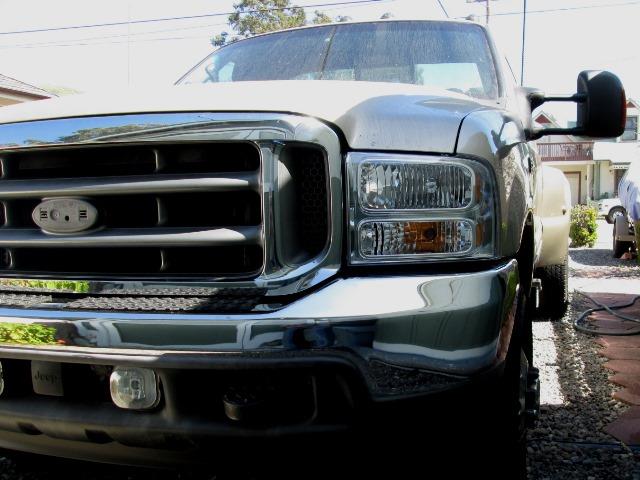
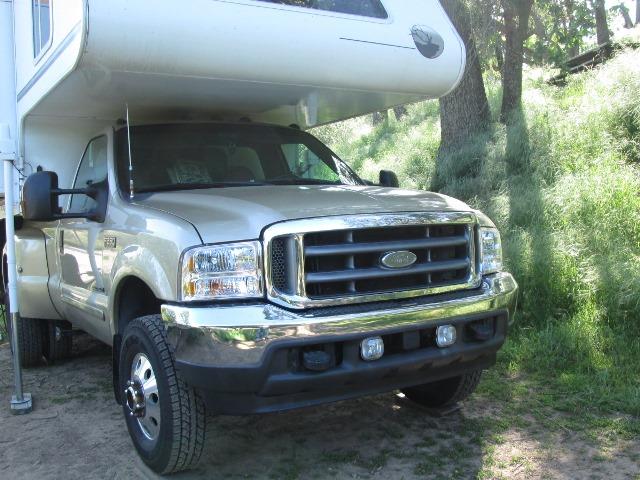
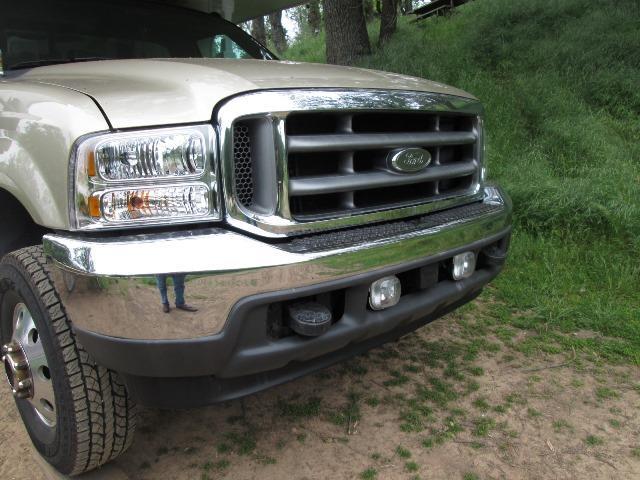
What it was...
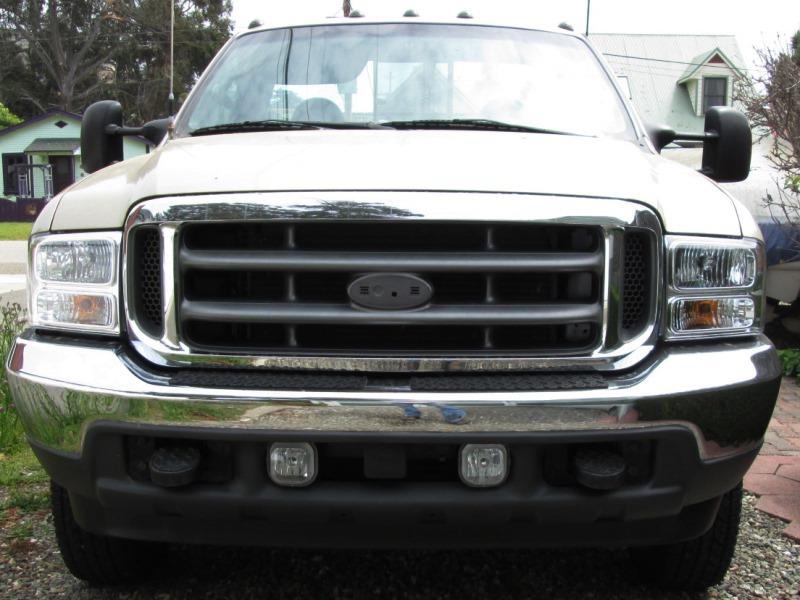
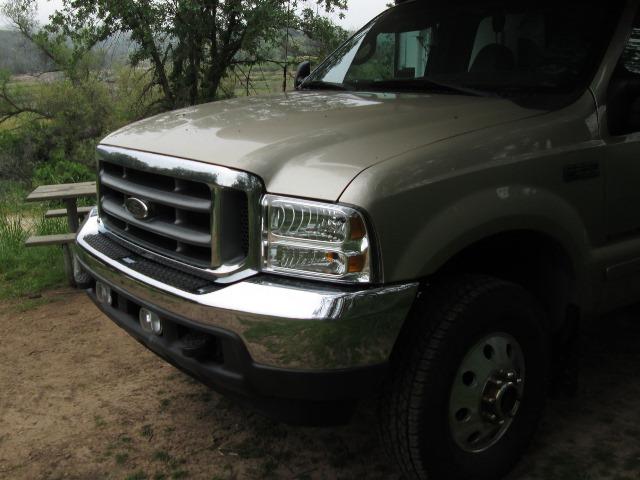
What it is, different perspective but no more 80's wrap-around orange.
Update 08/17:
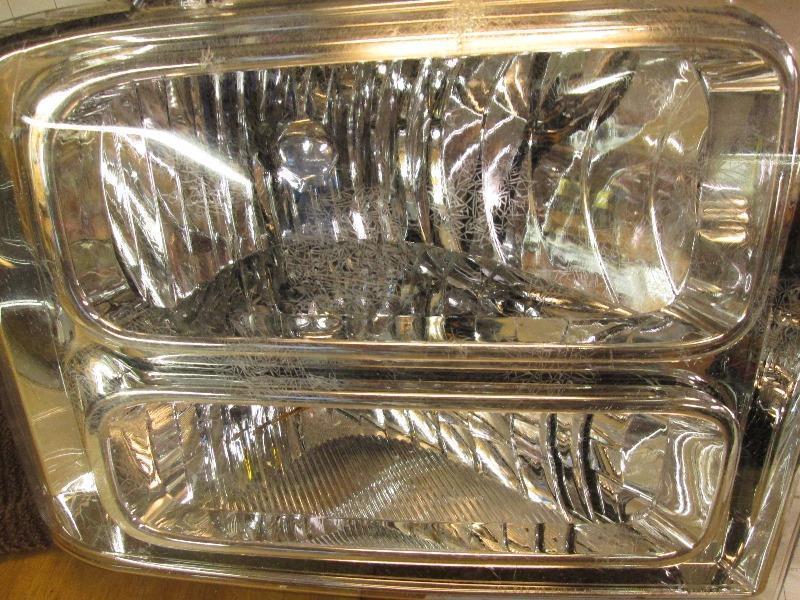
Well little over a year and one headlight has seriously started crazing.
Fine Asian quality for the American coinsurer...get what you pay for and these were the cheapest I could find, so cant complain too much. My original thought when these were bought was cheap to get truck set up because the work was modifying truck to accept and if any issue with lights get OEMs down the road. Well were down that road now cant justify cost. So likely fix or replace with same off-shore crap.
The crazing/cracks are pretty deep so light has coating that obviously applied on top of lens.
Only way to fix is sand. Or (cheap) replacements to use in the meantime-fix these for spares.
Cost was minimal, otherwise nice. It is odd only one light coating has failed. Also that other than the crazing they are still crystal clear? On line videos doesn't look like that big of task to refinish-still debating...
Well 03/2018 7 months later and lights are toast, could almost see the crazing increase daily...tried sanding out bad light, stuff is really thick. After 2 hours gave up-ordered Ford factory OEM left headlight assembly part 6C3Z-13008-AB..
- Links to other headlight installs at various forums, many also cover swapping grill. Hundreds of installs out there-
Upgrade to 03/04 clear on ford-trucks forum if you don't want to cut header
Cutting guide for the header to install '05 lights
Another installcutting guide and other info
Another install, identifies the marker socket
Cutting an '05 grill to fit earlier trucks
And our update 2019, installed an 05 grill 05-07 grill swap
Back to our F250 truck page
Back to Ourelkhorn Camper Modifications page