Remount fire extinguisher

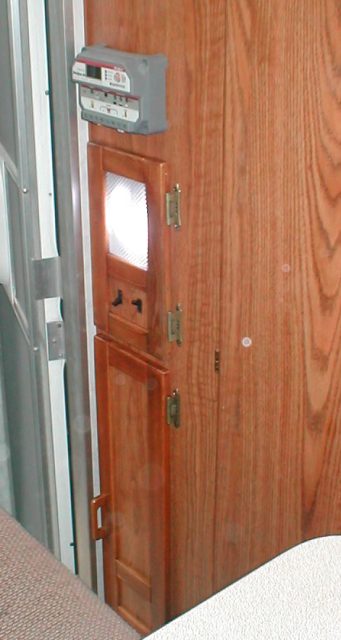
I had previously removed fire extinguisher to install a drawer where it was mounted. Now to find another place to remount the extinguisher. I had an extra much larger extinguisher to replace the rather small one that came with camper. Looking for place to remount fire extinguisher, I had decided next to door in the hollow shower wall. It would be easily accessible and an easy place to mount.

The shower wall is 2 pieces of 1/8 paneling with 1X2 framing. The shower has a large concave corner to allow room for drain vent pipe. I removed the light switch to access the space & verify there would be room for new extinguisher behind wall. My plan is to recess a box, and put a door with a window to house the extinguisher.

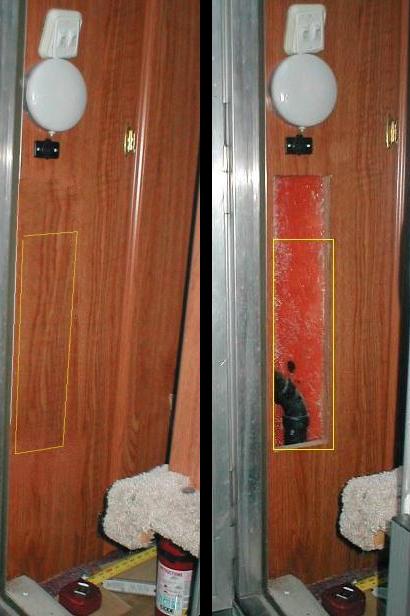
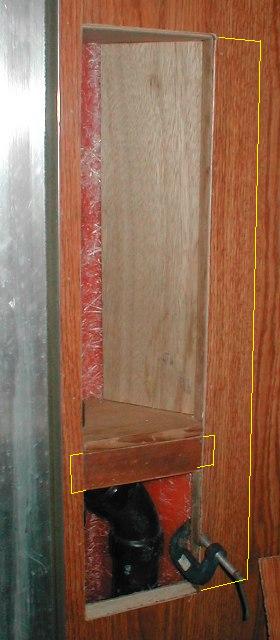
I sketched out the opening size from the lowest cross brace and flush to inside vertical stud (outlined in yellow). This allows only having to re-frame hole with 1x on 2 sides.

    Oops
Got a nice square hole cut in outer panel, this is going to work, everything is going well. Then cutting the inner panel, I cut one side, then top and other side-, when I went to cut bottom the blade hit something. Using a wire I probed behind-determined the vent pipe does not go straight down, there's an elbow bout 6" from my bottom line.

Oops...

Good grief.
Above yellow outline is how much I enlarged hole.

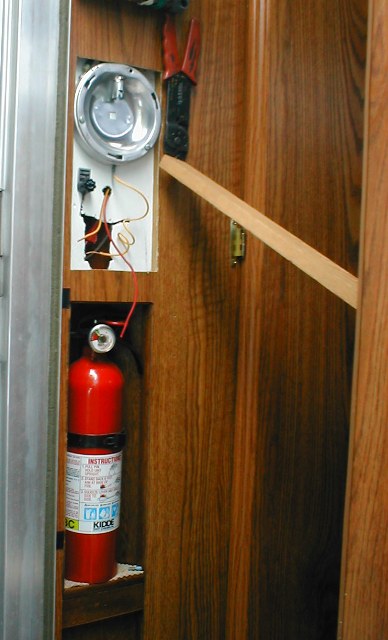
Were committed, after a bit of thought realizing that hole is already started, I finished cutting. Then probed above in between walls in hopes the next cross brace was high enough to simply allow making hole taller. It was so enlarged hole another 7" up to upper brace.

    Oops
Now I have a hole that's to inside framing on 3 sides. I'll install a 1X4 on right side between paneling to fully frame hole. I'll have to make a shelf for extinguisher above elbow. The part in front of elbow isn't deep enough to utilize, though would have been good place for the already installed entrance light and or the 12 v plug. Ill just cover with recessed piece of paneling.

Too bad I didn't know elbow was there, or too bad I didn't make hole from upper brace down like I had briefly though about. Just made a bit more work for myself. But Ill make a full length door that will cover. Not sure, generally when Im cutting into a blind wall Ill start with a small hole and probe in all directions, I didn't -I assumed I was good-

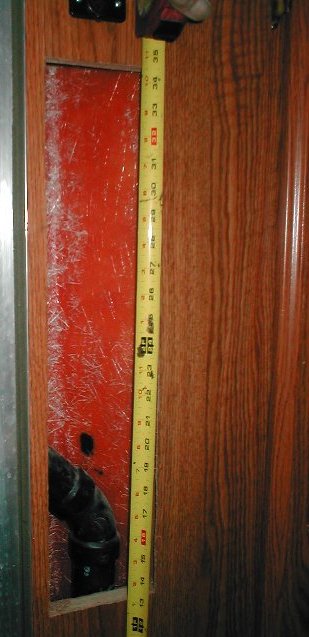
Just FYI, though wont be of much help to anyone unless your doing something similar in a '01 Elkhorn, heres a pic measure from floor, location of elbow and cross braces. Ill note however after the fact-my error kind of worked to my advantage- . I was able to put in a full height 1X4 between wall horizontal braces- and I was able to notch it and existing stud for shelf cross brace. So it will be much stronger.

    Oops
Here I've got extinguisher shelf installed. The cross piece is wider than hole. I made a notch in existing stud on left side and a notch on new 1x4 stud. By partially putting 2 nails into side to use as handles I lathered the new vert 1x4 in glue I shoved it further in between walls so I was able to insert shelf brace into existing notched stud, then pull new vert back flush inserting cross piece into it. So cross piece is set into both vert pieces. Much stronger than just face nailing. Lots of glue and small brads to reattach paneling.

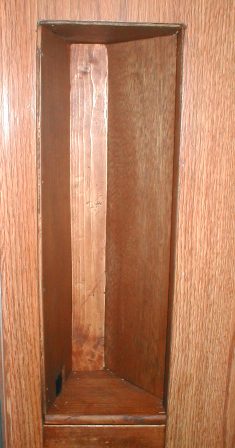
Sure wish I could think of something to use bottom hole fore. I'm lining the inside of ext. hole with 1/8 paneling. I cut top piece and loosely put in one side piece which tucks in just behind wall. The other side will be attached to side of face. The "box" is more of a triangular shape inside. 15deg on one side bout 45deg other side. The collar on elbow I need to notch around, it holds the panel side out to much.

    Oops
Just a preliminary look with extinguisher on shelf before finishing linings. I like it

    Oops Oops
Finished the lining, pre stained then urethane in place.

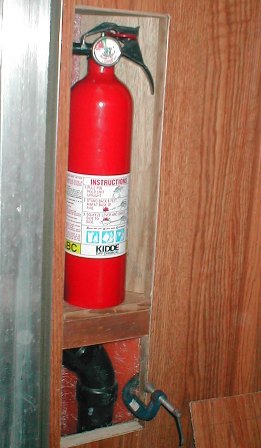
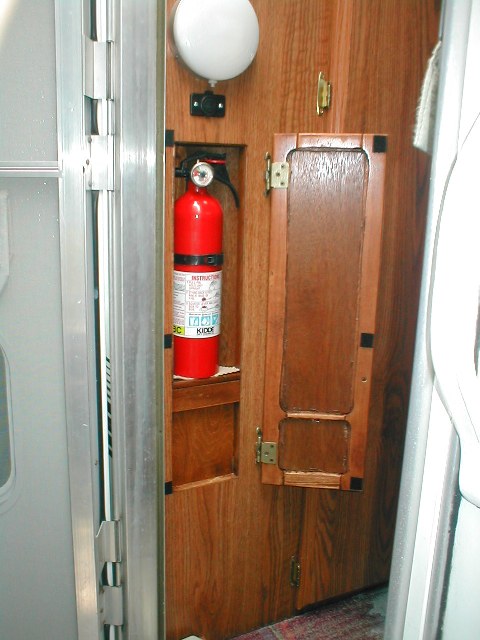
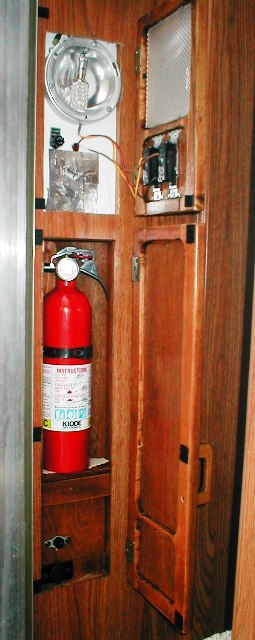
Sat extinguisher on shelf after finishing, stopped to ponder door.
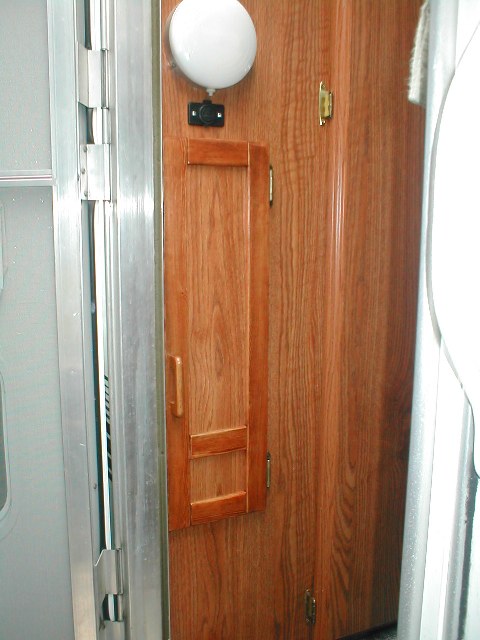
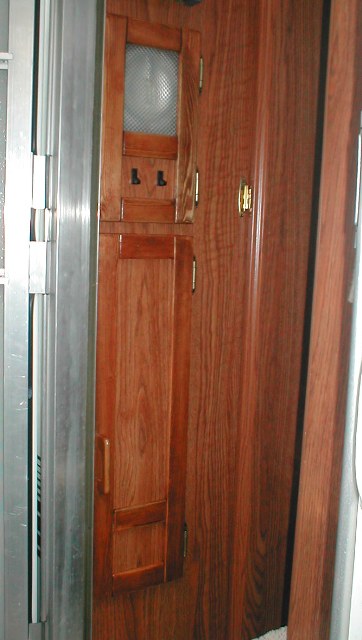
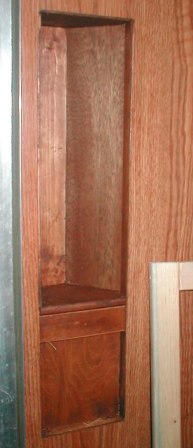
This wall is getting rather busy, I was going to make a simple solid door, might be less to look at. However after applying internal sides, the extinguisher doesn't sit back as far as I thought it would. Gage or handle protrudes bout a 1/8 inch beyond face of hole, so really need a recess in door for clearance. I'll use the paneling I cut out to make a panel door .

Back to work

    Oops

Made door frame out of 1x2s to utilize the removed paneling pieces. Talk about crude...I free hand routed the recess for panels on door, but it works. To the eye the stain color is a perfect match, I really don't understand why camera shows different colors. used the supplied extinguisher mount with a small non skid mat on shelf. On door I use self closing hinges, found an old oak handle. Also put on some velcro tabs to insure it stays closed.

    Oops
Finished- nicer than the plastic box that was installed under dinette step. The original smaller extinguisher that this replaces Im going to mount on wall at head of bed. This one, as we decided not to put a window in door, didn't want to see it. I may put a small plaque on door.
    Oops

We like it. Not sure I think its because it breaks up & gives more of a cabinet appearance to the other wise large blank expanse of paneling and blank bath door.

Like it so much in fact Im going to make another panel door above. I couldn't think of this while I was doing the ext. cabinet but now that its done I realized if I recessed the light fixture I could make another panel to cover holes.

I'm going to move the 12v plug to lower part of ext. cabinet-ya after covering easy access. Ill also add a panel fuse for the receptacle. The light Ill recess, make new door large enough to cover hole and put a lens in the door. The funky surface mount light switch I'll replace with a flush mount duplex switch. Will help with the 'cluttered' look of this wall. Ill look at possibly recessing the solar controller or maybe just a 1x frame around it...that requires a bit more thought.

It occurred to me, If it were not so difficult to make interiors this whole section of wall to ceiling could be utilized for ,albeit small, storage areas like the fire extinguisher cabinet. I could easily add another 2 cabinets or could have been one large door. Options, but this resultant project from drawer addition, that was sparked by the insulation project has grown large enough.


PART II

Basically I changed this to this..
    light

I moved the 12v receptacle down inside the lower part of fire extinguisher cabinet.
Now that Im making another 'door' I can cover holes.

Im removing only outer section of paneling. Ill recess the light & and have room for 2 switches. After verifying size of hole needed for light and 2 switches I cut out the outer paneling. I removed the ext. door to duplicate.

    light

I ended up rewiring everything. Behind the factory surface mount light switch was some rather bizarre wiring branches. Plus I needed longer, more flexible wire leads so I can make this door easily removable to have access to light bulb and fuse holder.

I reduced main power feed to one 12v hot, then split to feed bath light, (that factory switch use to control) one lead for 12v receptacle fuse holder and one to new light switch fuse holder. From light switch fuse holder out I ran a 18ga wire that will go to one of the new light switches, a jumper to other switch to feed power. I changed the entrance light fixture to a length of 18 ga. Soldered a length of 18ga to porch light feed.

This separates the porch and entrance light (both LEDs) from main with separate fuse. The moved 12v receptacle will have its own 7.5 amp fuse thats fed by main.

Painted the interior white, recessed the light & installed the panel fuse holder. I has a tag that says "2 AMP ONLY". The outer paneling is cut bout 3/4" above frame so there a trough that I placed bout a dozen extra fuses.

Glued in a piece of 1x2 on side. Jury rigged up clampage while I ran to get switches.

The guts...

I made another door (light & switch face plate) to match lower one. I ended up hinging the cover door for access but it doesn't have a handle. I was going to use a brown switch cover set in door recess but decided to mount switches behind a piece of paneling. Hinging just made wiring easier and future access. As this is 12v @2amps Im unconcerned with mounting switches directly to paneling.

    light

I used metal tape to cover wiring hole behind switches. Ill add a label to identify wiring connection behind tape. There are 2 crimped factory wire nuts and a power connection that was previously shoved in between walls behind factory light switch.

Got the receptacle and its fuse holder mounted in lower part of extinguisher cabinet. Took almost an hour to get the wires finally snaked behind extinguisher cabinet. This will be more convenient to use, were either charging stuff or have a fan plugged into this. Drawing outside air from floor at door directed up seems to worked best when its really hot.

Liking the fact this is all sub fused from main line. Especially the 12v receptacle. Seems Im often taking down entire line when charging RC stuff, irritates Margaret if she's trying to do something in the bath and I blow the fuse charging stuff.

Just a couple of finished pics

    light   light
Now to do something with solar controller. Probably a simple frame. though could recess, it could draw air from behind shower or could paint housing...maybe.

Quite a bit later...

light   light

Simply spray painted the solar controller..

Removed the controller, wow thats a lot of wires. Removed the internals from the housing, wanted to ensure top vents painted and NO overspray inside. Masked off the vinyl panels and all the screw terminals.

Painted couple of times, didn't like the solid brown. Last few coats were holding the can pretty far away letting it 'spit' alternating between brown & black. Nice, kind of textured, at least nicer than the gray plastic.

    light
Lets see.
Went camping it was 17deg. Came home insulated the camper. IN the process of installing insulation discovered that behind fire extinguisher was a large open area. Removed fire extinguisher & its recessed box mount & built a drawer that utilized that space. Then had to relocate extinguisher by building in wall cabinet. This made the previously installed entrance light, 12v receptacle and factory switches look 'stacked' and way cluttered. So rebuilt light as a recessed box light, rewire switches and move previously installed12v receptacle to newly built fire extinguisher cabinet.

See drawer addition that necessitated this project new drawer

Back to Ourelkhorn Camper Modifications page