Replace camper dump valves
- 04/2011- Original replacement at 10 years. Top section
01/2020- Second replacement 9 years later. Gray valve was getting VERY difficult to open. Added at bottom of this page
Made an access panel instead of dropping gray tank cover, add zerk fittings to new valves for lubeing.
Well not entertaining but a necessary evil...doing the nasty, happy dumping, how ever your refer to dumping the holding tanks, and at some point maintenance.
Our camper is approaching 11 years old. The black dump valve was getting extremely hard to pull open. Though most valves are in use forever, replaced only because they wont seal tightly anymore, they can and do break. Usually when tank is full, open the handle to dump-nothing happens....The handel will move but its no longer attached to the sealing disk.
I've had a valve break before, wont open and full black tank. Went to the parts house to get another valve. My plan was to punch stuck closed valve then replace. I told clerk what I was doing and he started busting up laughing, then explained how many folks had done that. He then proceeded to explain to me how to get the valve open by drilling a small hole in the valve body, opposite the handle and 'push' the valve open. No mess no fuse, then change valve without need for a shower. Wow almost a disaster, So I drilled the hole (In old motorhome miles of room) pushed open the valve and dumped. Went home changed out valve. That was easy
So being conscious of potential problem when our current camper valve started getting hard to open, I knew soon I'd need to change out or I'd have a disaster. Also when removing cap to hook up hose there'd be water in it so one of the valves is leaking. The drill hole trick that made my 1st replacement easy wouldn't work in camper if valve stuck because I cant get access to back of valves. I kept putting off because I also don't have access either to half the bolts to change out valves. Going to be painful.
Anyway last trip I almost didn't get it open, pushing in & out on handle bout 1/8" then it finally retracted out and to my relief I heard the BLURP_BLURP as the black tank drained. Never thought that would be a welcome sound.... When home perusing, you guessed it, RV.net a fella posted how his when he pulled out handle on his black tank it wouldn't drain. I shared the drilling hole trick to drain the tank...then immediately went to the local parts house and bought a new valve.
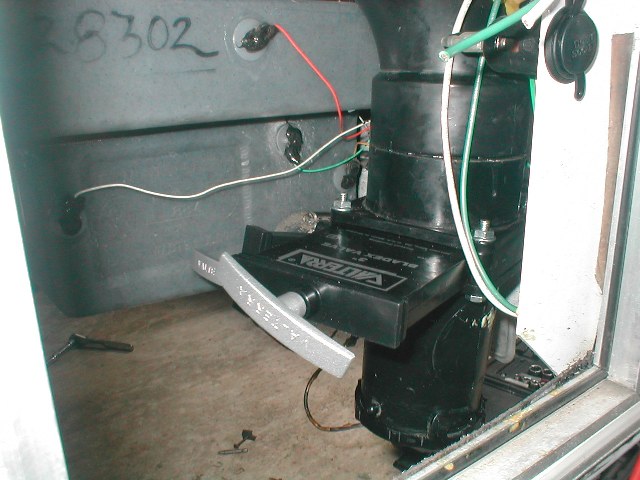
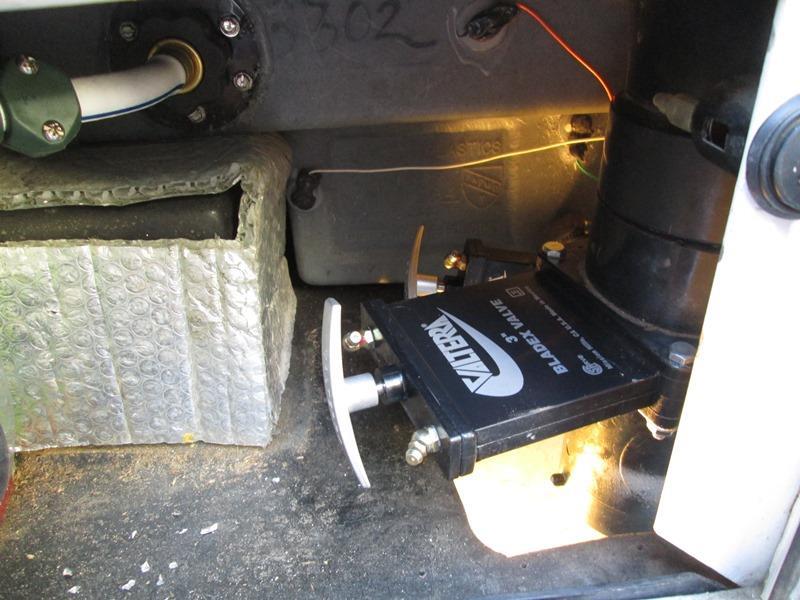
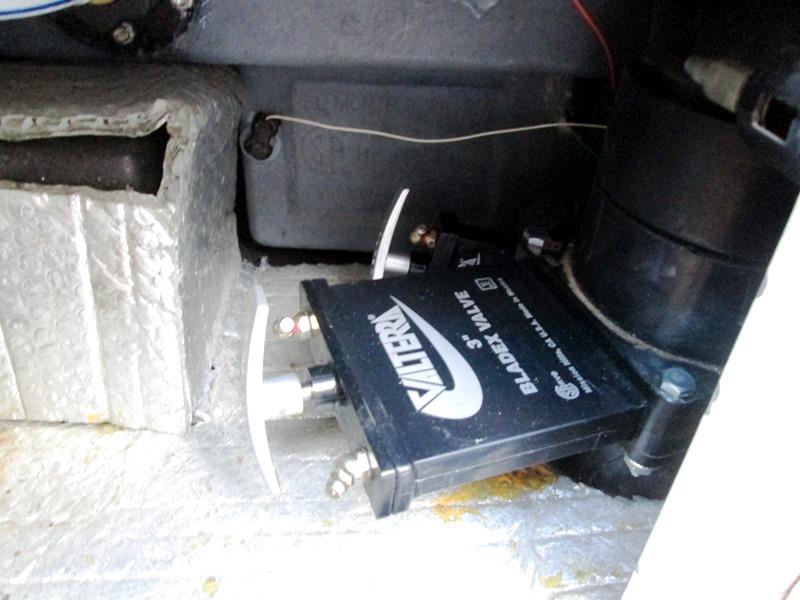
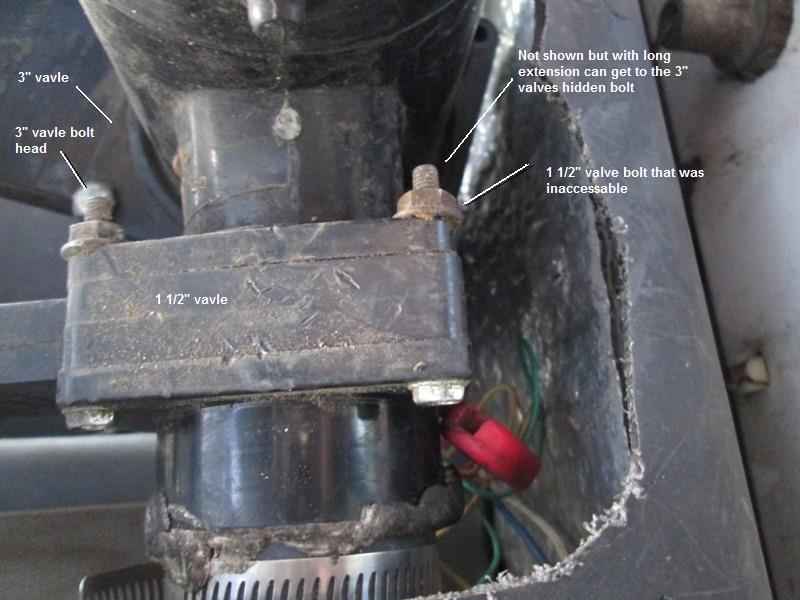
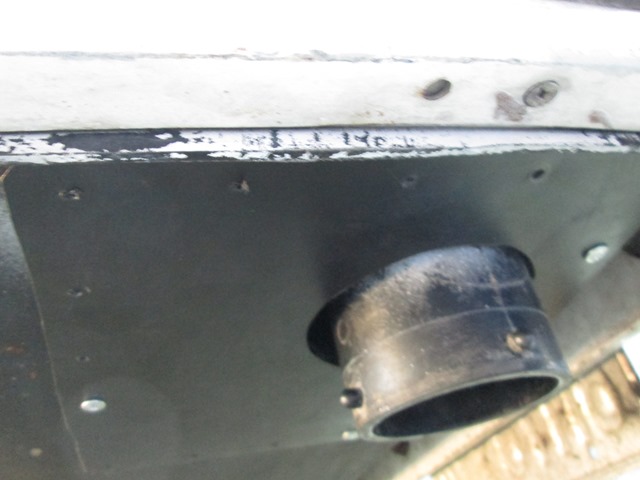
The dilemma, & and why I hadn't changed out before now. The main pipe is in a corner, one bolt on black valve is impossible to get to. The gray valve, mounted vertically, the 2 back bolts are also inaccessible. It simply isn't possible. This is looking thru the access cabinet door.
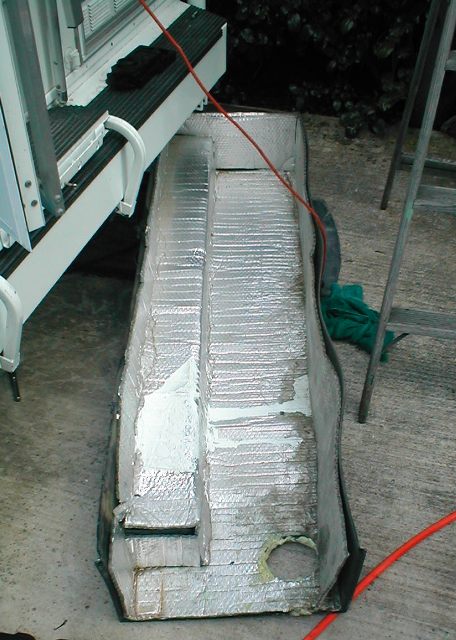
Previously, looking at options I thought that if bottom tank cover that also is bottom of valve cabinet was removed I might get better access. Think I even suggested this possibility to some one else fighting access to bolts. But not sure why, removal of tank cover just seemed like a big deal (because it is). I was planning on trying a handful of universal joints to get to back bolt, one on the small valve is physically impossible to access. After eyeballin some more figured I could remove the cover in a lot less time and grief than fighting the bolt, I could also see why my tank heater has never worked (if it has one). So proceeded to remove. Spent more time gathering up electric drill (and fighting myself) & stuff than dropping cover
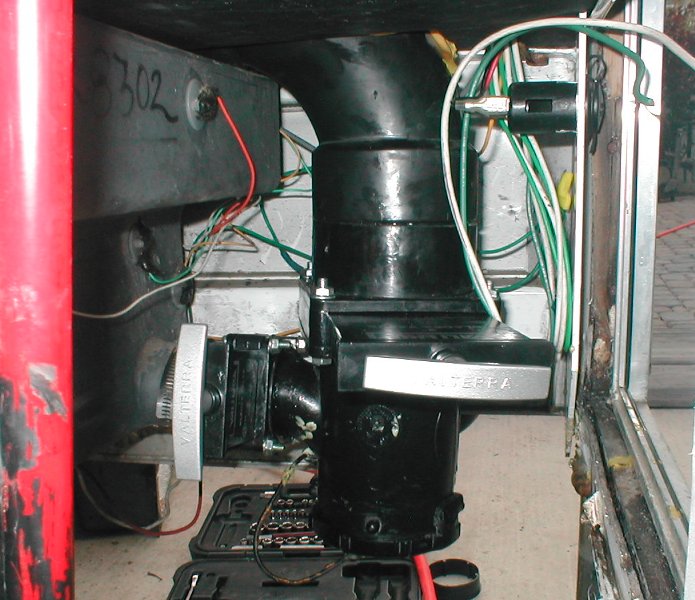
Looking toward back of camper under wing into access cabinet. MILES of room, not only access thru the door & now bottom, but straight on. I didn't realize that the side of cabinet was part of the tank cover. Wow, Now its clear on 3 sides...I could get in there with both hands. Had the valve out in 5 minuets.
As I had only planned on replacing the black because of difficulty getting to the gray valve i had only bought the black valve. With the cover off and ease of replacing decided it would be dumb not to replace both now. So off to the parts house for other valve.
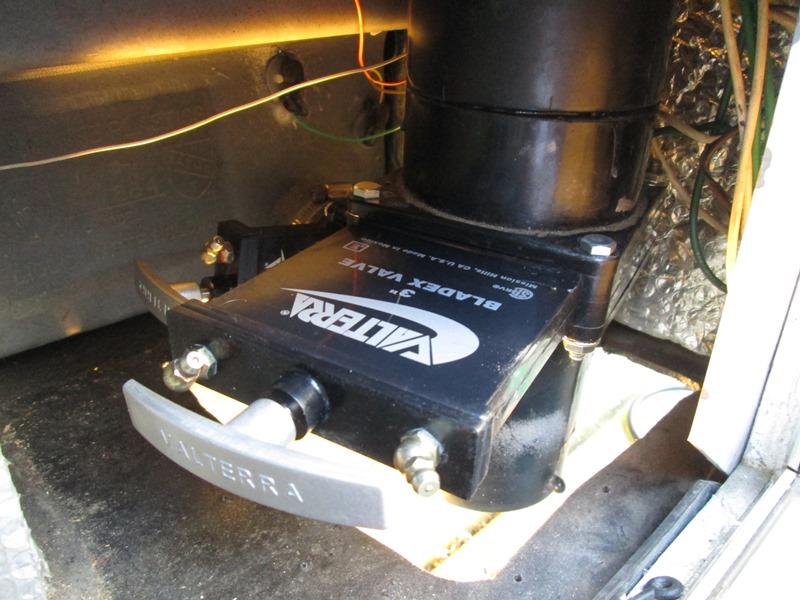
On mine the 3" black valve is at end of pipe, then a tee that 1 1/4" gray valve is attached to. So it all comes off, both valves and the tee (which cap attaches to) I greased everything with some synthetic grease, though a bit tricky I was able to slide everything together then slowly/uniformly tighten all bolts on both valves. Nice I was dreading this. Took about 15 minuets.
Hardest part of this necessary project was getting past my reluctance to do it & fighting myself. wha wha
Another tip from RV.net is using 2 pieces of thin metal. The valve gaskets go on end of plumbing, the valve slides in between. Can be difficult if valve is inline, valve can push the gaskets off. Using the thin metal on either side of valve allows you to slide on without pushing gaskets off. (I suppose spatulas and a 3rd hand would also work.) I tested with running water no leaks but not resealing the reinstalled tank cover until I've got full tanks.
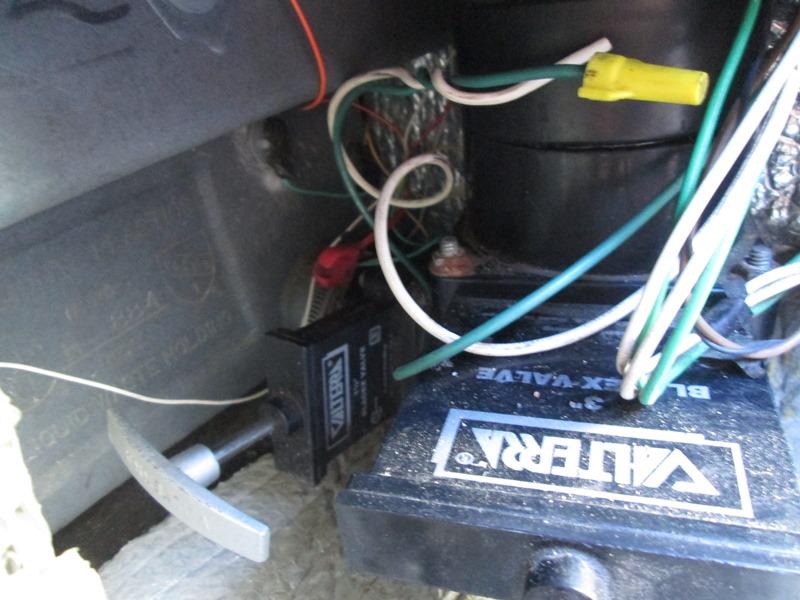
Side note I did discover that center strap on holding tank had come loose. Also tank heater is dead. Its never worked and doesn't freeze here so I cut the leads to it. I may utilize them to turn something? on as its switched power. Side lights on camper would be handy.
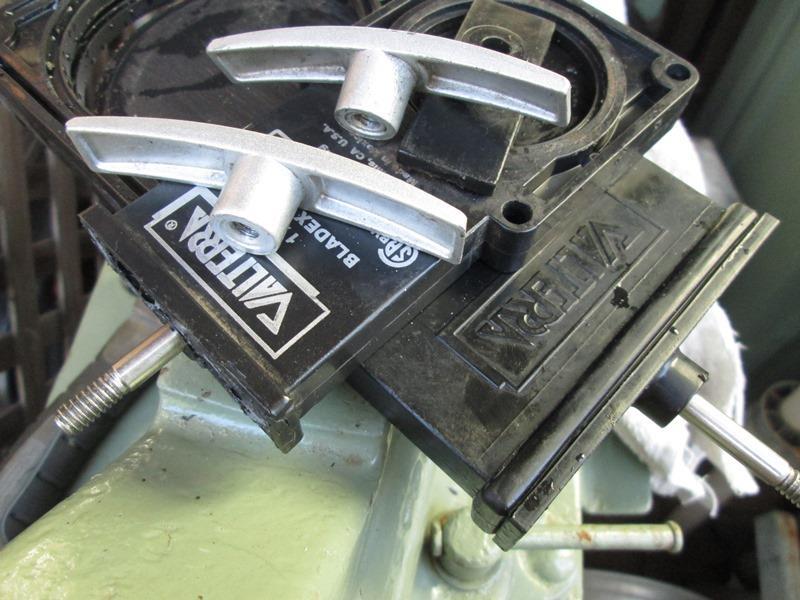
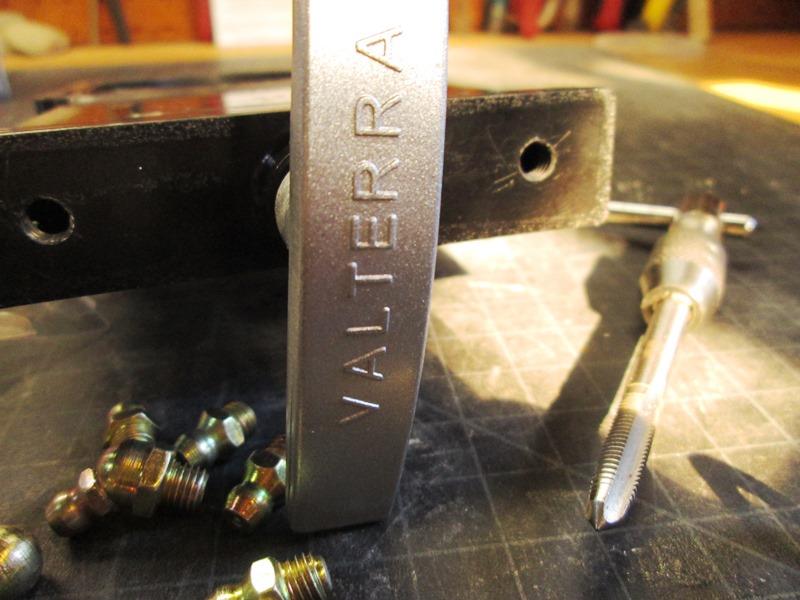
Back to top of page (1) 1 1/2" Valterra 'Bladex' valve #T1001VPM (5/16" bolt head, 3/8" nut size)
Originally I ended up dropping the Gray tank cover (shown above). While it worked well for access it's really a pain to remove the cover. So Im going to try something else.
Second thing is I'm going to try is add a zerk fittings to lube the valve disk and handles. Wont stop from leaking down the road but likely prevent breaking handle- that I want to avoid at all cost. Hoping also makes just opening easier-pretty tight within this compartment and pulling sideways on valve handles not easy.
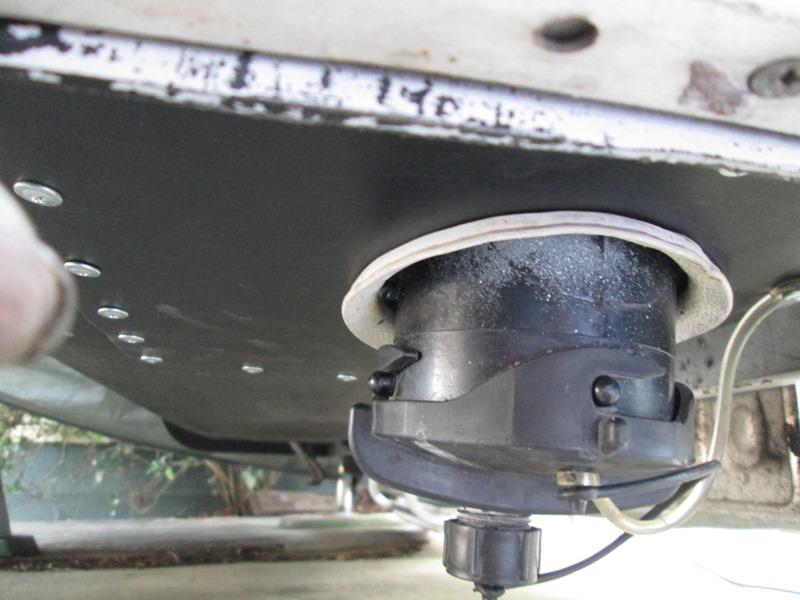
Looking up from underneath. Need to leave an inch at back edge and along the side for attaching new access cover, its close. Once I had an idea where to cut drilled couple of holes. Slowly cut with jig saw to keep from melting. At rear where saw wouldn't fit used jig saw blade in an exacto blade holder.
And inside compartment showing valves tucked in corner. Physically impossible to get to rear bolts on both valves unless the Gray tank cover removed. This mod addresses.
Whoo whoo!. Again, laying down looking up thru cut floor. Bolt on right 1 1/2" valve now accessible! Bolt on the 3" valve also accessible. Removed the valves. Not near as easy when the tank cover removed and had clear access on 4 sides but doable without to much grief. Minus chore of removing tank cover, stoked. Hopefully goes back together as easily.
Before installing new valves, as mentioned, want to install grease fitting on them. However first taking old valves to shop and open up, verify adding zerk fittings will actually lube valve disk and handle stem.
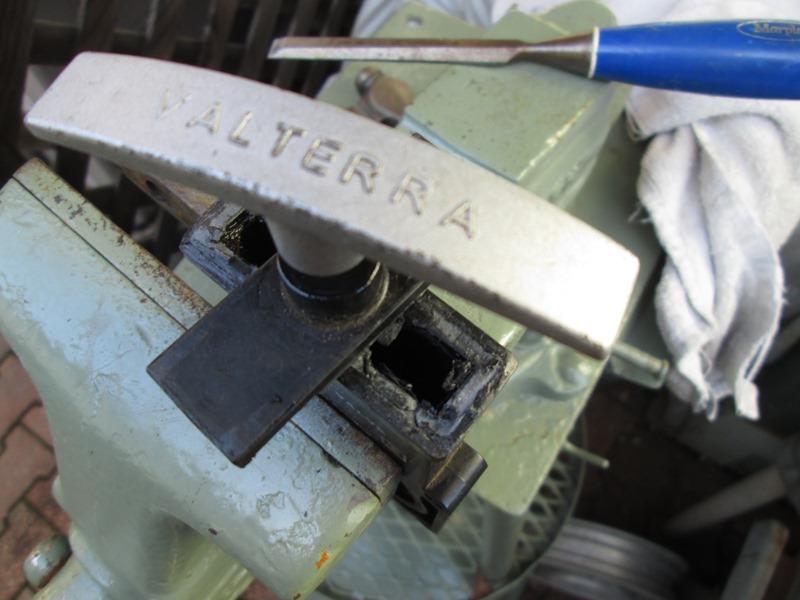
Bit of persuasion splitting the cap
The top box of valve is hollow that disk slides in. The handle stem only rides in boss of glued on cap. So yes pumping this void with grease will lube both the disk and handel stem.
Also let me see placement for drill/tap for zerk fitting.
Removed cast aluminum handles and throw in the valve compartment. If I ever change valves again order them with the plastic handles (cheaper) and swap.
Making access cover
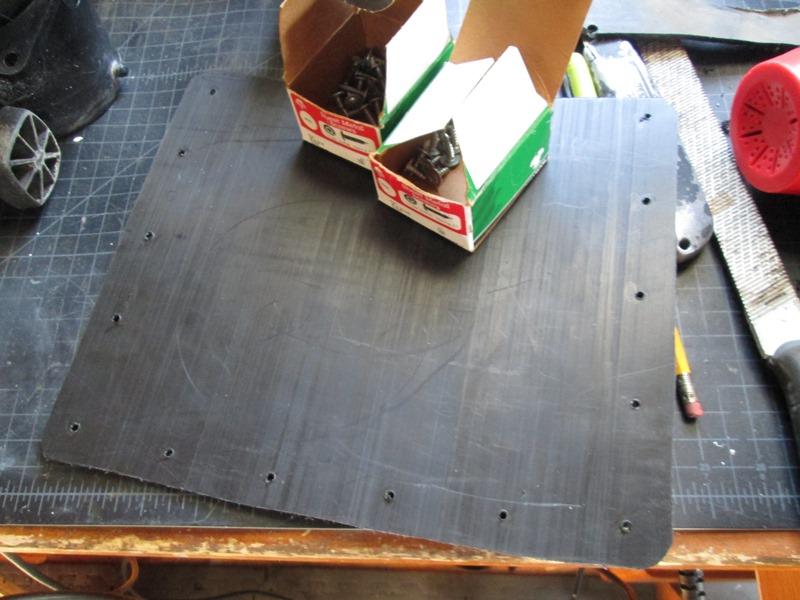
I had some UHMW 1/8" plastic from Mcmaster Carr, any waterproof material would work. Cut a good inch bigger around than removed piece. Drilled clearance holes for some lath screws. The cover box is also a soft plastic 3/16" thick that will easily accept the screws.
Mounted.
Dropped most of the screws to get the sewer hose tee in place and mark hole. Cut, close but may likely need to re trim the hole once valves are assembled. Access panel!
Valves arrived. Debating on drilling holes for tap as may introduce debris inside. Toying with idea of melting hole thru, nah...
Well order only had the 3" valve-1 1/2" shipped separate? errr
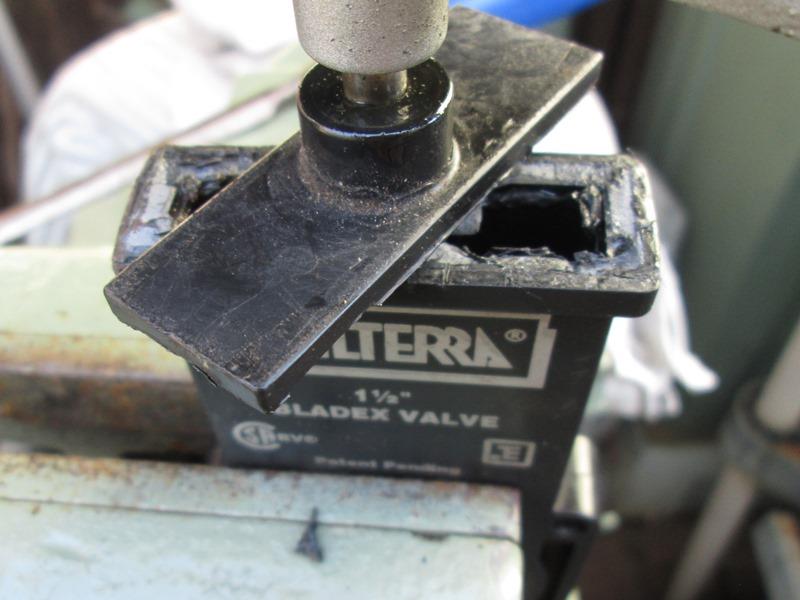
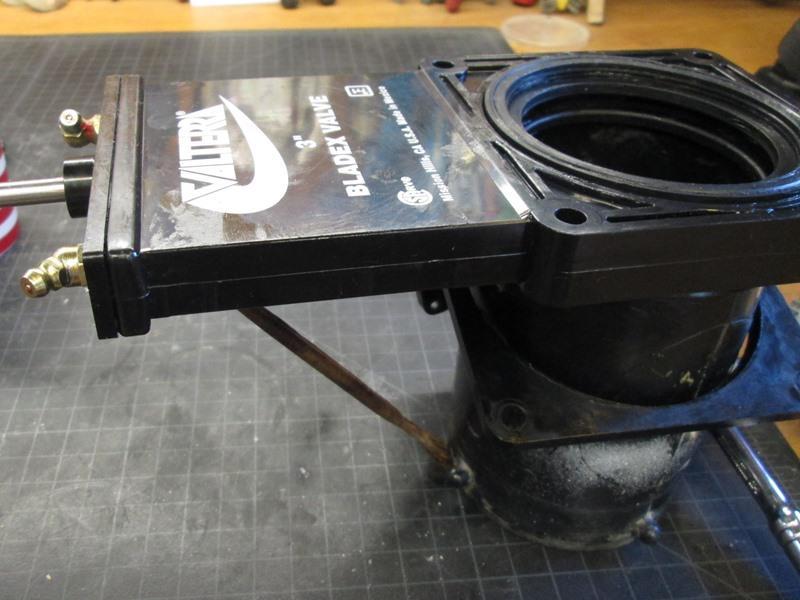
Tap 1/4-28. On the 3" used 2 zerk to ensure some grease at shaft. Used super glue as thread sealant. 90° zerk on rear and 45° toward front. I would have used 2 90°s but I need the other I have for the 1 1/2" valve. The 1 1/2" only 1 zerk but its mounted with blade vertical.
Hmm the front 45° is pointing upward as much as picture appears its pointing down? Not sure if this was a good idea. I wanted to lube sides of disk and wiper action of seals. Using old 1 1/2" to place rotation of zerks noted there's a seal embedded on inside of plastic top that handle shaft slides thru. Hopefully not rubber because I used some red water proof (petroleum) grease. Should have use silicone -oh well. wont take long to see if I errored.
Welp 5:00 rest of the order didn't show-pissed. ... cant button up camper...
Now to install both valves and tee, secure access panel
Drill and tap 1 1/2" valve, Install zerk-grease.
Not as easy as removing but installed thru 'new' access hole. Biggest issue other than crammed in the corner is the way hubs rotated and glued. Handle of 3" rotated so it doesn't hit tank cover but it puts the rear bolt right at rear top bolt of 1 1/2" valve.
Removal easy, just a specific sequence to get in. Both rear bolts in that corner have to go in from tee side so the heads are next to each other, not easy when feeding it with 2 fingers. Otherwise threads will hit other bolt. Needless to say -still not a fun task but at least now i don't need to reinstall/seal the tank cover box (acts as sides of compartment).
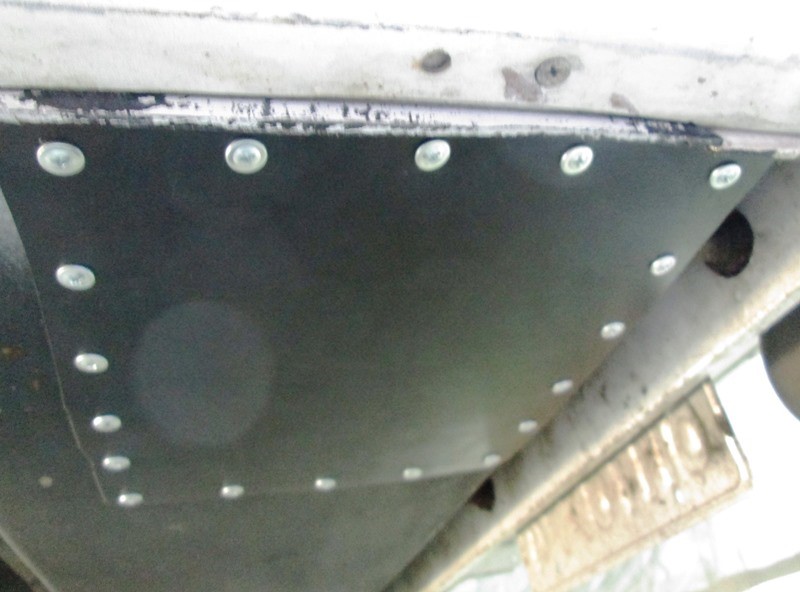
Cover installed. ground off tips of the very sharp lath screws. Hole for sewer hose connection now centered at pipe and sized for closer fit. Before looked like was re trimmed to fit actual placement of tee and had like 1 1/2" gap. Course now I get to add a hole. I used that large gap to drop cord for portable solar panel. Minor.
New valves, zerked for lube, new access panel. Also allows for when on the road/camper mounted, working on it if needed as new panel will come off while on the truck, the tank cover box wouldn't. Alls well that ends well. If the seals swell, though I found seal are Buna so hopefully not. Changing out valves if on hand, should now be an hour task. I'd do the zerks again but find better lube.
Back to Ourelkhorn Camper Modifications page
And here we are again. Gray dump valve getting very hard to open to point feels like Im going to pull handle off. Black tank has very slight leak thru valve so changing out both.
Replacing dump valves 2020
(1) 3" Valterra 'Bladex' valve #T1003VPM (7/16" bolt head & nut head size)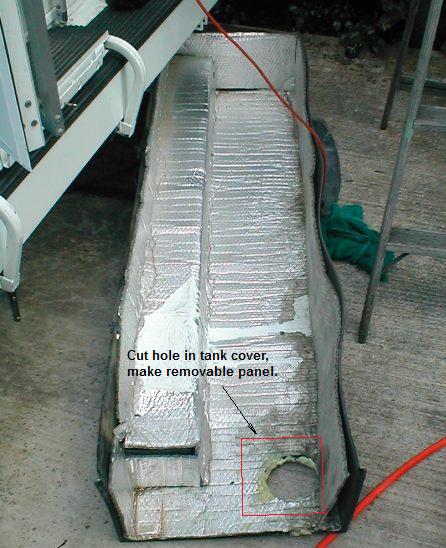
I believe if I cut a hole in the tank cover I can access the bolts at rear of valves. Make a cover. The existing tank cover isn't structural, just plastic box. Replacing new 'access' cover. with a few screws should retain boxes integrity.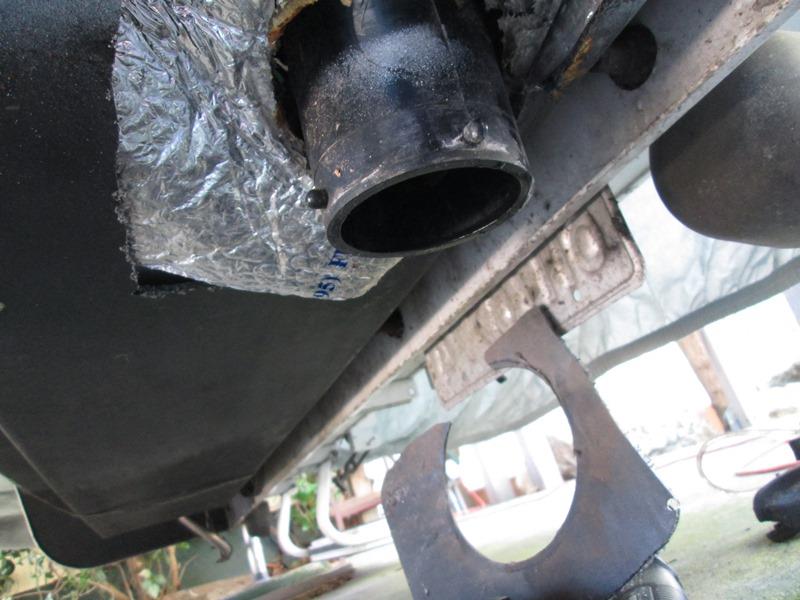
Set on drill press and used vacuum to try to keep shavings from falling in.
Day later, the other valve arrived.