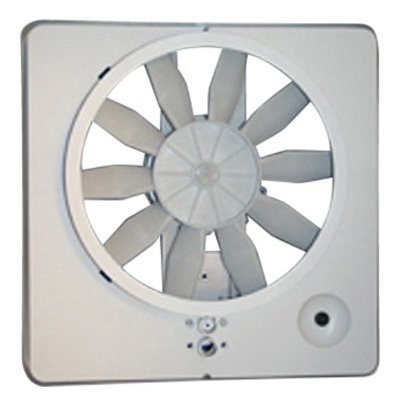
Replace bath fan with Heng's Vortex I fan, PWM speed controller
Intro This section and what Im doingModifying vents crank location
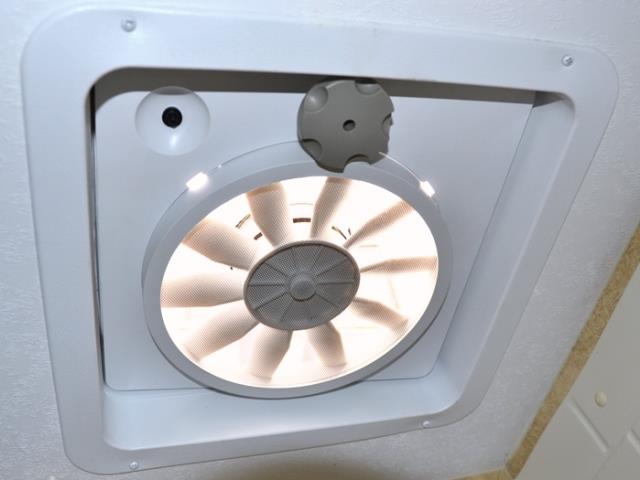
New fan installed
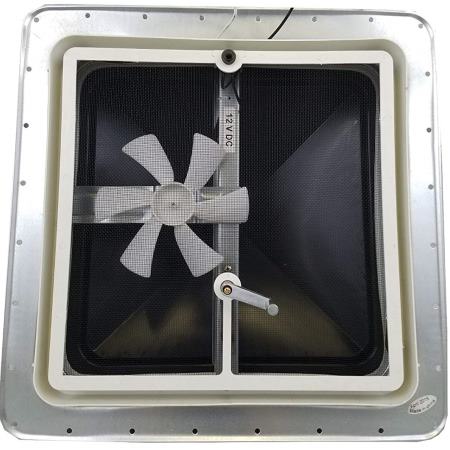
Simply replacing loud- ineffective buzz & whir fan in camper with a Heng's Vortex I fan assembly. I am using a remote PWM switch to control speed which I've already installed and pre wired. Fan replacement is a very simple upgrade. Basically replaces existing vent screen assembly, motor and blade with 1 piece screen & fan assembly. All from inside camper, no need to remove or replace entire vent assembly.
Remove existing vent trim flange. Remove existing vent crank handle and screen. Remove old motor & fan blade, if equipped. New fan assembly has a gear box that engages existing vent crank stem. If stem of existing vent crank is approximately 4" from edge, connect wires to new fan assembly, screw new fan in place of old screen. Install new knob, replace trim ring -done.
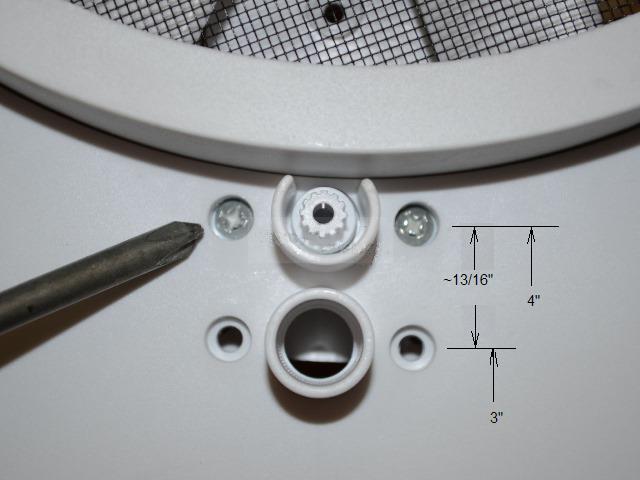
If your vents crank is about 3" from edge an additional step required. New Vortex fan does have allowance for different existing vent crank handle locations. Most vent handles are approximately 4" in from screen edge, however some are 3". New Fan comes setup for 4" vent, to use on vent with handle at 3" remove 2 screws holding the Vortex gear box, move and reattach.
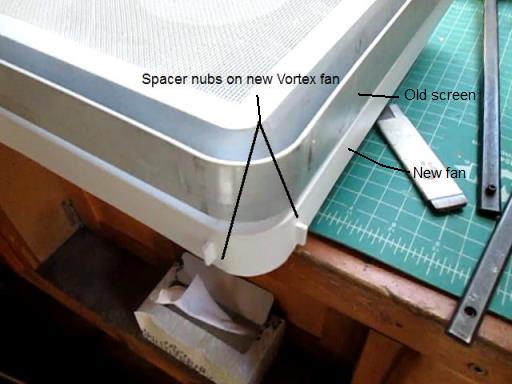
Other variable is the spacer nubs on new fan housing. If your old screen has these likely no modification needed. If old screen doesn't have them or looks like they were cut off you may need to cut off nubs. Trial fit will determine if removal required.
The Vortex fan is designed to and will fit a multitude of different existing vents. It may require a bit of modification to fit particular brand of vent.
- Departure from typical install
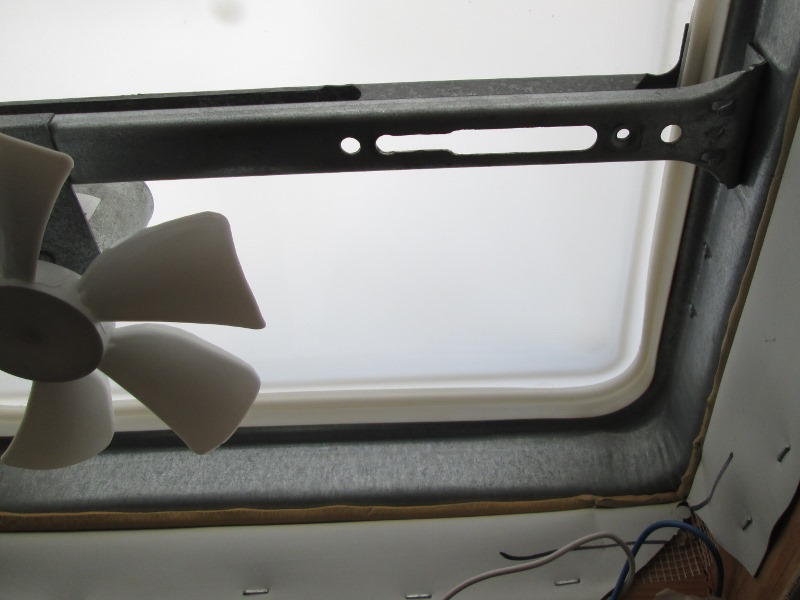
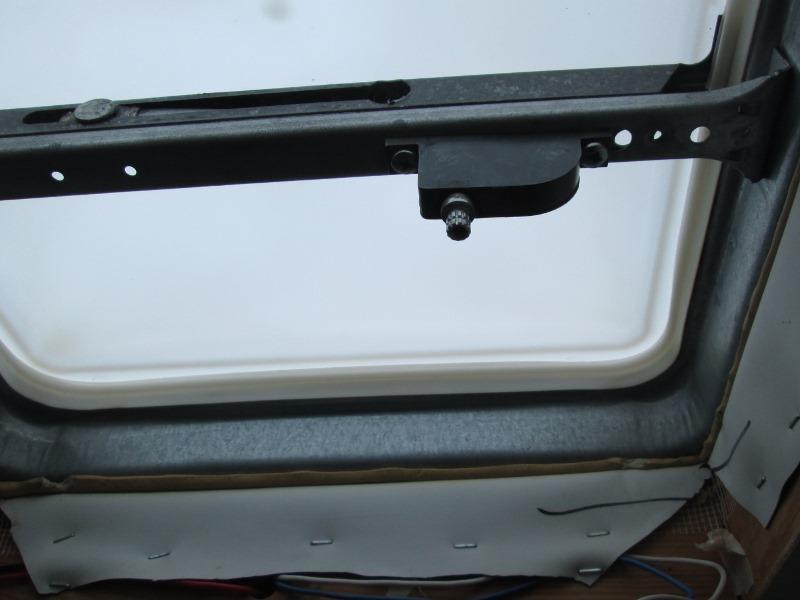
All that said the real point and purpose of this page other than documenting replacement upgrade is I am modifying my vent. Our vent is a Ventline with the short 3" from edge crank handle. as shown above, Instead of taking advantage of the Vortex fans ability to adapt and move the Vortex gear box to match existing vent, I am moving the vents crank to utilize Vortex in the 4" position. Why?
Simply due to it places the knob away from edge of vent trim. Otherwise knob is too close to edge of vent as shown above, cannot fully rotate as there isn't room for fingers to fit between knob and trim. Moving crank assembly of vent will allow turning knob full rotation without repositioning hand. Also allows to reuse original crank handle instead of the new knob if wanted. That allows continuous rotation to raise or lower. Knob is nice but there is a reason vents use the crank handle. Bottom line relocating crank isn't needed but I would rather spend extra effort & time once now than deal with what I see as inconvenience every time I open/close.
If the vent wasn't already installed in camper modifying would be a simple 10 minute job. However its mounted so its working overhead, cutting vent making a mess inside camper. Other wise very simple to move vents crank assembly.
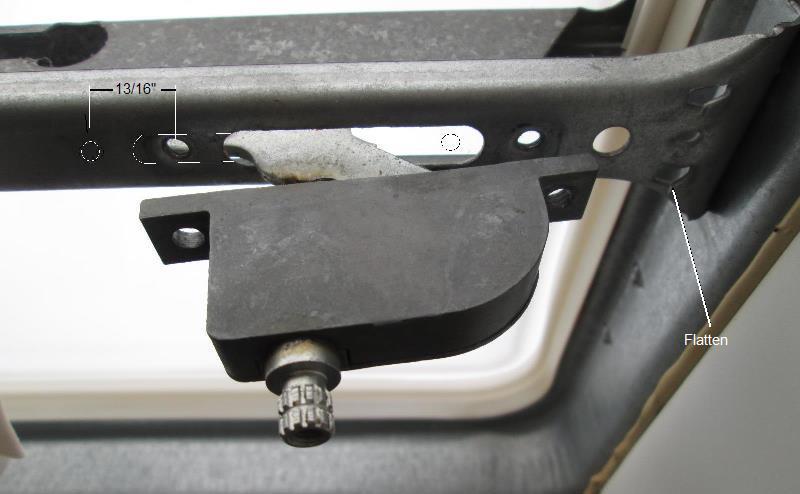
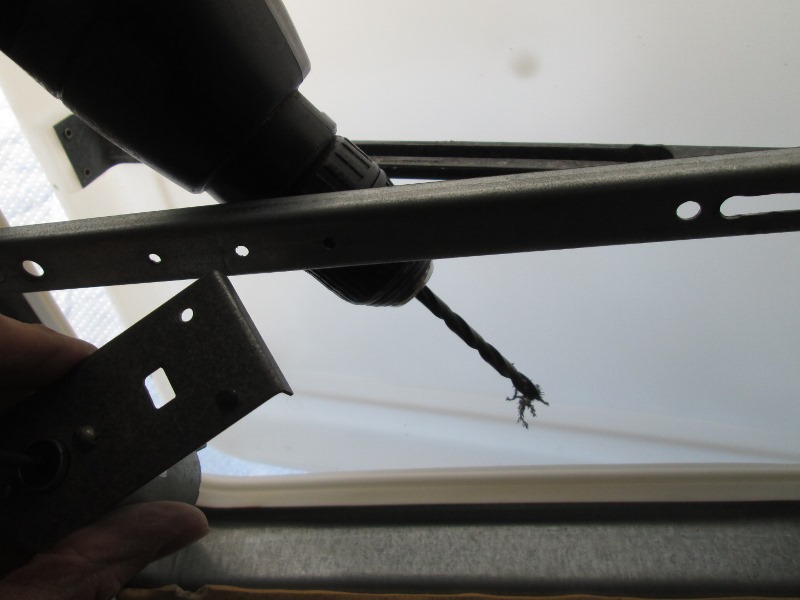
As shown, simply extending the slot for crank arm in vents cross bar, drilling new hole for screw. Making a backup bar for hole now in slot. I roughly measured 13/16" between Vortex gear box locations so that's how much I am moving crank assembly. IF your vent uses tabs instead of screws (not common) to clip in screen they will need to be cut off or flattened.
Lastly or the 1st thing to check if relocating crank is with the lid fully closed, verify the lids slot is open or continues another 13/16" past end of crank arm button. Haven't seen vent this would be problem but if the lids slot ends close to where arm slides in closed position there wont be room to move- lid will not close.
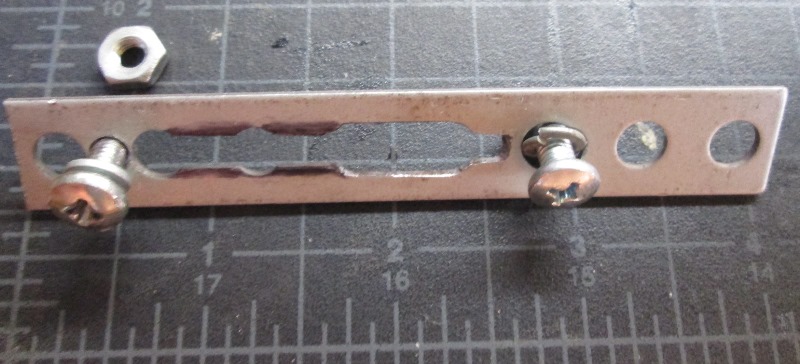
Fab a simple piece of flat bar to attach crank assembly to. NOTE: All that is needed is a short piece, wider than slot, for the rearward hole that will now be located in slot of vents cross bar. I used 1/16" thick x 5/8" x 4" long strap, to backup both holes before I realized, after the fact, wasn't needed. Much simpler, would have saved cutting slot. Washer may have worked. Oh well.
I used #8x 1/2" machine screws, only thing to watch is that arm does not hit screw preventing from fully closing. I choose to run screw up with nut on top, just easier, but dropping in from top with nut on bootom would more give clearance if your arm hits (cant be seen once new fan installed).
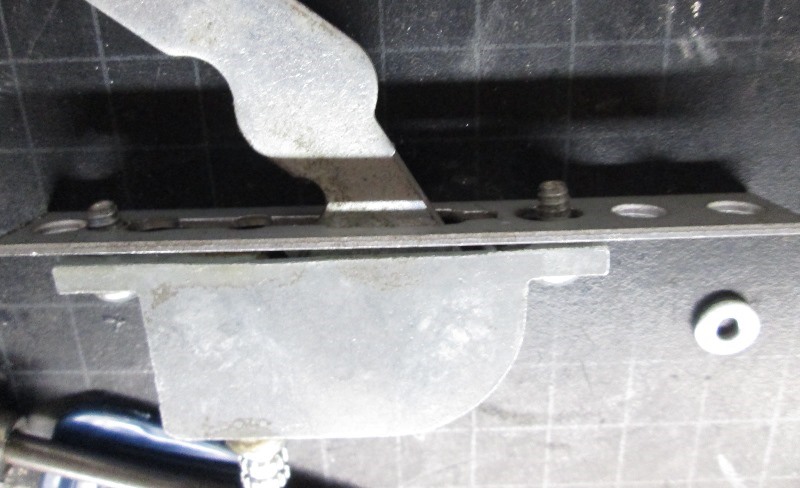
After cutting /drilling vents cross bar, lay new backup 'mount' in cross bar, reattach crank assembly, sandwiching cross bar between crank operator and new mount bar. I'm bolt & nutting as material I used had holes, otherwise screws would work. Bolting does allow slight positioning to match Vortex gear box. I am sure my 13/16" measurement isn't exactly accurate...
All that's left is to drill and open up slot in campers vent, which I really don't want to do because of the mess it will make.
And done..
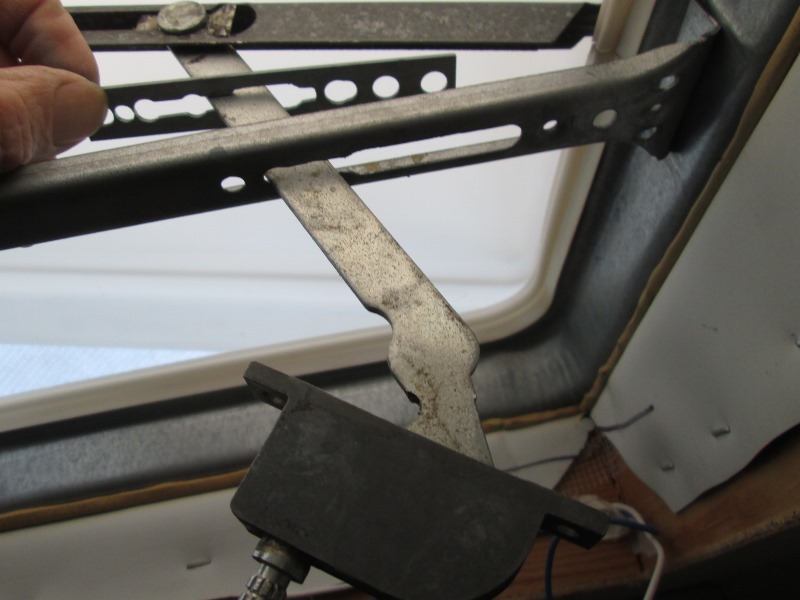
Slot extended and hole drilled. Think my hole spacing is close but if needed slight filing of new hole will let crank and new mount slide which ever way needed. Cutting slot wasn't as bad I was dreading-though I did use occilating saw verses cut off wheel. Drilled hole end of slot then at very high speed and lightly engaging blade to minimize vibration to crossbar, went pretty fast. Cut off on dremel would have been a LOT safer-with little possibility of working cross bar spot welds. Got lucky.
Since crank arm disconnected and all the tools were out, went ahead and drilled out the rivets from top side that held stock motor bracket. Not required, you only need to remove the old fan blade by pulling, its tight, off old motor. Exposes 2 small screws to remove motor.
Mounting crank assembly with new flat bar spacer.
Mounted. Had an old screen that matched new crank location as I've gotten ahead of myself. Still haven't ordered fan.... Once it arrives should be simple drop in- connect the wires from pre-wired PWM controller. That's the plan. Relocated crank assembly will give full access/ rotation of knob or handle.
- THE FAN! THE FAN!
Arrived-
Surprisingly went without a hitch, well almost. But as far as new fans gearbox and relocated vent crank they aligned perfectly, I assumed I'd be fiddling with it. Nice, however the new fan when set against the vent, the gearbox was being pushed away. Like the vent crank gear box was to tall. So removed the fan, add washers to the base where screws go thru and reinstalled.
Not the fans fault- few years ago replaced vents crank assembly as it was binding and sticking. Not an exact duplicate the body just slightly taller and the arm shorter.

Removed the fan blade to wire. Used aluminum tape to secure wire nuts against inside of fan housing. WAY easier than connecting wires with fan hanging then trying to stuff it all up. This is when I decided to take back down and add washers to compensate for taller crank body
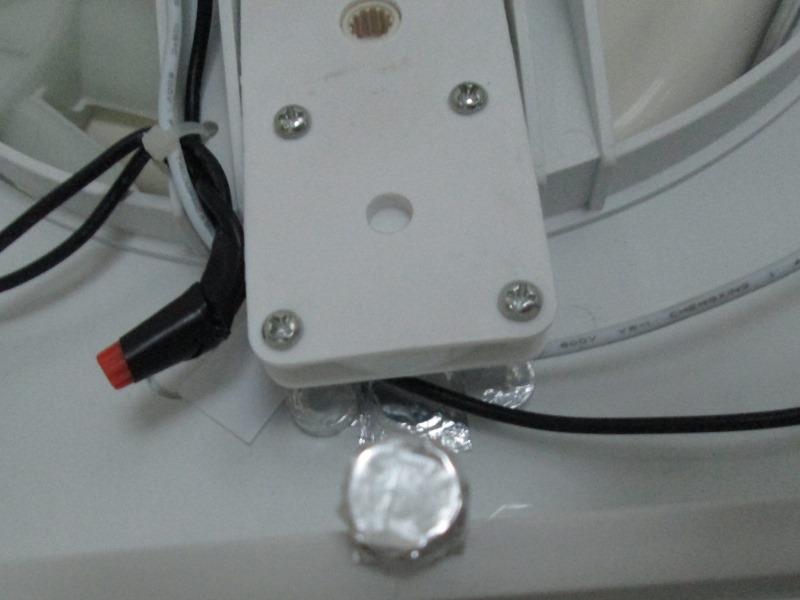
Simple flat washers taped to housing to space fan down away from crank body. Also tapped unused holes.
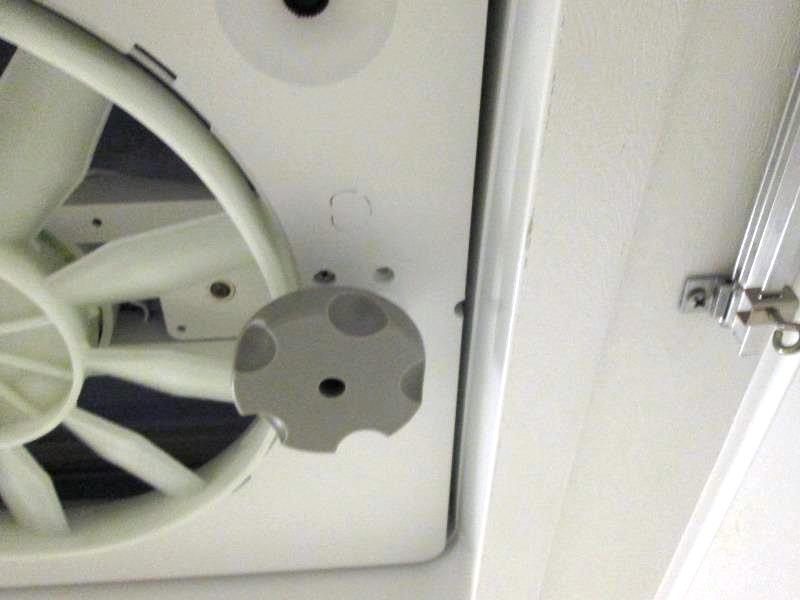
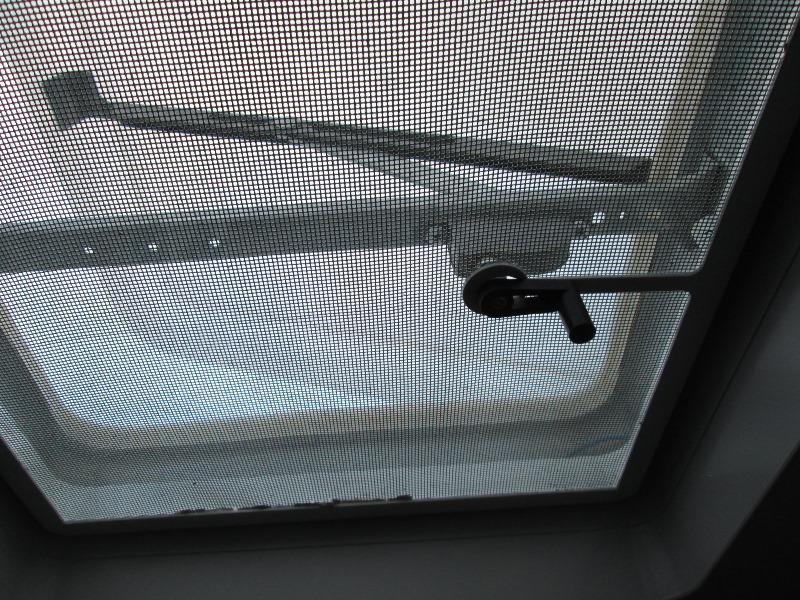
And the reason I relocated the crank- space around around the knob for full rotation.
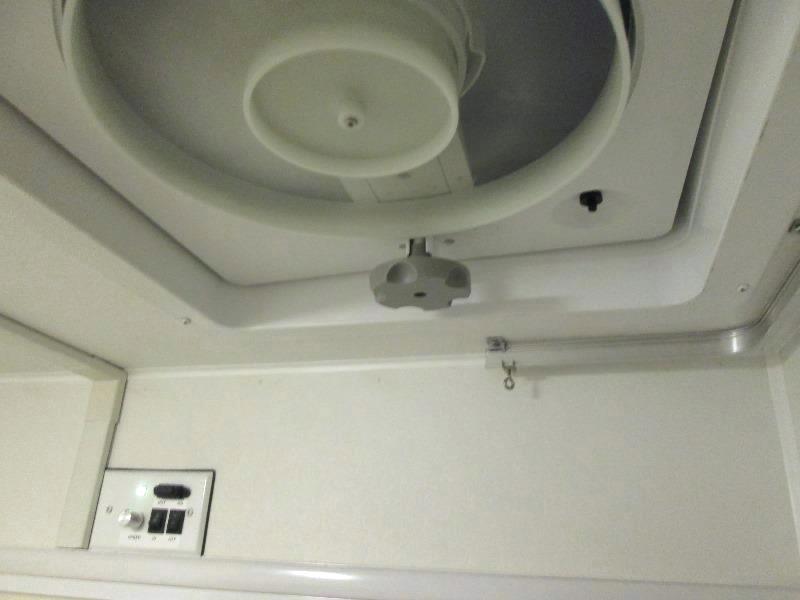 Pretty happy-fan compared to old one is quite a bit quieter, not the full rattling roar. Easier access to turn on/off. Ability to adjust speed or reverse just convenient. Though cant imaging reverse would be used but left the option. The other really big plus is the PWM controller also saves 12v battery. Screen is yet to be attached but its a simple twist and turn it on.
I consider this a huge upgrade over the stock whir and buzz fan. The old one was only used when showering- it was so obnoxious. All in all worth the time to change out.
Put up short video, just 'hearing' new fan.
Link if embed doesn't show
Prewire and install of PWM remote controller for planned new fan
Back to Ourelkhorn Camper Modifications page