Add under table shelf to camper dinette table
Well here we are again. Sitting in the shop pondering our campers dinette table.
It and the seats are a catch all for everything we do in the camper. Mostly there isn't any place else to put stuff. I mean its a small area. We've looked at under table drawers. Most come out the front-other than small would be a issue with knees. There are some keyboard type drawers that might work on sides. We try to keep it picked up but some stuff like my laptop just takes up half the table-when not in use, or laying on the seat just to have table space. I honesty never thought about trying to address. It just is what it is.
However recently a post by Mark Siminoff on RV.net got me all excited. He built a replacement table top. They home school their kids and needed a place to support this. The table is divided in half with 2 full length flip up tops. One side houses a midi keyboard, yes a keyboard, and the other side is for school supplies. Much like a desk. It has to be one the more awesome modifications I've ever seen to a camper dinette table.
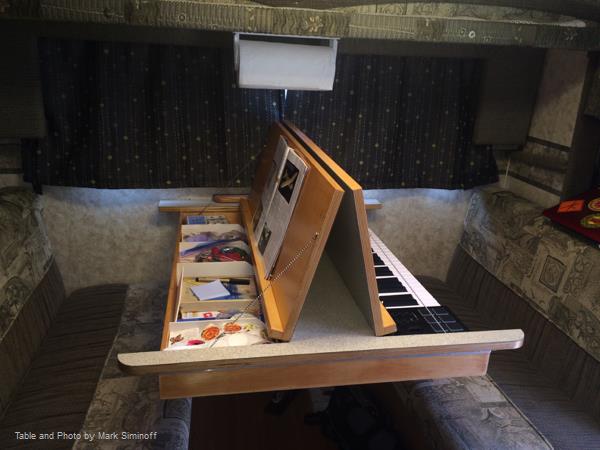
Picture of his handy work and what motivated me to look at our table courtesy of Mark Siminoff. More can be seen on his awesome build THREAD at RV.net. That and his execution of the idea, just inspiring. At least I've never seen this done in camper. Though I could only hope to gain the functionality I don't even pretend I could match the finished results of his work. That said wasn't couple of hours after seeing his table I pulled ours out.
Seems like an ideal solution for gaining storage at the camper table. Easy access. We recently picked a side table for the house and it has a flip top. Inside is a power strip and room to store/charge laptops/ phones etc., nice but it still hadn't occurred to me this could be applied to campers table until I seen it done. Wow is an understatement.
- The exercise
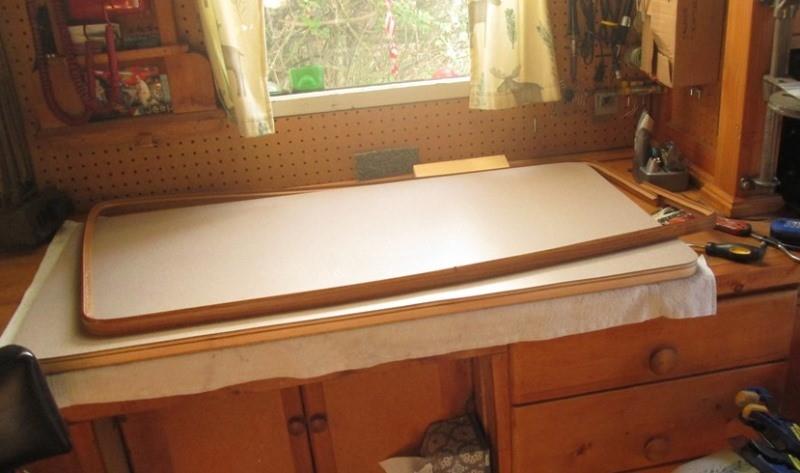
Our table is 43x23". Just the 2 of us, end of table, about half, is used for piling stuff. Rarely are we both on same side of table though If I paid attention appears would be room underneath to have storage underneath table & still able to sit. Having never actually looked at modifying I always assumed there wasn't room and would be issue with knees.
Plan was cut the top and have single rear section, maybe a 1/3 of top, flip toward wall. If I could get at least my laptop (13"x16 1/2") off the table would be nice but be room for hers which is smaller and some of the other stuff. I could incorporate power strip for charging etc. all kinds of possibilities, but mostly clear table.
Shooing away the sugar fairies-I needed to look at HOW I might do this. My plan involves reworking existing table, not building a new one, and using material on hand. Laid out the area to cut taking into consideration size needed, fitting different uses. Then looked at how 'box' could be attached to hang underneath. Because our table is hollow 1x perimeter frame with (2) 1x2s spanning width, will need to cut thru both top/bottom surfaces. Hole and lid material would need to be reframed. Tapping the table I was able to ascertain internal structure but decided I need to know EXACTLY where edges of internal frame were. Also IF I could separate at least the luan bottom panel would simplify cutting. Formica top needs to be cut from back side to minimize chipping, also be nice to cut the bottom from back side. Likely at end and along sides where attached to internal 1x's could be cut assembled but across the center there is nothing. After couple of hours eyeballing first thing is to see if table can be separated, at least peek inside, verify actual inside material dimensions.
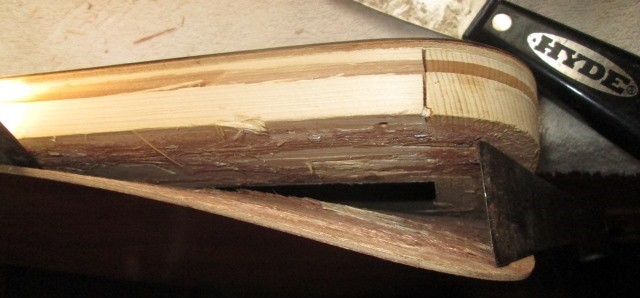
After considerable time got about 8" pried off around end corner. (It did leave the 1/8" crown wire staples behind, but cleanly pulled thru, surface staple holes unaffected). At this point it became much easier to separate being able to pull up on luan, but I stopped. It will be tedious to get around entire table top, doable but more effort than anticipated to save. Clean up, even replacing bottom panel, will take more time. Recorded table internal frame material, side pieces are 3/4"x1 7/16", end is 3 1/8" wide. Noted joints use wide crown staples, if I don't separate means Id be cutting thru staples as one of the side to side 1x2s is in middle of hole. But primary reason I stopped is cutting the formica top.
The formica top, other than possibly ruining, issue I see is getting drop lid material from hole in table without ending up with a very large gap when finished. Any deviance from a perfect cut (error) would require more material. I would try but not without more material just incase. Given more time and motivation I still think this is doable and may revisit. But my conclusion is reworking existing table isn't going to be knocked out in a couple of days. Working with constraints of existing table limits how & what I can do. It would be a LOT simpler to build from scratch what I'm envisioning. But not now.
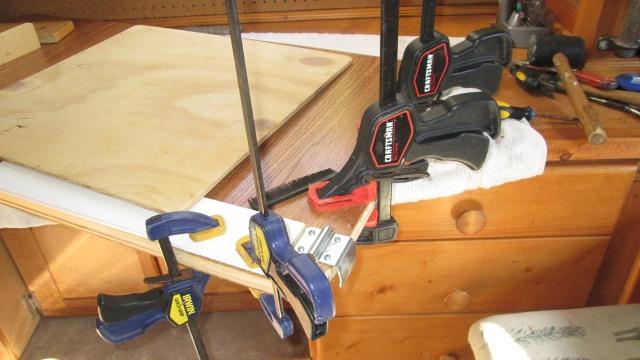
So put table back together. Removed staples, clean up surfaces, glued and re stapled. Watching the clamps work I mentally recorded my observations, some of the details I saw and worked thru in my head. Processes in case I ever decided to follow thru. Getting ready for an outing kinda bummed not going to have 'clear table'. Oh well.
- The resurrection of the function & purpose
Above exercise proved that converting our table utilizing Marks ideas wasn't really viable at this point in time but copying the concept, reconfiguring and building one to fit our needs, at some point, is.
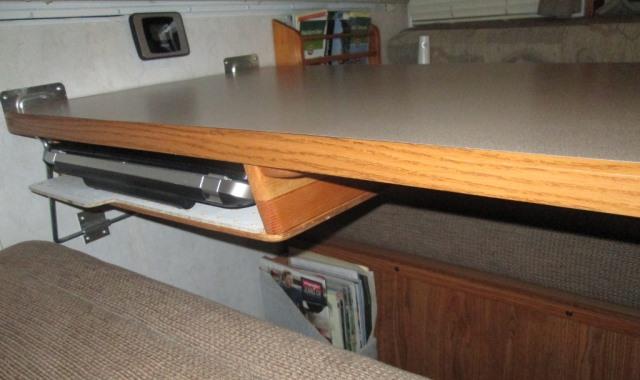
And then it occurred to me...main thrust is a place for stuff that sets on table. I've already allowed for depth, why cant it be a shelf? The drop lid is cool but not without its own issues for a table, IE clearing to gain access, periodic spills...One of the details I had worked out is the drop down depth of the table storage area under table top. Not a lot of leg room but had concluded could get about 3" hangdown and still sit under without whacking knees. We don't sit on that half of table- but on occasion company does. Given the size, almost full width, it wouldn't be a protrusion but a full flat surface. Tight but not something you'd hit and unlike drawer hardware nothing metal, hard or sharp if you did. So to accomplish what were after....why cant it be a shelf?
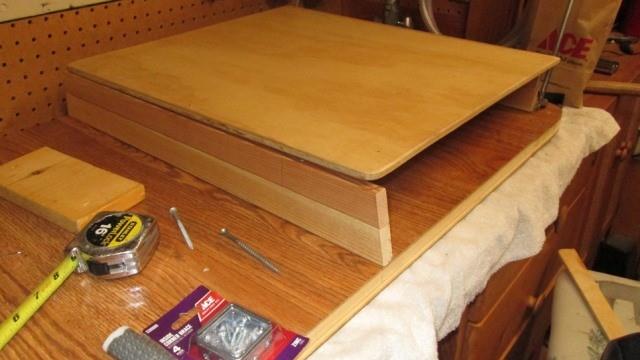
An hour later. I rough cut 'new' plan just to see. 1x2 I had on hand is 1 3/8" nominal x2 plus piece of 5/16" plywood from another project gives me 3 1/16" total hang down. By golly... I recut back 1 x 2s to clear the 'knee' of table bracket. The front 1x2 tapered to fit full width of table for attachment and to width of ply which was about an 1" narrower. I recut ply as it was wider than needed to minimize how much of under table used.
Plan was to attach (1) 1x2s on edge to the table at front and back, then attach second 1x2 to them. Then attach ply. Use some leftover metal L brackets to get more attachment support. Not the best plan screwing thru edge wise but would work. Maybe. Aligning will be problem, but don't like it.
Picking up for the night figured I decide tomorrow if I really want to do this. Kinda iffy. I sat the cut off from ply on table. DOH!
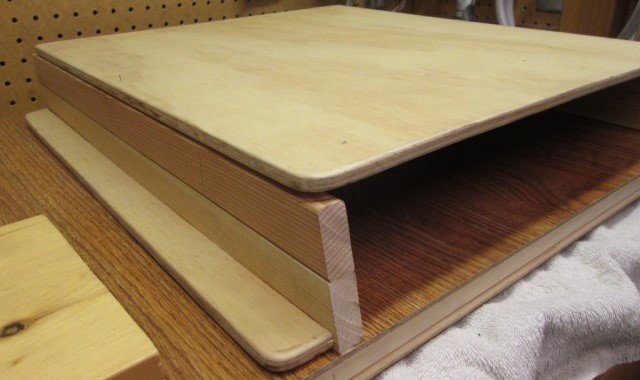
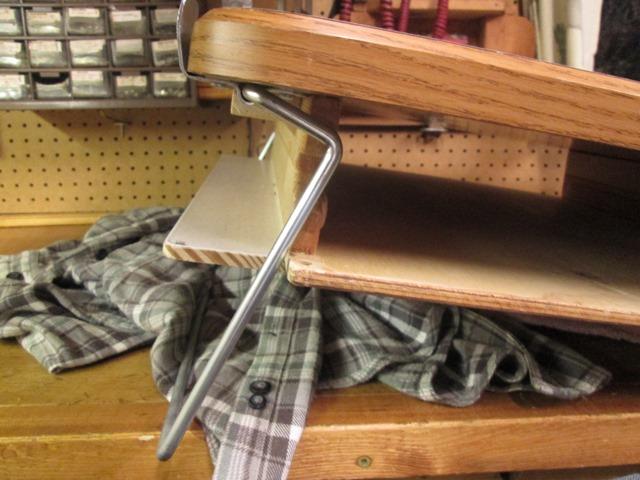
Cutting side 1x2s as attachment plates & attaching to 1x2" would allow preassembling, everything. Verses building to table. Iffy edge attachment, stacked 1x2s for screw access, using brackets to try to gain rigidity, difficulty in alignment assembly- Gone. The entire shelf assembly can be built off table, installed but more importantly removed. Allow assembling to table, put table back in camper and see if this is even viable without doing anything permanent to table.

Cut side attaching boards. Glued & screwed the 1x2s 'sides together with opposing 2 1/2" screws, (could have ripped 1x4 now but these are already cut). Glued and screwed on side boards. Ply bottom is temporarily attached with 4 corner screws. Drilled and counter sunk all mounting holes. Mark/ pilot drill the table. Sanded & blended entire shelf assembly.
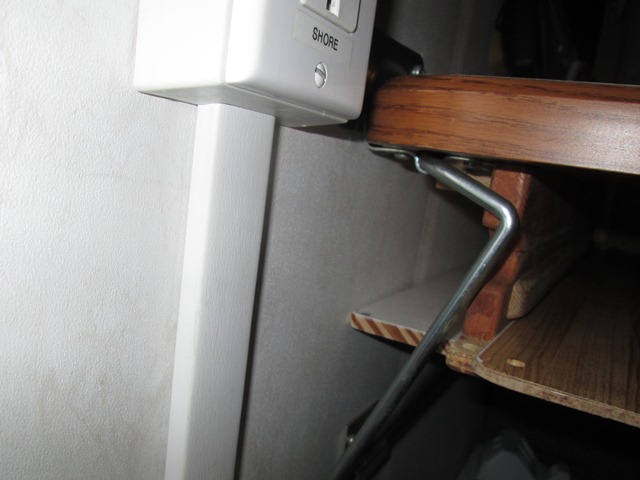
The center screw at middle of table is an issue. IF this works Ill remove and glue the shelf to table. If it doesn't I already have a place in shop this would be handy. But for now I need more than screws at edge of table. Plus when/if I glue need more positive screw pull. Several ways to insert blind backing but if shelf not used I want less evidence that I attempted. Had I continued separating back could have inserted backing. If I knew this was permanent could separate enough to slip strips of 1/4" ply, or simply cut the bottom panel full width and insert 1x, reattach to blocking
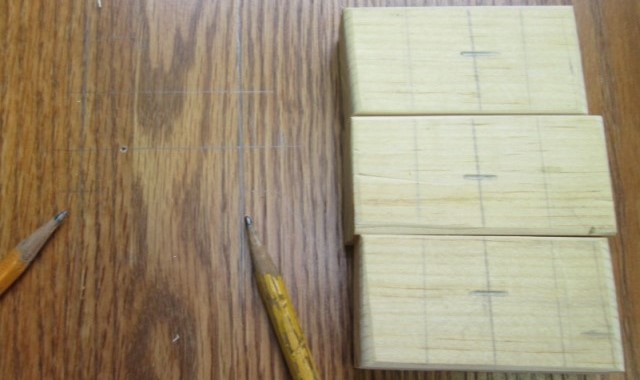
I simply cut a scrap piece of 3/4" nominal narrower than foot print of shelf edge. Cut into 3rds.
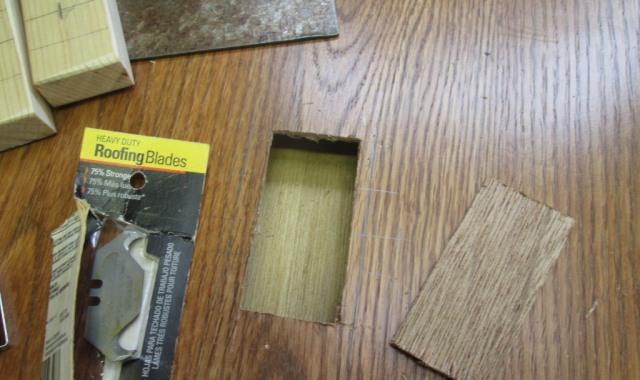
Scored hole then cut out with hook blades. Just enough to squeeze blocks thru. Once inserted will rotate 90�.
Partially add staple to sides of end of end blocks, tied off string. Partial staple in top of center block. So I can push the end blocks inside to insert center block then retrieve. Did a dry run.
Pulled blocks out, profusely applied glue and to inside of hole. Once center block inserted added small finish nails (handle) and removed side staples and string.

Though I started out with 16 penny nail using head to hold up luan so glue wasn't scraped off, used screwdriver and brush to reapply glue everywhere. Positioning blocks, reapplying glue sort of reminiscent of removing seeds from a pumpkin...
Stapled blocks to hold in position, removed the 'handles. More glue and replace cut out section. Bout this point I realized I should have pushed over some blocks halfway to table edge while I had the hole open. Not sure why I hadn't thought of it. Not happening now. Stack some bricks on hole and let 'er set overnight.
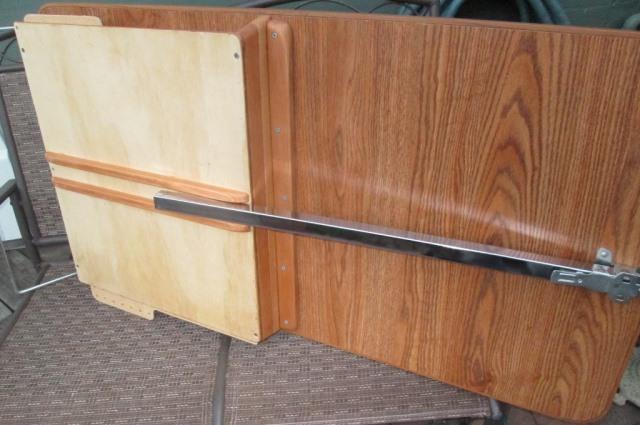
Assembled!
Added split 1x2 to stiffen the bottom ply. Due to size of scrap piece I used grain is going in wrong direction for the span. Flexed a bit more than I liked.
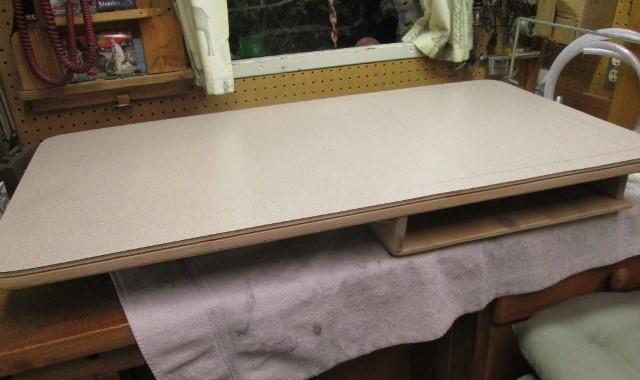
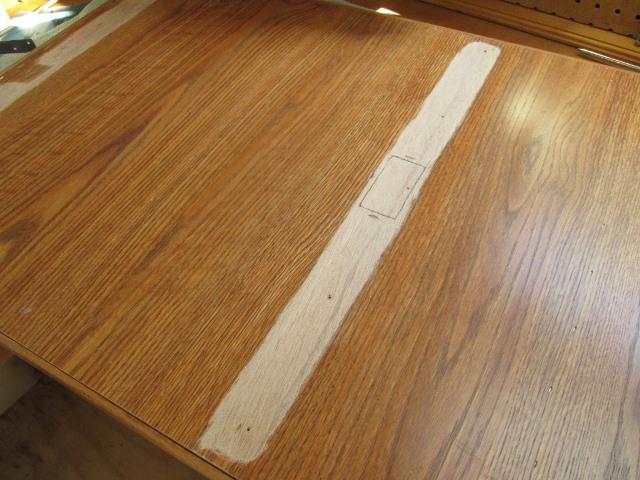
You can almost see original penciling of drop lid plans. For what this started out and what it is, if it works I'll still be happy. But the test -reinstall table in camper. umm... you know... I should check if my laptop fits...
As this was main driving force on dimensions- would be nice if my tape measure didn't lie..umm I hadn't check since originally laying out
"Whew!" He exclaims loudly while wiping the perspiration from his brow...
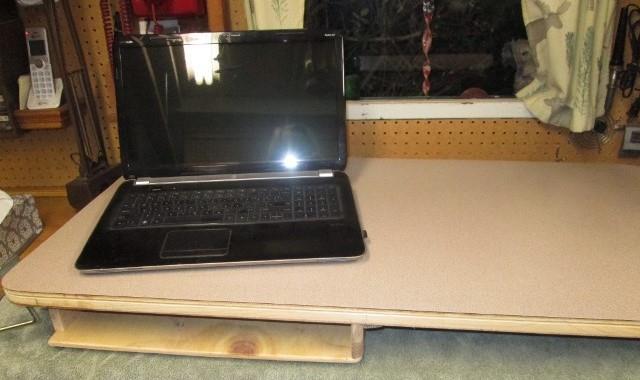
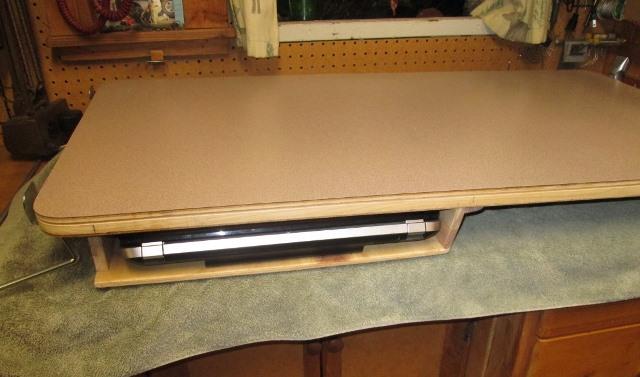
Wouldn't be the first time on the fly mods defeat intent. But laptop fits.
However it doesn't 'slide in'. Weight of laptop causes its feet to grab. Width keeps hand from assisting/lifting. Putting in lengthwise works but it would take up whole shelf, err. So apart it comes.
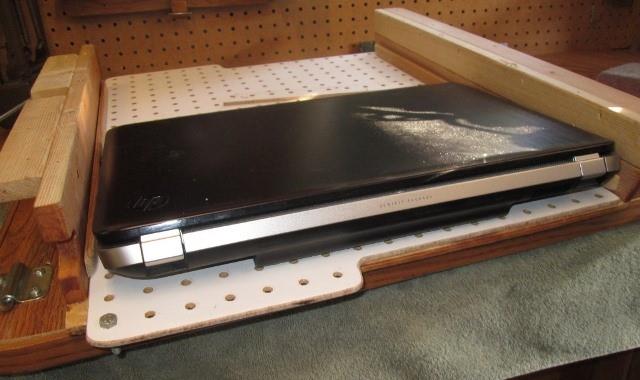
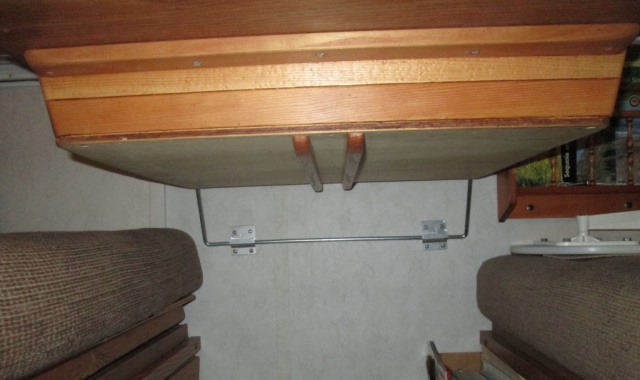
And trayed. I had actually thought about this previously but I didn't have any masonite/hardboard on hand. Did have some white pegboard so used it. Extended wall side out some so a place to grab.
Works well, L/T can slide on painted side, though I will pull tray out to set down. Enough friction from embossed bottom the tray slides but some resistance. (I tried painted side down and tray would shoot all the way thru if pushed too hard). Add 2 rails to guide tray & keep it from lifting. Cut a half circle in rear 1x2 sides, my laptop charger cord comes out side, so now it can be plugged in for charging. Ill add some cup hooks and the charge cord for her laptop can run behind. Simple bolts dropped in keep tray from sliding while underway (and or being moved while charging). Have some small pins, just need to drill and tether. Nothing will ride on shelf under way.
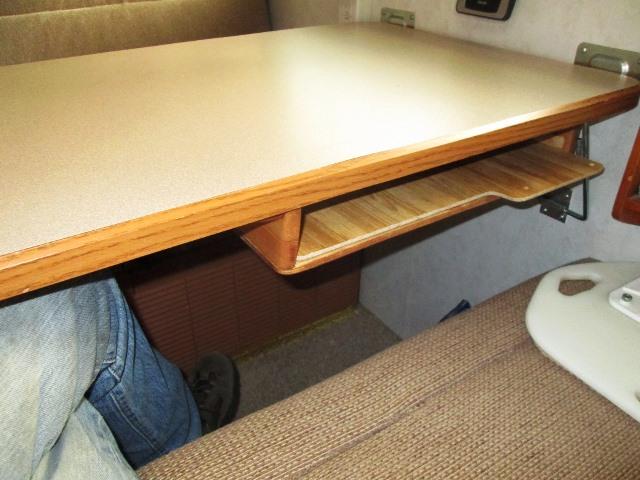
Finally in the camper to verify reworked table functions in camper. No issues I can see

Surprisingly, sliding all the way over I can sit under the shelf at the front (or left) seat. Side I usually set, its edge is elevated.
Simple 2x4 that elevates edge of front seat. Easily removed if needed for more room as shown rear or right side seat. But as a worst case can still sit under shelf. So now I know it works, out the table comes again. Finish staining and permanently mount to table
Close match on the stain. I should mention, table top currently will NOT set in the recess to make into bed. In 14 years we've used once so it wasn't a design consideration. But I checked, simply need to remove about an inch of the 1x1 rails that are screwed to dinette boxes in line with shelf side.. Shelf clears, but at the front edges where 1x2 side tapers up to table width it hits. Minor when/if I get around to it.
Removed shelf and sanded thru vinyl surface to wood. Glued and reattached the shelf. Its permanent. I also added couple more screws into the center backing block.

Found some old contact paper in the pantry to cover the pegboard. Not a great match but better than the white
Going out for a few days, see how this works. Far cry from what motivated me and what Mark Siminoff accomplished-but still...for a couple of days shop time-no cost I'm liking it. I think the convenience of having a place to put stuff will eventually override the crudeness. If not- there's always time in the shop to try again. Some times its the little things as much as the big that makes our camper more friendly.
- Update: added shelf to shelf
Few days out, the modified table worked great. Well, having the table uncluttered due to the shelf was really nice. Well worth the time
Couple of details. One was I hadn't allowed or thought about the power supply "brick" for my laptop, its huge. 1 1/4"x2"x5" long with several feet of cord on both ends. I placed on the shelf this trip but it took a lot of room. Decided as there's about 2 1/2" between side of tables shelf and wall, that IF I had noted I could have extended the bottom of shelf. Hindsight.
But to utilize the space for laptops power supply I added a shelf to shelf.
Can set the brick on shelf, most of the cordage will be unseen. As other laptop/phone etc have rather short charger cords, running under table & hiding cords limits use while charging.
So second is, pretty sure somehow I'm going to add another split receptacle on 'her' side of the table, right where I recently installed magazine rack. Too many electronic gadgets. Not sure yet. Nice would be some USB ports for the stuff that doesn't require shore or inverter power that could be charged directly thru battery. Save some power not running inverter. But 12v USB circuit another project.
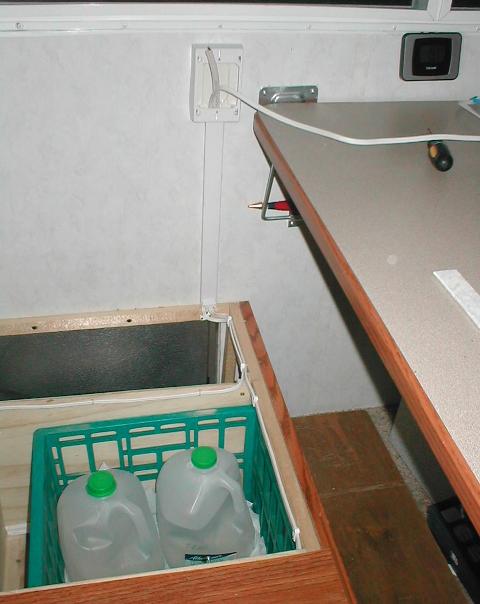
Picture during original 110v receptacle install few years ago. Nice would be to tee from existing receptacle wiremold channel, run across under table but pretty positive cant get any more romex in it. Could tap side of receptacle box and run across above table but likely I'll run from source(s) again and come up opposite dinette box. Match what's there. Ohh...add remote switch for the inverter...hmm- that's motivation... and where this project became messy and convoluted
And moved off this page to its own...Wire in second split if interested
All in all though really happy with the table mods and the clear space. One thing leads to another, after adding the second 110v receptacle then its install USB circuit.
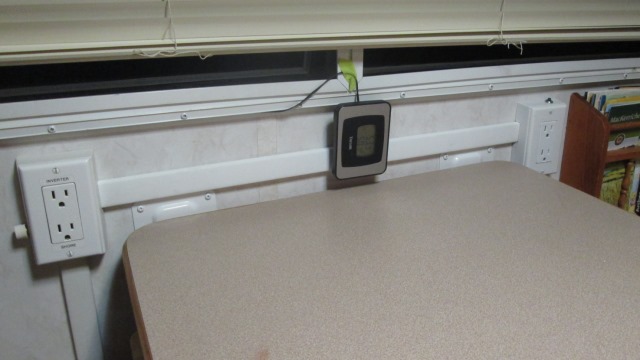
But we'll have easy access to power from either side of table. Just need to place thermometer that's hanging.. But holding off permanent fix until USB receptacles installed. It may go in center...to be done. Back to top of page
on to Part 2, add 110v Receptacle & Inverter remote switches
on to Part 3 add USB charging ports /circuit
on to Part 4 add AC/DC laptop charger
Back to Ourelkhorn Camper Modifications page