Easier Cabover bed access. 07/2017 UPDATES 2019
-
2019 Updates:
- The what & why
- Hook & eye Readdress holding step stored,
- Assit handles Add handles for something to grab
- Original step project
Original project, changing this
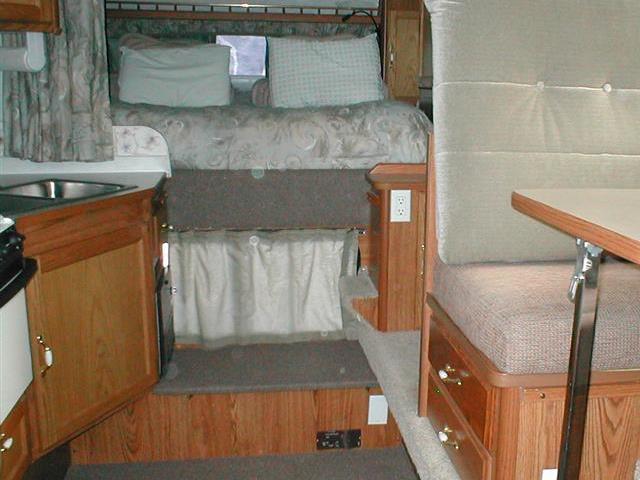
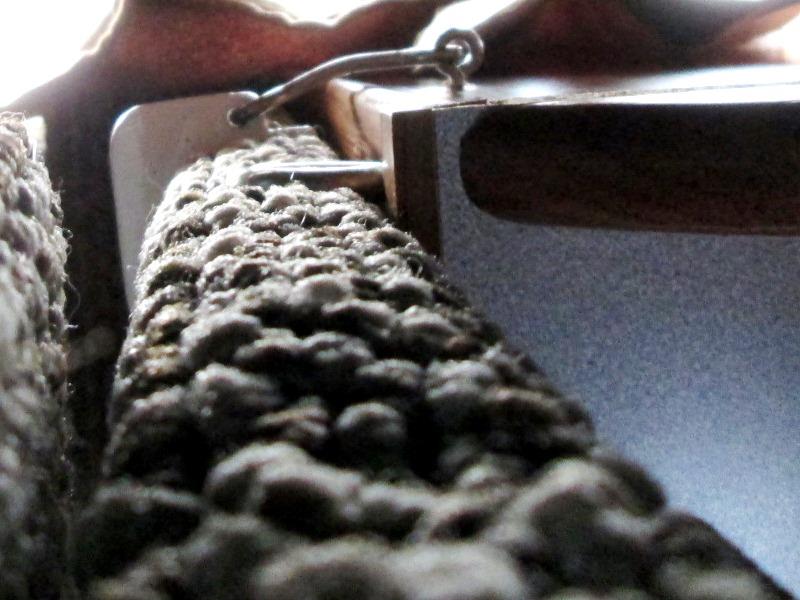
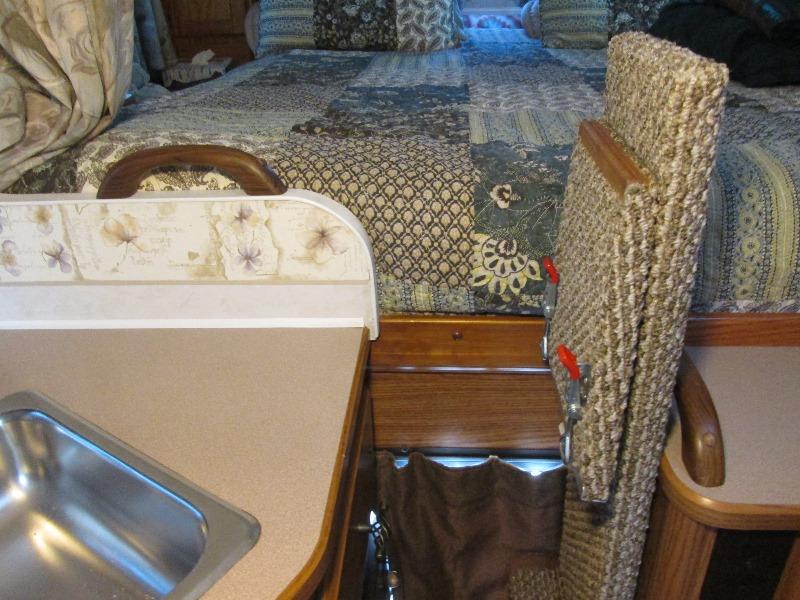
Step is awesome in use but coulple of issues. Shown below, 1st issue, used simple hook and eye to hold step up in stored position. Step stands vertically- .
When slide is in, climbing over cabinet to access cabover invaribly grab top of step. While it holds step in stored position well force of using as handle pulls eye loose out of plywood step.
2nd issue, Step deployed. On the round to it was a hand hold/grab bar or steady rest. Just nothing to grab when going up or down.
Finally addressing both. Back to top of page
Updates 07/2019
Address hook & eye, add hand grab handles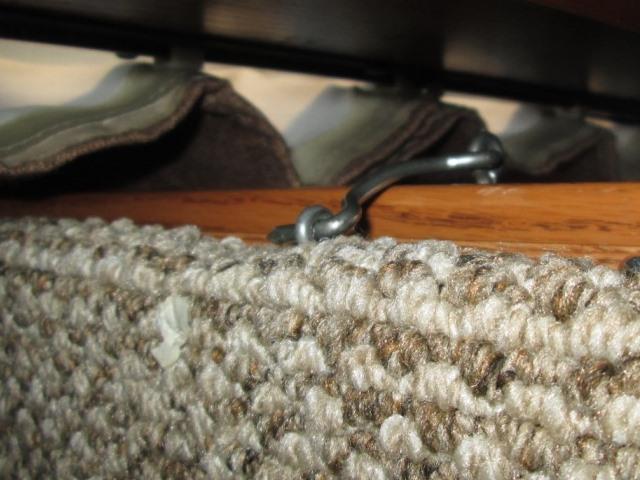
Surprised it lasted this long as the eye just screwed into edge of plywood. Not having a better idea at the time, worked on the road, no issue. Its getting up into bed when packing/etc or otherwise when step is up, invariably place hand on it and use as handle.
Need something that will screw to face thru plywood, wrap around to still use the hook.
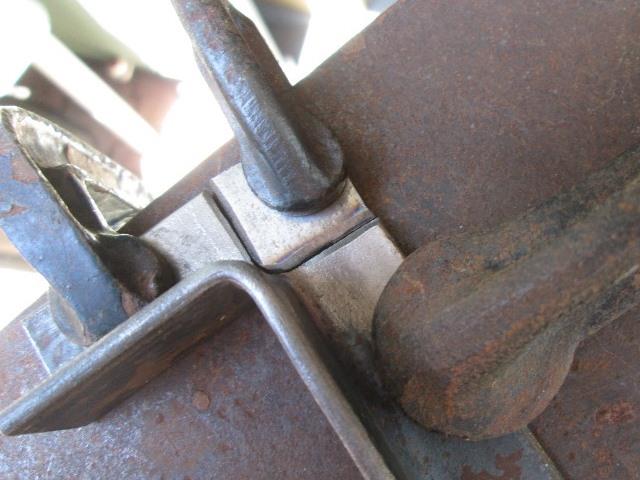
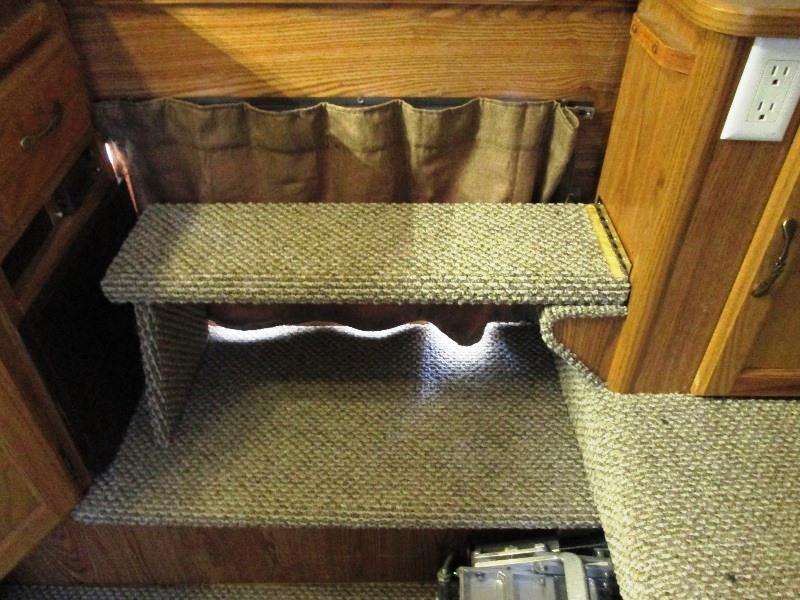
What I came up with, cut a piece of angle, fold over, weld in a filler to make an outside angle. Drill hole to act as eye.
Drilled and counter bored. Clamped to step compressing carpet to mark hook hole. Screwed to step and the hook wouldn't drop into hole. Too far from edge so cut back the end.
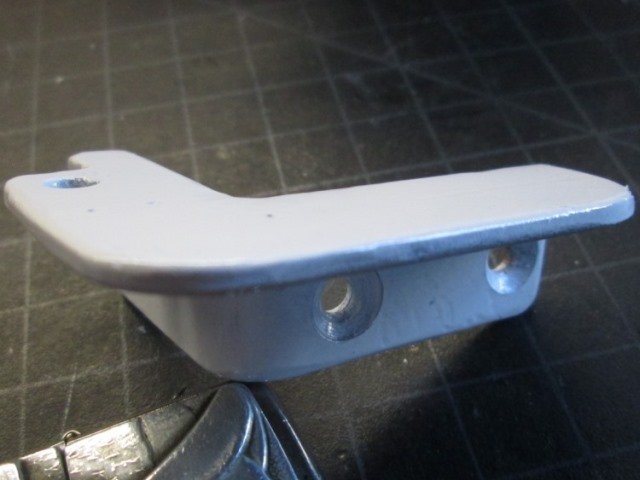
Painted white to help see.
Doesn't help camera to 'see'. Looking down
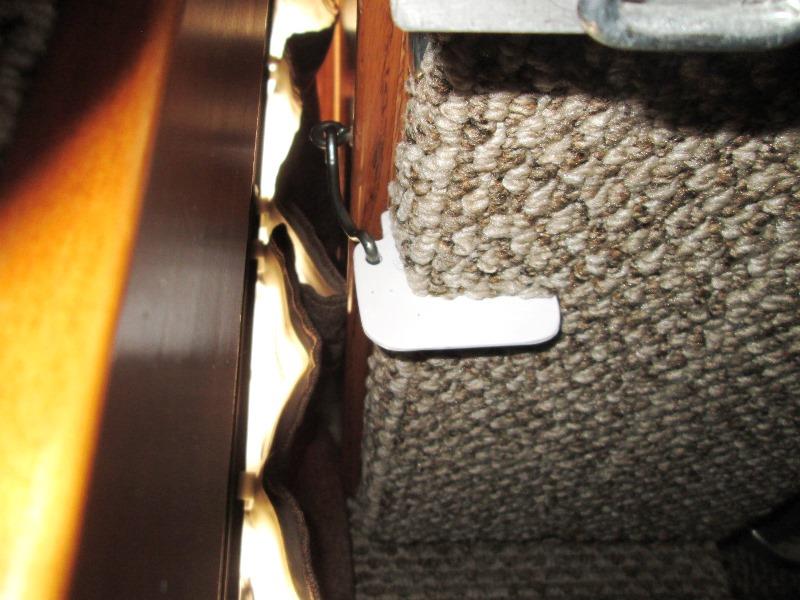
Fixed. No issue with the threaded in hook screw as in solid wood, but if it tried to pull simply replace screw in eye for hook with threaded machine eye bolt and nuts.
Assist handles
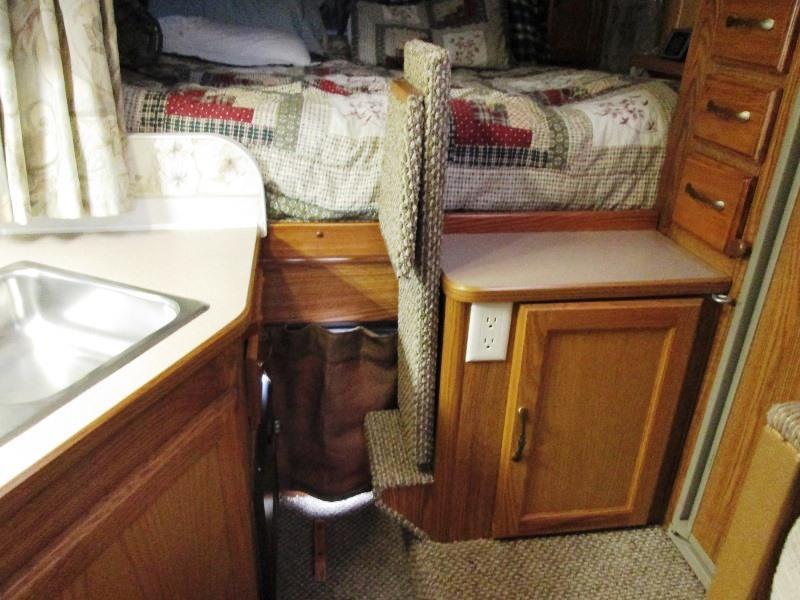
Adding handles to left and right side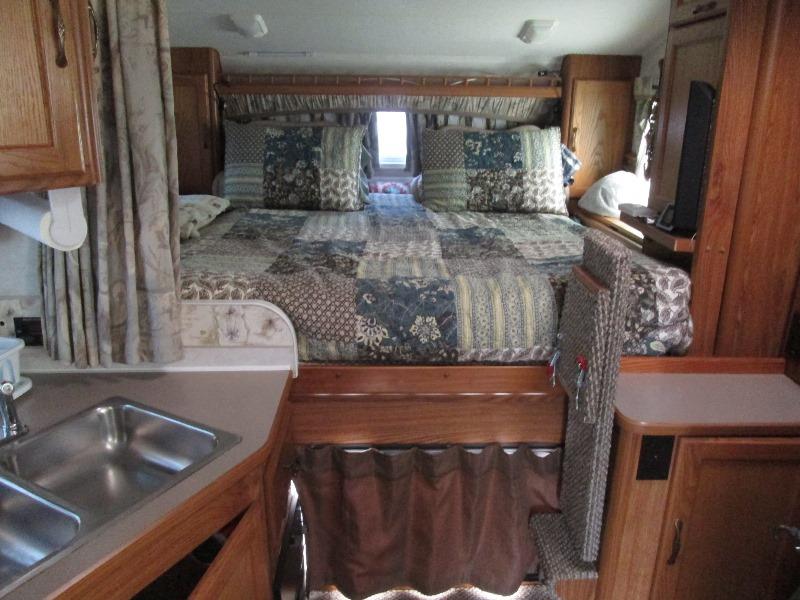
Here step is still up but on the left (facing bed) is where I thought I'd always add assist handle. To the divider wall at counter top. Never found anything that would really work so I'm going to add a simple handle to top edge of wall.
 Not the best solution but will give something to grab.
The short section of cut divider wall is part of full height wall, pretty rigid but addling some 3 1/2" angle brackets to stiffen and ensure isn't loosened. Though not much force will be applied easy enough.
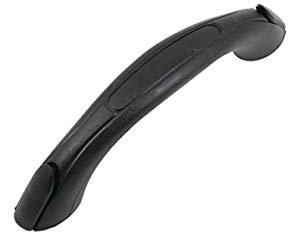
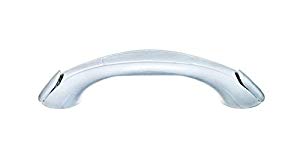
To the right side still undecided. Using a black handle on the wood. Assumed it would go on wardrobe wall (behind the black speaker).
But on top of the small cabinet at outer edge would work too. It also would be useable when slide is in.
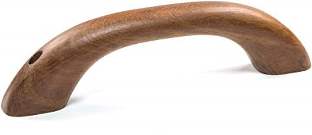
Then I stumbled on a teak handle, which if placed on the cabinet top would look a lot nicer. Its also a lot more money. But would look like more like counter top surround instead of 3rd handle stuck on---decisions. Talked myself into it & ordered. It would be useable when slide is in, keep from grabbing step when up. Handle on wardrobe and the half wall wouldn't be accessible when slide is in. It also may be easier to use getting off the bed. So adding both, black one on wardrobe and the teak on cabinet top for right side. With the other white one on half wall should be easy grabbing whatever is handier.
Adding the brackets.
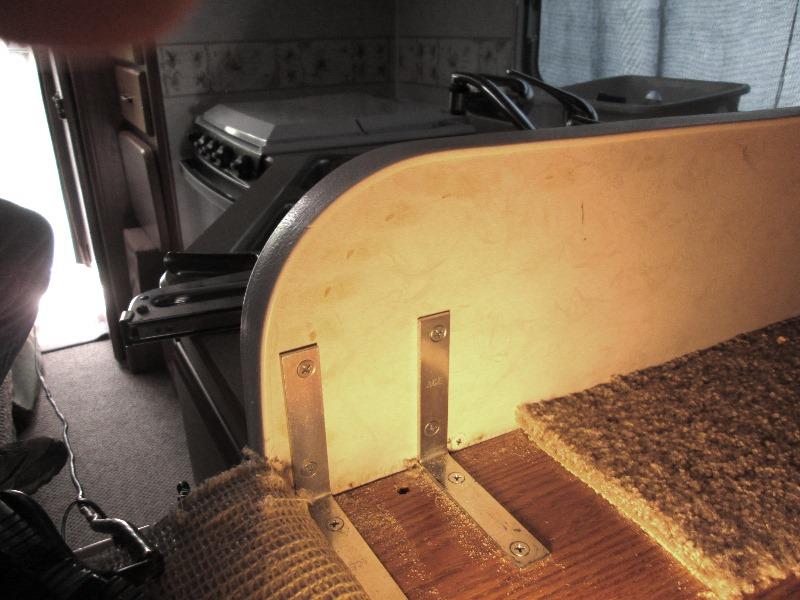
Pulled back the 6" strip of carpet under bed. added the brackets.
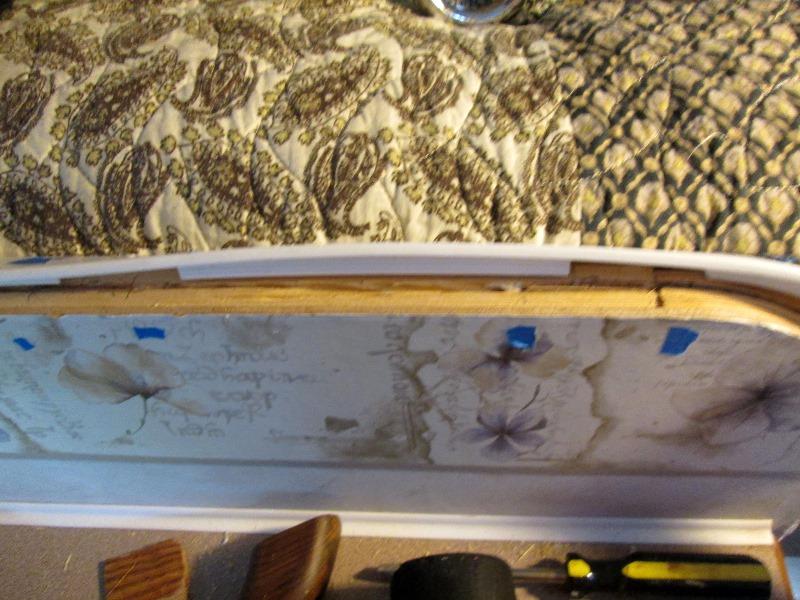
The white handle on cut wall was the easy straight forward one, turned not. Discovered the partial wall isn't a contiguous piece of plywood as I thought. Though the paneling on both sides are, the structure is 1x with a plywood block on end. Better for attaching handle on top instead of plywood edge. However the top 1x board has a slot cut in it for the plastic T edge trim to pop in. I see potential for 1x to split, also tightening down handle may crack plastic trim. It may not but not worth the risk.
Cutting off trims T barb under handle, glue a strip into the 1x's slot. If trim were wider than handle I would cut holes so handle mounted thru onto wood. But its not. At the moment all I can think is to apply caulk between plastic and 1x so when tightening handle caulk will spread giving a uniform base under plastic. More thought required....
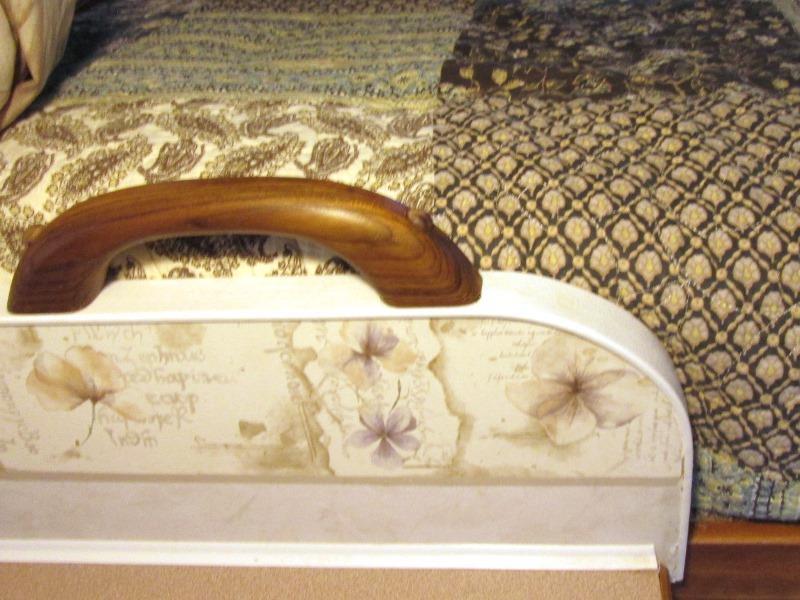
I also thought white handle would be best choice, setting on wall it looked funny, sat the teak handle on it- dang. For an opinion I sat the white handle back on wall, had Margaret come look at it, 'that'll work' she says, then I switched for the teak handle. 'Oh, that looks a lot better, can you put the white handle on cabinet?' Bottom line returning the vinyl handles ordering another teak.
So 'easy' one on roundtoit, preceded to mount the teak handle on cabinet at right side.
- The right side
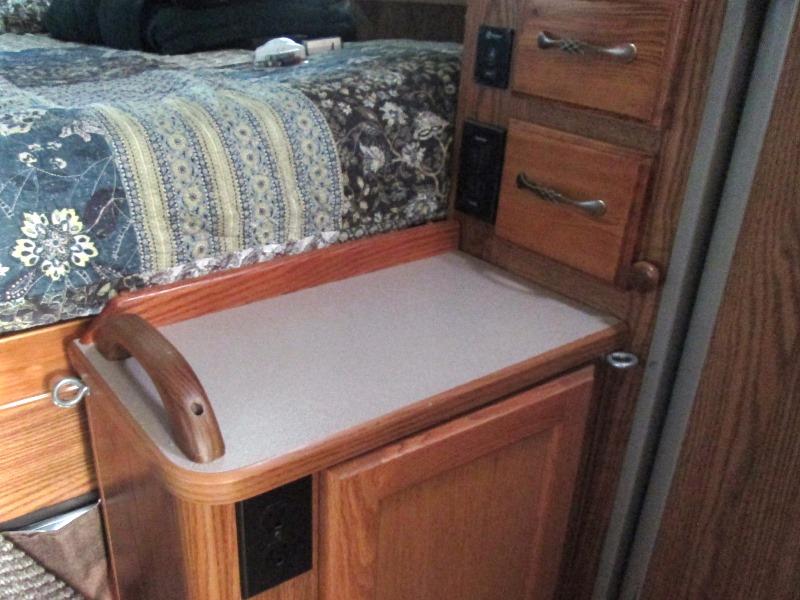
Placed masking tap under where handle to mount, pulled the cartridge out of ball point to mark holes. Drill 1/8" holes thru counter top. Then drill formica 3/16" so screws pass thru into wood. That was easy.
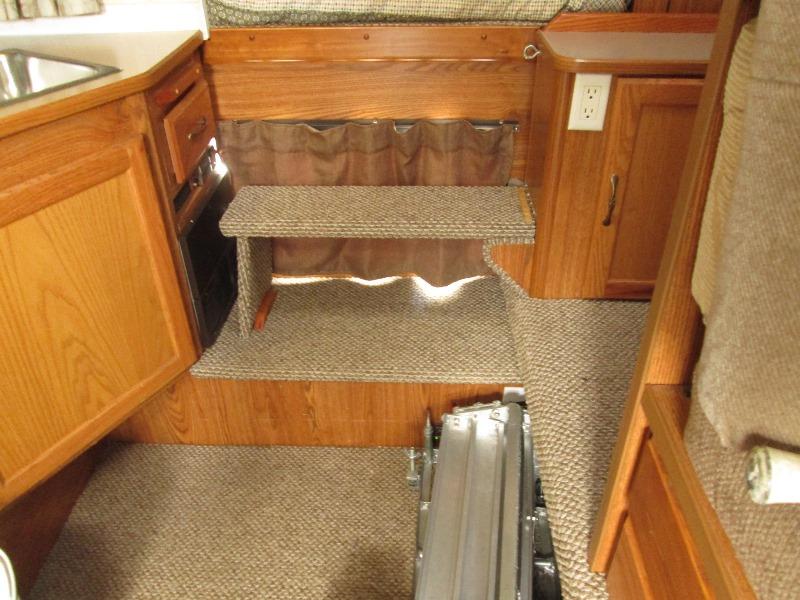
This handle on the cabinet, useable when step deployed also gives something to grab when slide out is in so useable whether slide in or out step deployed or in stored position
Replacement handle suppose to arrive today. Address top edge of cut wall.
- The left side
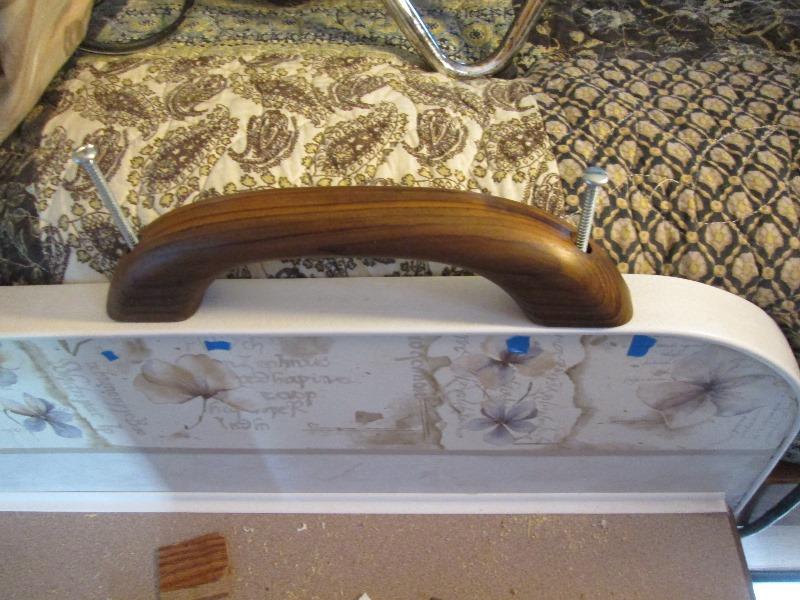
Teak handle. Using 2 1/2" pan head to completely go thru the 1x top. They are actually sheet metal verse wood screws due to the head fits in existing counter bore of handle. Same procedure mark and drill 1/8" holes
Not that it shows but cut some 1/2" strips about 2" long from 1/8" plywood. Glued into slot centered about pre drilled holes. Redrill the holes thru 1/8" ply. I don't know how much this may or may not help but at least its solid wood for screws. Notched the plastic web where slot now filled.
Mounted. Hardware store had some walnut bungs that match color. They stand proud but nicer than open holes. Plus is though glued they could be popped off.
My camera really doesn't like low light.
I like it-spent more than expected but will be convenient. Again especially middle of the night scooching off the bed. I had bought a 3rd handle thinking I was going to add at wardrobe. But holding off. I think handle on either side of pass thru space adequate. We'll see...
Back to Ourelkhorn Camper Modifications page