Relocate and Replace bath 1 1/2" P Trap with 1 1/4"
-
The purpose
Move P-trap back and up for access into cabinet. Actually done in the middle of adding a hot water circulating pump in bath (see circulating pump page) and some duplication but... I had a leak after adding the new pump and getting ready to reinstall after some rework- I kept noting the sink drain.
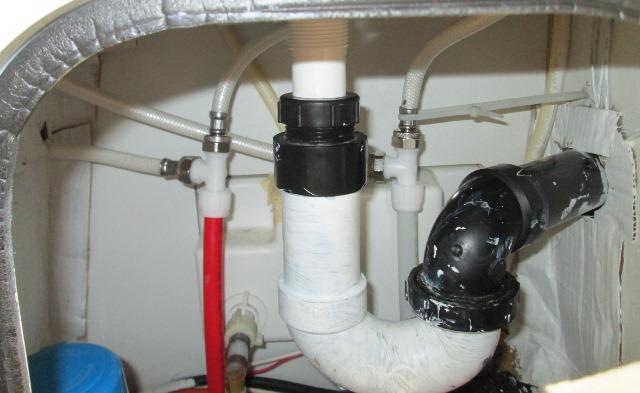
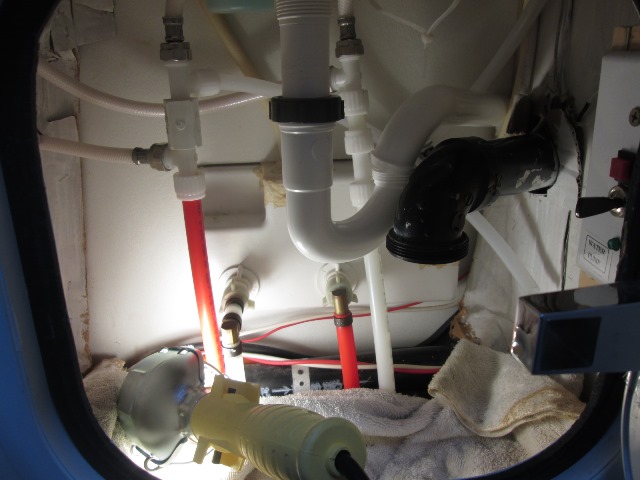
Ready to reinstall pump but I got stalled. I keep seeing the way drain is plumbed. Open the door to this under sink cabinet your greeted with 1 1/2" P trap. Area inside is fairly large but can barely get a spare roll of TP inside. I don't know why its plumbed as it is.
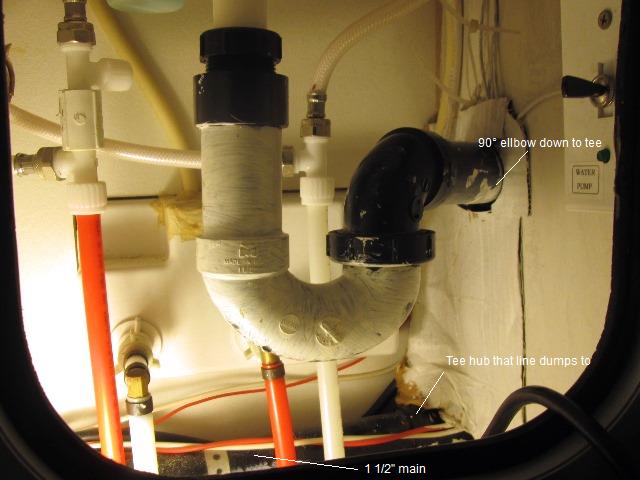
The drain line goes to the right then down to a sanitary tee, The tee 'could' have been placed in line with sink, stand pipe in back so P trap rotated toward back and raised Several inches. I understand less why 1 1/2" on this little sink.
Since water lines are loose and before hooking up new pump- I decided on the fly to ponder doing something. Virtually impossible to put tee and stand pipe where it should be at the back- however I might be able to cut the horizontal line- use 45° ell so it points toward sink, swing a 1 1/4" p-trap toward back then enter the drain at 90°, both moving away from door and raising. hmmm.... Wont happen after reinstalling pump. So pump reinstall holding...Going to a least seriously look at drain.
Ran to the hardware and picked an ABS 45° 1 1/2" ell, drain adapter and 1 1/4" P trap. Also picked up a 60° & 22° ells just in case. First I need to cut out old p-trap, half at wall side is glued in. Then I realized cutting the pipe is going to be a problem. The side facing opening is 45° to wall- no way to get a saw in there. Needs to be cut about an 1" from wall. Guess I could tape ends of hack saw blade-done that before.
While pondering how I might cut I started playing with the pipe see if I could fudge the cut line.
Looking at where drain is ...
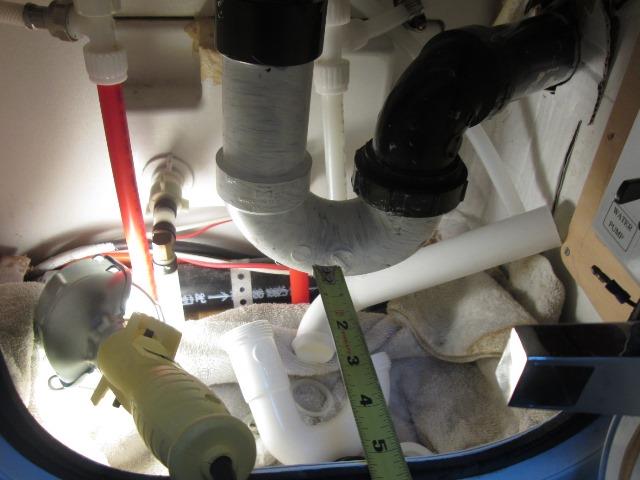
And where it might end up. Removed half of P-trap from sink and slipped on the 1 1/4". Gain quite a bit in...oh pooh...Houston...
The rest of the story. As it will need to be shortened I wasn't holding horizontal piece up there, but in order to get the other half of P-trap on sink side needs to drop down for the horizontal to be at level to enter the wall pipe. Means I wont gain any height underneath P-trap. Also means I need a longer sink tail piece, too short to reach the trap. The 1 1/2" had a riser glued in.
I played with it a while-no help need a longer tail piece. Almost decided not worth the effort for what little I was going to gain. But even an inch would help. Making sure I didn't need anything else and looking at which angled ell would work so I could take back the unused ones I discovered none were going to work. Not enough distance between sink and wall no mater how I rotated P-trap. The pipe would be pointing pretty much directly at sink center. I'm not sure how but I realized if I used 2 90° ells I could point the first one up, second point toward sink. Dog leg. Between the 2, rotating on the pipe and between each other I should be able to move the entrance location but more importantly raise it. Maybe.
But first I still need to cut pipe at wall. If I cant get ells to provide the fit I can trim the pipe & couple it back together. Wont know till I try
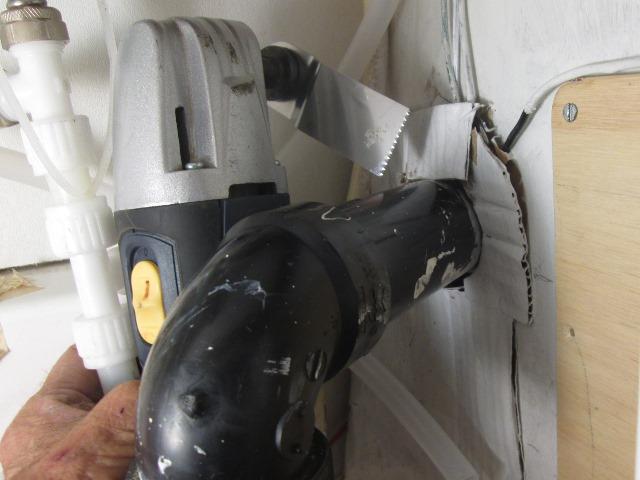
Oscillating saw! I haven't had this long and its not a tool that comes to mind when doing stuff. But there are places where nothing else will work. This is one. Barely. I had to reposition blade a couple of times to cut at different angles. Even at lowest speed had stop to let blade cool as it was melting the ABS back together but made it simple. Was able to get between and cut downward. Cleaned up and started playing with the ells.
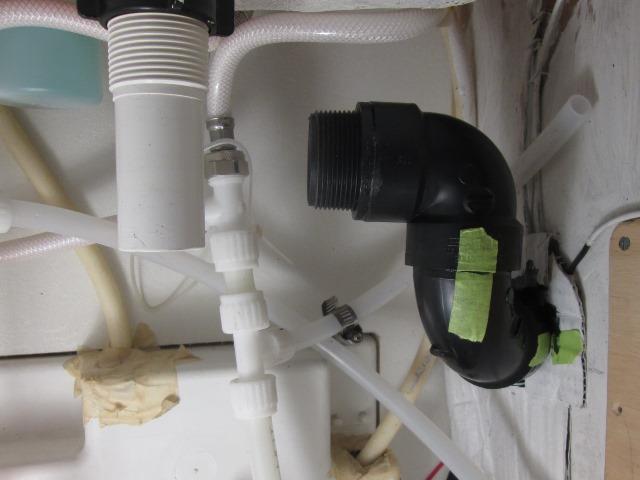
The ells, top one is a short or vent ell, which because of room I was going to use 2 of them. But looking noted the street ells are almost as short but street ell has a much greater sweep, better for flow. As Ill have an upper horizontal dumping into lower horizontal line, water hitting that bottom sweep should keep clear, induce momentum to help flow. Plus I wont have to cut a piece of pipe to join them. Cleaned up all the edges so I could dry fit pieces and rotate around to find position where everything will fit.
Finally found an orientation where everything lined up-fit between existing lines and allow P-trap assembly. But it was tight, 1/8" swing either way and stuff wouldn't line up. Marked with tape, glued the drain adapter into top ell and glued the ells together. Checked again dry at wall again then glued in. One chance... Fit the P-trap, think its going to work. Stopped and lined compartment with some foil'd bubble wrap for a bit of insulation.
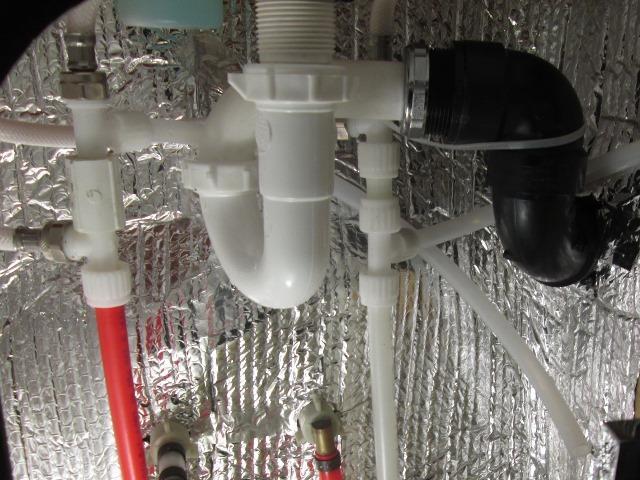
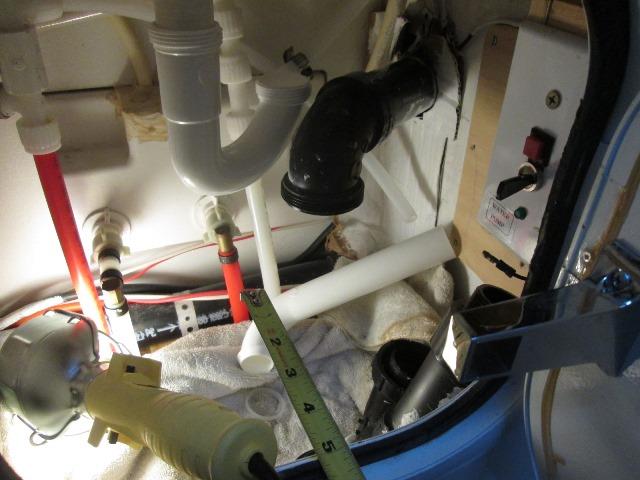
Wow- never had a drain so critical in placement but once glued trap slipped in like a glove. I have a 1/4" clearance between the p-trap top outlet pipe and the sink tail piece nut, the nut on cold water flex and the hot out line to pump. I mean holy cow. Its done.
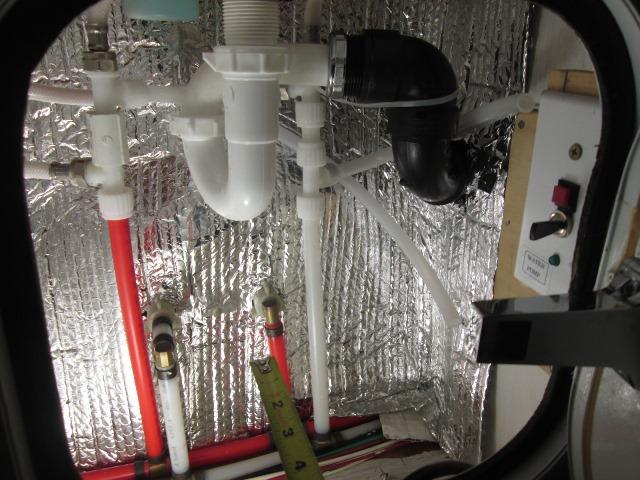
But look at the room!
Finished the original purpose-reinstalling circulating pump and filled the sink couple of times checking the drain for leaks. I wasn't sure about the decreased tail drop and smaller 1 1/4" p-trap and how it would affect drain. Old drain was clear, this honestly flows faster than it ever has? Everything dry so were good. For almost giving up & putting it all back ended up more space than hoped. Stoked, though a bigger pain than I imagined.
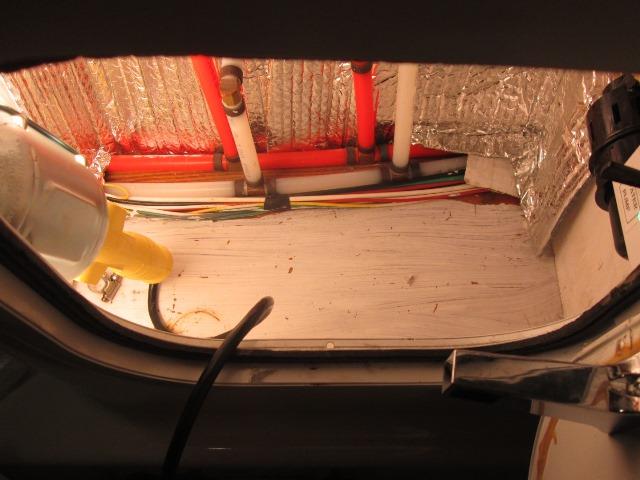
This, for us after looking at the 1 1/2" p-trap blocking inside this cabinet for 14 years is just amazing.
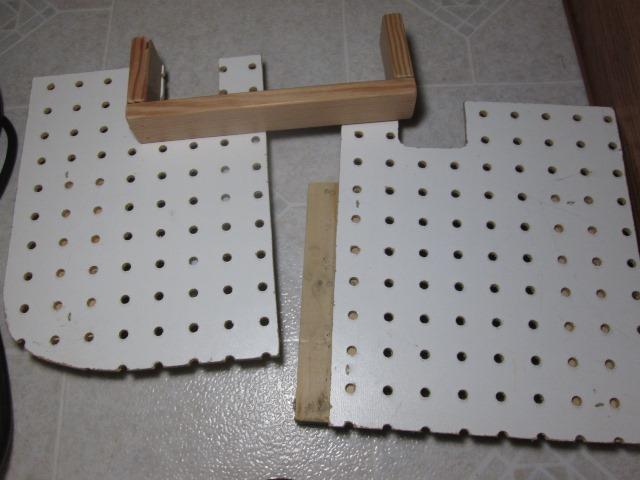
Lastly, made a false bottom to raise stuff and protect the wiring/plumbing on the floor. Plus air space.

2 halves easily removable. I may and had planned on small 3 sided box to set inside the frame, when/if I get around to it. Back to the circulating pump that got side tracked to do this...
Back to the top
Back to Adding circulation pump that led to this refit and on hold while this done.
Back to subsequent timer addition to pump switch page
Back to Ourelkhorn Camper Modifications page