Change Torklift "Basement Step" 6" tread to 8" tread
Intro:
Install the basement step-truly an awesome addition on our basement camper. ..However in actual use we found the 6" tread too shallow when stepping out of camper. To easy to overstep, took a very conscious to step straight down. Of coarse I should mention part of that was we were simply use to having the extended landing with old steps mounted to back of flip over stepI was able to procure an 8" replacement tread from the Torklift "Glow Steps" scissors steps/ I had already verified the 6" tread 'could' be swapped out for the 8" tread. With the rear or heel of tread in stock location, the nose would protrude another 2" out, Just easier to land on step.
Some pics of modified step, then Ill try to explain how. Its basically a swap out but to minimize the added leverage to step I made some changes.
note all pics displayed at 800X600-clicking on pic for larger 1600x1200 for more detail if wanted-use back button to return

New Torklift basement step with 8" tread.
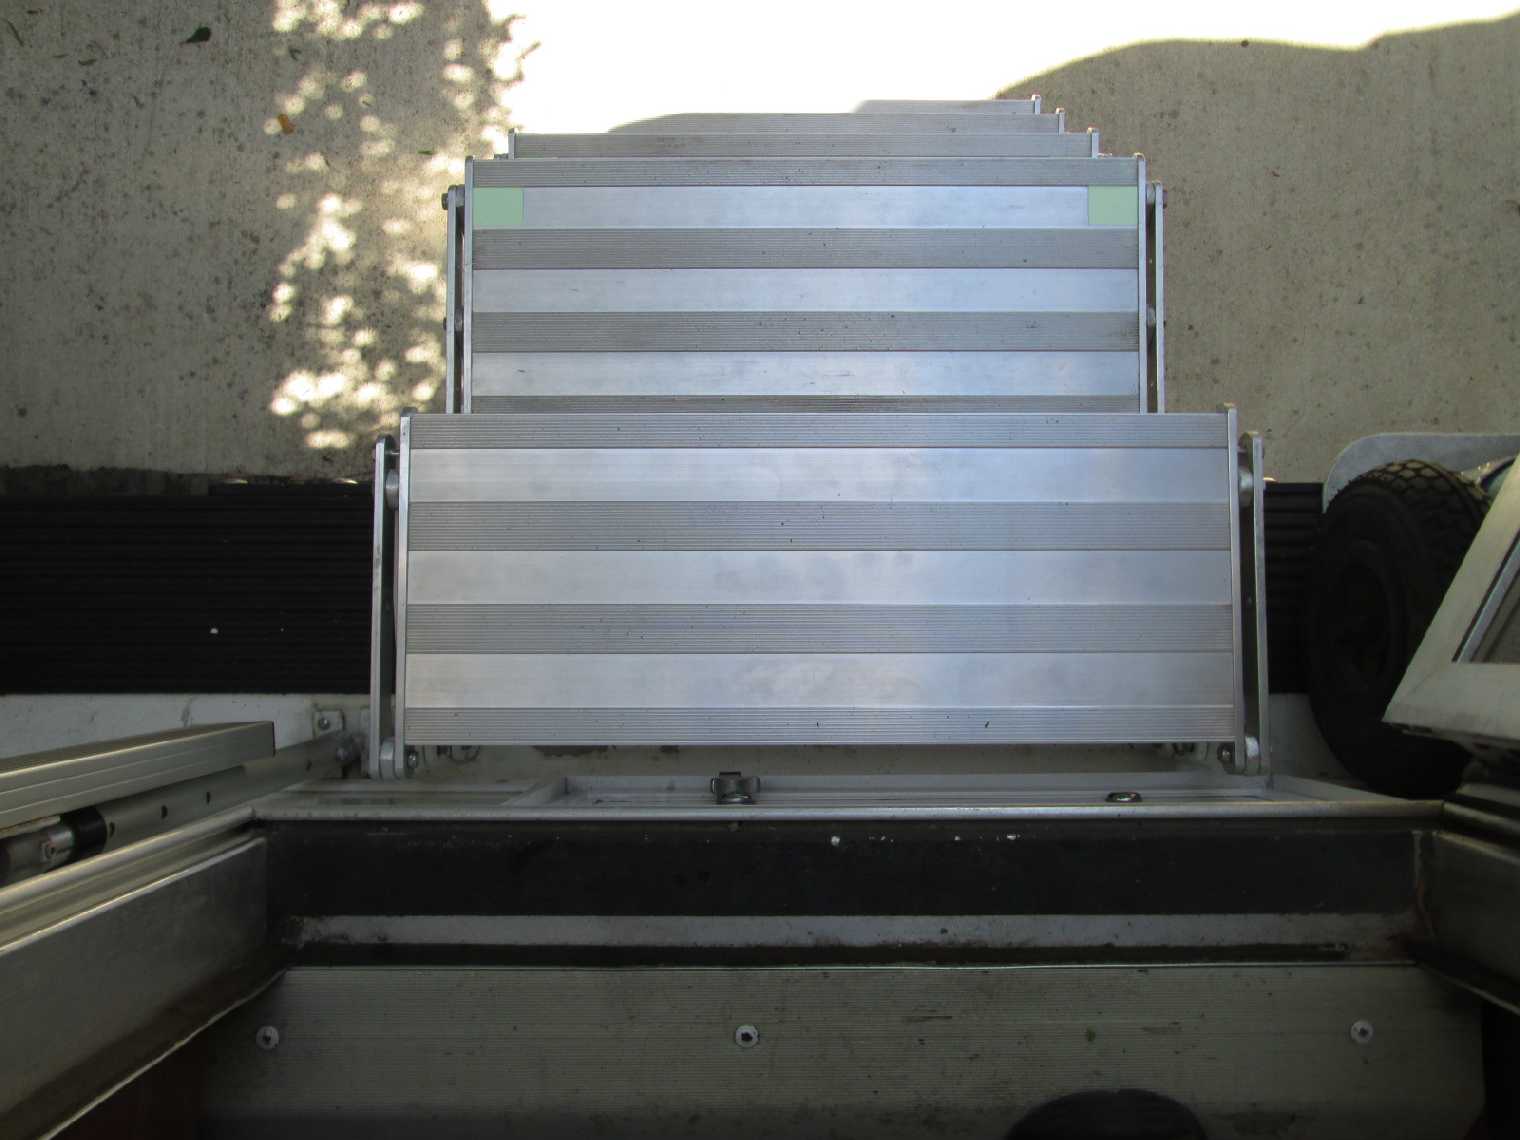
Only 2" but a Lot easier to use.
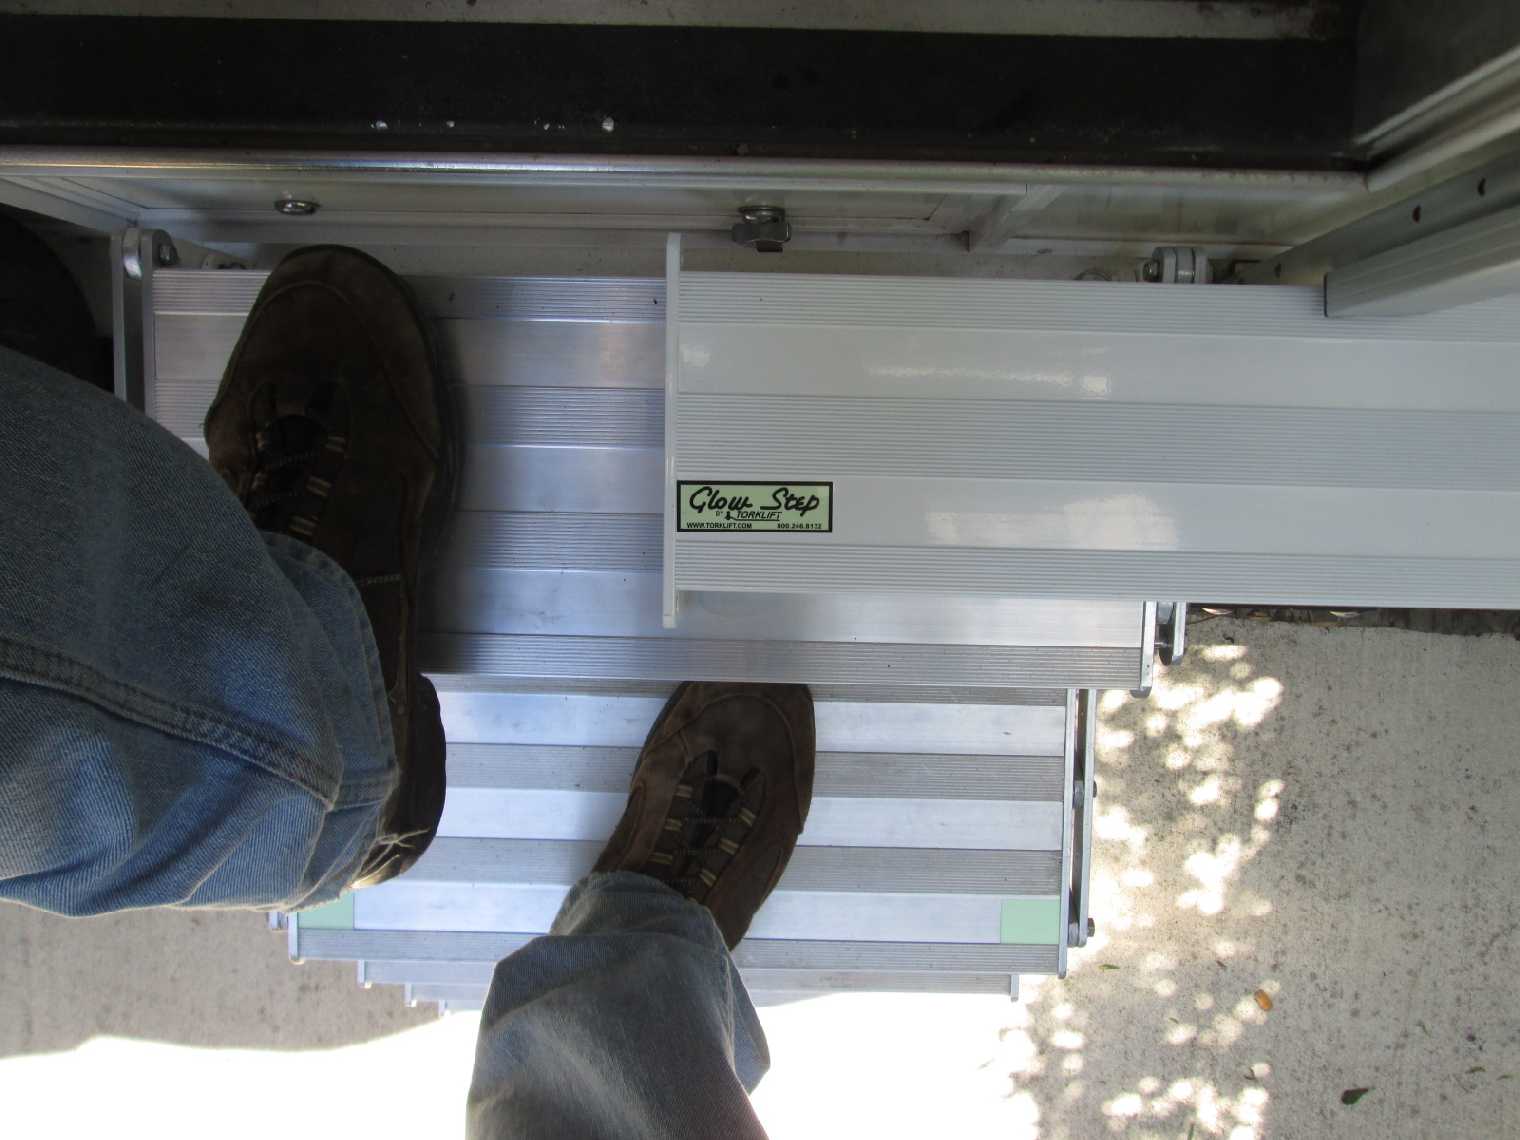
Even going up easier. here 6" tread laid on top. More of my ugly boot on 8" tread verses 6" tread.
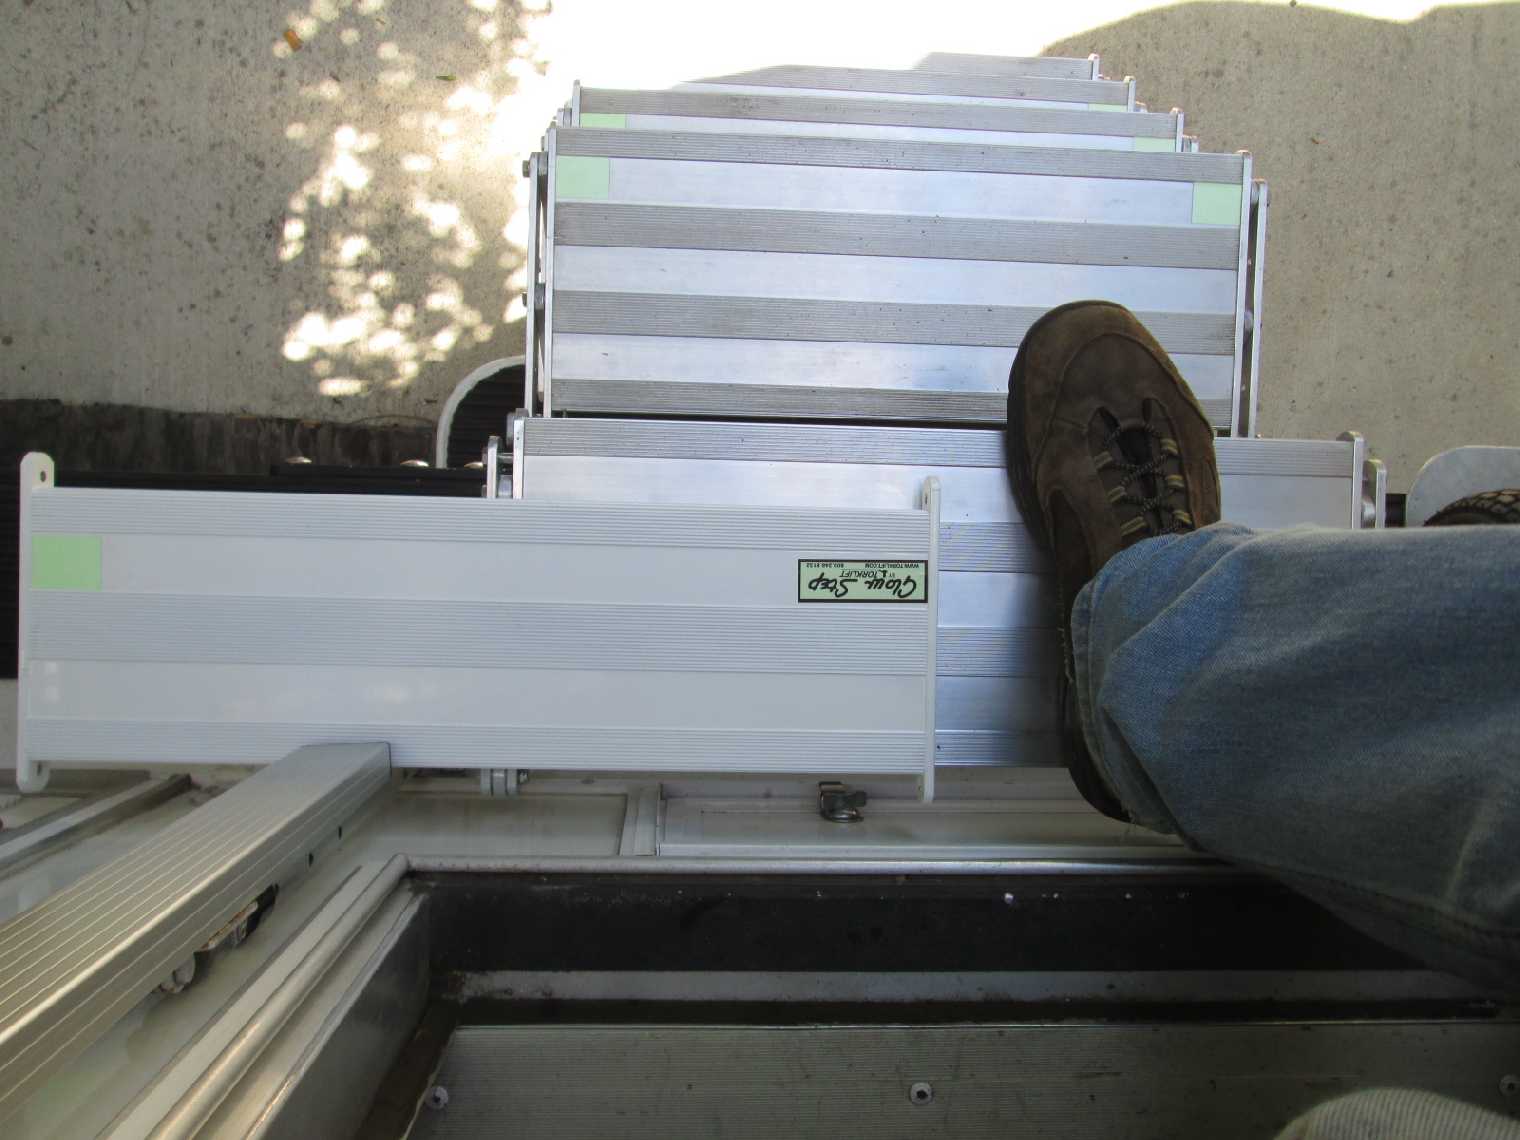
For me this tells all. Stepping out onto 8" tread ball of my foot (and weight) lands on tread. Where before edge of 6" tread was at arch of foot. Why I had to pay attention when stepping out. now it’s a breeze. Happy, happy, happy- to coin a phrase
And what we did

The 6 " tread placed bearing weight, as it was behind front vertical arms, transferred most of load straight down. With step on bench and 6" tread, pushing down on tread nose had no effect on step. With extra 2" of 8" step load is now outside of arm so some of load is translated to horizontal or it wants to rotate the step outward. Again on bench, pushing straight down on nose of 8" tread the step would immediately start to rock forward.
To minimize this I did couple of things. Shorten the vertical arms, rotate them to true vertical and add additional lock arm.
The HOW
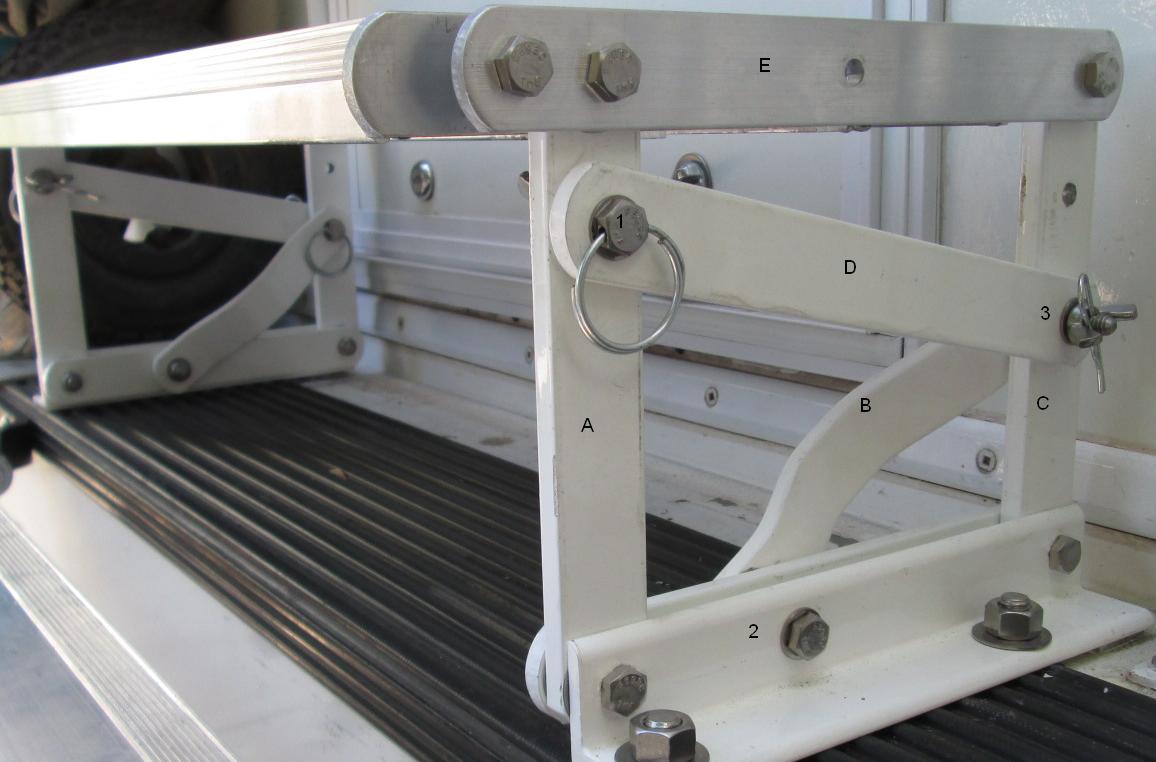
One was the vertical arms (A & C) in stock configuration lean outward a bit, almost 3/4". By standing the vertical arms truly vertical decreased the leverage quit a bit. Or took a lot more effort pushing down to rotate the step, moving some of the load back over center
Second thing I did was shortening the step height. Our door threshold from bumper is 14". The basement step is 8" height stock. The scissors step treads are space about 7 1/2" (rise) apart. So from top of scissors steps to basement step was 8" with 6" to door. Sooo I cut off 1" from height of basement step. Now its 7" from top of scissors and 7" to door threshold. Primary thing this did though other than splitting the distance from bumper to door is decrease the length of the leverage. This was done by simply redrilling arms A & C step hole at top 1" down and cutting off 1" from arms (both sides)
All this required reworking the 'lock' arms B. As the vertical arms A &C are standing vertical the holes don’t line up for support arm B (at hole 1). Too close to redrill front arms A, I rotated Arms B to back. I also added an arm D to transfer some of the load to both arms A & C. For appearance I moved the powder coated arm that was at top and replace with another raw bar, arm E. To find hole 3 I temporarily moved arm B to out side of mount angle (flipped end for end) & attached at hole 2, new arm D attached at hole 1. With a 1/4" drill bit stuck thru holes at other end of both bars I marked hole 3.
Probably clear as mud but quite simple.
So I now have 2 horizontal arms resisting the forward thrust. I do now have 4 pins to remove instead of 2 but minor in my opinion. Which wouldn’t be a consideration if using lynch pins and clips. I choose to replace with bolts and wing nuts for more rigidity so will take a few more seconds.
Only issue is because I shortened the step height that the arms B will not rotate forward, the door on the one side JUST clears. I could rotate the arm assemblies 180° swapping sides which would work. It does work and for some reason simply looks stronger than with hole #3 at front. Yet to do, maybe, I didn't cut the replacement bar E to length, the extra bit stuck out front (and the forward bolt) do nothing but cover hole in step. Its loose.
Going camping for a few-get to field test new tread. Between the new basement step, and the new 8" Glow Steps scissor steps from Torklift, getting in & out of camper is awesome. Hopefully my personal mods don't negatively affect decision, For 98% of the folks these would be a bolt on-just amazing.
Back to Torklift Glow Step scissors steps and basement step install
Back to Ourelkhorn Camper Modifications page